File: 09hunt.lt1.doc
[Headline: How do you get to Broadway? Practice, practice, practice …]
In my last two columns, I discussed maneuver shape, body placement for maneuvers, and the technique of scribing the shape of the maneuvers with your extended arm. If you have practiced these techniques, then you have probably become a better flier and have put some points on your pattern.
Armed with these basic skills, let’s now delve into flying the pattern from start to finish. This will take a few columns, because there is a lot to learn about each individual maneuver, and there are 15 maneuvers in the AMA rule book.
Many years ago I talked with Bill Werwage about performing the pattern and he told me that he visualizes the pattern as one long maneuver from the point at which the model is released to the instant it stops rolling after landing. He focuses on every aspect of the pattern, including the level laps between maneuvers, as if all of it was being judged and scored.
That made a lot of sense to me. If a flier can do that consistently, then the entire performance looks much more polished and professional. Of course, you have to practice the maneuvers to the point where they all have the same high standard of appearance to make the one-maneuver concept work effectively. Let’s start working toward that goal.
Takeoff
It helps to know exactly what the maneuver description is in the AMA rule book. If you don’t have a current edition of the rule book, go to the address listed in “Sources” and download it from the AMA website.
Here is the takeoff maneuver description that is contained in the official AMA rule book:
13.1. Takeoff. A correct takeoff consists of the model rolling smoothly along the ground for a distance of not less than 4.5 meters (14.8 feet), but not greater than one quarter of a lap. The model then rises smoothly into the air with a gradual climb and a smooth level-off to normal flight level over the point at which the model commenced its ground roll. The model continues on for two (2) smooth laps of normal level flight to point of original level off. Maximum 40 points. Minimum 10 points.
There is an old adage in CL Stunt flying that you should never give away the “free points.” The maneuvers that contain these so-called free points are takeoff and level flight, inverted flight, and landing.
These maneuvers seem so simple that many rarely focus on improving them. Nothing is free when it comes to flying the Pattern maneuvers; those three maneuvers can win or lose a contest for you.
Before you even get to the point of trying to make a rule book-perfect takeoff, you need to be sure that your airplane is capable of performing one. Test-roll the model on a flat paved surface without the lines connected. It should track straight or just very slightly outward from the center of the circle.
If it tracks too far outward, the model will scrub the sides of the tires and cause a hop instead of a roll. If the model tracks at all inward during the test roll, it will lose tension on takeoff and be, at best, uncontrollable during the takeoff run. You will not be able to make it break ground where you want it to, and after it becomes airborne it will tend to hit the end of the lines abruptly as its flight trim takes over, causing further takeoff shape problems (yes, the takeoff does have a shape!).
Good takeoffs start with proper attention to the landing gear installation during the building process. I try to bend the gear in such a manner that there is a slight toe-in to make the model track better. Too much torsion bar length will yield a wobbly airplane on the ground. I try to keep the torsion bar length no more than 21/2 inches on my airplanes.
Try to visualize the perfect takeoff in your mind, and then think about how yours looks. The first thing to consider when improving your takeoff maneuver is the release of the model. If it is positioned on the ground with the nose pointed slightly inward toward the center of the circle, it will tend to track slightly into the circle until the gear forces it back to the end of the lines.
If the nose is pointed slightly outward away from the arc of the circle, the model will scrub the tires as it is pulled back onto path. Either way, the smoothness of the rollout at the release point will be lost.
Instruct your helper how to best hold and release your model. Some models have springier tail wheel struts than others, and if your helper presses down too much on the tail as the model is released, the tail will pop up. This can ruin the illusion of smoothness, and possibly cause the propeller to strike the ground.
I find it is best to have just one person launch my model in both practice and competition. Buddy Wieder has done so recently for me. Bud knows from experience just how to position and release my model. He lightly wraps the fingers on his right hand around the LE of the right wing panel and the fingers on his left hand around the left stabilizer panel’s LE. When I signal for release, he gently extends his fingers and lets the model smoothly roll out from under them.
I often see helpers suddenly let go of a model and abruptly withdraw their hands. This type of release can cause the model to move about and affect the start of the roll out.
Buddy also knows to not adjust the model’s attitude after I have set it where I want it. He knows that I will move left or right after I have picked up the handle to the exact point relative to the model that I feel will give the best rollout tracking. Wow! That’s a lot of stuff to think about even before the model is released!
Before I signal for the model’s release, I feed in a small amount of down control at the handle. This ensures that the model will not jump off the ground too quickly. The small amount of down forces the model onto the main gears and allows me to fly the model on the ground. (I’m discussing tail-dragger models at this point; the trike-gear technique will come later.) As the model picks up speed and the controls become more effective, I ease slowly back on the handle until the model smoothly separates from the ground at a shallow angle.
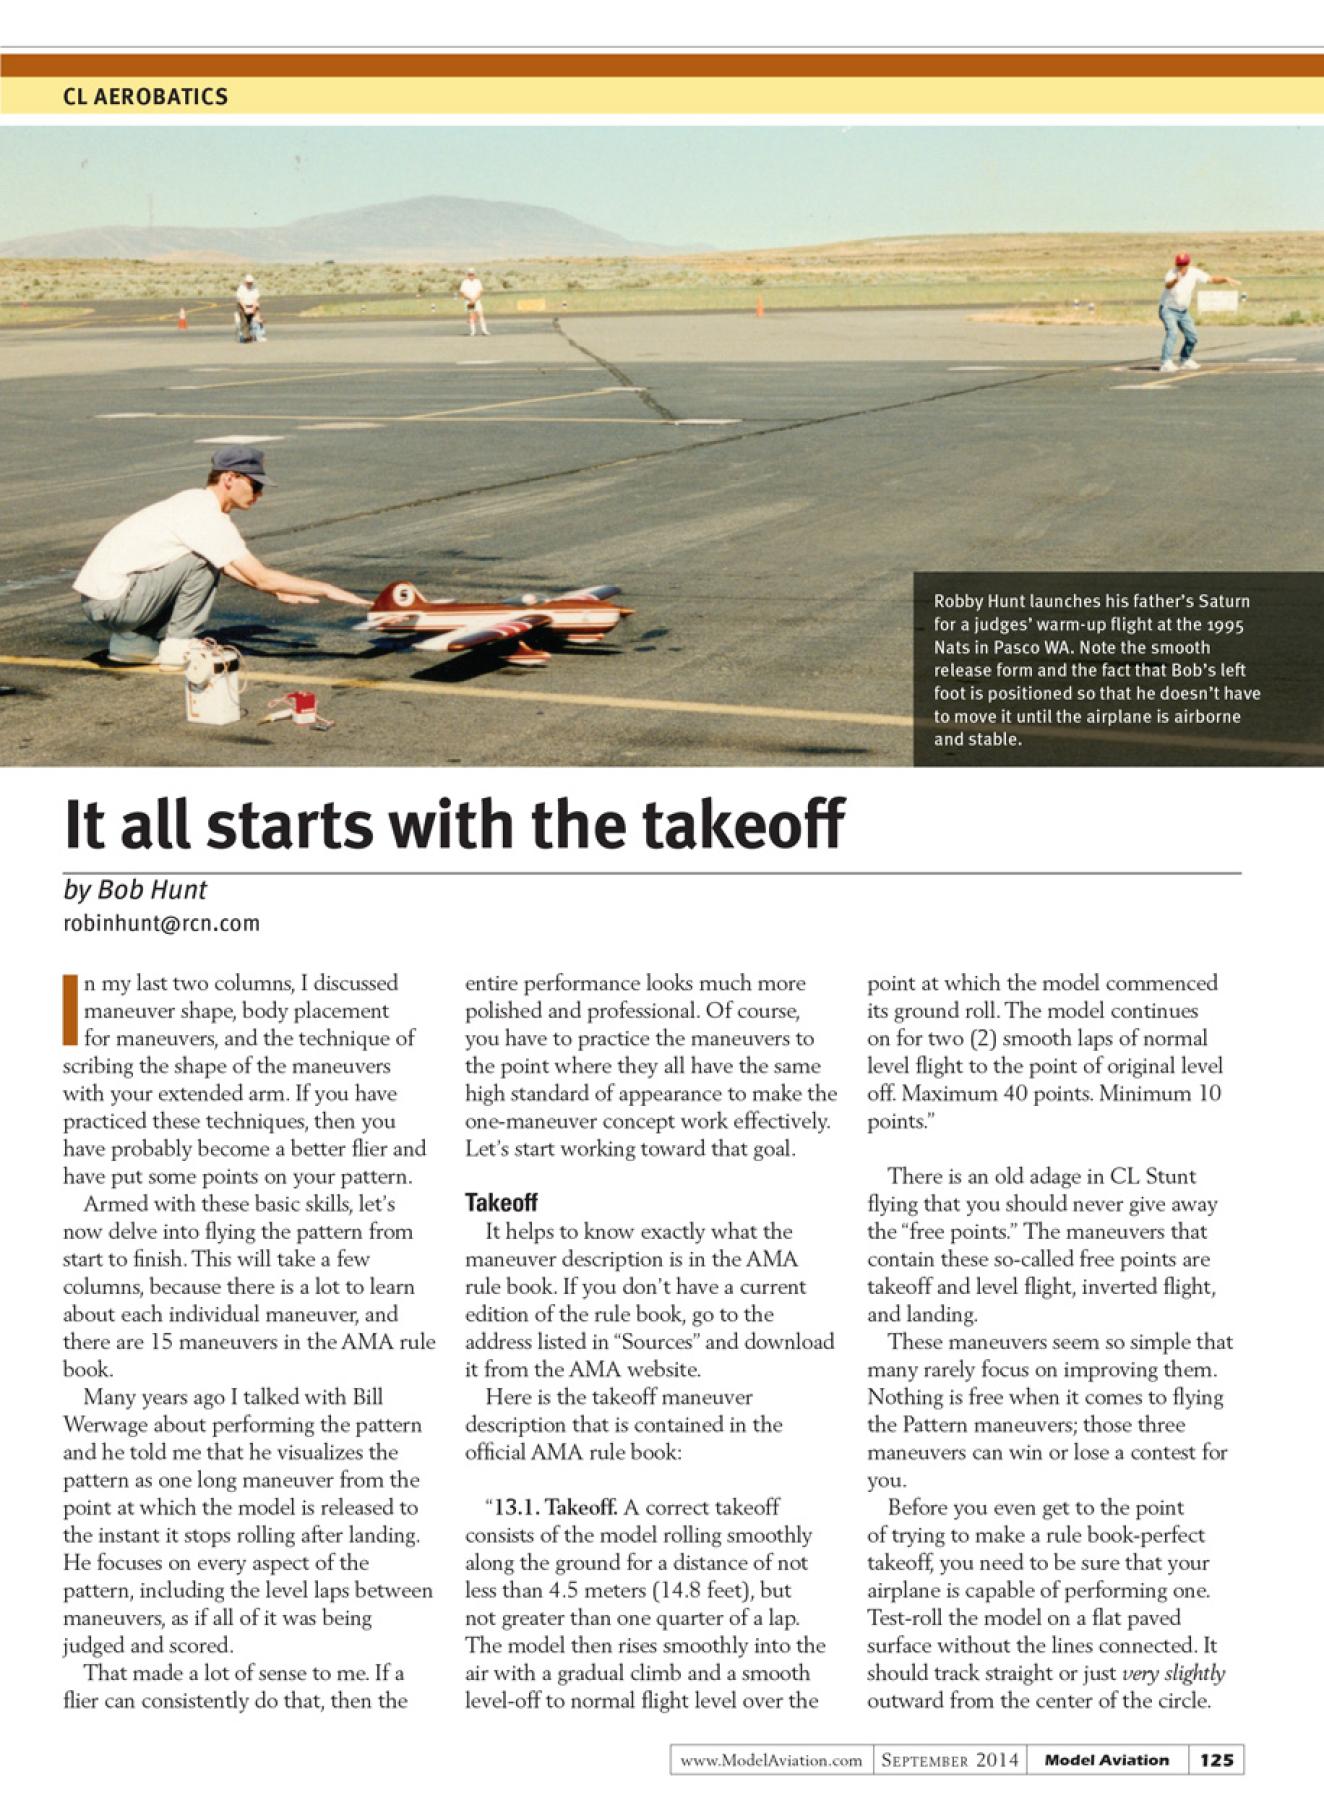
Body positioning at the launch point is important. Instead of having both feet facing the model at the launch, I move my left foot to the left so that it is planted during the takeoff roll in such a manner that I don’t have to move it until after the model is airborne and nearly a half lap into the takeoff maneuver. Any sudden movement in your body will be transmitted in some manner to the model.
The angle of the climbout should be practiced to allow the model to come to normal, level-flight altitude as the model passes over the release point. This can be challenging in windy or turbulent conditions!
I’m out of space for this issue’s discussion. I’ll finish the takeoff and level flight maneuver discussion next time and I’ll share a valuable tip about how to safely take off on windy days.
Until then, fly Stunt![dingbat]
SOURCES:
AMA Competition Regulations 2013-2014, CL Precision Aerobatics
www.modelaircraft.org/files/2013-2014CLAerobatics.pdf
Precision Aerobatics Model Pilots Association (PAMPA)
www.control-line.org