
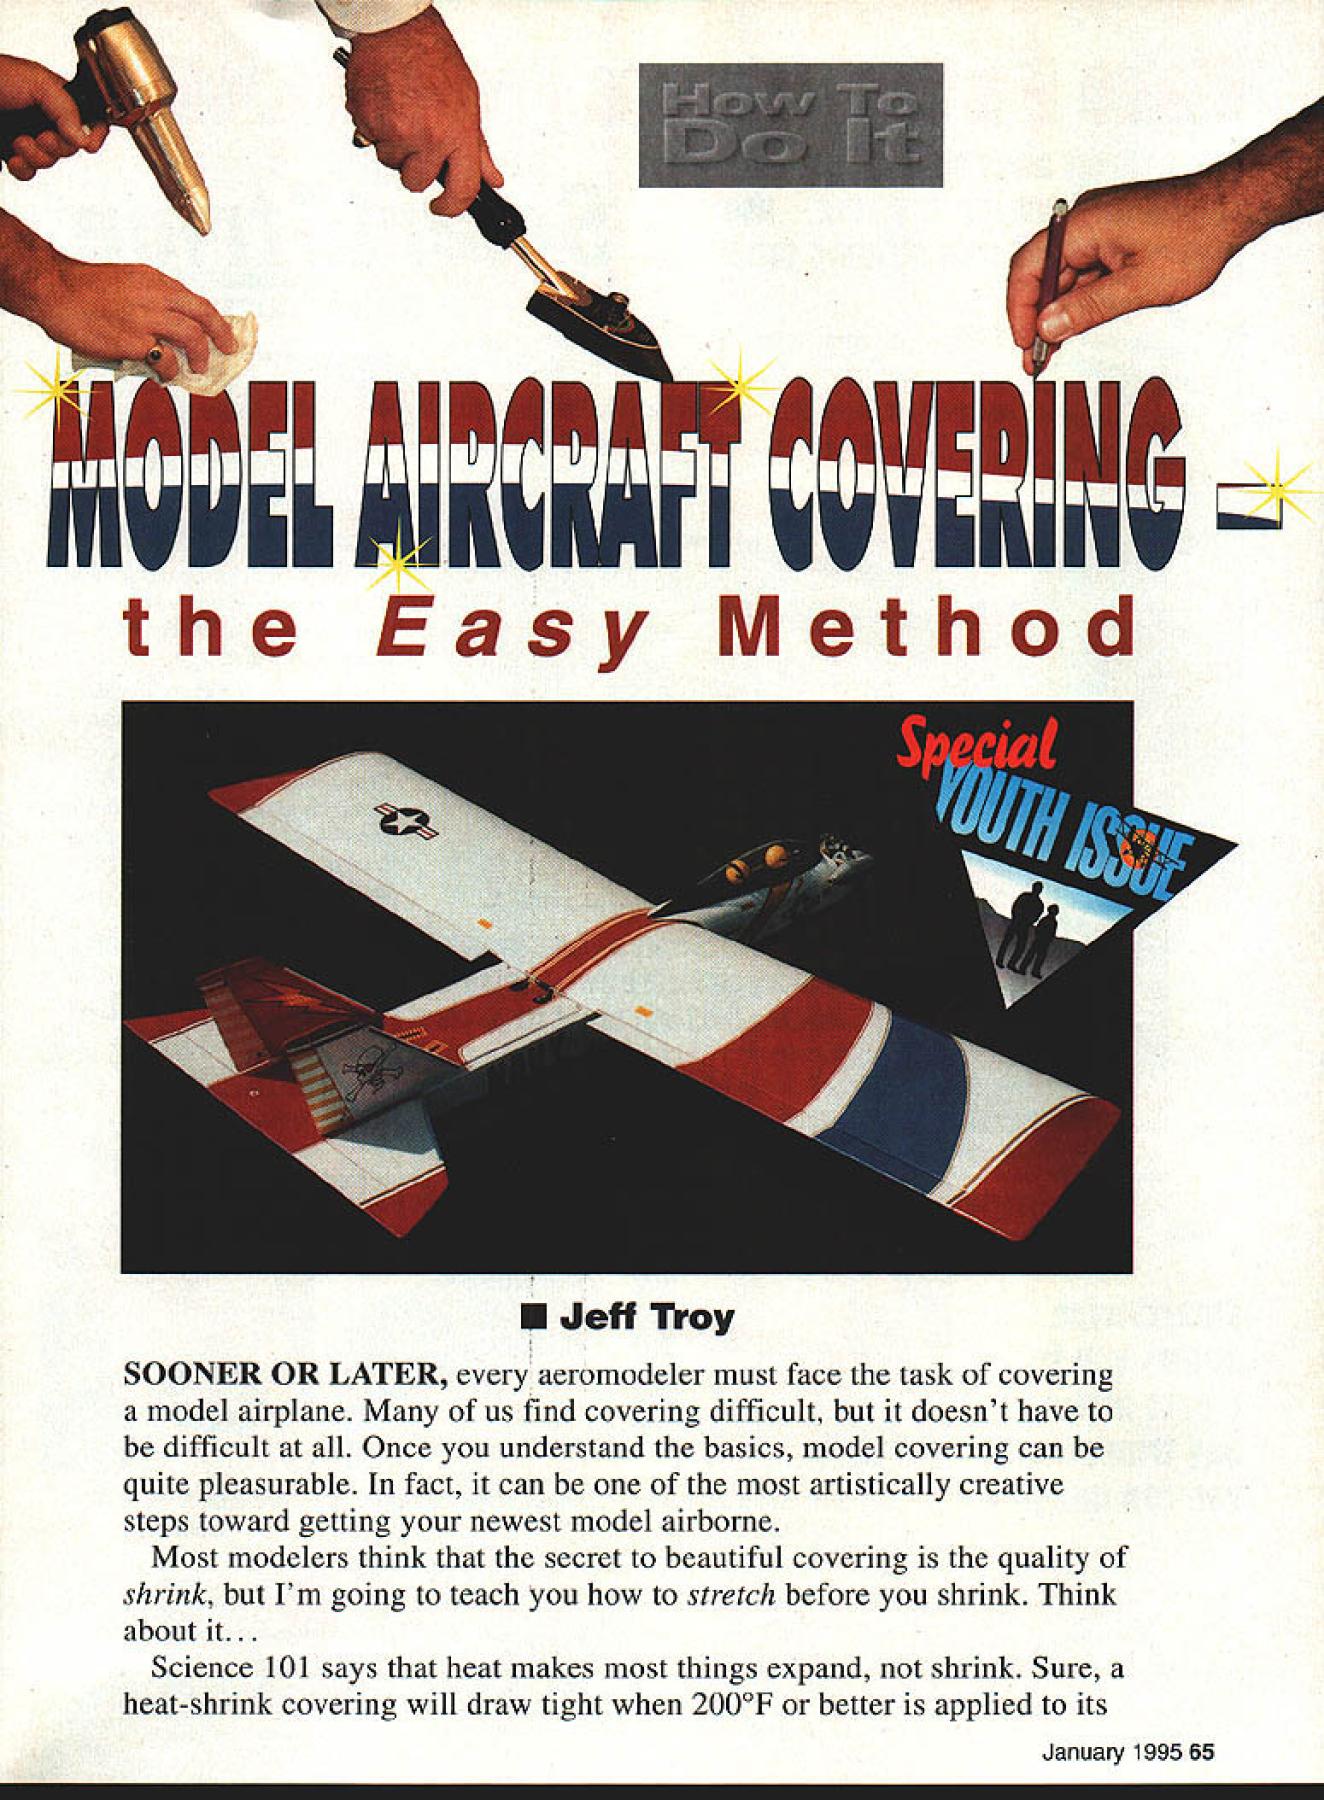
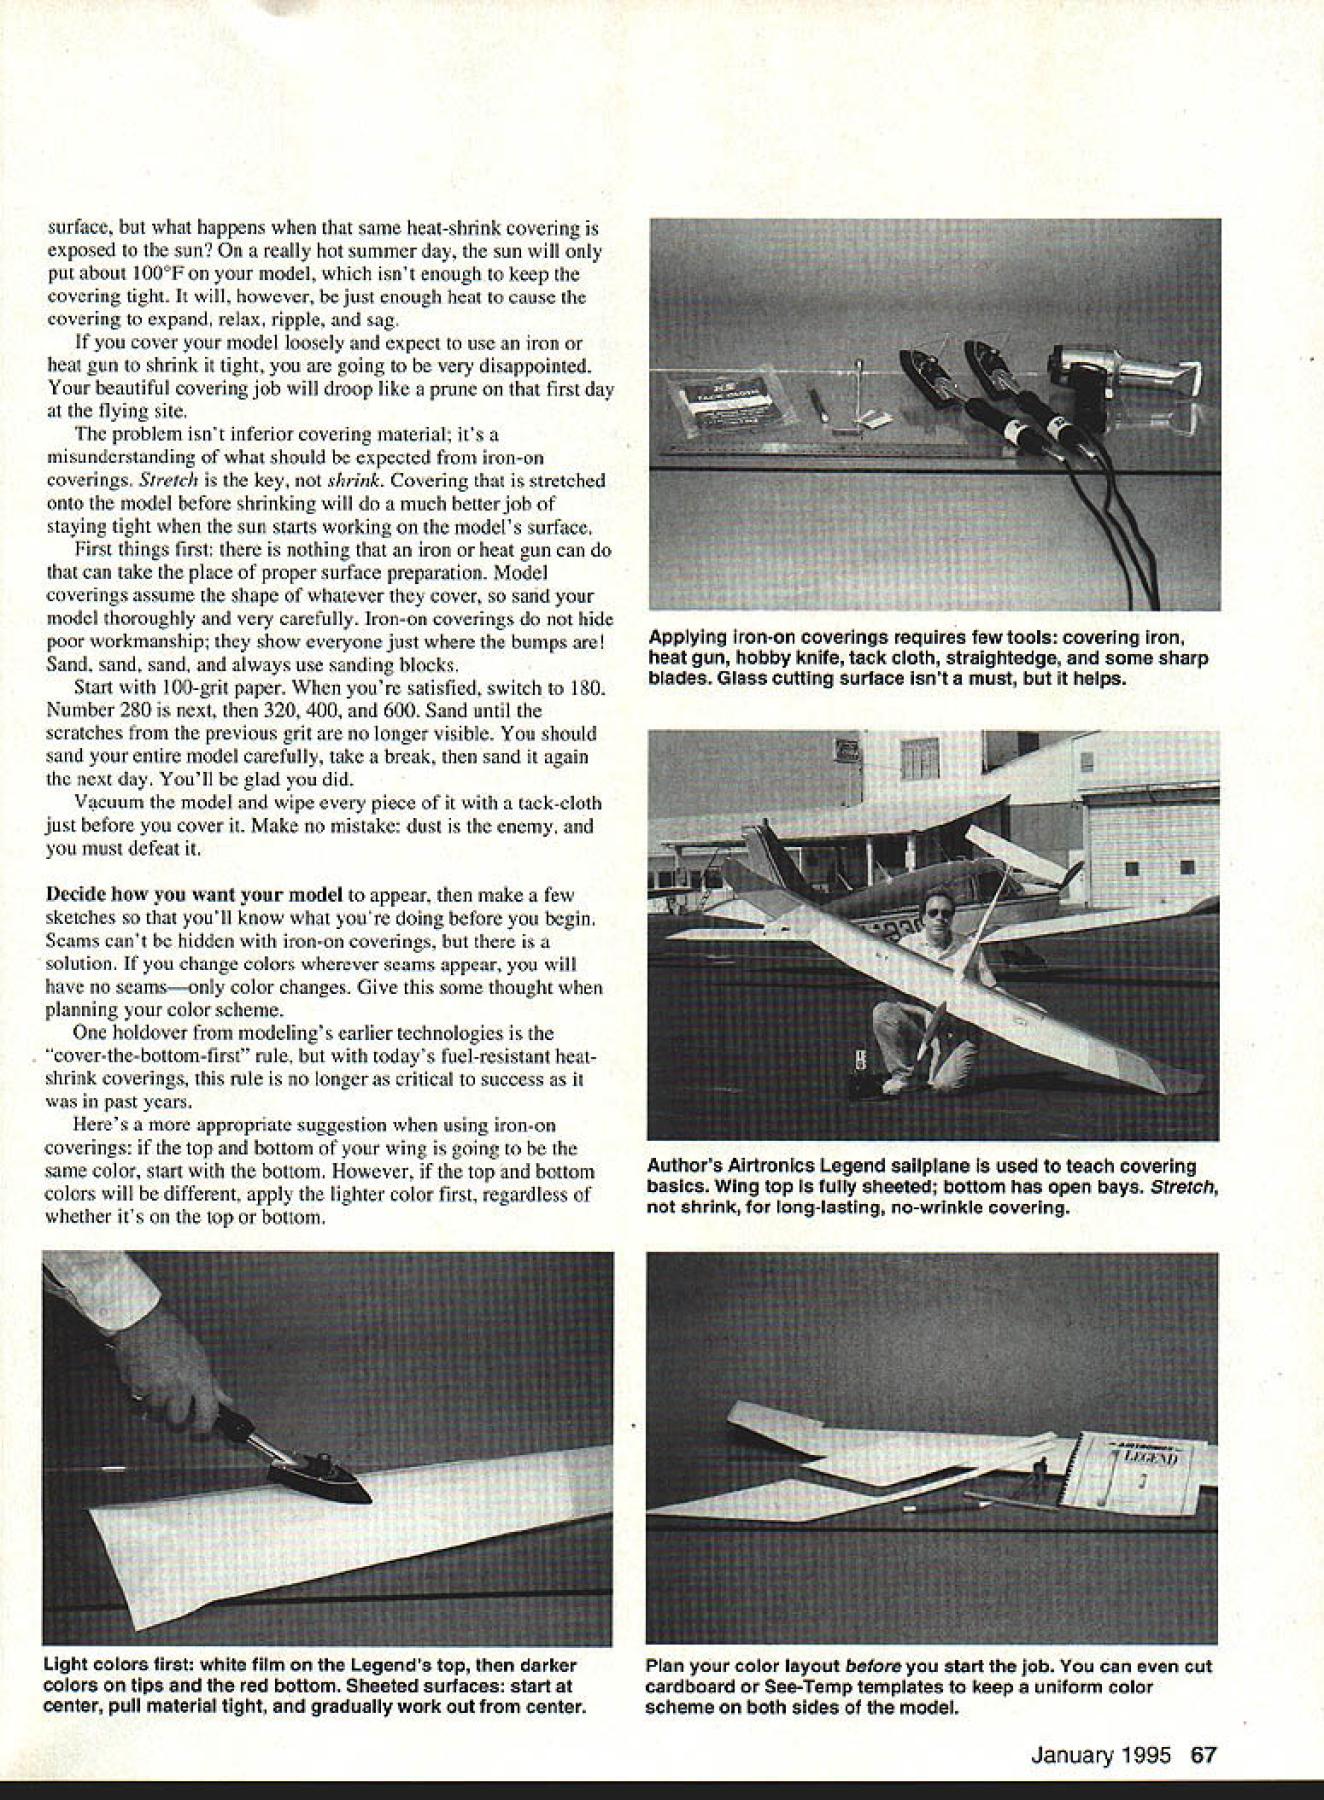
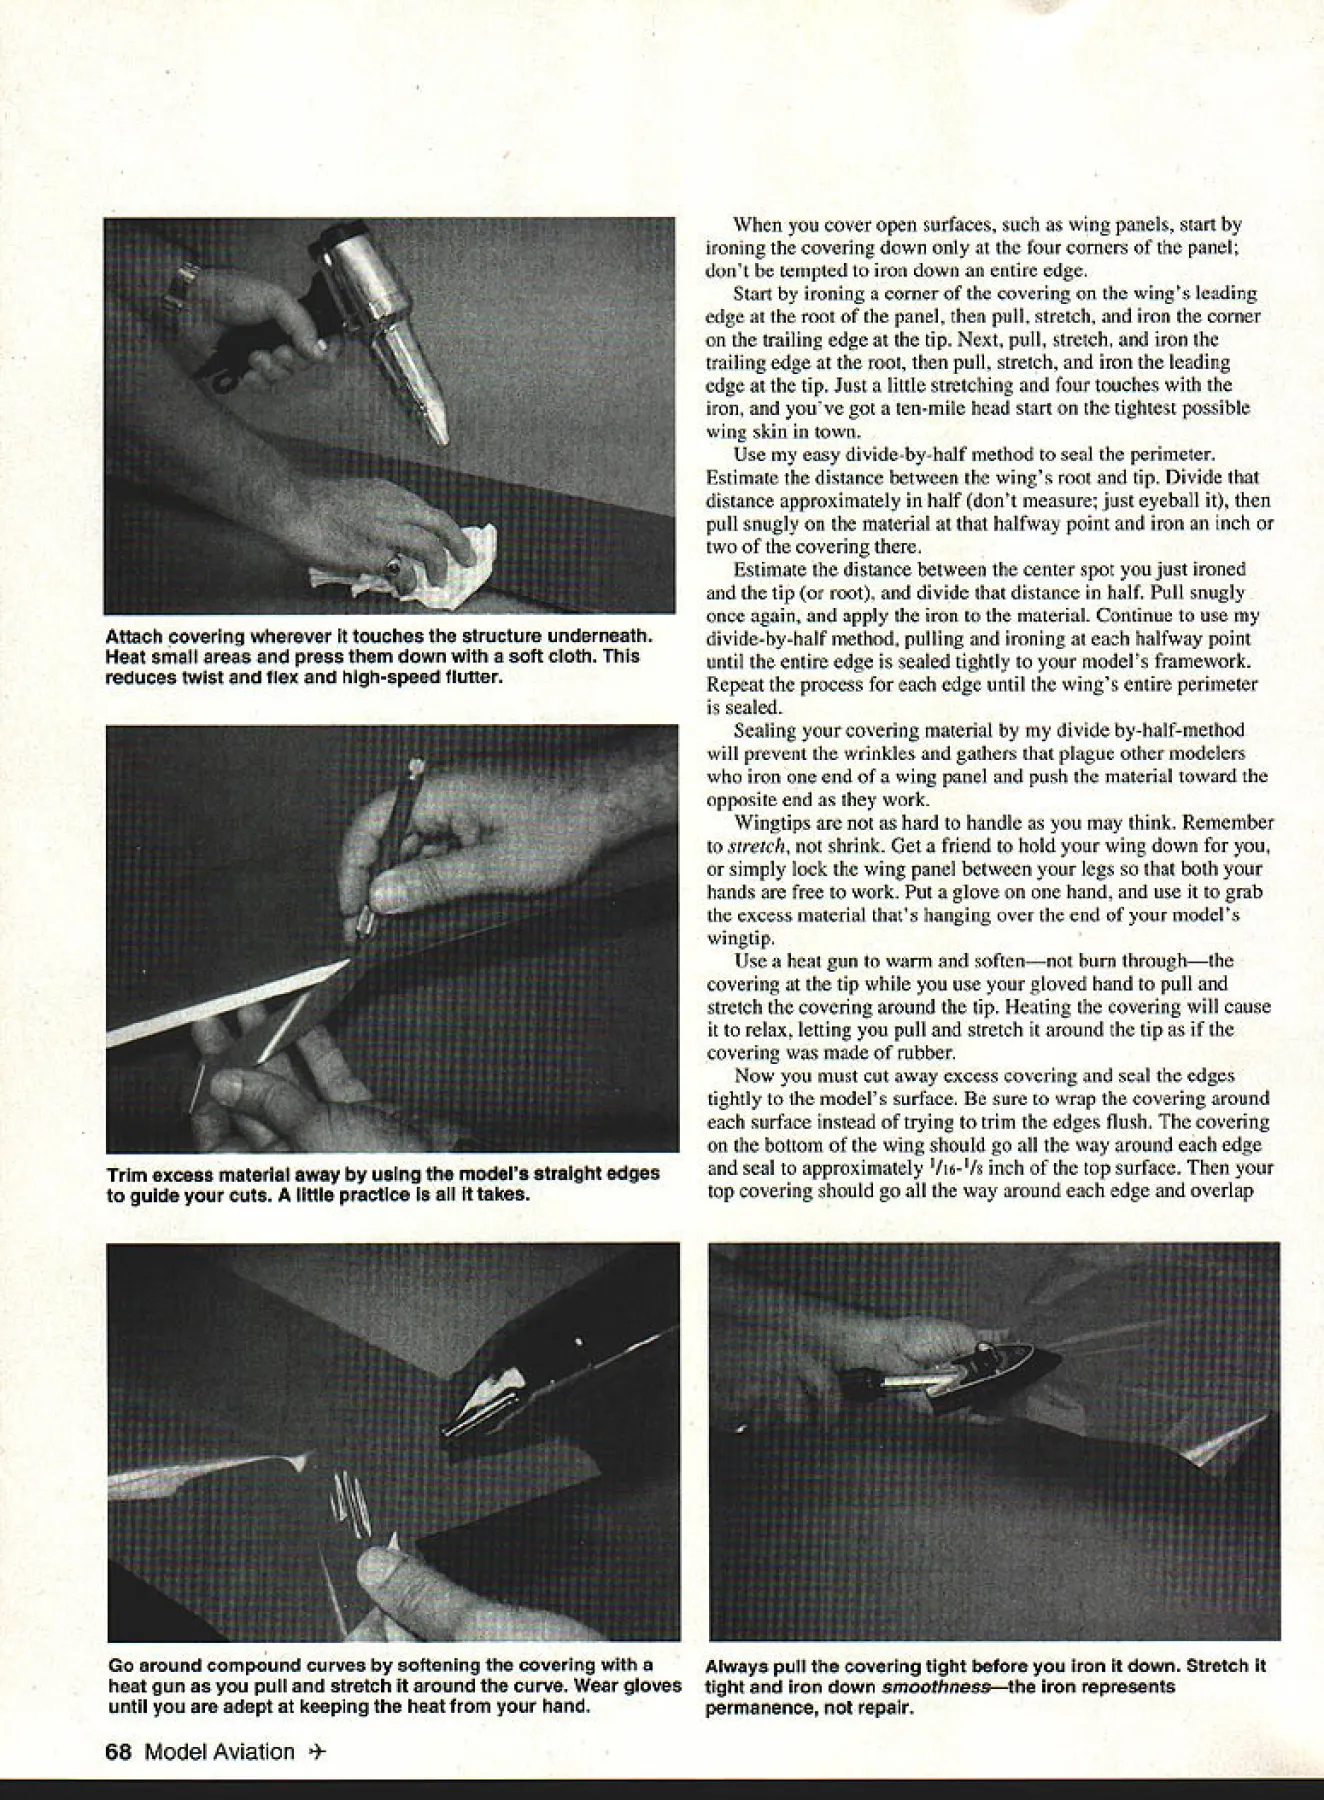
U Jeff Toy SOONER OR LATER aeromodeler must face task covering model airplane us find covering difficult doesnt have difficult Once understand basics model covering can quite pleasurable fact can artistically creative steps toward getting newest model airborne Most modelers think secret beautiful covering quality shrink Im going teach stretch before shrink Think about it. Science 101 says heat makes things expand shrink Sure heat-shrink covering will draw tight 2000F better applied its January 199565 lhlII 111W Easy I I I I Method surface what happens same heat-shrink covering exposed sun really hot summer day sun will put about 1000F model isnt enough keep covering tight will however just enough heat cause covering expand relax ripple sag cover model loosely expect use iron heat gun shrink tight going very disappointed beautiful covering job will droop like prune first day flying site problem isnt inferior covering material its misunderstanding what should expected iron-on coverings Stretch key shrink Covering stretched onto model before shrinking will much better job staying tight sun starts working models surface First things first nothing iron heat gun can can take place proper surface preparation Model coverings assume shape whatever cover sand model thoroughly very carefully Iron-on coverings hide poor workmanship show everyone just bumps Sand sand sand always use sanding blocks Start 100-grit paper youre satisfied switch 180 Number 280 next 320 400 600 Sand until scratches previous grit no longer visible should sand entire model carefully take break sand again next day Youll glad did Vacuum model wipe piece tack-cloth just before cover Make no mistake dust enemy must defeat Decide want model appear make few sketches youll know what youre doing before begin Seams cant hidden iron-on coverings solution change colors wherever seams appear will have no seamsonly color changes Give some thought planning color scheme holdover modelings earlier technologies cover-the-bottom-first rule todays fuel-resistant heatshrink coverings rule no longer critical success past years Heres appropriate suggestion using iron-on coverings top bottom wing going same color start bottom However top bottom colors will different apply lighter color first regardless whether its top bottom January1995 67 Applying iron-on coverings requires few tools covering iron heat gun hobby knife tack cloth straightedge some sharp blades Glass cutting surface isnt must helps Authors Airtronics Legend sailplane used teach covering basics Wing top fully sheeted bottom has open bays Stretch shrink long-lasting no-wrinkle covering Ligni colors tirst white turn Legends top darker colors tips red bottom Sheeted surfaces start center pull material tight gradually work out center Plan color layout before start job can cut cardboard See-Temp templates keep uniform color scheme both sides model cover open surfaces such wing panels start ironing covering down four corners panel dont tempted iron down entire edge Start ironing corner covering wings leading edge root panel pull stretch iron corner trailing edge tip Next pull stretch iron trailing edge root pull stretch iron leading edge tip Just little stretching four touches iron youve got ten-mile head start tightest possible wing skin town Use easy divide-by-half method seal perimeter Estimate distance between wings root tip Divide distance approximately half dont measure just eyeball pull snugly material halfway point iron inch two covering Estimate distance between center spot just ironed tip root divide distance half Pull snugly once again apply iron material Continue use divide-by-half method pulling ironing halfway point until entire edge sealed tightly models framework Repeat process edge until wings entire perimeter sealed Sealing covering material divide by-half-method will prevent wrinkles gathers plague other modelers iron end wing panel push material toward opposite end work Wingtips hard handle may think Remember stretch shrink Get friend hold wing down simply lock wing panel between legs both hands free work Put glove hand use grab excess material thats hanging over end models wingtip Use heat gun warm softennot burn throughthe covering tip use gloved hand pull stretch covering around tip Heating covering will cause relax letting pull stretch around tip covering made rubber Now must cut away excess covering seal edges tightly models surface sure wrap covering around surface instead trying trim edges flush covering bottom wing should go way around edge seal approximately 1/161/8 inch top surface top covering should go way around edge overlap 68 Model Aviation ch covering wherever touches structure underneath Heat small areas press down soft cloth reduces twist flex high-speed flutter Trim excess material away using models straight edges guide cuts lIttle practice takes Go around compound curves softening covering Always pull covering tight before iron down Stretch heat gun pull stretch around curve Wear gloves tight iron down smoothnessthe iron represents until adept keeping heat hand permanence repair bottom covering approximately 1/8 inch models covered way danger loose edges almost eliminated fuel wont penetrate skin could edge-to-edge butt-joint application can now shrink covering although its probably pretty tight already After surface tight can get must seal covering model wherever models structure touches covering includes sheeting spars ribs capstrips tips Sealing covering models structure will improve its structural integrity will also help prevent highspeed flutter reduce twist flex increase wings torsional rigidity Dont use flat iron seal covering models surface heating small areas heat gun about three four square inches time pressing covering structure very soft cloth Hold cloth place until covering cools move next small area everything sealed tightly structure underneath use heat gun tighten material once again remove imperfections may have caused too-heavy hand iron cloth Solid sheet block surfaces different must handled little differently open-bay structures Coverings should stretched ironed solid surfaces time applied covering fully-sheeted fuselage bottom touch iron center area wish cover Iron about one-inch area pull stretch covering tightly toward tail iron down another inch two direction Stretch covering toward nose iron down another inch two Pull covering toward right side iron little bit pull toward left side apply iron Get Keep pulling stretching ironing until entire piece bottom covering flat fuselage bottom wise modelers rule thumb working iron-on coverings stretch shrink Never iron over wrinkle expect remove after fact iron tool represents permanence repair Always pull tightly covering use iron press flatness youll well way winning awards almost no effort whatsoever model completely covered clean covering dope thinner brake fluid Coverites Ironex products will remove pigment adhesive may have oozed under seams during covering procedure will also help provide clean surface application striping tapes other press-on graphic trim materials may select ary1995 69 AR/Box /238 Higginsvi//e MO 64037816 584-6284FAX 816 584-6285 YES THE TWIN-AIR 20 IS HERE AT LAST YES THE 1JVIN-AIR 20 REALLY CAN BE CONTROLLED ON JUST ONE ENGINE YES THE lYVIN-AIR 20 OFFERS THE SAME HIGH QUALITY PERFOR MANCE EASE OF FLYING AND HANDLING AEROBATiC CAPABIU TIES FUN TO BUILD AND FUN TO FLY FEATURES FOUND IN ALL NORTHEAST AERODYNAMIC KITS THE TRAIN-AIRS BEL-AIRS AND SPORT AIR YES ITS FROM. NORTHEAST AERODYNAMICS INC 4 NORTHEA ST AERODYNAMICS INC 150 ROBINSON ROAD ON NH 03051 881-5899 Specifications Engine Requirement -Two 20-30 Wing Span 58 Wing Area 625 Sq 434 Sq Fuselage Length 43 Fuselage Width 35 Overall Weight Range 55 65 pounds Wing Loading Range 195 239 Sq Ft Radio Functions -4 Channel Ask local hobby shop order direct
Edition: Model Aviation - 1995/01
Page Numbers: 65, 67, 68, 69
Edition: Model Aviation - 1995/01
Page Numbers: 65, 67, 68, 69
U Jeff Toy SOONER OR LATER aeromodeler must face task covering model airplane us find covering difficult doesnt have difficult Once understand basics model covering can quite pleasurable fact can artistically creative steps toward getting newest model airborne Most modelers think secret beautiful covering quality shrink Im going teach stretch before shrink Think about it. Science 101 says heat makes things expand shrink Sure heat-shrink covering will draw tight 2000F better applied its January 199565 lhlII 111W Easy I I I I Method surface what happens same heat-shrink covering exposed sun really hot summer day sun will put about 1000F model isnt enough keep covering tight will however just enough heat cause covering expand relax ripple sag cover model loosely expect use iron heat gun shrink tight going very disappointed beautiful covering job will droop like prune first day flying site problem isnt inferior covering material its misunderstanding what should expected iron-on coverings Stretch key shrink Covering stretched onto model before shrinking will much better job staying tight sun starts working models surface First things first nothing iron heat gun can can take place proper surface preparation Model coverings assume shape whatever cover sand model thoroughly very carefully Iron-on coverings hide poor workmanship show everyone just bumps Sand sand sand always use sanding blocks Start 100-grit paper youre satisfied switch 180 Number 280 next 320 400 600 Sand until scratches previous grit no longer visible should sand entire model carefully take break sand again next day Youll glad did Vacuum model wipe piece tack-cloth just before cover Make no mistake dust enemy must defeat Decide want model appear make few sketches youll know what youre doing before begin Seams cant hidden iron-on coverings solution change colors wherever seams appear will have no seamsonly color changes Give some thought planning color scheme holdover modelings earlier technologies cover-the-bottom-first rule todays fuel-resistant heatshrink coverings rule no longer critical success past years Heres appropriate suggestion using iron-on coverings top bottom wing going same color start bottom However top bottom colors will different apply lighter color first regardless whether its top bottom January1995 67 Applying iron-on coverings requires few tools covering iron heat gun hobby knife tack cloth straightedge some sharp blades Glass cutting surface isnt must helps Authors Airtronics Legend sailplane used teach covering basics Wing top fully sheeted bottom has open bays Stretch shrink long-lasting no-wrinkle covering Ligni colors tirst white turn Legends top darker colors tips red bottom Sheeted surfaces start center pull material tight gradually work out center Plan color layout before start job can cut cardboard See-Temp templates keep uniform color scheme both sides model cover open surfaces such wing panels start ironing covering down four corners panel dont tempted iron down entire edge Start ironing corner covering wings leading edge root panel pull stretch iron corner trailing edge tip Next pull stretch iron trailing edge root pull stretch iron leading edge tip Just little stretching four touches iron youve got ten-mile head start tightest possible wing skin town Use easy divide-by-half method seal perimeter Estimate distance between wings root tip Divide distance approximately half dont measure just eyeball pull snugly material halfway point iron inch two covering Estimate distance between center spot just ironed tip root divide distance half Pull snugly once again apply iron material Continue use divide-by-half method pulling ironing halfway point until entire edge sealed tightly models framework Repeat process edge until wings entire perimeter sealed Sealing covering material divide by-half-method will prevent wrinkles gathers plague other modelers iron end wing panel push material toward opposite end work Wingtips hard handle may think Remember stretch shrink Get friend hold wing down simply lock wing panel between legs both hands free work Put glove hand use grab excess material thats hanging over end models wingtip Use heat gun warm softennot burn throughthe covering tip use gloved hand pull stretch covering around tip Heating covering will cause relax letting pull stretch around tip covering made rubber Now must cut away excess covering seal edges tightly models surface sure wrap covering around surface instead trying trim edges flush covering bottom wing should go way around edge seal approximately 1/161/8 inch top surface top covering should go way around edge overlap 68 Model Aviation ch covering wherever touches structure underneath Heat small areas press down soft cloth reduces twist flex high-speed flutter Trim excess material away using models straight edges guide cuts lIttle practice takes Go around compound curves softening covering Always pull covering tight before iron down Stretch heat gun pull stretch around curve Wear gloves tight iron down smoothnessthe iron represents until adept keeping heat hand permanence repair bottom covering approximately 1/8 inch models covered way danger loose edges almost eliminated fuel wont penetrate skin could edge-to-edge butt-joint application can now shrink covering although its probably pretty tight already After surface tight can get must seal covering model wherever models structure touches covering includes sheeting spars ribs capstrips tips Sealing covering models structure will improve its structural integrity will also help prevent highspeed flutter reduce twist flex increase wings torsional rigidity Dont use flat iron seal covering models surface heating small areas heat gun about three four square inches time pressing covering structure very soft cloth Hold cloth place until covering cools move next small area everything sealed tightly structure underneath use heat gun tighten material once again remove imperfections may have caused too-heavy hand iron cloth Solid sheet block surfaces different must handled little differently open-bay structures Coverings should stretched ironed solid surfaces time applied covering fully-sheeted fuselage bottom touch iron center area wish cover Iron about one-inch area pull stretch covering tightly toward tail iron down another inch two direction Stretch covering toward nose iron down another inch two Pull covering toward right side iron little bit pull toward left side apply iron Get Keep pulling stretching ironing until entire piece bottom covering flat fuselage bottom wise modelers rule thumb working iron-on coverings stretch shrink Never iron over wrinkle expect remove after fact iron tool represents permanence repair Always pull tightly covering use iron press flatness youll well way winning awards almost no effort whatsoever model completely covered clean covering dope thinner brake fluid Coverites Ironex products will remove pigment adhesive may have oozed under seams during covering procedure will also help provide clean surface application striping tapes other press-on graphic trim materials may select ary1995 69 AR/Box /238 Higginsvi//e MO 64037816 584-6284FAX 816 584-6285 YES THE TWIN-AIR 20 IS HERE AT LAST YES THE 1JVIN-AIR 20 REALLY CAN BE CONTROLLED ON JUST ONE ENGINE YES THE lYVIN-AIR 20 OFFERS THE SAME HIGH QUALITY PERFOR MANCE EASE OF FLYING AND HANDLING AEROBATiC CAPABIU TIES FUN TO BUILD AND FUN TO FLY FEATURES FOUND IN ALL NORTHEAST AERODYNAMIC KITS THE TRAIN-AIRS BEL-AIRS AND SPORT AIR YES ITS FROM. NORTHEAST AERODYNAMICS INC 4 NORTHEA ST AERODYNAMICS INC 150 ROBINSON ROAD ON NH 03051 881-5899 Specifications Engine Requirement -Two 20-30 Wing Span 58 Wing Area 625 Sq 434 Sq Fuselage Length 43 Fuselage Width 35 Overall Weight Range 55 65 pounds Wing Loading Range 195 239 Sq Ft Radio Functions -4 Channel Ask local hobby shop order direct
Edition: Model Aviation - 1995/01
Page Numbers: 65, 67, 68, 69
U Jeff Toy SOONER OR LATER aeromodeler must face task covering model airplane us find covering difficult doesnt have difficult Once understand basics model covering can quite pleasurable fact can artistically creative steps toward getting newest model airborne Most modelers think secret beautiful covering quality shrink Im going teach stretch before shrink Think about it. Science 101 says heat makes things expand shrink Sure heat-shrink covering will draw tight 2000F better applied its January 199565 lhlII 111W Easy I I I I Method surface what happens same heat-shrink covering exposed sun really hot summer day sun will put about 1000F model isnt enough keep covering tight will however just enough heat cause covering expand relax ripple sag cover model loosely expect use iron heat gun shrink tight going very disappointed beautiful covering job will droop like prune first day flying site problem isnt inferior covering material its misunderstanding what should expected iron-on coverings Stretch key shrink Covering stretched onto model before shrinking will much better job staying tight sun starts working models surface First things first nothing iron heat gun can can take place proper surface preparation Model coverings assume shape whatever cover sand model thoroughly very carefully Iron-on coverings hide poor workmanship show everyone just bumps Sand sand sand always use sanding blocks Start 100-grit paper youre satisfied switch 180 Number 280 next 320 400 600 Sand until scratches previous grit no longer visible should sand entire model carefully take break sand again next day Youll glad did Vacuum model wipe piece tack-cloth just before cover Make no mistake dust enemy must defeat Decide want model appear make few sketches youll know what youre doing before begin Seams cant hidden iron-on coverings solution change colors wherever seams appear will have no seamsonly color changes Give some thought planning color scheme holdover modelings earlier technologies cover-the-bottom-first rule todays fuel-resistant heatshrink coverings rule no longer critical success past years Heres appropriate suggestion using iron-on coverings top bottom wing going same color start bottom However top bottom colors will different apply lighter color first regardless whether its top bottom January1995 67 Applying iron-on coverings requires few tools covering iron heat gun hobby knife tack cloth straightedge some sharp blades Glass cutting surface isnt must helps Authors Airtronics Legend sailplane used teach covering basics Wing top fully sheeted bottom has open bays Stretch shrink long-lasting no-wrinkle covering Ligni colors tirst white turn Legends top darker colors tips red bottom Sheeted surfaces start center pull material tight gradually work out center Plan color layout before start job can cut cardboard See-Temp templates keep uniform color scheme both sides model cover open surfaces such wing panels start ironing covering down four corners panel dont tempted iron down entire edge Start ironing corner covering wings leading edge root panel pull stretch iron corner trailing edge tip Next pull stretch iron trailing edge root pull stretch iron leading edge tip Just little stretching four touches iron youve got ten-mile head start tightest possible wing skin town Use easy divide-by-half method seal perimeter Estimate distance between wings root tip Divide distance approximately half dont measure just eyeball pull snugly material halfway point iron inch two covering Estimate distance between center spot just ironed tip root divide distance half Pull snugly once again apply iron material Continue use divide-by-half method pulling ironing halfway point until entire edge sealed tightly models framework Repeat process edge until wings entire perimeter sealed Sealing covering material divide by-half-method will prevent wrinkles gathers plague other modelers iron end wing panel push material toward opposite end work Wingtips hard handle may think Remember stretch shrink Get friend hold wing down simply lock wing panel between legs both hands free work Put glove hand use grab excess material thats hanging over end models wingtip Use heat gun warm softennot burn throughthe covering tip use gloved hand pull stretch covering around tip Heating covering will cause relax letting pull stretch around tip covering made rubber Now must cut away excess covering seal edges tightly models surface sure wrap covering around surface instead trying trim edges flush covering bottom wing should go way around edge seal approximately 1/161/8 inch top surface top covering should go way around edge overlap 68 Model Aviation ch covering wherever touches structure underneath Heat small areas press down soft cloth reduces twist flex high-speed flutter Trim excess material away using models straight edges guide cuts lIttle practice takes Go around compound curves softening covering Always pull covering tight before iron down Stretch heat gun pull stretch around curve Wear gloves tight iron down smoothnessthe iron represents until adept keeping heat hand permanence repair bottom covering approximately 1/8 inch models covered way danger loose edges almost eliminated fuel wont penetrate skin could edge-to-edge butt-joint application can now shrink covering although its probably pretty tight already After surface tight can get must seal covering model wherever models structure touches covering includes sheeting spars ribs capstrips tips Sealing covering models structure will improve its structural integrity will also help prevent highspeed flutter reduce twist flex increase wings torsional rigidity Dont use flat iron seal covering models surface heating small areas heat gun about three four square inches time pressing covering structure very soft cloth Hold cloth place until covering cools move next small area everything sealed tightly structure underneath use heat gun tighten material once again remove imperfections may have caused too-heavy hand iron cloth Solid sheet block surfaces different must handled little differently open-bay structures Coverings should stretched ironed solid surfaces time applied covering fully-sheeted fuselage bottom touch iron center area wish cover Iron about one-inch area pull stretch covering tightly toward tail iron down another inch two direction Stretch covering toward nose iron down another inch two Pull covering toward right side iron little bit pull toward left side apply iron Get Keep pulling stretching ironing until entire piece bottom covering flat fuselage bottom wise modelers rule thumb working iron-on coverings stretch shrink Never iron over wrinkle expect remove after fact iron tool represents permanence repair Always pull tightly covering use iron press flatness youll well way winning awards almost no effort whatsoever model completely covered clean covering dope thinner brake fluid Coverites Ironex products will remove pigment adhesive may have oozed under seams during covering procedure will also help provide clean surface application striping tapes other press-on graphic trim materials may select ary1995 69 AR/Box /238 Higginsvi//e MO 64037816 584-6284FAX 816 584-6285 YES THE TWIN-AIR 20 IS HERE AT LAST YES THE 1JVIN-AIR 20 REALLY CAN BE CONTROLLED ON JUST ONE ENGINE YES THE lYVIN-AIR 20 OFFERS THE SAME HIGH QUALITY PERFOR MANCE EASE OF FLYING AND HANDLING AEROBATiC CAPABIU TIES FUN TO BUILD AND FUN TO FLY FEATURES FOUND IN ALL NORTHEAST AERODYNAMIC KITS THE TRAIN-AIRS BEL-AIRS AND SPORT AIR YES ITS FROM. NORTHEAST AERODYNAMICS INC 4 NORTHEA ST AERODYNAMICS INC 150 ROBINSON ROAD ON NH 03051 881-5899 Specifications Engine Requirement -Two 20-30 Wing Span 58 Wing Area 625 Sq 434 Sq Fuselage Length 43 Fuselage Width 35 Overall Weight Range 55 65 pounds Wing Loading Range 195 239 Sq Ft Radio Functions -4 Channel Ask local hobby shop order direct

