

AGS Retro
By Bob Noll and Ken Maroni
Background
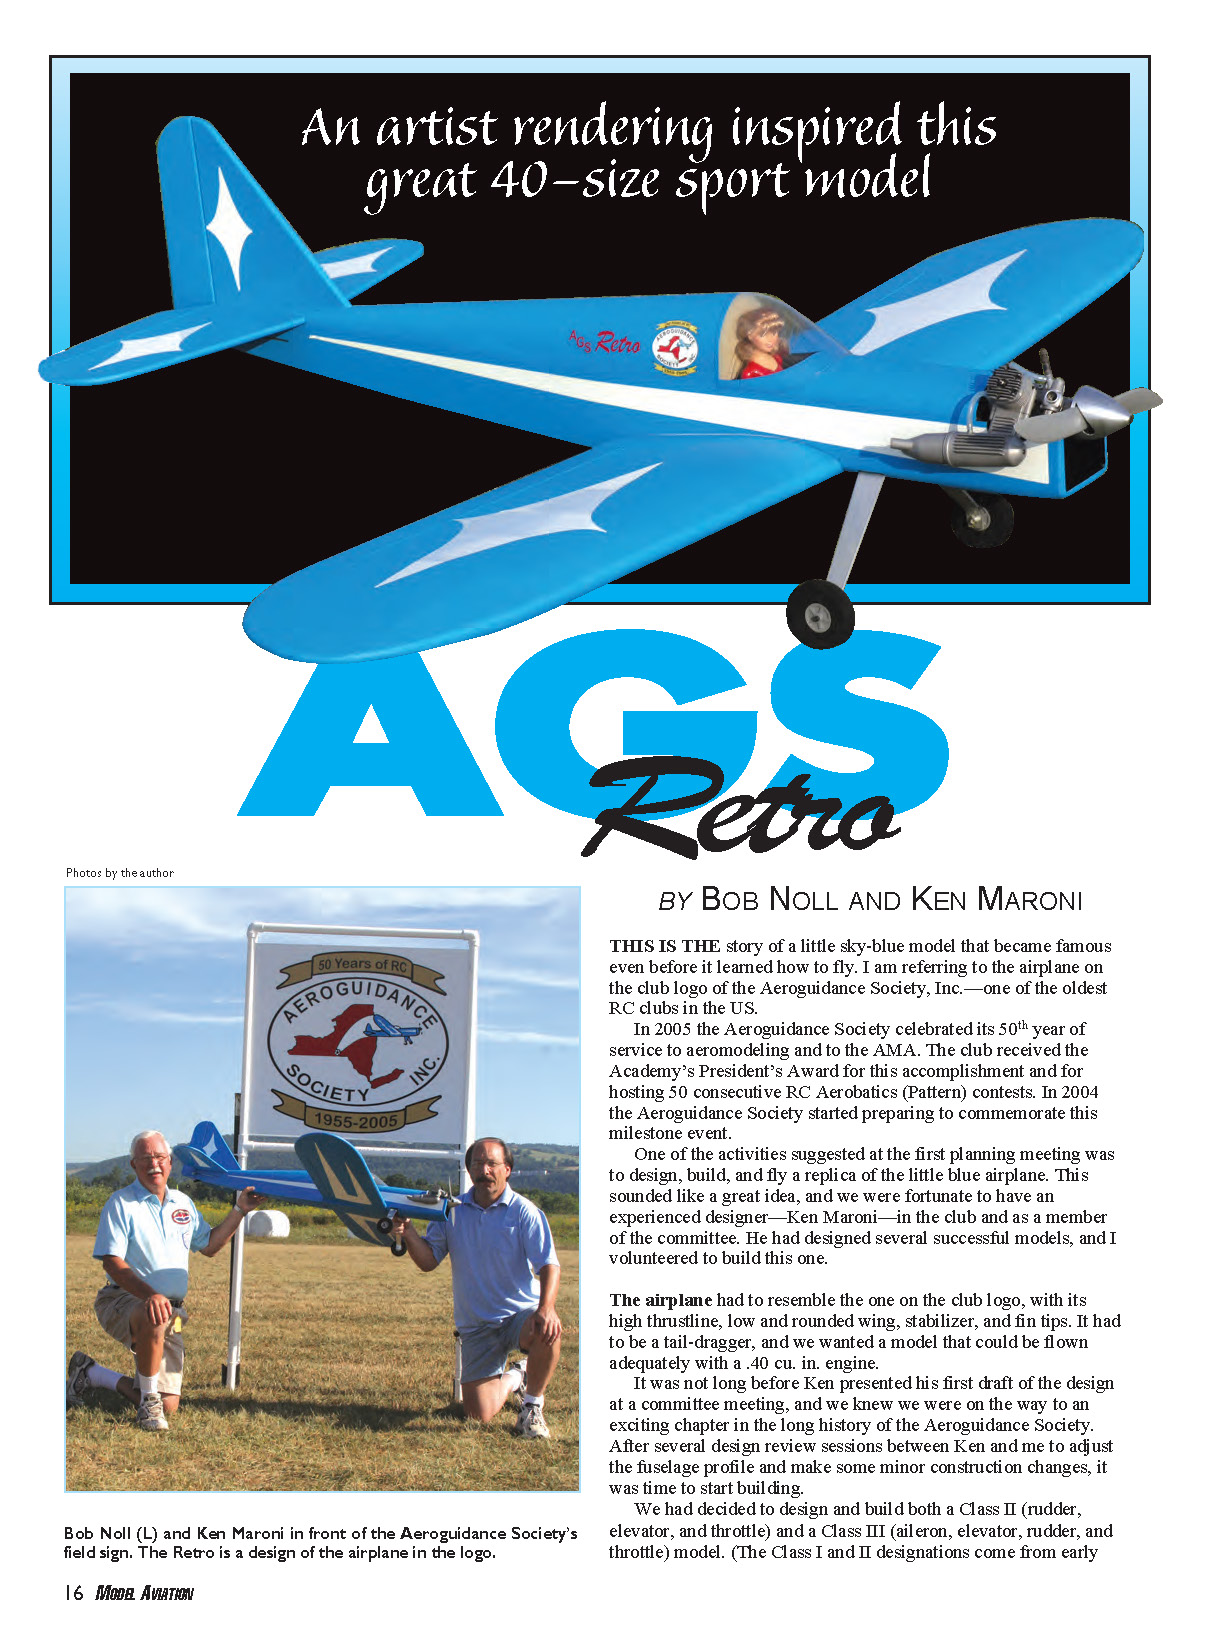
This is the story of a little sky-blue model that became famous even before it learned how to fly. The airplane on the club logo of the Aeroguidance Society, Inc. — one of the oldest RC clubs in the U.S. — was chosen as the subject for a replica to mark the club’s 50th anniversary in 2005.
When the Aeroguidance Society prepared to commemorate the milestone, the planning committee suggested designing, building, and flying a replica of the little blue airplane on the club logo. Ken Maroni, an experienced designer and committee member, produced the first draft of the design and Bob Noll volunteered to build it.
The airplane needed to resemble the logo plane: high thrustline, low rounded wing, stabilizer and fin tips, a taildragger undercarriage, and be flyable with a .40 cu. in. engine.
Design approach
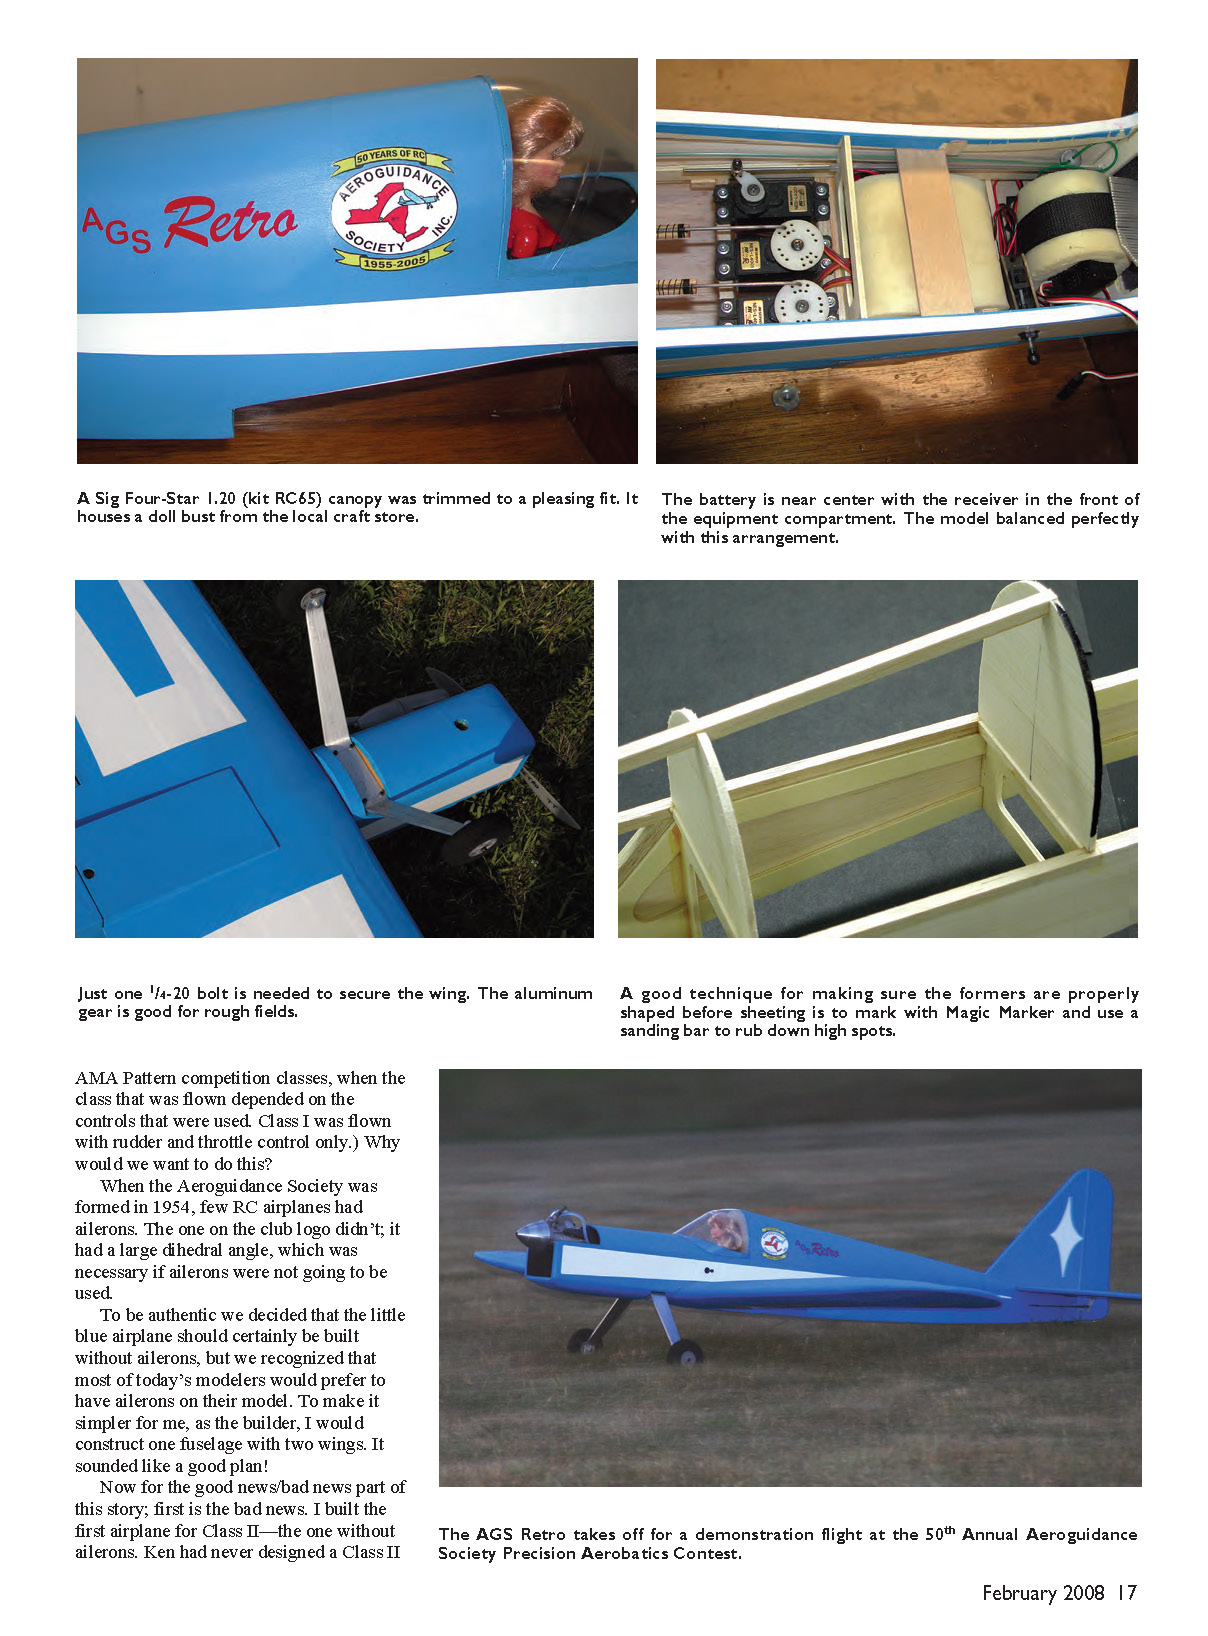
The team decided to produce both a Class II (rudder, elevator, and throttle) and a Class III (aileron, elevator, rudder, and throttle) model. (Class I and II designations come from early AMA Pattern competition classes; Class I was flown with rudder and throttle control only.) To be authentic to the original logo airplane, which had no ailerons and relied on significant dihedral, the plan was to build one fuselage and two interchangeable wings (one without ailerons and one with).
First flights and lessons learned
The first airplane built was the Class II version (no ailerons). Ken had not designed a Class II model before; most modern designs use ailerons. The lack of sufficient dihedral in the wing produced a hairy first flight: the model would not fly wings-level after the first turn, and when left rudder was applied the airplane tended to fly on its left side. Fortunately the pilot managed to land without damage. After inspecting what had happened, it was clear the dihedral was insufficient to allow the rudder alone to turn the model effectively.
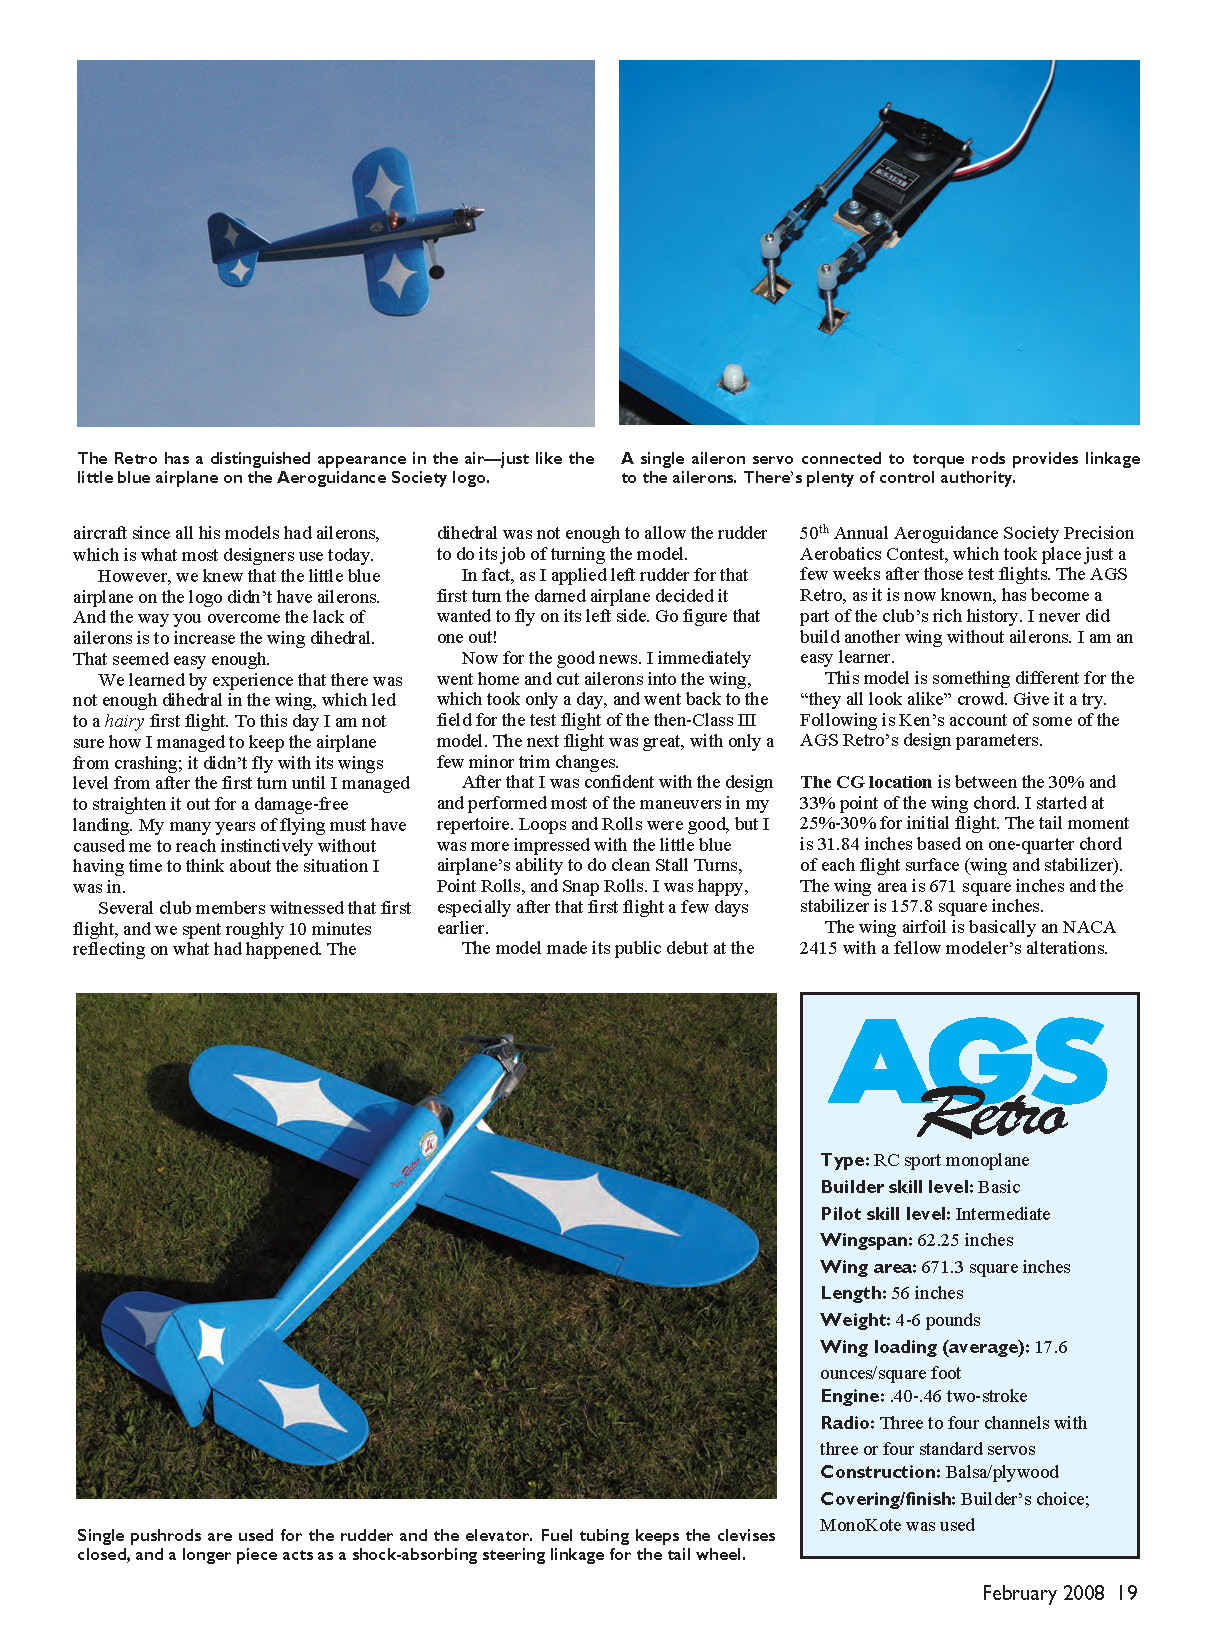
The author went home, added ailerons to the wing (a one-day job), and returned for another test flight as a Class III model. The next flight was excellent with only minor trim changes. The model performed well in loops and rolls, and excelled at Stall Turns, Point Rolls, and Snap Rolls. The AGS Retro made its public debut at the 50th Annual Aeroguidance Society Precision Aerobatics Contest held shortly thereafter. Bob Noll reports he never built another wing without ailerons.
Specifications
- Type: RC sport monoplane
- Builder skill level: Basic
- Pilot skill level: Intermediate
- Wingspan: 62.25 in
- Wing area: 671.3 sq in
- Length: 56 in
- Weight: 4–6 lb
- Wing loading (average): 17.6 oz/sq ft
- Engine: .40–.46 two-stroke
- Radio: 3–4 channels with 3–4 standard servos
- Construction: Balsa/plywood
- Covering/finish: Builder’s choice (MonoKote was used)
Center of gravity and tail moment
- CG location: between 30% and 33% of the wing chord (initial flights started at 25%–30%).
- Tail moment: 31.84 in, based on one-quarter chord of each flight surface (wing and stabilizer).
- Stabilizer area: 157.8 sq in.
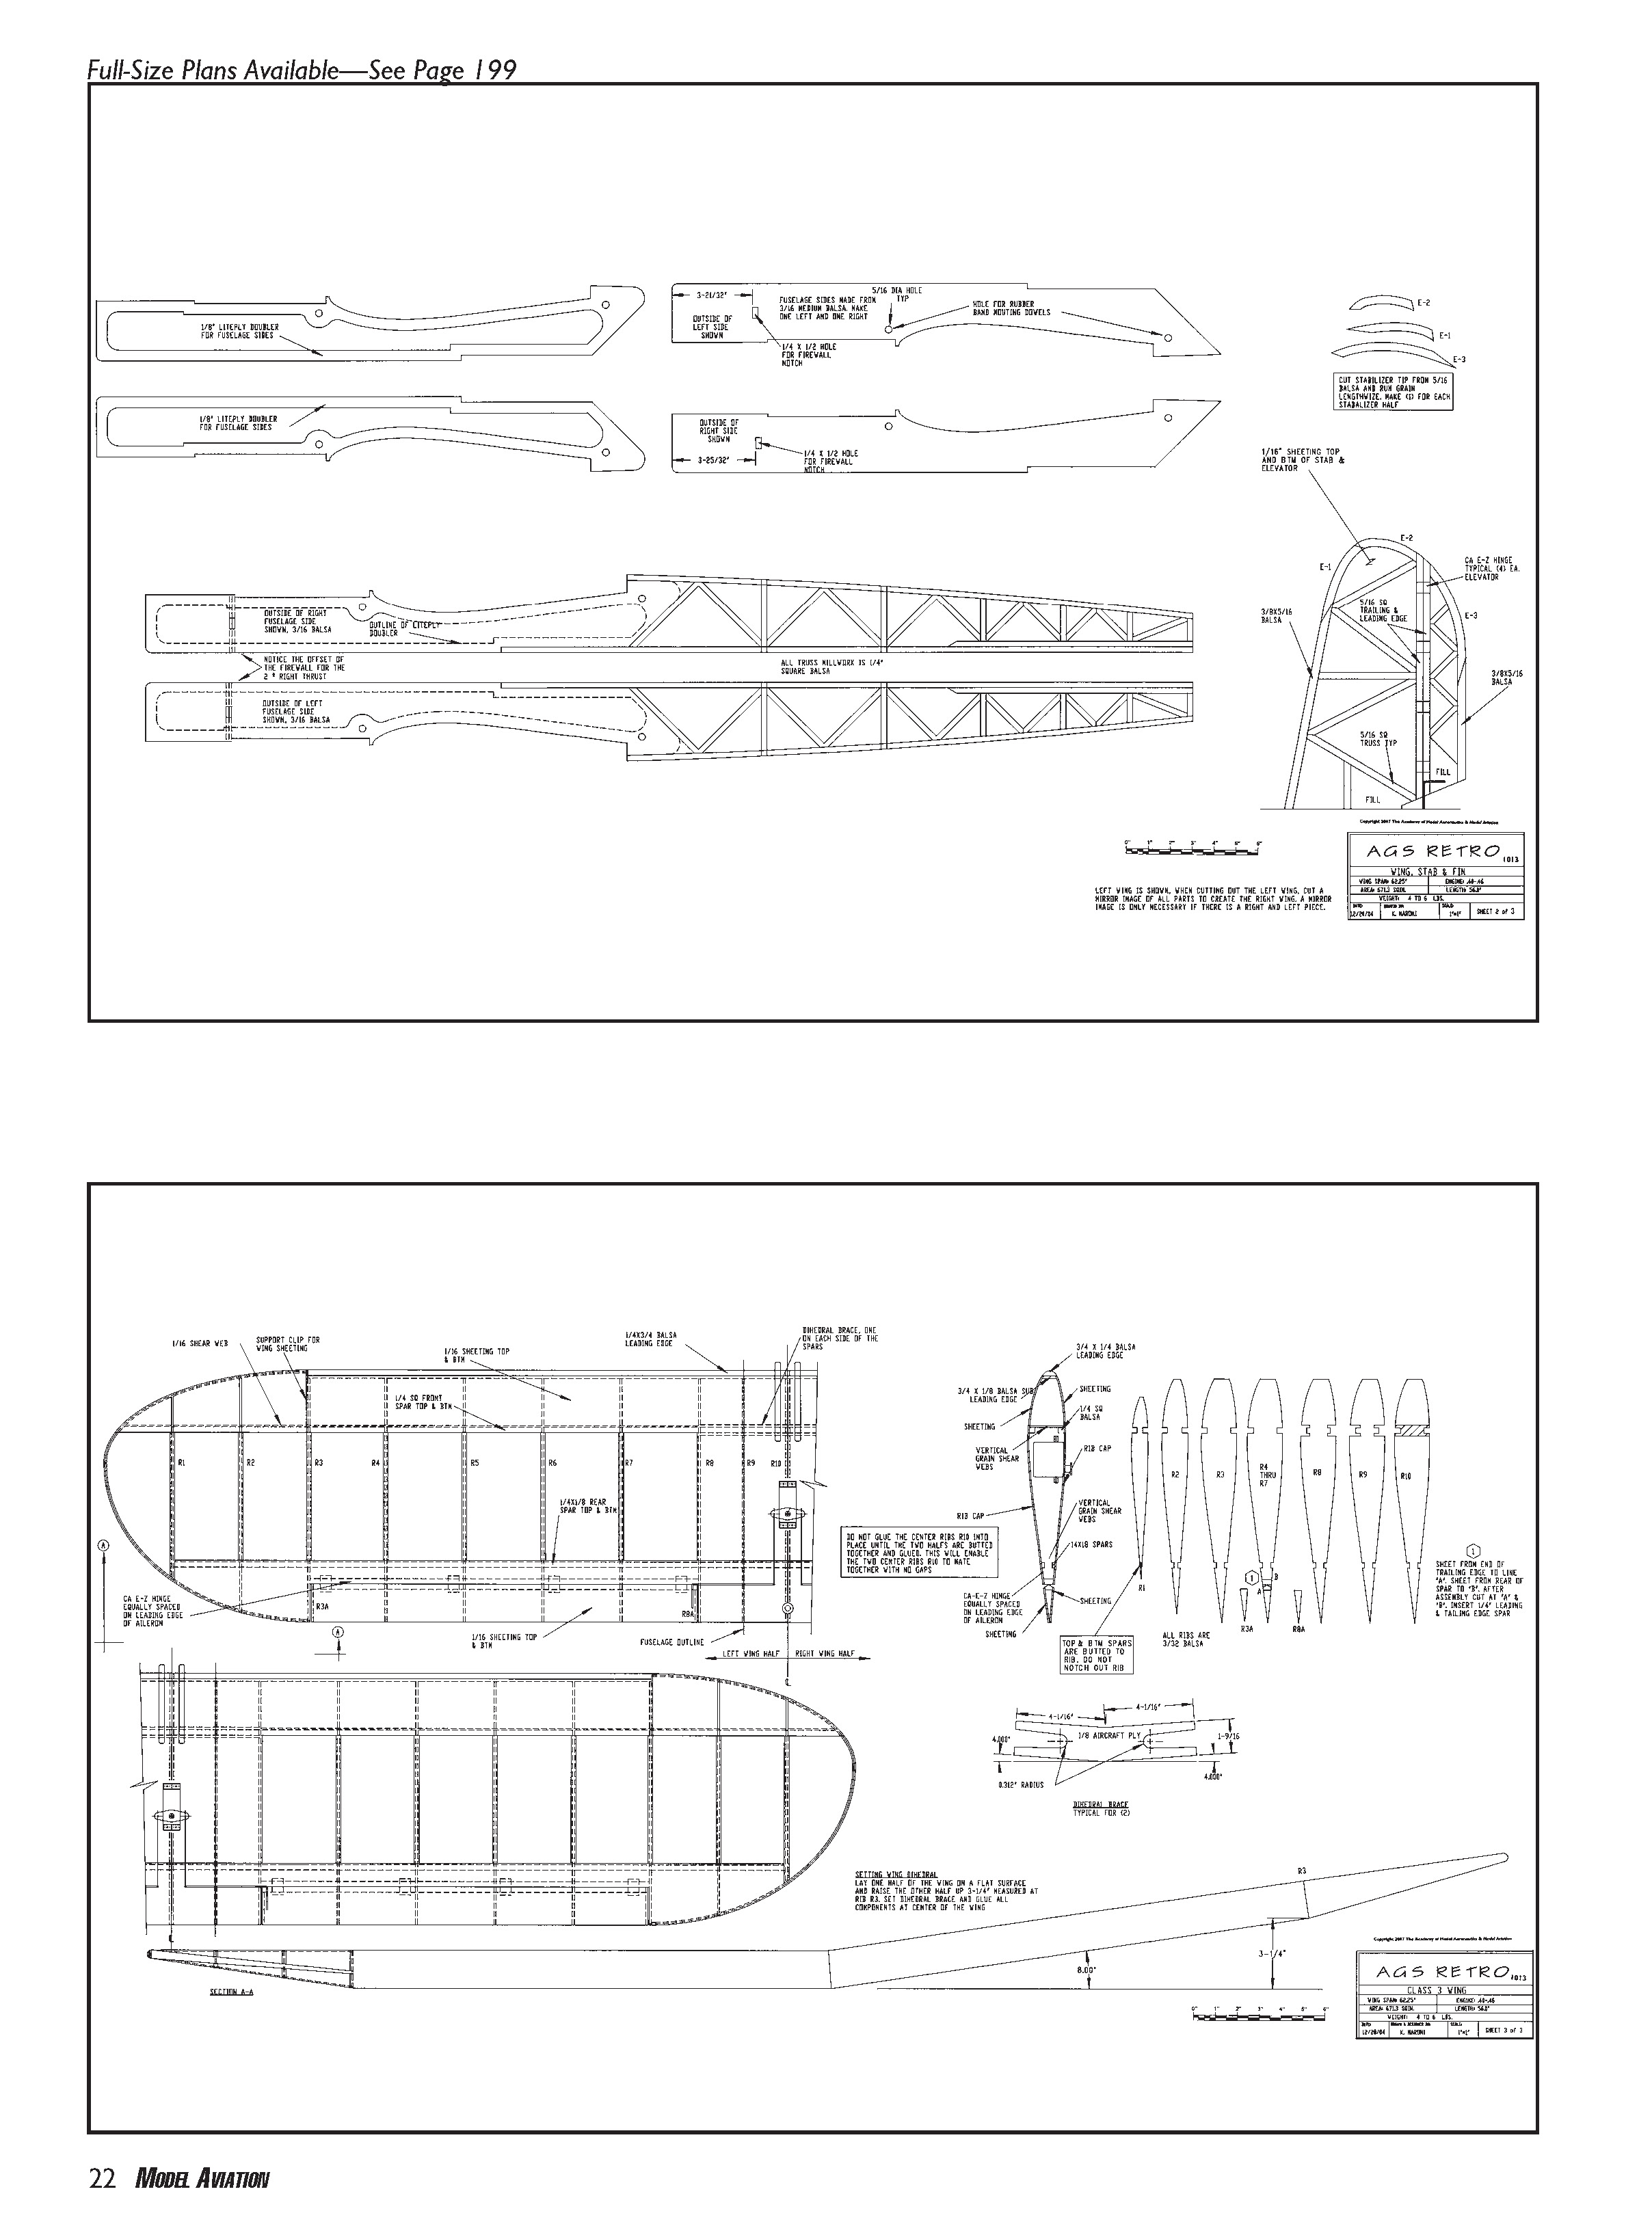
Airfoil and wing construction
The wing airfoil is basically an NACA 2415 with a fellow modeler’s alteration: the bottom of the airfoil is flattened from the 20% chord point to make it possible to build on a flat surface without a wing fixture. This modified airfoil has been used for many models.
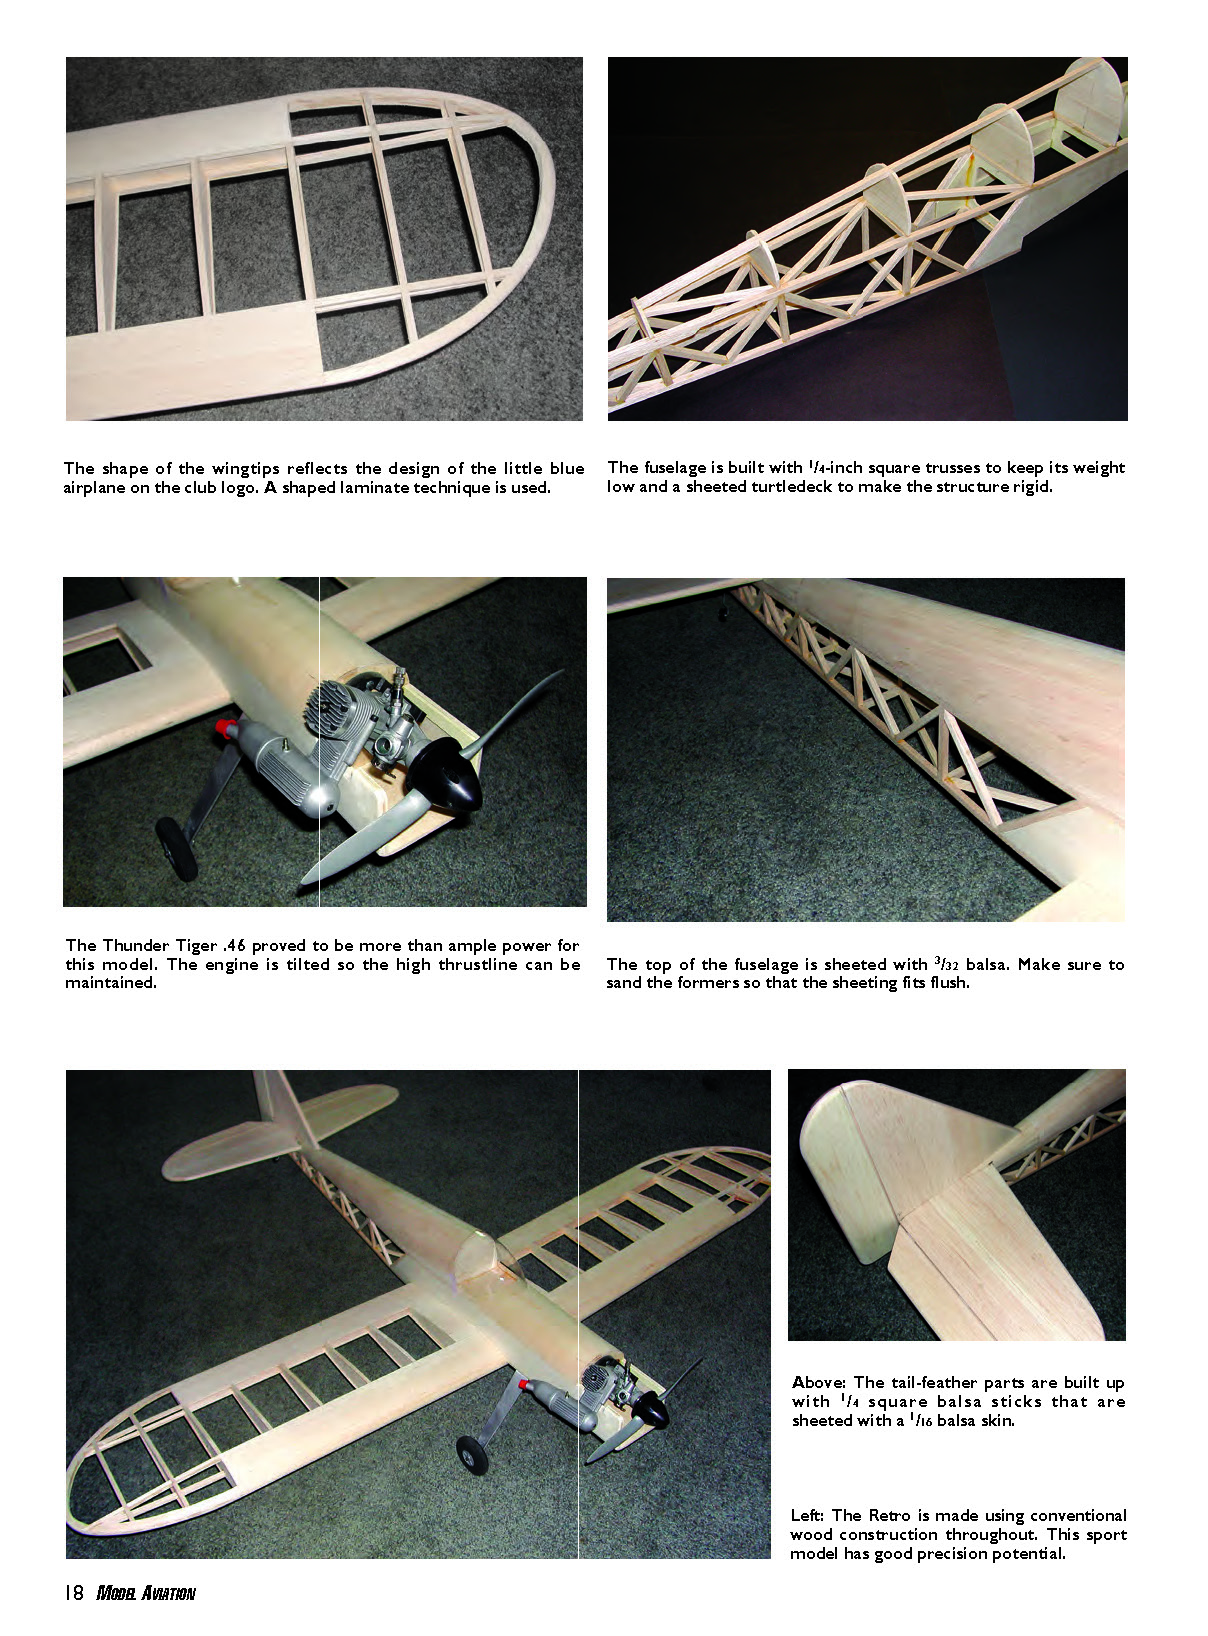
The wing uses standard D-tube construction with shear webs, planking on the trailing edge, and rib capstrips. The wing halves are joined with a dihedral brace that ties the upper and lower spars together and sets the dihedral angle. The leading edge is formed by two pieces of stick balsa glued together and shaped to radius for a strong assembly.
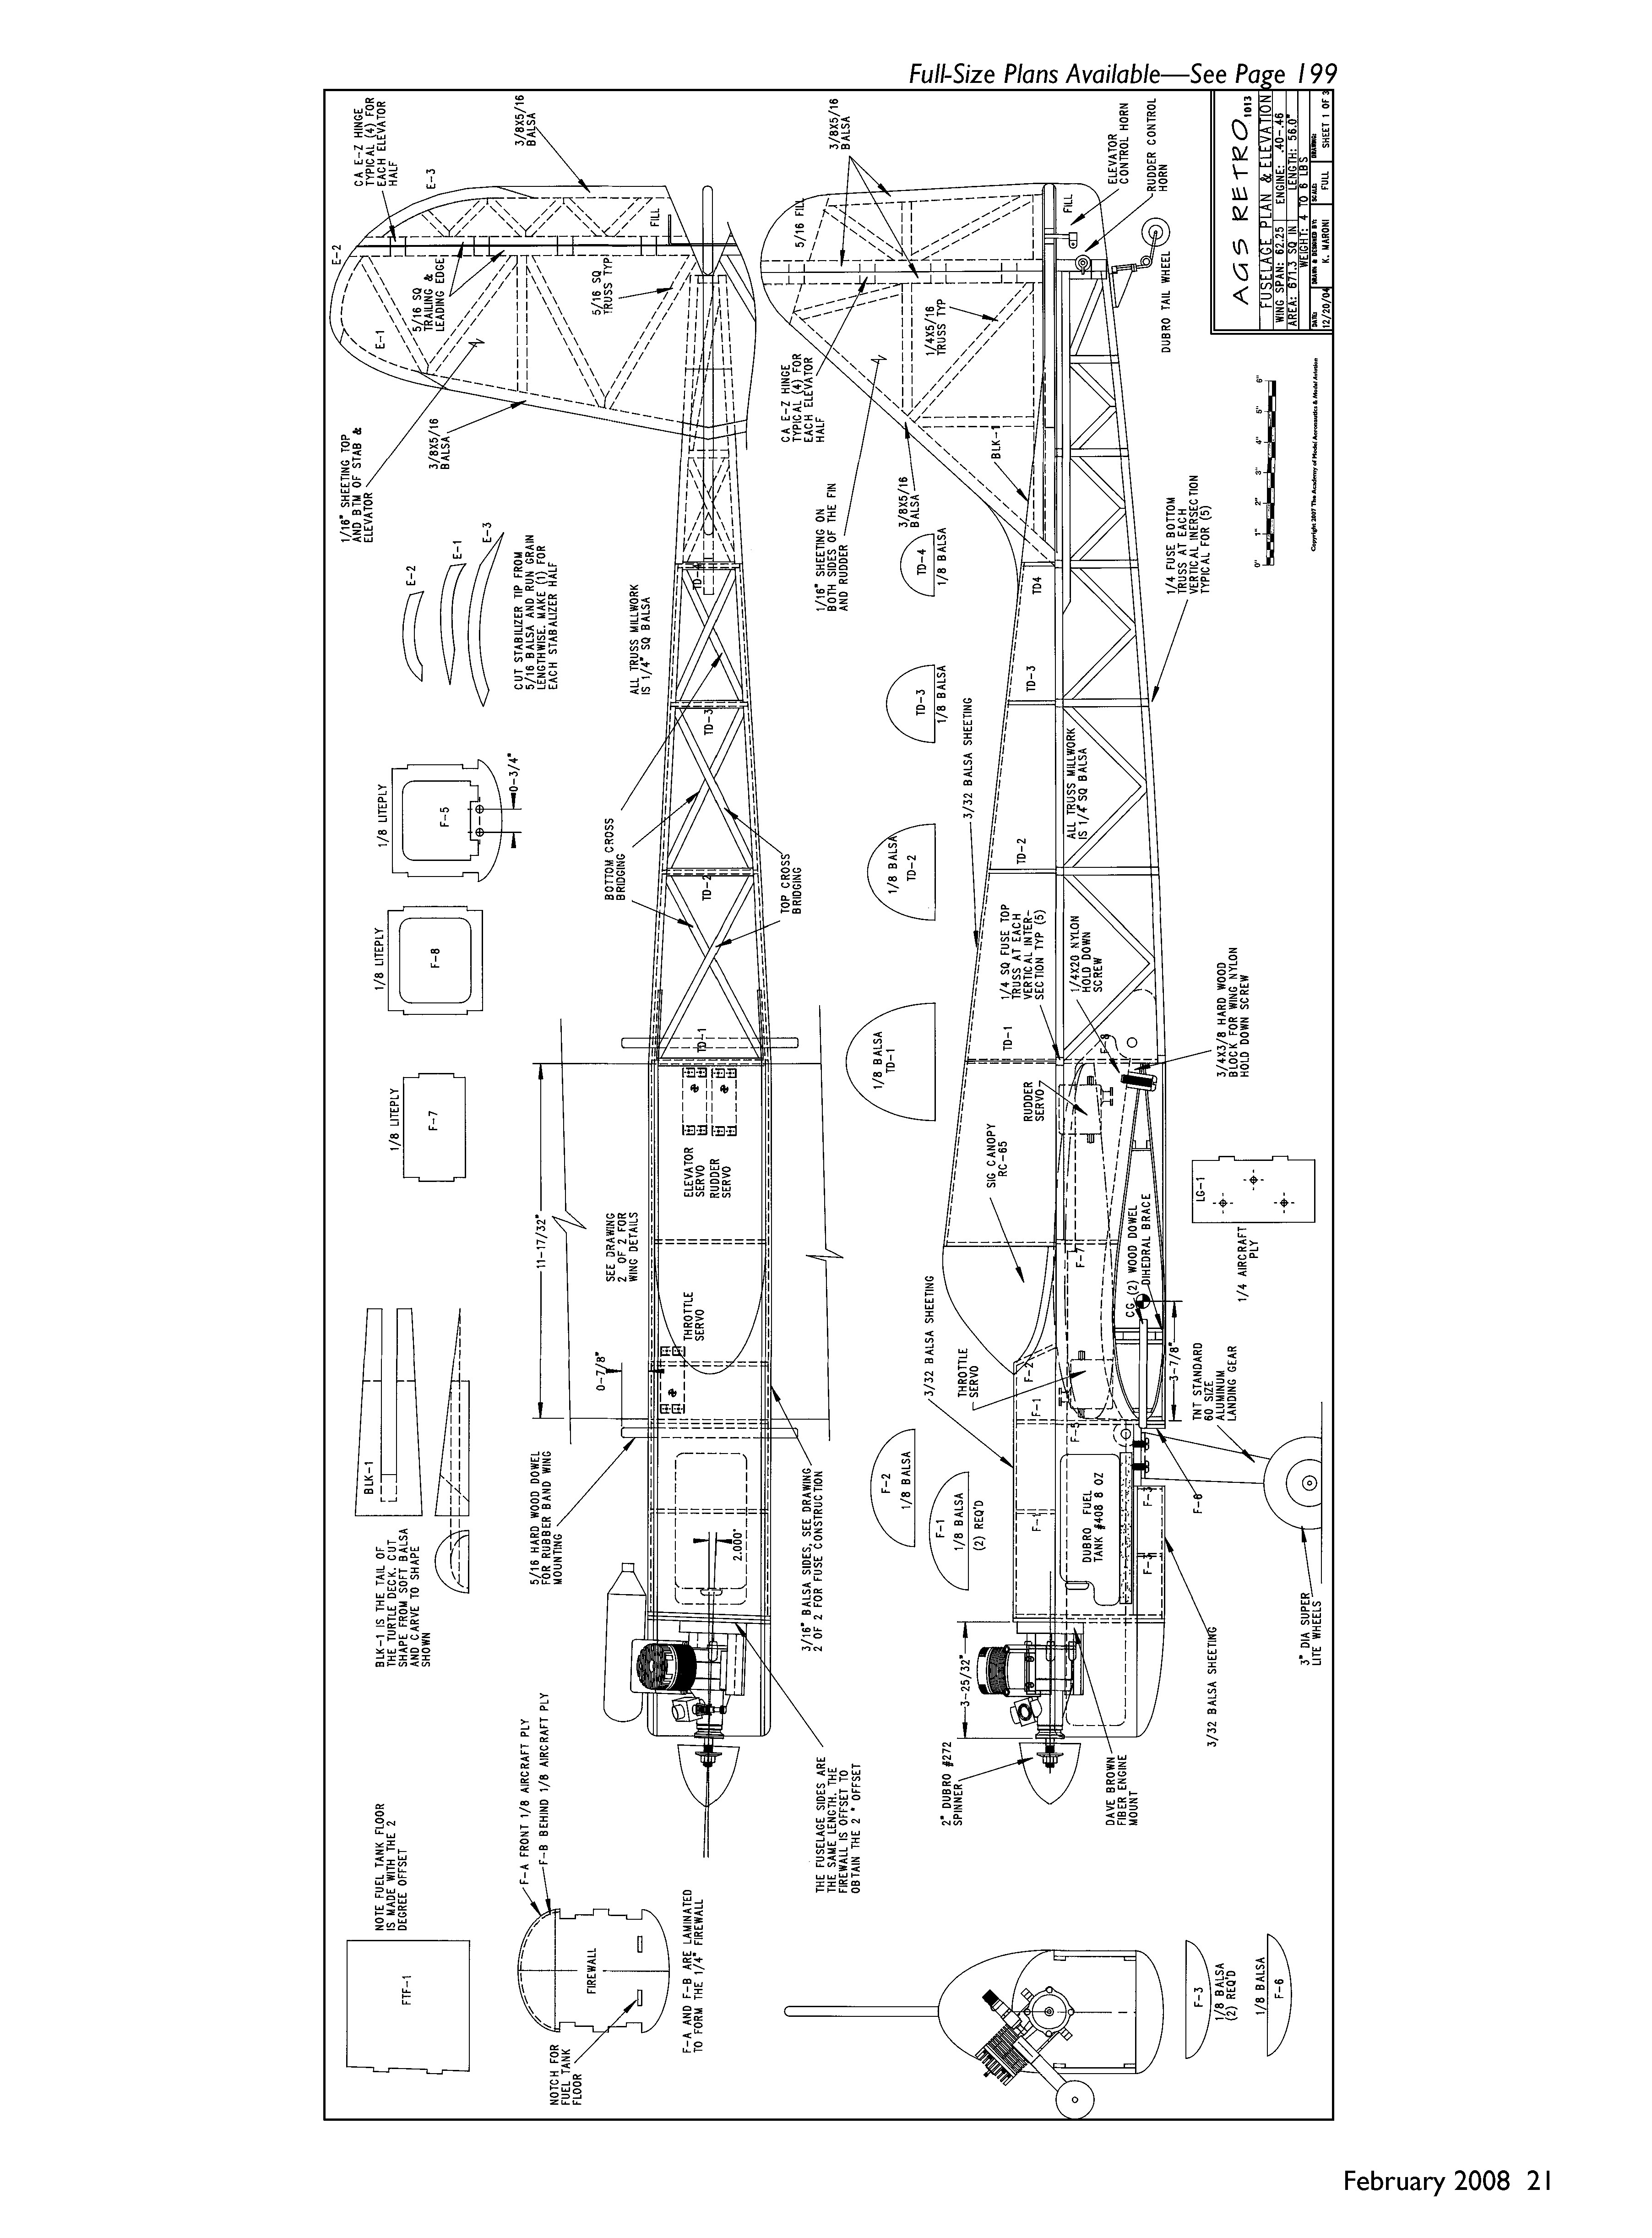
Fuselage and empennage
The fuselage is a laminated main body with a truss assembly for the empennage. The lamination uses light plywood as a skeleton with medium-grade balsa as the laminate, yielding a strong yet light structure. The truss empennage section is integrated into the main fuselage to improve strength and distribute moment forces.
Fuselage formers, landing-gear mount plate, fuel-tank floor, and firewall are notched to interlock with the fuselage sides and associated formers. The engine firewall has a 2° offset and is integrated as part of the fuselage-side construction. Tail feathers are stick construction sheeted with balsa.
Installation and accessories
The engine is mounted at a 45° angle to create a clean, sleek appearance with the muffler tucked close to the fuselage side. Many accessories — canopy, landing gear, tail wheel — are common parts available from Internet distributors or hobby shops. Servos and control linkages are sized to suit a standard .40-size model.
Building notes
The AGS Retro’s construction is simple and straightforward; no special building techniques are required, making the project enjoyable for builders and pilots of various skill levels.
Contacts and plans
Bob Noll — [email protected] Ken Maroni — [email protected]
Full-size plans available — see page 199.
Transcribed from original scans by AI. Minor OCR errors may remain.

