


ARF PATCHING TECHNIQUES
by Steve Hunt
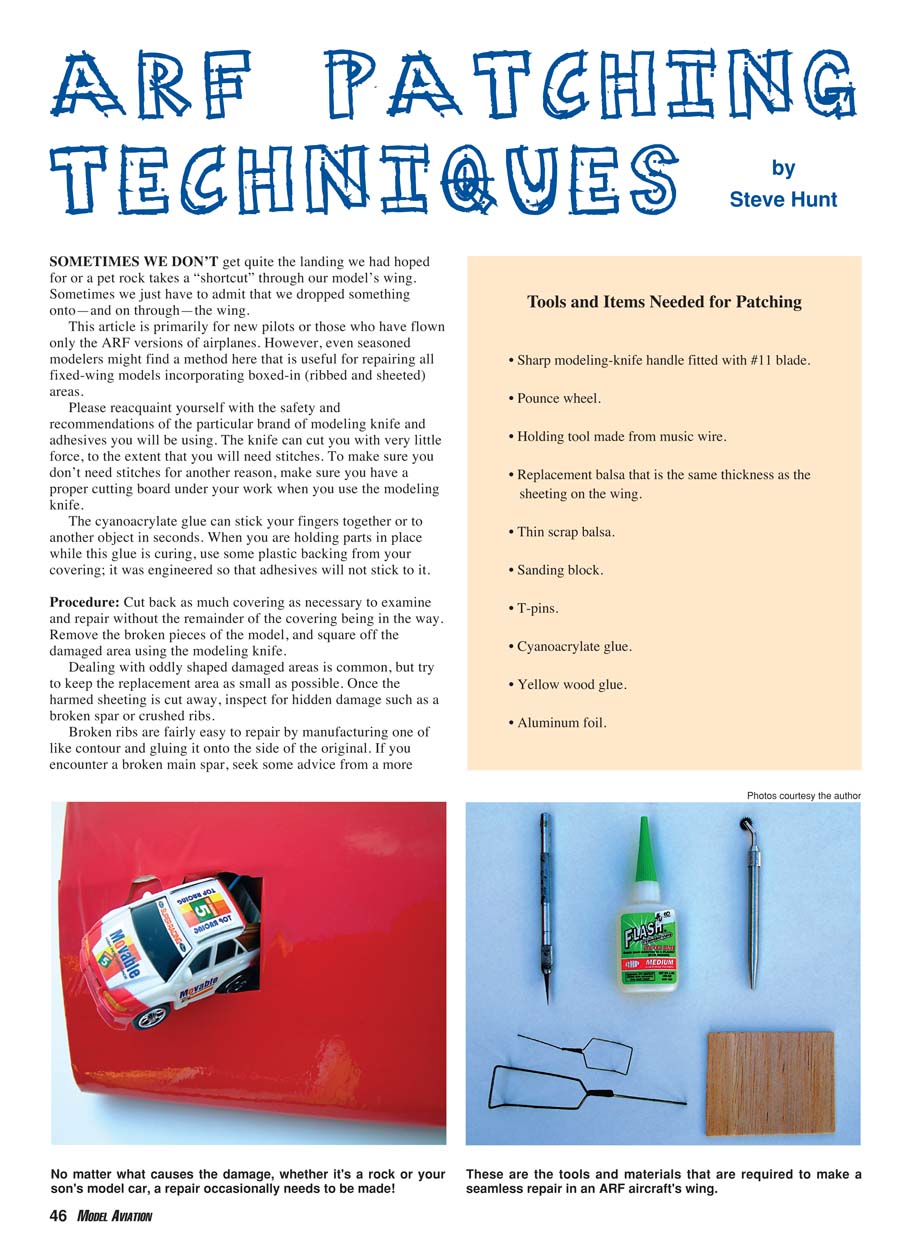
SOMETIMES WE DON'T get quite the landing we had hoped for or a pet rock takes a "shortcut" through our model's wing. Sometimes we just have to admit that we dropped something onto—and on through—the wing.
This article is primarily for new pilots or those who have flown only the ARF versions of airplanes. However, even seasoned modelers might find a method here that is useful for repairing all fixed-wing models incorporating boxed-in (ribbed and sheeted) areas.
Safety and general precautions
- Reacquaint yourself with the safety recommendations for the brand of modeling knife and adhesives you will be using.
- The modeling knife can cut you with very little force. Use a proper cutting board under your work to avoid serious injury.
- Cyanoacrylate (CA) glue can stick fingers together or to other objects in seconds. When holding parts while CA cures, use plastic backing from your covering material (it was engineered to resist adhesives).
- Repair spars and other primary load-carrying members only after consulting an experienced builder if you are unsure. Spars are critical for safe flight.
Tools and items needed for patching
- Sharp modeling-knife handle fitted with a #11 blade
- Pounce wheel (or a pin for making a series of prick marks)
- Holding tool made from music wire (custom-made)
- Replacement balsa the same thickness as the wing sheeting
- Thin scrap balsa (for reinforcement strips)
- Sanding block and sandpaper
- T-pins
- Cyanoacrylate glue (CA)
- Yellow wood glue (aliphatic)
- Epoxy (optional; more difficult to sand)
- Vinyl spackling compound (for filling small gaps)
- Aluminum foil
- Small weights and plastic sheeting (to keep weights from sticking to glue)
Procedure
- Cut back covering
- Remove as much covering as necessary to examine and repair the damage without remaining covering getting in the way.
- Remove broken pieces of sheeting and square off the damaged area with a modeling knife.
- Inspect for hidden damage
- Look for broken ribs, crushed structure, or a damaged spar.
- Repair broken ribs by fabricating a replacement of like contour and gluing it to the side of the original.
- If you find a broken main spar, seek advice from a more experienced builder.
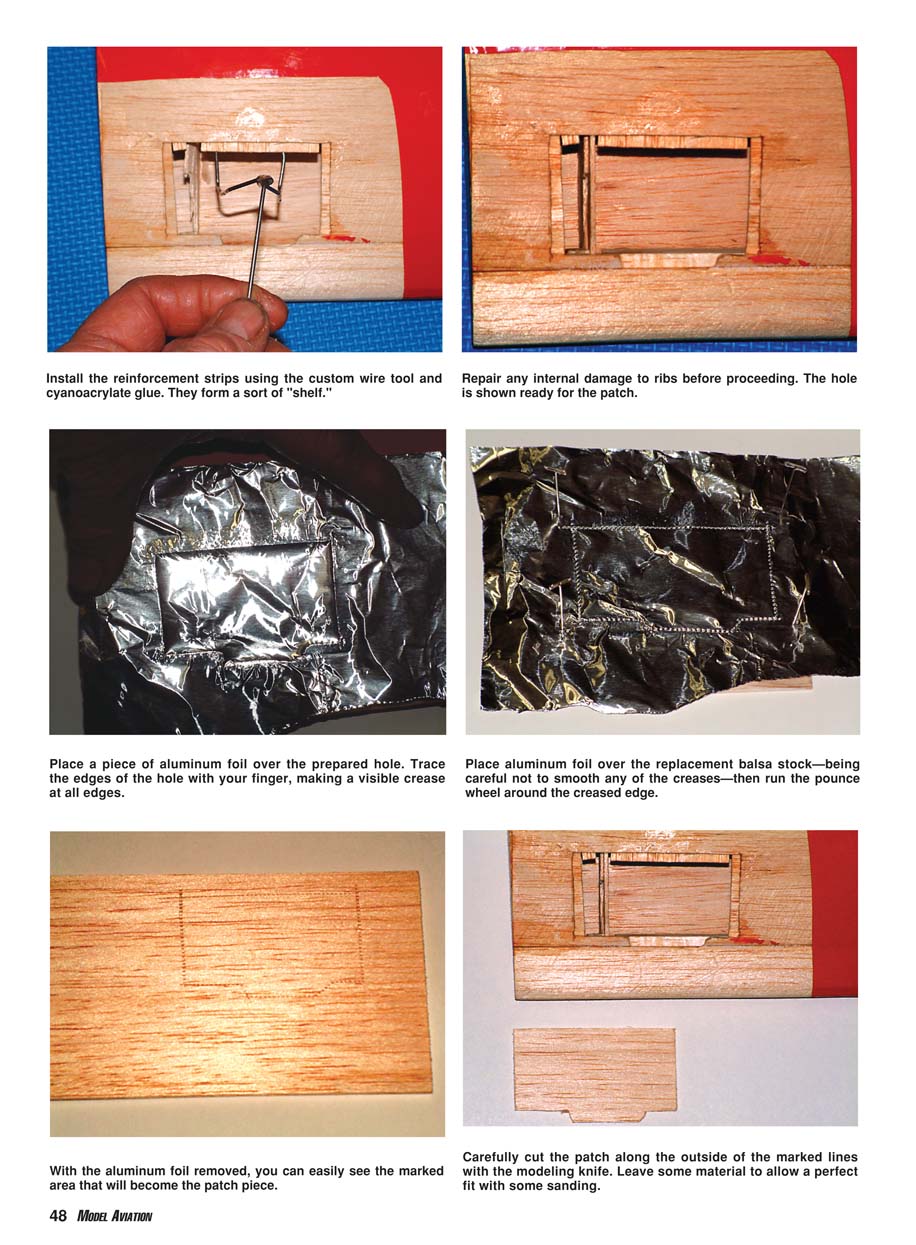
- Make and install reinforcement strips
- Cut reinforcement strips cross-grain from scrap balsa.
- Install these on the underside of the existing sheeting in the damaged area using CA glue.
- Hold the reinforcement strips in place with the custom-made wire holding tool until the CA cures.
- If the repair is too close to a rib, spar, or other support, fit a 1/4" balsa ledge to contour and glue it in place so the replacement panel will sit flush.
- Create a template from aluminum foil
- Place a piece of aluminum foil over the prepared hole.
- Hold the foil so it does not move, trace the edges of the hole with your finger and make a visible crease along all edges.
- Carefully transfer the creased foil to the replacement balsa stock without smoothing the creases.
- Transfer the pattern with a pounce wheel
- While holding the aluminum foil firmly in place over the balsa, roll the pounce wheel along the creased edge to transfer a dotted line to the wood.
- If you don't have a pounce wheel, make a series of pin pricks along the creases to produce the same effect.
- Cut and fit the patch
- Remove the foil and cut along the dotted lines on the balsa. Make the cross-grain cuts first with light pressure, making several passes to avoid splitting the wood.
- Carefully sand the edges of the replacement part until it fits perfectly into the prepared hole. Check progress frequently—sandpaper removes material quickly.
- For curved areas (leading edge, etc.), slightly bend the replacement panel by lightly dampening the outside surface with water (dip fingers, shake off excess, then rub). Do not saturate the wood.
- Install the replacement panel
- Use yellow wood glue (aliphatic) to install the replacement part. Remove excess glue with a damp paper towel.
- Use small weights to hold the replacement in place on curved areas and use plastic sheeting between the weights and glue to prevent sticking.
- Allow the adhesive to dry for several hours before sanding. Five-minute epoxy may be used but is more difficult to sand smooth.
- Finish seams and recover
- After sanding, fill small gaps in the seam with vinyl spackling compound. When dry, block-sand it flush with the surface.
- Multiple thin coats of epoxy can also be used to fill voids, sanding between coats for a smooth finish.
- Re-cover the repaired area with a heat-shrink film that closely matches the original finish.
Tips and additional thoughts
- Dealing with oddly shaped damaged areas is common; keep the replacement area as small as possible.
- Cross-grain reinforcement strips provide a strong "shelf" for the patch and should be glued to the underside of the sheeting.
- The custom holding tool in this article was made from small-diameter music wire bent to allow splicing pieces in place under the sheeting while the glue cured.
- A perfect fit of the replacement part yields a stronger, cleaner repair.
Sources and contact
- I have only been successful in locating pounce wheels at Micro-Mark; they were $19.95 for a set of three (item 15200). Visit the company online at www.micromark.com.
- Steven Hunt
- Box 1152
- Evansville, WY 82636
- [email protected]
Photos courtesy the author
Transcribed from original scans by AI. Minor OCR errors may remain.

