
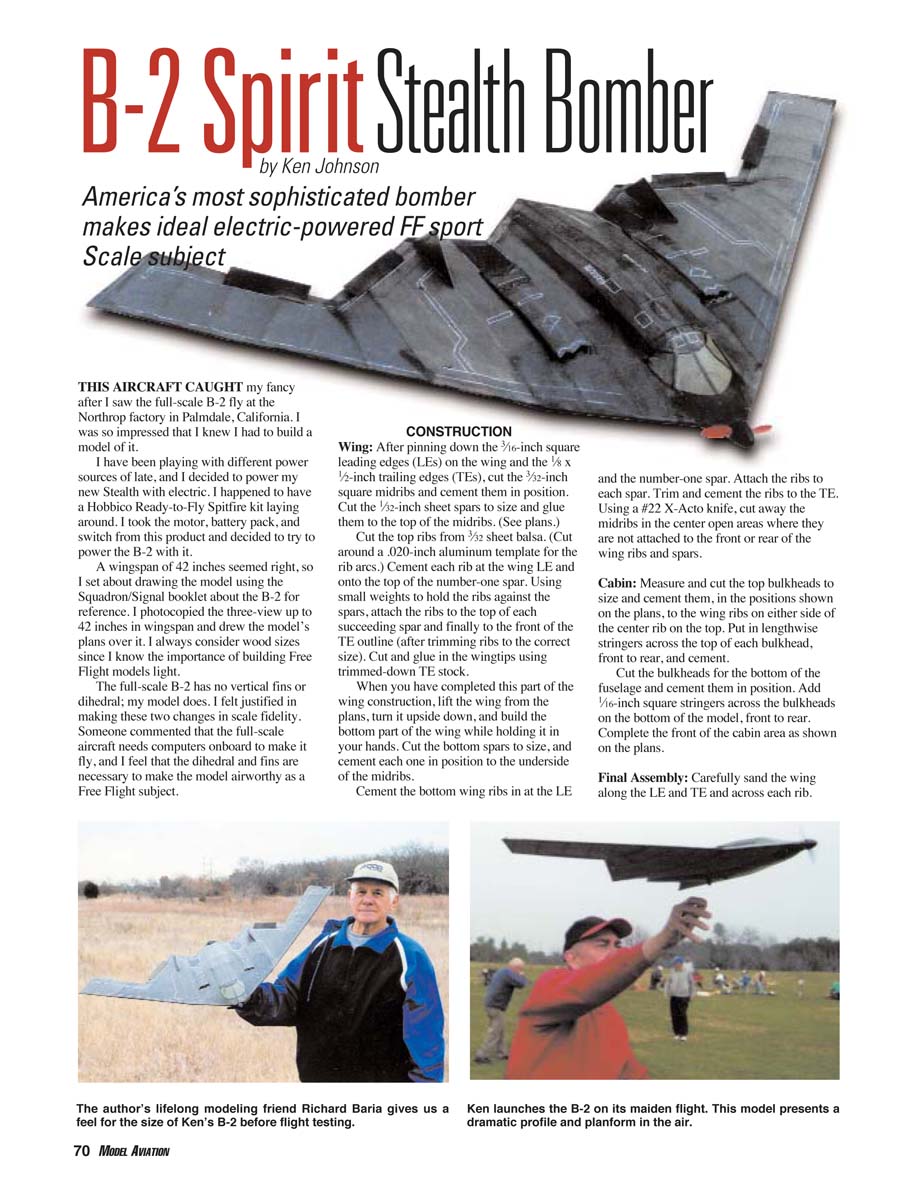
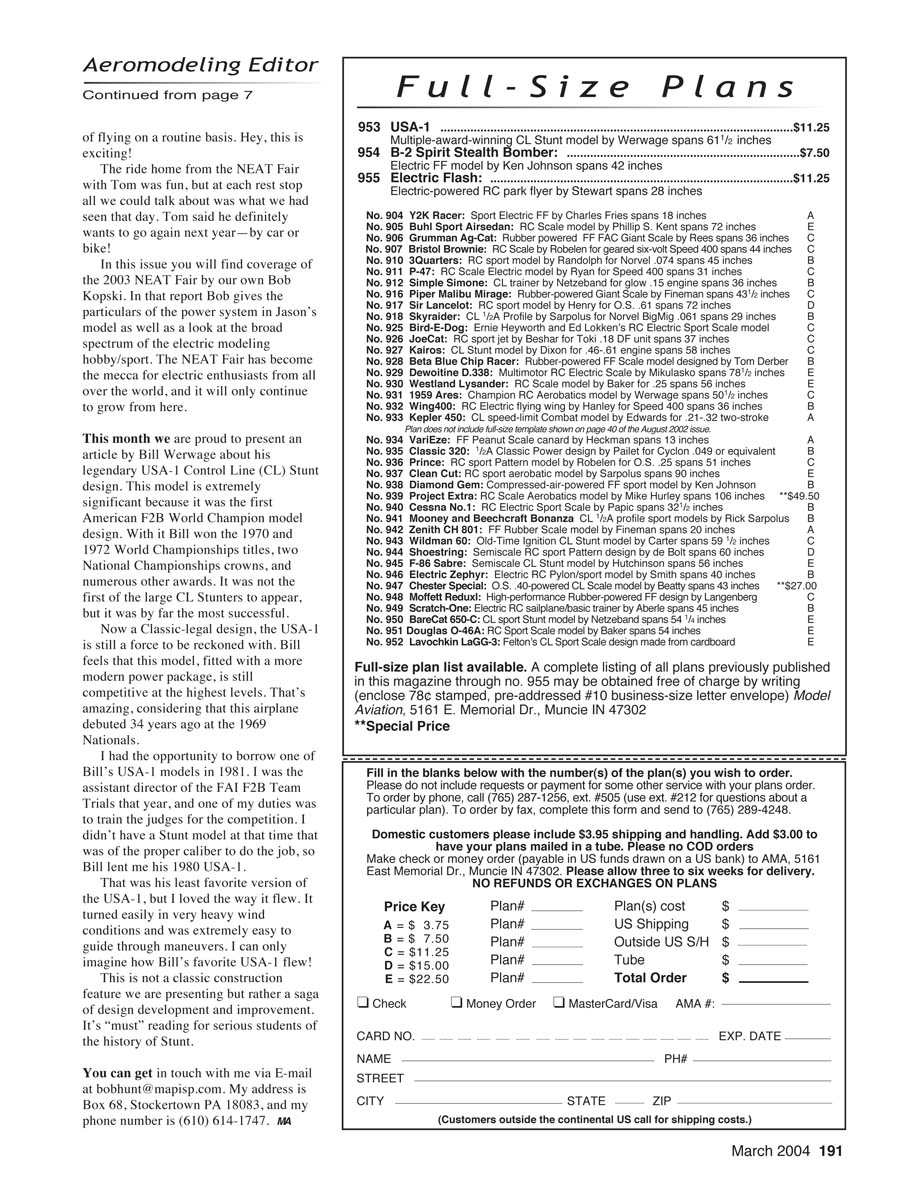
B-2 Spirit Stealth Bomber
by Ken Johnson
America's most sophisticated bomber makes an ideal electric-powered free-flight (FF) sport-scale subject.
This aircraft caught my fancy after I saw the full-scale B-2 fly at the Northrop factory in Palmdale, California. I was so impressed I knew I had to build a model. I decided to power my new Stealth with electric and used a motor, battery pack, and switch from a Hobbico Ready-to-Fly Spitfire kit. A wingspan of 42 inches seemed right, so I drew the model using the Squadron/Signal booklet about the B-2 for reference, photocopying the three-view up to 42 inches and drawing the plans over it. I always consider wood sizes since building FF models light is important.
The full-scale B-2 has no vertical fins or dihedral; my model does. I felt justified in making these two changes to scale fidelity. Someone commented that the full-scale aircraft needs computers onboard to make it fly; I feel the dihedral and fins are necessary to make the model airworthy as a free-flight subject.
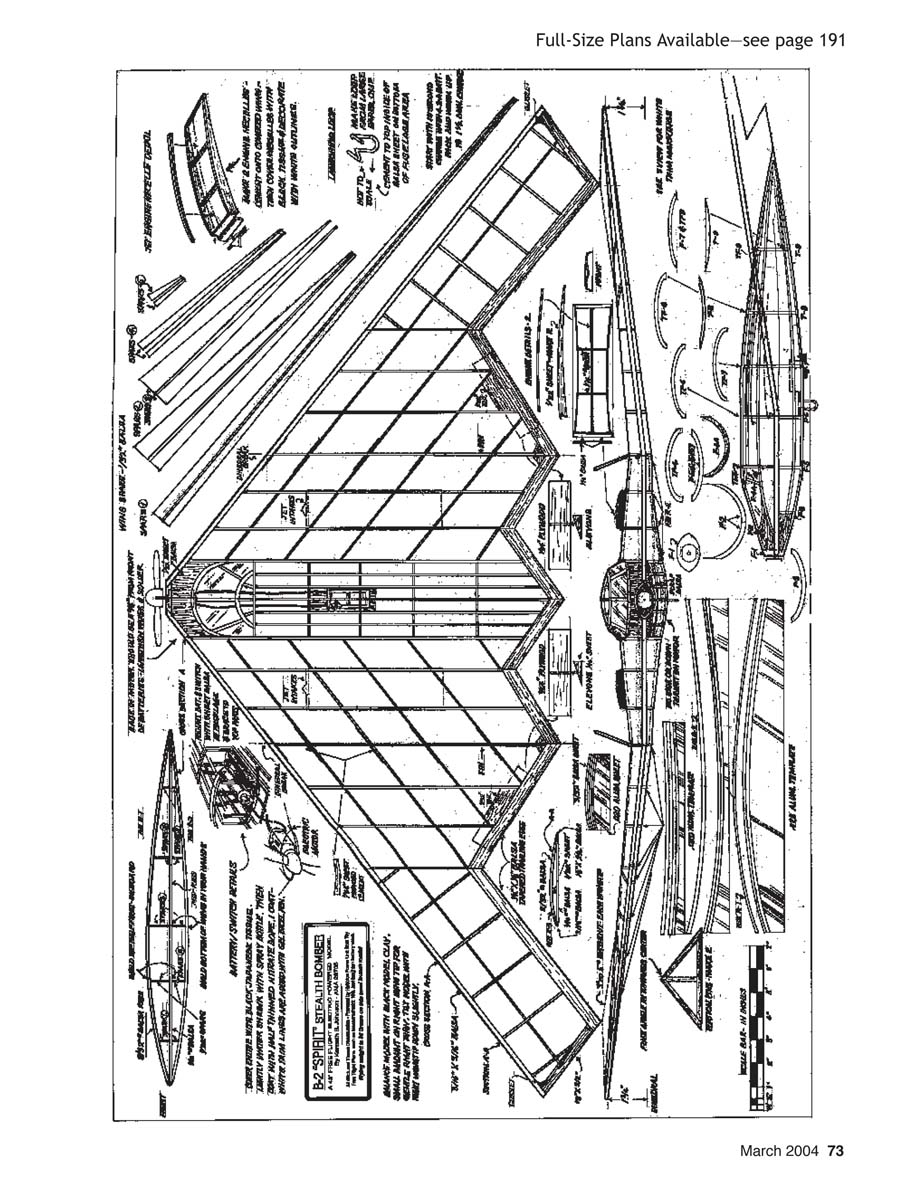
Construction
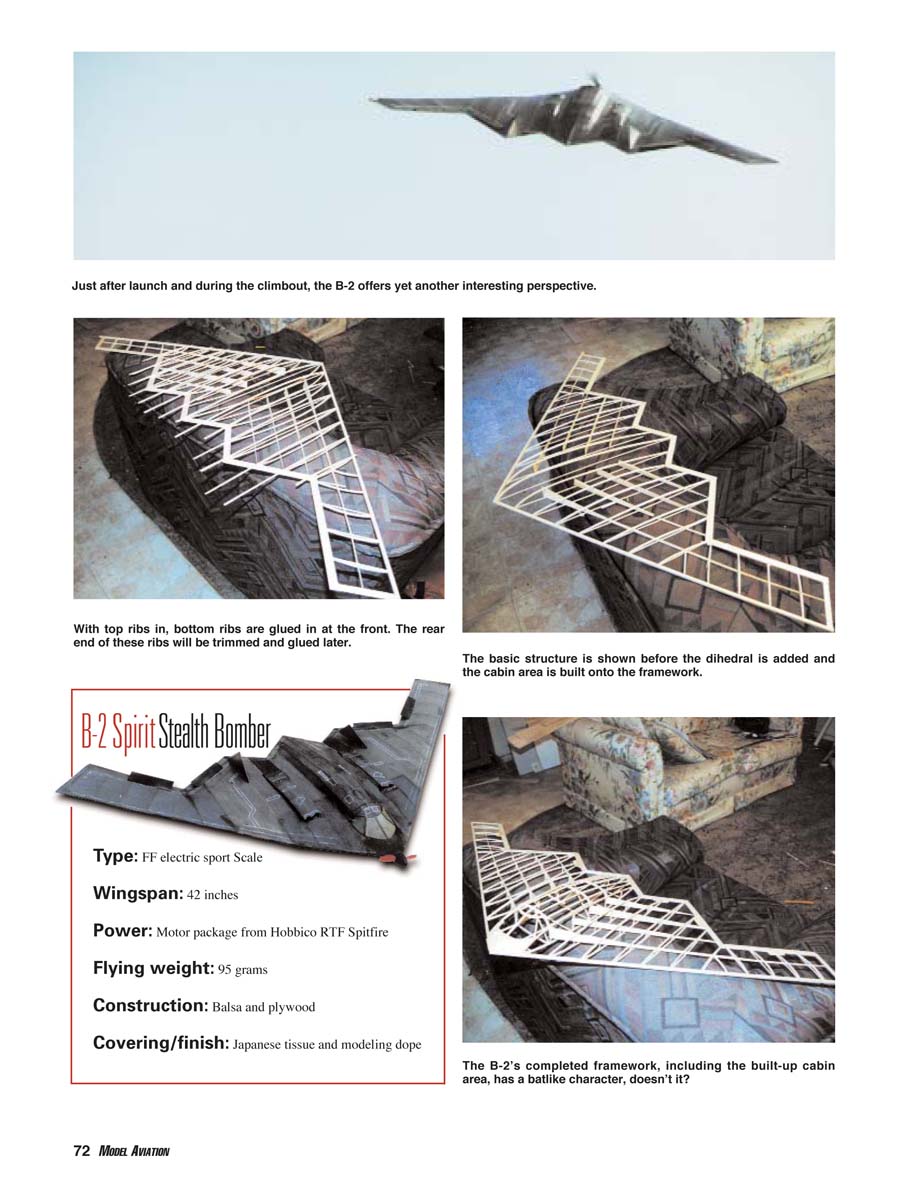
Wing
- Pin down the 3/16-inch square leading edges (LEs) and the 1/8 x 1/2-inch trailing edges (TEs) on the plans.
- Cut 3/32-inch square midribs and cement them in position.
- Cut 1/32-inch sheet spars to size and glue them to the top of the midribs (see plans).
- Cut top ribs from 3/32-inch sheet balsa (cut around a .020-inch aluminum template for the rib arcs). Cement each rib at the wing LE and onto the top of the number-one spar.
- Using small weights to hold ribs against the spars, attach ribs to each succeeding spar and finally to the front of the TE outline (trim ribs to correct size).
- Cut and glue in the wingtips using trimmed-down TE stock.
- Lift the wing from the plans, turn it upside down, and build the bottom part while holding it in your hands. Cut bottom spars to size and cement each to the underside of the midribs.
- Cement bottom wing ribs at the LE and the number-one spar, then attach ribs to each spar and trim/ cement to the TE.
- Using a #22 X-Acto knife, cut away the midribs in the center open areas where they are not attached to the front or rear ribs and spars.
- Add gussets on the wing where the elevons will attach at the rear and add wingtip gussets as shown on the plans.
Cabin
- Measure and cut top bulkheads to size and cement them in the positions shown on the plans to the wing ribs on either side of the center rib on top.
- Install lengthwise stringers across the top of each bulkhead, front to rear, and cement.
- Cut bulkheads for the bottom of the fuselage and cement them in position.
- Add 1/16-inch square stringers across the bottom bulkheads, front to rear.
- Complete the front of the cabin area as shown on the plans.
Final assembly and systems
- Sheet the center of the nose area top and bottom with 1/32-inch soft balsa. Fill the open front end of the nose with 3/4-inch scrap balsa.
- Install the motor and battery box/switch as shown on the plans. No side thrust or downthrust is needed.
- Fill in the area around the switch with soft 1/16-inch sheet balsa. Cut and lengthen the wires from the motor aft to the batteries.
- Notice where the center of gravity (CG) is located on the plans, and make sure your model’s CG matches.
- Build the vertical fins over the plans in the usual way. Sand and cover them with black tissue and modeling dope.
- Cut the elevons from 1/64-inch sheet plywood, sand them, and lightly spray with black paint. Cement small mounting triangles underneath the elevons at the center and glue the bottoms of these triangles to the top side of the wing TE in the positions shown.
- Build the engine nacelles from the plans, cover them, and cement them to the top of the covered wings on each side.
- Add the launch handle: form a loop of wire (part of a large paper clip) under the fuselage as the launching handle. Fill the inside of the loop with 1/16-inch balsa sheet and cement it to the wire.
- Draw white panel outlines with a white Marvy Gel Excel ballpoint pen, using a 10-inch length of 1/16-inch sheet balsa as a straightedge.
Covering and finishing
- Cover the entire model with black Japanese tissue (shiny-side up) except the cabin area at the front, which is covered with green tissue.
- Lightly spray with water from a misting spray bottle and warp in 4–5° of washout (TE up) at the wingtips. A heat gun is useful; if unavailable, use a hair dryer.
- Adhere the tissue to the frame with full-strength nitrate dope applied with a #4 soft brush. After water-shrinking the tissue, use a 50/50 mixture of nitrate and thinner to coat the model.
- If you do not have enough washout in the wingtips, you will need to install extra elevons at the TE of the wings to make the model fly properly.
Flying
- After completing and covering the B-2, check the CG. Add modeling clay to achieve a clean, flat glide. Target flying weight is about 95 grams ready to fly.
- If the airplane is heavy, consider adding another battery cell for more power.
- Charge the batteries using an eight-pack of D-cell flashlight batteries. VL Products of Canoga Park, California, markets a handy charger; call Hank Fasola at (818) 244-1702.
- Start with a 30-second charge and check to see if the model climbs. A slight right turn is desirable; use a small amount of black modeling clay on the right wingtip to achieve this.
- Add charging time to achieve longer, higher flights.
Have good flying with your Stealth B-2 model.
MA
Ken Johnson 14551 Bledsoe St. Sylmar, CA 91342
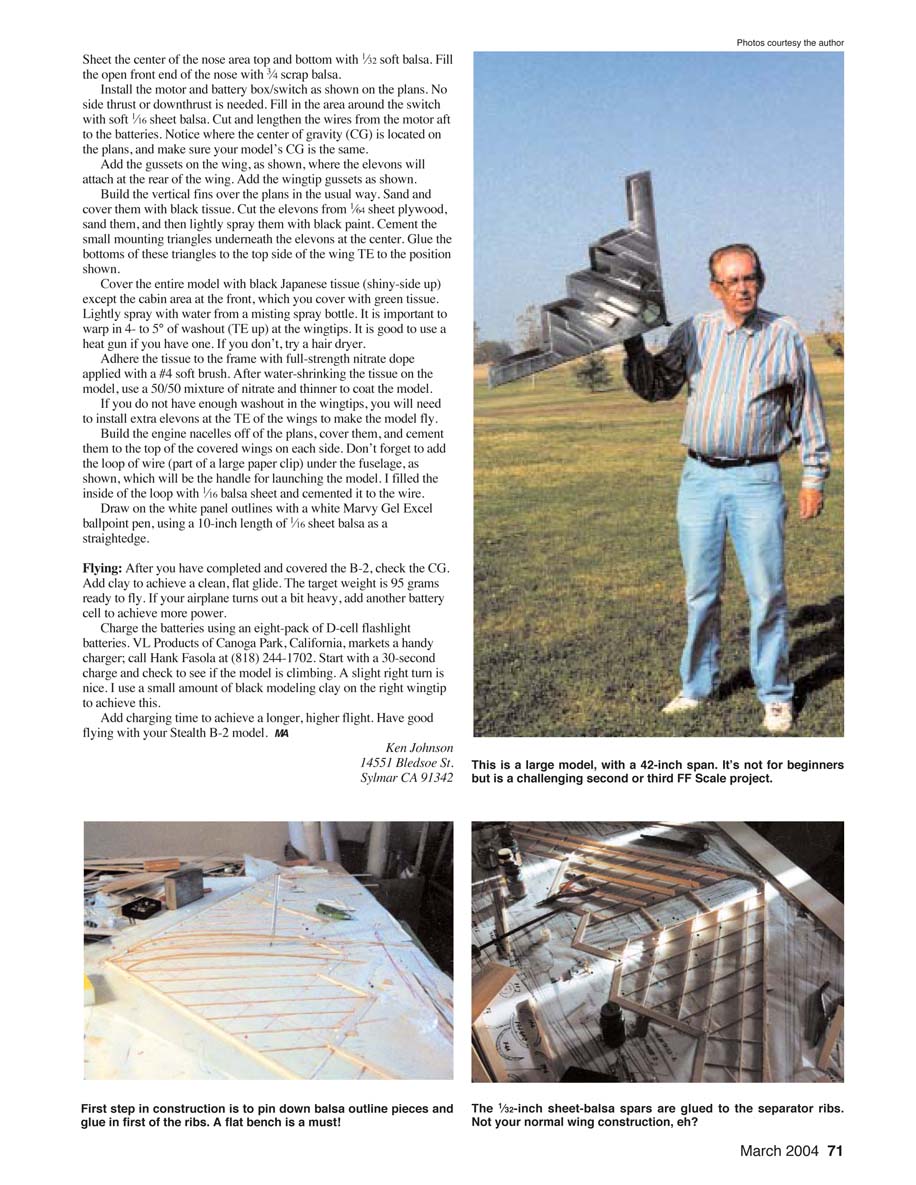
Specifications
- Type: FF electric sport scale
- Wingspan: 42 inches
- Power: Motor package from Hobbico RTF Spitfire
- Flying weight: 95 grams (ready to fly)
- Construction: Balsa and plywood
- Covering/finish: Japanese tissue and modeling dope
Transcribed from original scans by AI. Minor OCR errors may remain.

