
bavarianDEMON Cortex
Chris Mulcahy [email protected]
Until recently, gyros were only something you would typically find in model helicopters. As technology improved and components shrank, smaller gyro-stabilized airplanes began to populate the market.
Before the micro model aircraft boom, some people were already using gyros. They are popular with scale models and turbines to tame a nose wheel or calm a rudder, and people have experimented with aerobatic 3-D airplanes to see how the gyro helps or hinders performance.
For multiple control surfaces, more than one gyro was required, which led to complex systems that were difficult to set up and tedious to tune. As model helicopters began to shed their flybars, three-axis gyro systems started taking over and became the new standard.
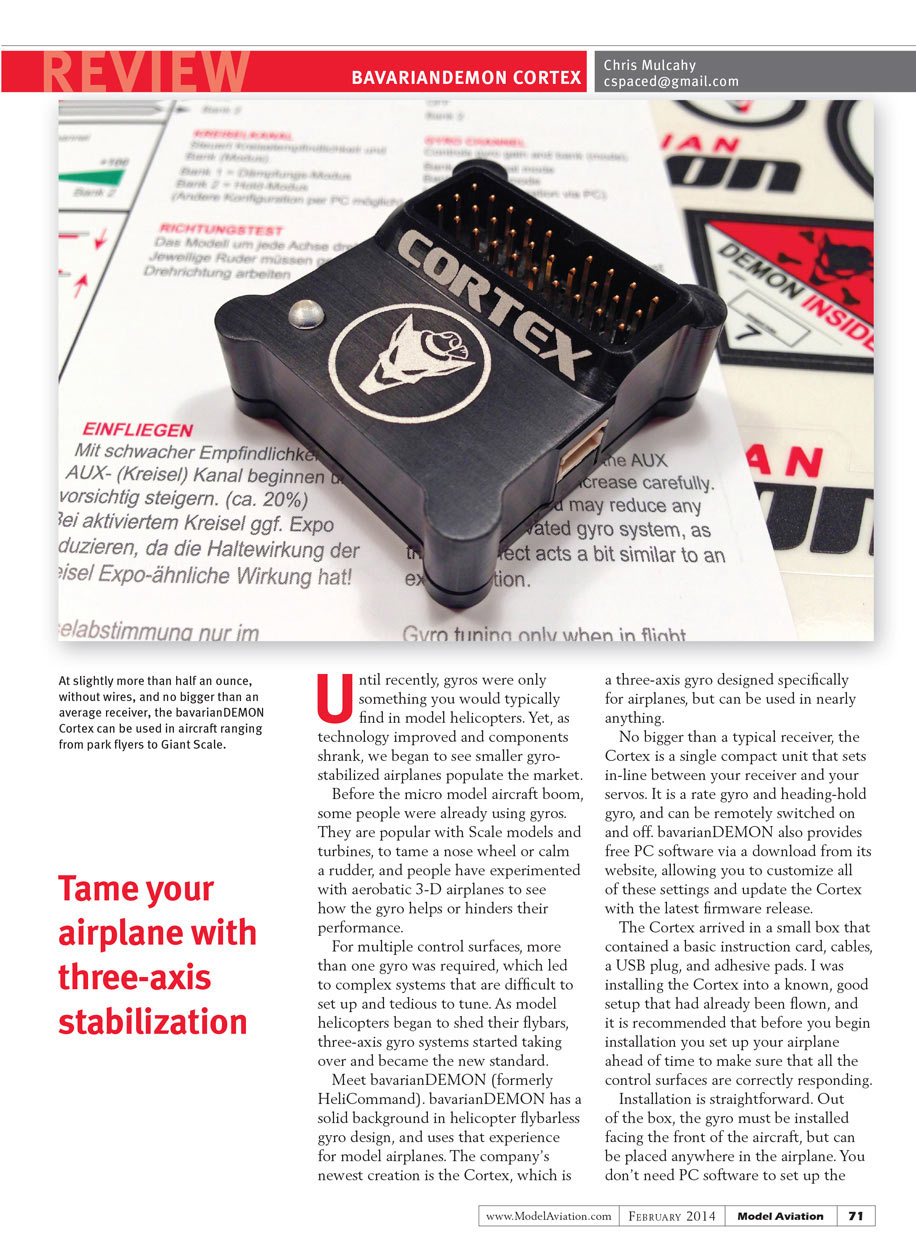
Meet bavarianDEMON (formerly HeliCommand). bavarianDEMON has a solid background in helicopter flybarless gyro design and uses that experience for model airplanes. The company’s newest creation is the Cortex, a three-axis gyro designed specifically for airplanes but usable in nearly anything.
No bigger than a typical receiver, the Cortex is a single compact unit that sits in-line between your receiver and your servos. It is a rate gyro and heading-hold gyro, and can be remotely switched on and off. bavarianDEMON also provides free PC software via download from its website, allowing you to customize settings and update the Cortex with the latest firmware release.
The Cortex arrived in a small box containing a basic instruction card, cables, a USB plug, and adhesive pads. I was installing the Cortex into a known, good setup that had already been flown. It is recommended that before you begin installation you set up your airplane ahead of time to make sure all control surfaces are correctly responding.
Installation
Installation is straightforward. Out of the box, the gyro must be installed facing the front of the aircraft, but it can be placed anywhere in the airplane. You don't need PC software to set up the gyro — it can all be done without it, but that requires the gyro to be placed in the correct orientation. After you've downloaded the PC software, you can specify the gyro's orientation.
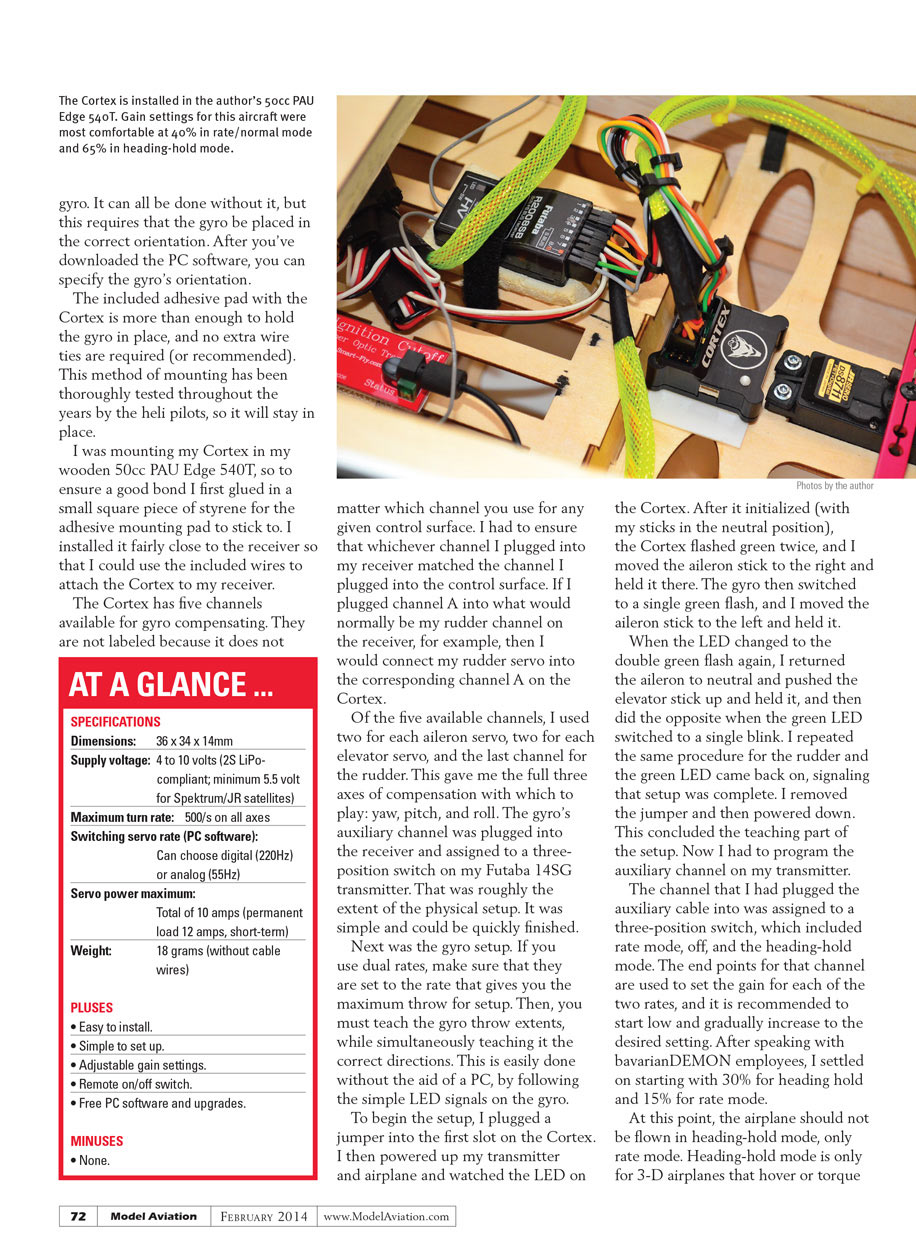
The included adhesive pad is more than enough to hold the gyro in place; no extra wire ties are required (or recommended). This method of mounting has been thoroughly tested by heli pilots, so it will stay in place. I mounted my Cortex in a wooden 50cc PAU Edge 540T. To ensure a good bond I first glued in a small square piece of styrene for the adhesive pad to stick to. I installed it fairly close to the receiver so I could use the included wires to attach the Cortex.
The Cortex has five channels available for gyro compensation. They are not labeled because it does not matter which channel you use for any given control surface. You must ensure that whichever channel you plug into your receiver matches the channel you plug into the control surface. For example, if you plug channel A into what would normally be your rudder channel on the receiver, then you connect your rudder servo into the corresponding channel A on the Cortex.
Of the five available channels, I used two for the aileron servos, two for the elevator servos, and the last channel for the rudder. This gave me full three-axis compensation: yaw, pitch, and roll. The gyro's auxiliary channel was plugged into the receiver and assigned to a three-position switch on my Futaba 14SG transmitter. That was roughly the extent of the physical setup — it was simple and could be quickly finished.
Setup
If you use dual rates, set them to the rate that gives you the maximum throw for setup. Then teach the gyro the rates' extents while simultaneously teaching it the correct directions. This can be done without a PC by following the simple LED signals on the gyro.
To begin setup, plug a jumper into the first slot on the Cortex. Power up your transmitter and airplane and watch the LED on the Cortex. After it initializes (with your sticks in the neutral position), the Cortex flashes green twice. Move the aileron stick to the right and hold it there. The gyro will then switch to a single green flash; move the aileron stick to the left and hold it.
When the LED changes to the double green flash again, return the aileron to neutral and push the elevator stick up and hold it, then do the opposite when the green LED switches to a single blink. Repeat the same procedure for the rudder. When the green LED comes back on, setup is complete. Remove the jumper and power down. This concludes the learning part of the setup.
Program the auxiliary channel on your transmitter. The channel you plugged the auxiliary cable into should be assigned to a three-position switch for rate mode, off, and heading-hold mode. The end points for that channel are used to set the gain for each of the two rates — start low and gradually increase to the desired setting. After speaking with bavarianDEMON employees, I started with 30% for heading-hold and 15% for rate mode.
At this point, do not fly the airplane in heading-hold mode; only use rate mode. Heading-hold mode is for 3-D airplanes that hover or generate great torque while performing maneuvers, and only after you have fine-tuned the gains.
First flights and impressions
I took my Edge to the field and launched it. I set the gyro to 15% and flew the plane through a bunch of maneuvers to note how the airplane responded. Overall, it was wonderful. The Cortex dramatically reduced the amount of pilot input needed to keep the airplane pointing in the correct direction. The rates behaved as expected and allowed me to set the amount of correction I wanted. Heading-hold mode was excellent for keeping the airplane tracking in a straight line during knife-edge passes or hovering on the rudder.
When powering up the airplane, let everything set for roughly six seconds while the gyro initializes. This is indicated by a couple of twitches on all control surfaces plugged into the gyro. The LED on the Cortex shows the current mode: orange means rate mode, red is off, and green indicates heading-hold mode. I typically take off with the gyro switched off and then set it to rate mode in straight-and-level flight.
The first few flights were uneventful because my gains were slightly low, so I gradually increased them to achieve the desired effect. If the gain is set too high, the airplane will oscillate in straight-and-level flight — a clear sign you should dial back the gain. I ended up with gains at 40% in rate/normal mode and 65% in heading-hold mode.
The Cortex was particularly effective in windy conditions. The airplane tracked with minimal corrections from me, and point-roll maneuvers showed definite stops without effort from the pilot. Harrier maneuvers are where the gyro shined: it removed much of the hard work and allowed me to concentrate on flying. The overall experience was more enjoyable because it smoothed the airplane's flight for most maneuvers.
I attempted to hover in heading-hold mode but found I was fighting the gyro out of habit. If I let go of the sticks, the airplane would practically remain in place, but I had a better personal experience hovering in rate mode. After the first couple of flights, I left the gyro on and quickly got accustomed to the improved handling.
My Edge is already a great-flying airplane, and the gyro enhanced the flying experience. It is difficult to explain precisely what it does, so if you get the chance to try one, give it a shot. I think many people will like how a correctly set up airplane flies with the Cortex.
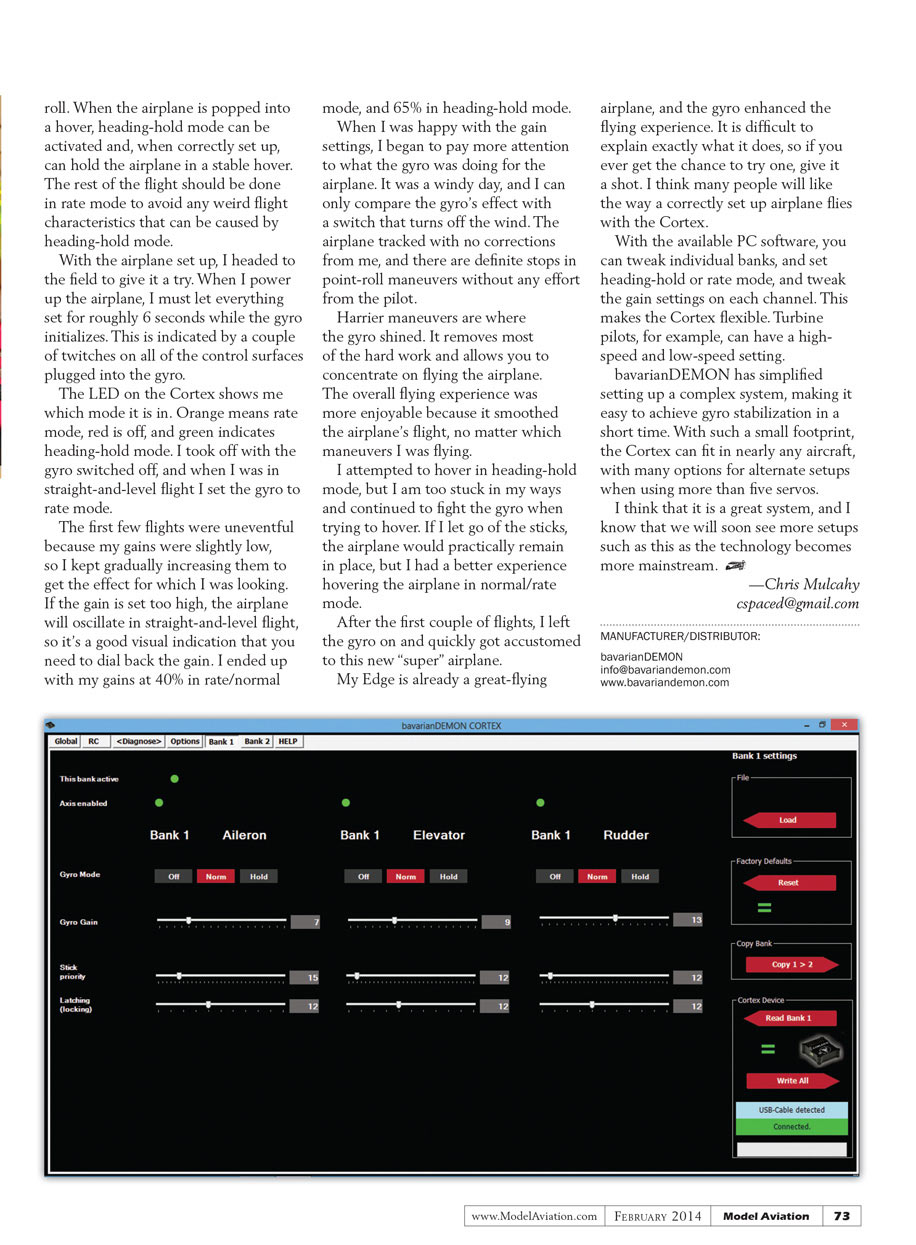
With the PC software, you can tweak individual banks, set heading-hold or rate mode, and adjust gain settings on each channel. This makes the Cortex flexible — turbine pilots, for example, can have a high-speed and a low-speed setting.
bavarianDEMON has simplified setting up a complex system, making it easy to achieve gyro stabilization in a short time. With such a small footprint, the Cortex can fit in nearly any aircraft, with options for alternate setups when using more than five servos.
I think it is a great system, and I expect to see more setups like this as the technology becomes more mainstream.
— Chris Mulcahy [email protected]
AT A GLANCE ...
SPECIFICATIONS
- Dimensions: 36 x 34 x 14 mm
- Supply voltage: 4 to 10 volts (2S LiPo-compliant; minimum 5.5 volts for Spektrum/JR satellites)
- Maximum turn rate: 500°/s on all axes
- Switching servo rate (PC software): choose digital (220 Hz) or analog (55 Hz)
- Servo power maximum: total of 10 amps (permanent load), 12 amps short-term
- Weight: 18 grams (without cable wires)
PLUSES
- Easy to install
- Simple to set up
- Adjustable gain settings
- Remote on/off switch
- Free PC software and firmware upgrades
MINUSES
- None
MANUFACTURER / DISTRIBUTOR
bavarianDEMON [email protected] www.bavariandemon.com
Transcribed from original scans by AI. Minor OCR errors may remain.

