
Beginner's Guide to Gas Engines
by Aaron Baldwick
How Gas Engines Run
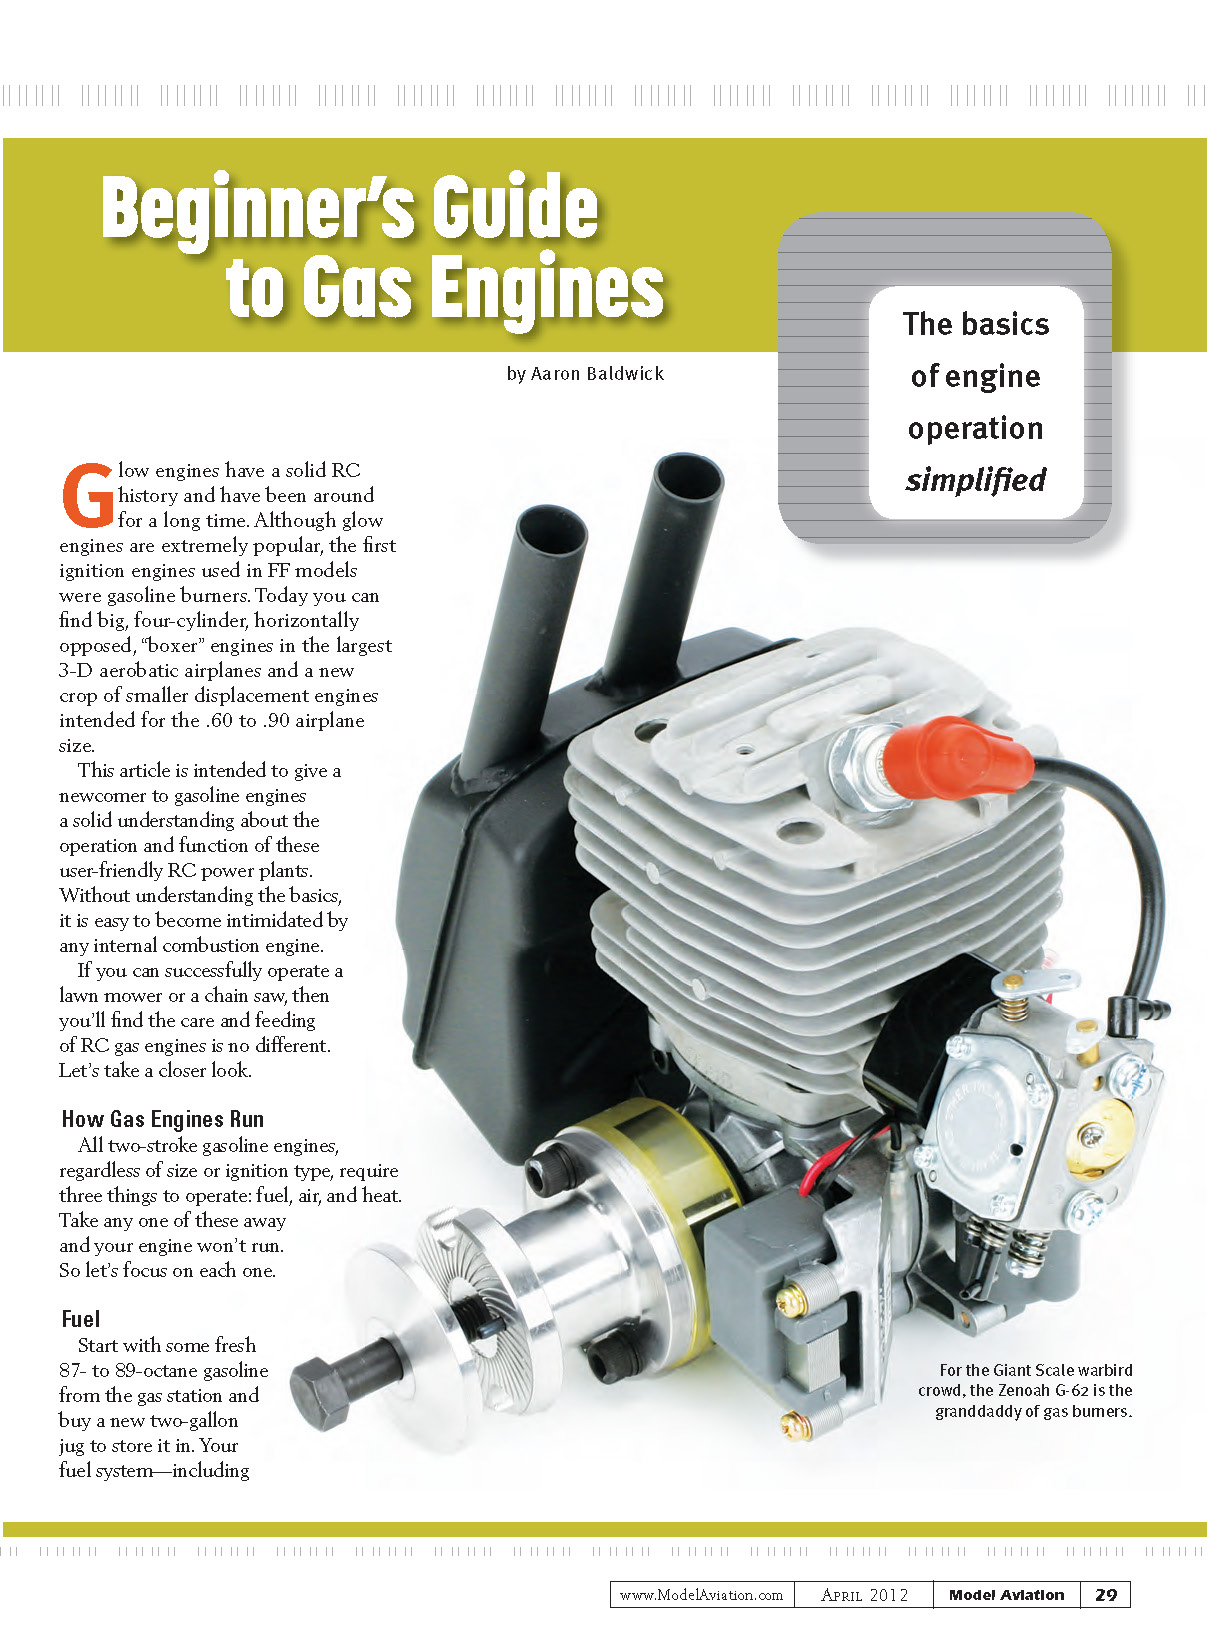
Glow engines have a solid RC history and have been around for a long time. Although glow engines are extremely popular, the first ignition engines used in FF models were gasoline burners. Today you can find big, four-cylinder, horizontally opposed "boxer" engines in the largest 3-D aerobatic airplanes and a new crop of smaller-displacement engines intended for the .60 to .90 airplane size.
This article is intended to give a newcomer to gasoline engines a solid understanding of the operation and function of these user-friendly RC power plants. Without understanding the basics, it is easy to become intimidated by any internal combustion engine.
If you can successfully operate a lawn mower or a chainsaw, you'll find the care and feeding of RC gas engines no different. Let's take a closer look.
Fuel
All two-stroke gasoline engines, regardless of size or ignition type, require three things to operate: fuel, air, and heat. Take any one of these away and your engine won't run. Start with some fresh 87- to 89-octane gasoline from the gas station and buy a new two-gallon jug to store it in. Your fuel system—including the fuel tank, fuel line, hardware, and stopper—needs to be gasoline grade. Silicone fuel lines and tank stoppers intended for glow fuel don't like gasoline and will eventually degrade when exposed to it.
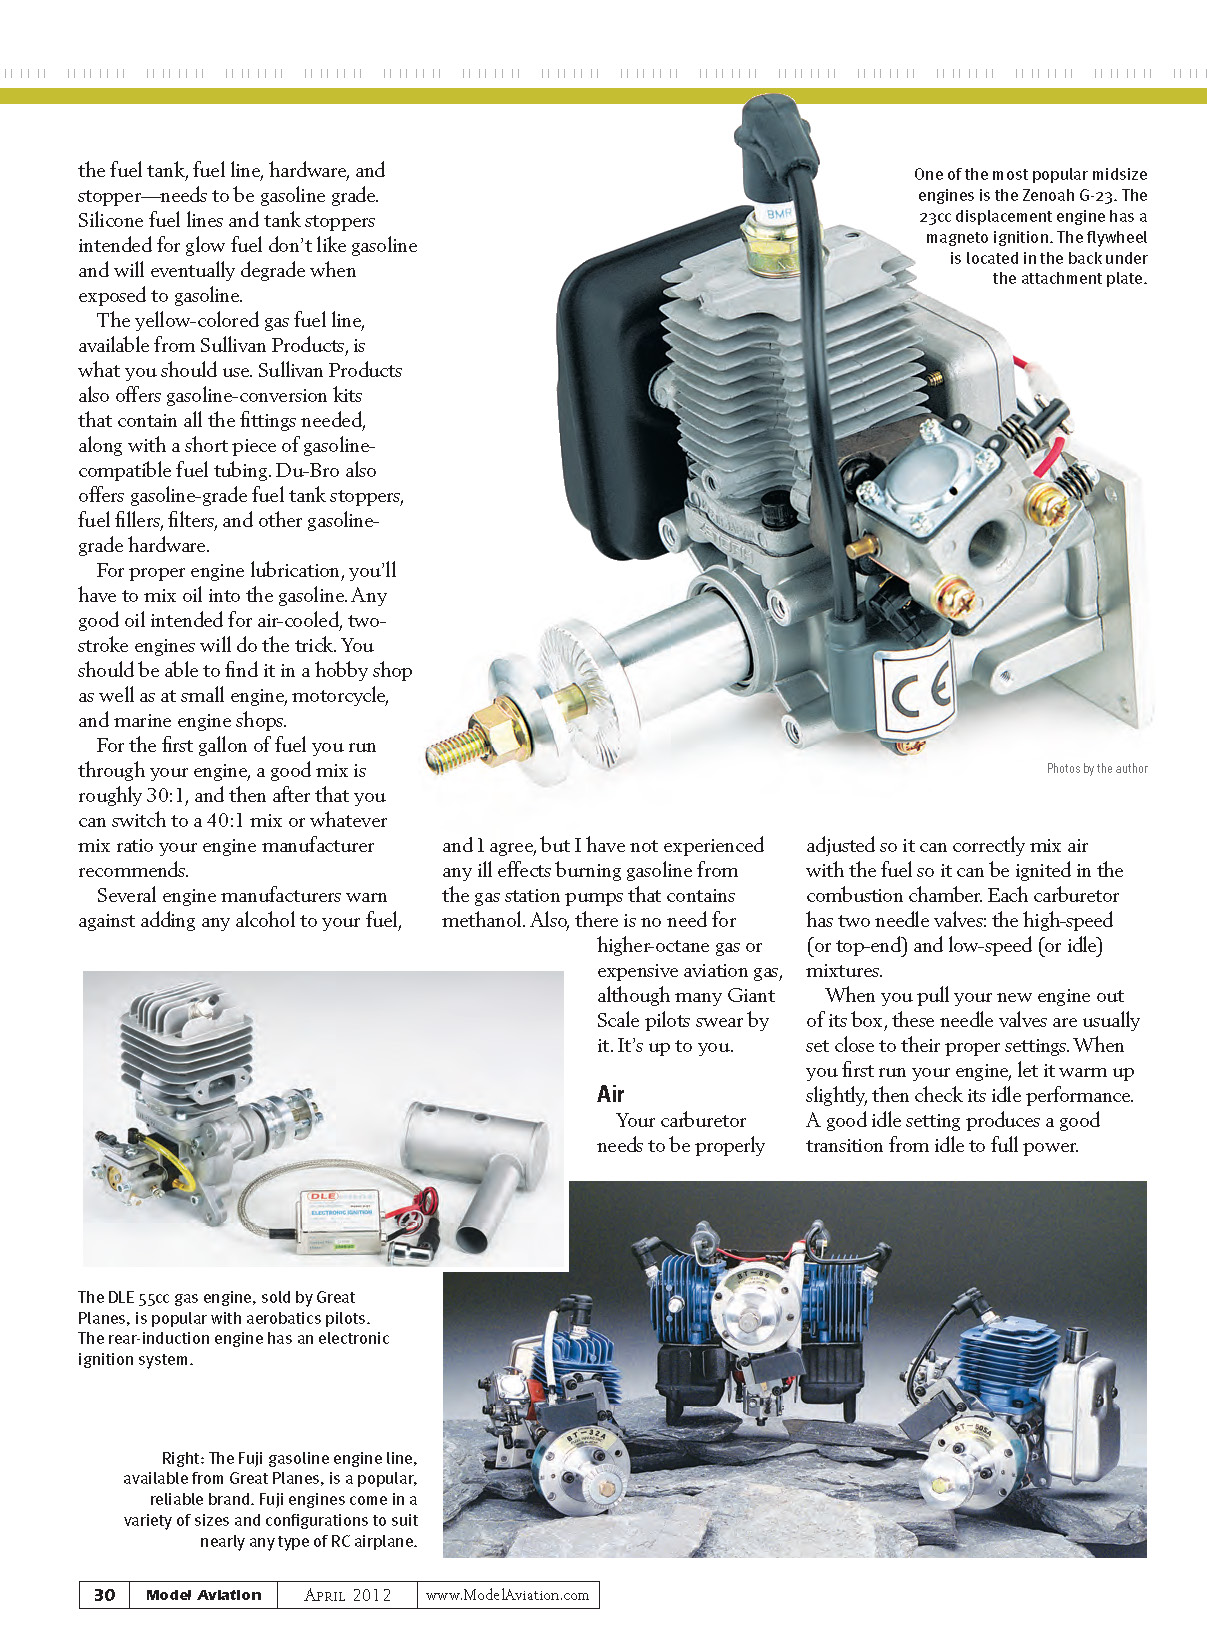
The yellow-colored gasoline fuel line, available from Sullivan Products, is what you should use. Sullivan Products also offers gasoline-conversion kits that contain all the fittings needed, along with a short piece of gasoline-compatible fuel tubing. Du-Bro also offers gasoline-grade fuel tank stoppers, fuel fillers, filters, and other gasoline-grade hardware.
For proper engine lubrication, you'll have to mix oil into the gasoline. Any good oil intended for air-cooled, two-stroke engines will do the trick. You should be able to find it in a hobby shop as well as at small-engine, motorcycle, and marine-engine shops.
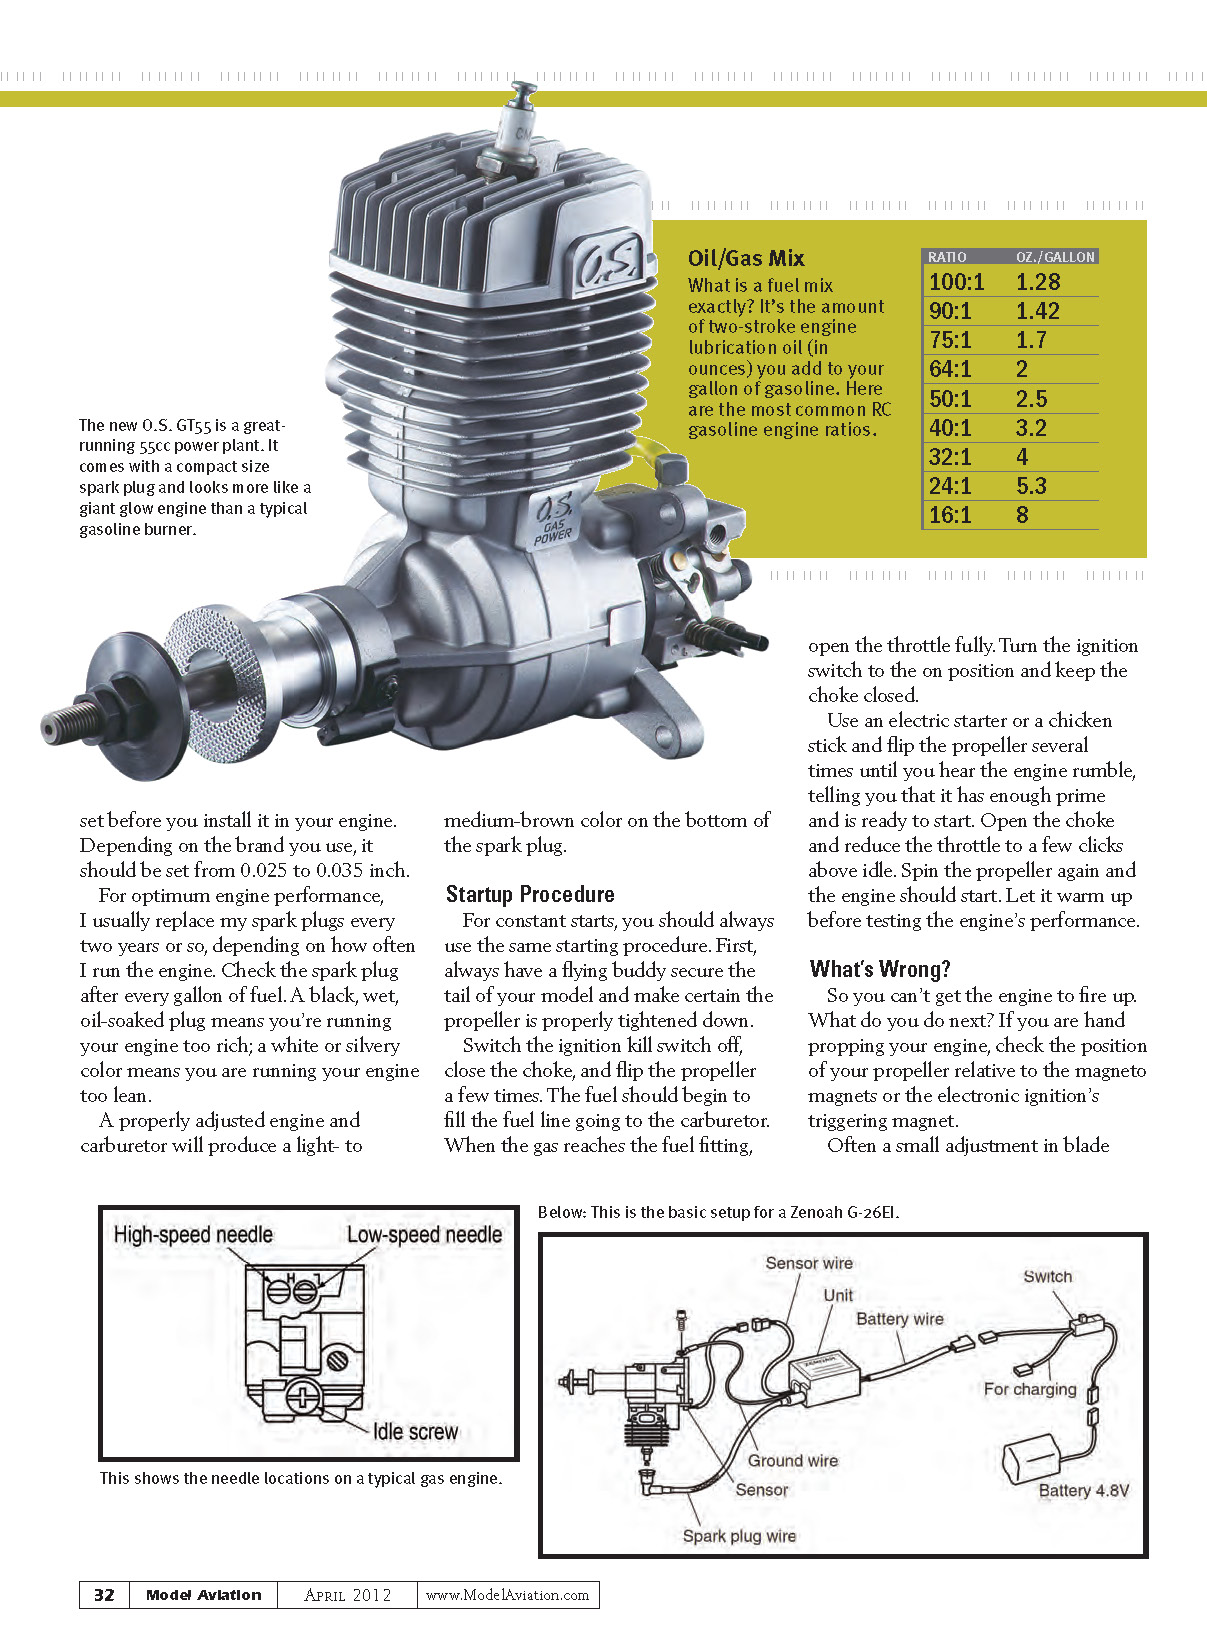
For the first gallon of fuel you run through your engine, a good mix is roughly 30:1; after that you can switch to a 40:1 mix or whatever ratio your engine manufacturer recommends.
Several engine manufacturers warn against adding any alcohol to your fuel, and I agree, but I have not experienced any ill effects burning gasoline from gas station pumps that contains methanol. There is no need for higher-octane gas or expensive aviation gas, although many Giant Scale pilots swear by it. It's up to you.
Air
Your carburetor needs to be properly adjusted so it can correctly mix air with the fuel for ignition in the combustion chamber. Each carburetor has two needle valves: the high-speed (or top-end) and low-speed (or idle) mixtures.
When you pull your new engine out of its box, these needle valves are usually set close to their proper settings. When you first run your engine, let it warm up slightly, then check its idle performance. A good idle setting produces a smooth transition from idle to full power.
Slowly advance the throttle to run the engine at full power. Don't try to set the high end by sound; check the maximum rpm with a digital tachometer. Slowly lean out the high-speed needle a bit at a time and then check the rpm with the tachometer.
When you get to a point where further leaning does not result in an increase in rpm, you are at the maximum power setting. Now richen it slightly and check with the tachometer for a 200- to 300-rpm drop.
Check the low speed again. Adjusting one needle valve slightly affects the other, so it can take a little effort to zero in on good overall performance. Once set, most gasoline engines won't need their needle valves adjusted for a long time.
As a safety note, always shut down the engine before making adjustments to the needle valves. Make adjustments an eighth-turn at a time and check the engine rpm with a digital tachometer.
AMA regulations also require the installation of an ignition grounding/kill switch (for magneto engines) or an on/off switch for an electronic ignition system. A kill switch allows you to quickly shut down your engine and it also prevents accidental starts. You should also consider adding an onboard, radio-operated kill switch.
Heat
The heat or fire part of the equation is produced by the engine's ignition system. Whether you have a magneto or an electronic ignition system, it needs to operate properly to fire the spark plug.
Magnetos consist of a flywheel, a coil, and a condenser to produce the spark energy. The flywheel gap needs to be set properly. Typically 0.015 to 0.020 inch is right, but refer to your engine manual to be sure.
With electronic ignition systems, it is also important to check the gap between the triggering magnet and the pickup sensor to produce a strong spark. The battery pack powering the electronic ignition system should be fully charged at the beginning of each flying day.
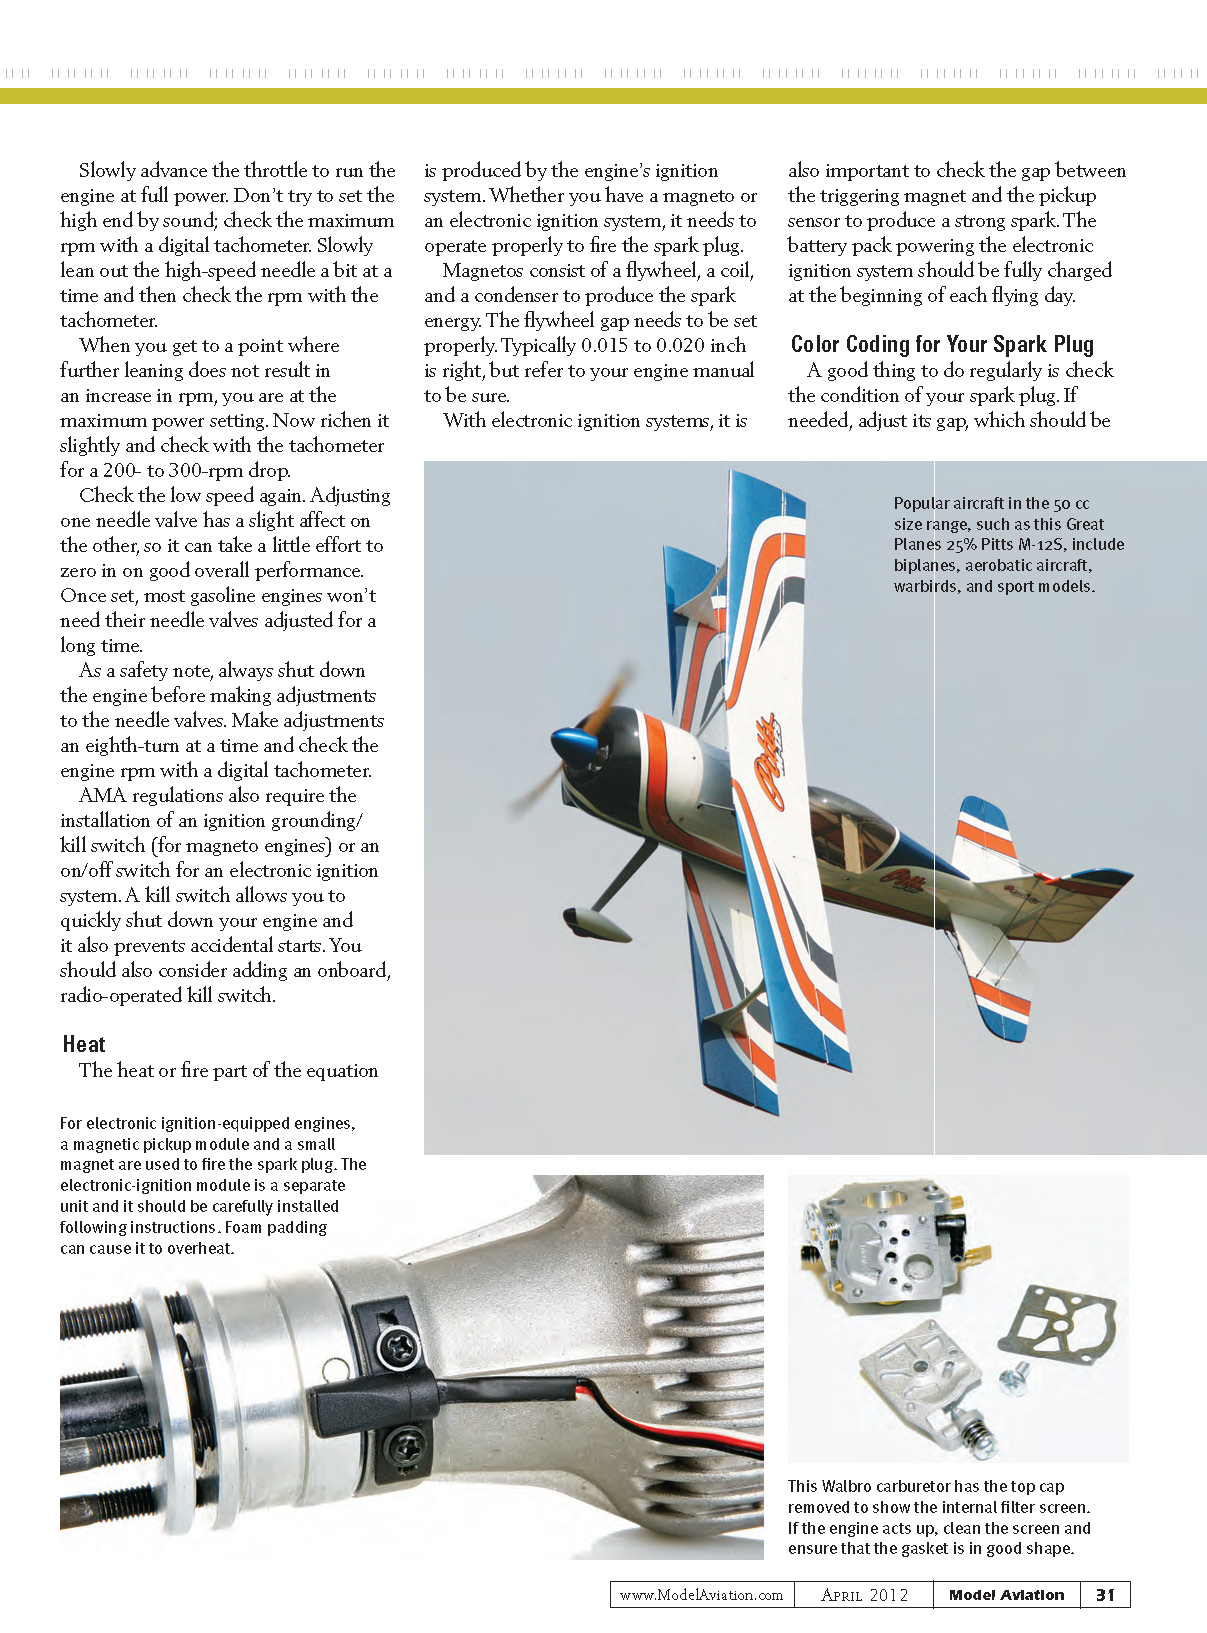
For electronic ignition-equipped engines, a magnetic pickup module and a small magnet are used to fire the spark plug. The electronic-ignition module is a separate unit and it should be carefully installed following instructions. Foam padding can cause it to overheat.
Color Coding for Your Spark Plug
A good habit is to check the condition of your spark plug regularly. If needed, adjust its gap, which should be set before you install it in your engine. Depending on the brand you use, it should be set from 0.025 to 0.035 inch.
For optimum engine performance, I usually replace my spark plugs every two years or so, depending on how often I run the engine. Check the spark plug after every gallon of fuel. A black, wet, oil-soaked plug means you're running your engine too rich; a white or silvery color means you are running your engine too lean.
A properly adjusted engine and carburetor will produce a light- to medium-brown color on the bottom of the spark plug.
Startup Procedure
For consistent starts, always use the same starting procedure. First, have a flying buddy secure the tail of your model and make certain the propeller is properly tightened. Switch the ignition kill switch off, close the choke, and flip the propeller a few times. The fuel should begin to fill the fuel line going to the carburetor. When the gas reaches the fuel fitting, open the throttle fully. Turn the ignition switch to the on position and keep the choke closed.
Use an electric starter or a chicken stick and flip the propeller several times until you hear the engine rumble, indicating it has enough prime and is ready to start. Open the choke and reduce the throttle to a few clicks above idle. Spin the propeller again and the engine should start. Let it warm up before testing the engine's performance.
What's Wrong?
So you can't get the engine to fire up. What do you do next?
- If your engine starts but then quickly dies, this indicates a fuel-draw issue. Check your fuel lines for any pinch points, blockage, or anything preventing the flow of fuel.
- If the carburetor won't draw any fuel, check to make sure the needle valves are open. Also check that the carburetor is snugly fastened and positioned so the small pressure passage from the engine to the carburetor isn't blocked.
- Check the internal screen filter and make sure it is clean. It's located under the top carburetor cap (held in place with a center screw). If it's dirty, remove it and flush it with some fresh gas.
- Check that the engine cylinder is tightly fastened to the engine case and that the gasket is undamaged. A small air leak will prevent the engine from starting.
- Do you have a good spark? If not, check the kill switch. With electronic ignitions, make sure the battery is fully charged and the timing sensor wire is still connected.
If you are hand-propping your engine, check the position of your propeller relative to the magneto magnets or the electronic ignition's triggering magnet. Often a small adjustment in blade position can make a big difference. I like to start my engines using my left hand and set the propeller so that the blade is at 11 o'clock and I swing it downward to the 7 o'clock position. The magneto produces spark at approximately 9 o'clock. If you aren't sure about hand propping, there's nothing wrong with using an electric starter.
Pumper Carburetors
Most gas engines use a Walbro or some other type of pumper carburetor. These have built-in diaphragms that are driven by pulse pressure caused by the up-and-down motion of the piston. This draws the fuel into the carburetor and also makes fuel tank placement in the airplane less critical than in a glow-powered airplane.
The Walbro carburetor has two needle valves on the left side of the carburetor body. A third larger screw is the idle adjustment screw and it has a tapered end that adjusts the throttle stop position. In most cases, you can remove this screw and use your servo's travel adjustment to set your idle position.
Gasoline engines are simple to operate, and after you understand the basics, you will find that they are easy to run and user-friendly. They produce good torque and, when set up with the correct propeller, will provide years of trouble-free service. They come in a variety of displacements and types. Give gas power a try; you'll quickly become a believer.
— Aaron Baldwick [email protected]
Sources
- Sullivan
(410) 732-3500 www.sullivanproducts.com
- Du-Bro
(800) 848-9411 www.dubro.com
- O.S. Engines
(800) 637-7660 www.osengines.com
- Zenoah Engines
(800) 338-4639 www.zenoah.com
- DLE Engines
(800) 637-7660 www.dle-engines.com
- Fuji Engines
(800) 637-7660 www.fuji-imvac.com
Transcribed from original scans by AI. Minor OCR errors may remain.

