
BirdsEyeView AEROBOTICS FireFLY6
Hybrid aircraft blurs the line between multirotor and airplane
by Jon Barnes
Posted conspicuously on multiple pages of the BirdsEyeView Aerobotics website is the slogan "Welcome to the Revolution." Those might seem like big words from a small company that currently only has two founding partners on its roster.
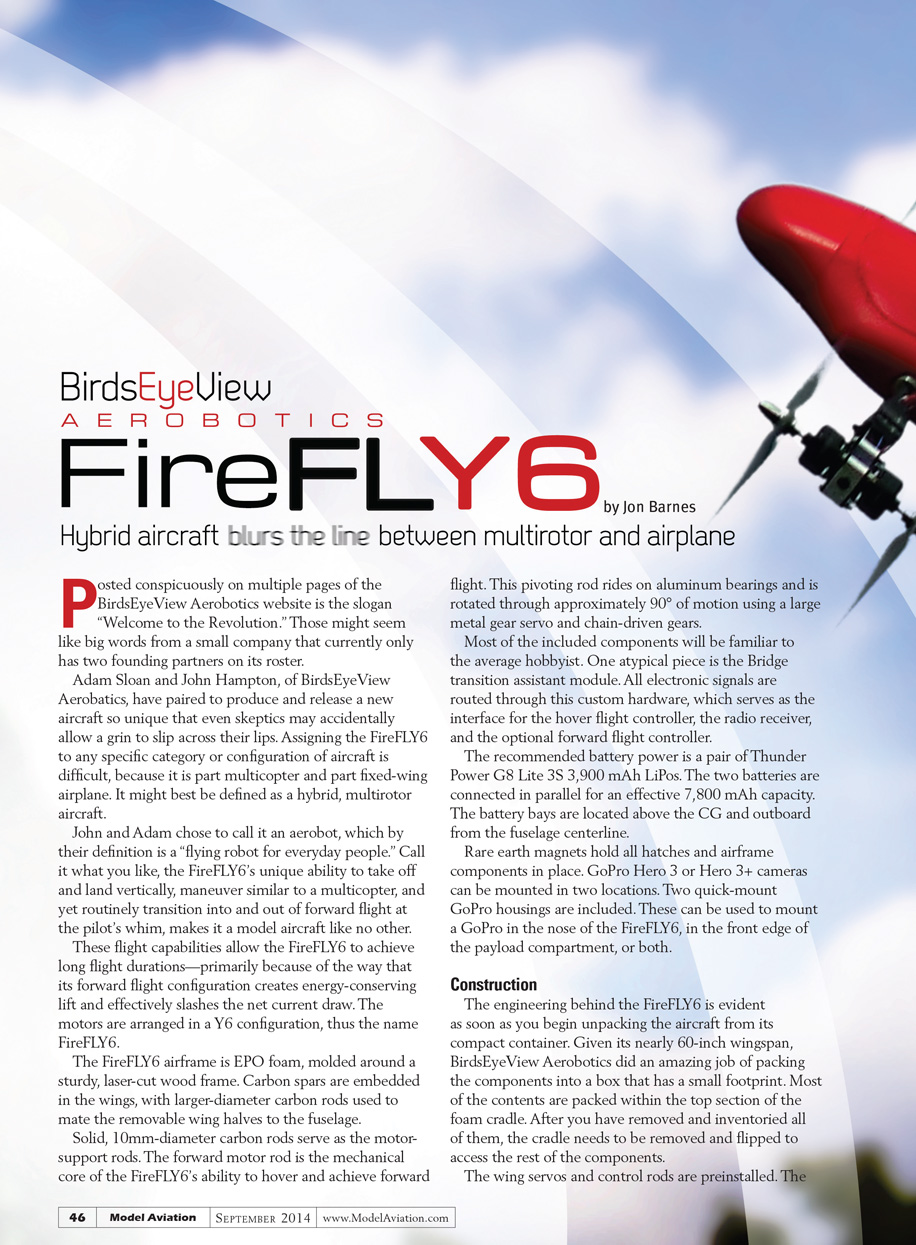
Adam Sloan and John Hampton, of BirdsEyeView Aerobotics, have paired to produce and release a new aircraft so unique that even skeptics may accidentally allow a grin to slip across their lips. Assigning the FireFLY6 to any specific category or configuration of aircraft is difficult, because it is part multicopter and part fixed-wing airplane. It might best be defined as a hybrid multirotor aircraft.
John and Adam chose to call it an aerobot, which by their definition is a "flying robot for everyday people." Call it what you like — the FireFLY6’s unique ability to take off and land vertically, maneuver similar to a multicopter, and yet routinely transition into and out of forward flight at the pilot’s whim makes it a model aircraft like no other.
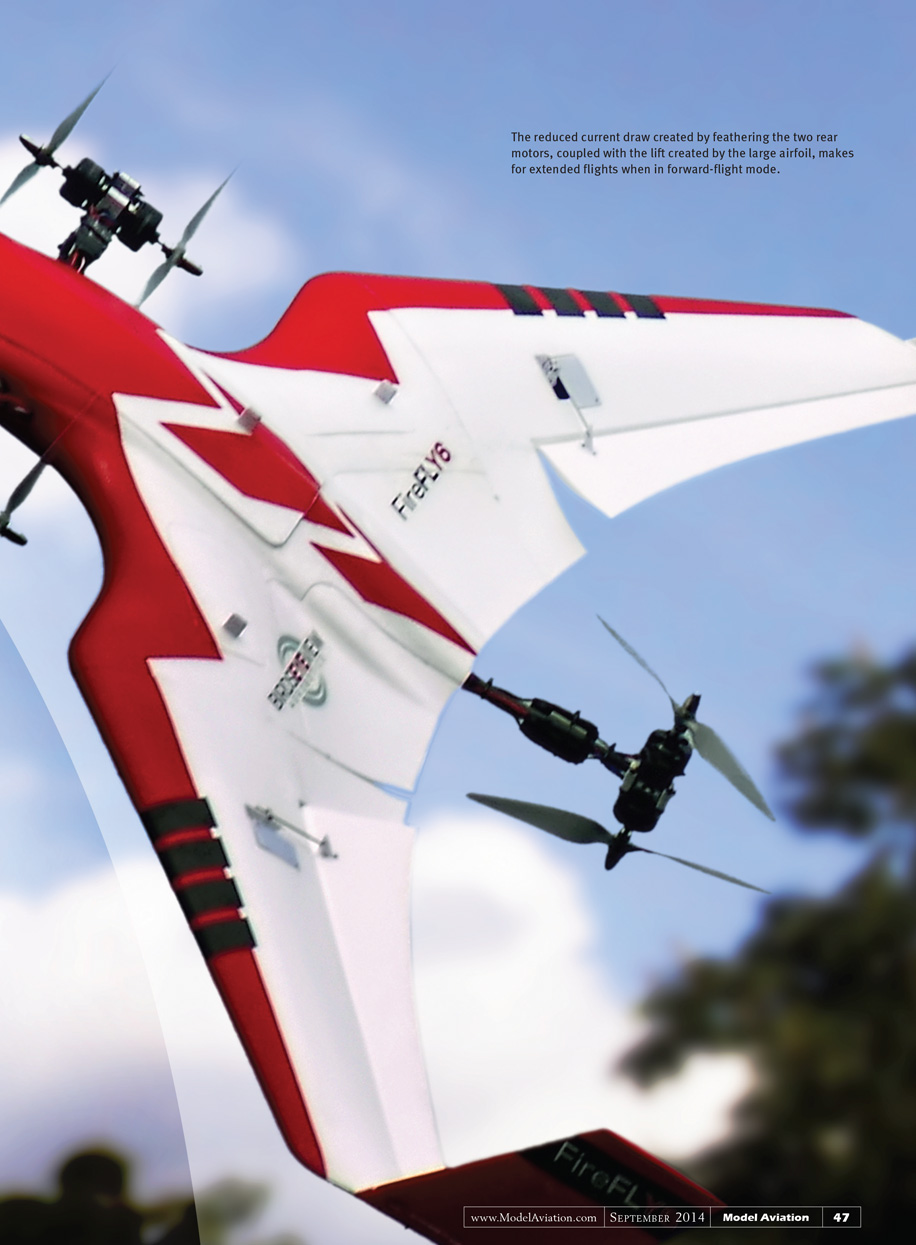
These flight capabilities allow the FireFLY6 to achieve long flight durations—primarily because its forward-flight configuration creates energy-conserving lift and effectively slashes net current draw. The motors are arranged in a Y6 configuration, thus the name FireFLY6.
The FireFLY6 airframe is EPO foam, molded around a sturdy, laser-cut wood frame. Carbon spars are embedded in the wings, with larger-diameter carbon rods used to mate the removable wing halves to the fuselage.
Solid, 10 mm-diameter carbon rods serve as the motor-support rods. The forward motor rod is the mechanical core of the FireFLY6’s ability to hover and achieve forward flight. This pivoting rod rides on aluminum bearings and is rotated through approximately 90° of motion using a large metal-gear servo and chain-driven gears.
Most of the included components will be familiar to the average hobbyist. One atypical piece is the Bridge transition-assistant module. All electronic signals are routed through this custom hardware, which serves as the interface for the hover flight controller, the radio receiver, and the optional forward-flight controller.
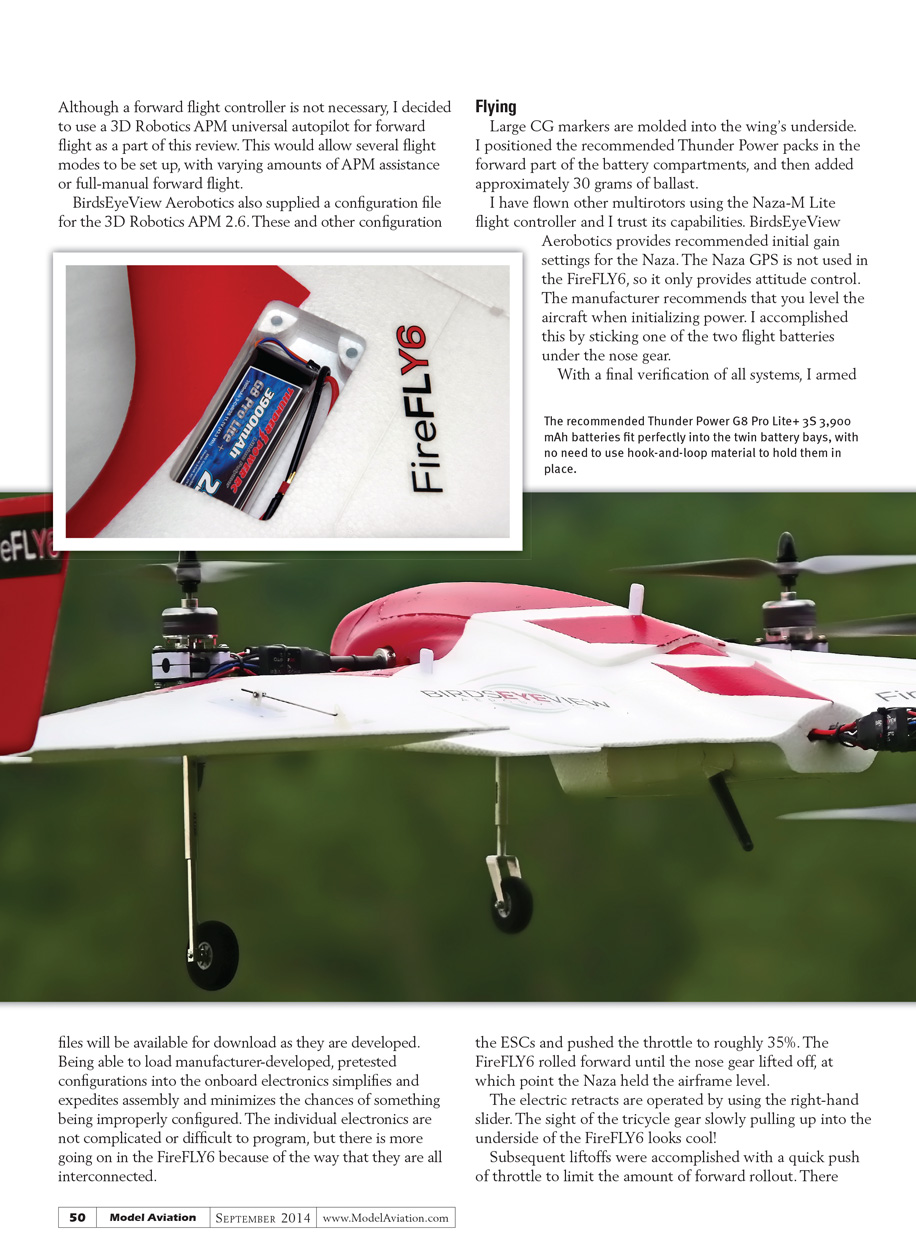
The recommended battery power is a pair of Thunder Power G8 Lite 3S 3,900 mAh LiPos. The two batteries are connected in parallel for an effective 7,800 mAh capacity. The battery bays are located above the CG and outboard from the fuselage centerline.
Rare-earth magnets hold all hatches and airframe components in place. GoPro Hero 3 or Hero 3+ cameras can be mounted in two locations. Two quick-mount GoPro housings are included. These can be used to mount a GoPro in the nose of the FireFLY6, in the front edge of the payload compartment, or both.
Construction
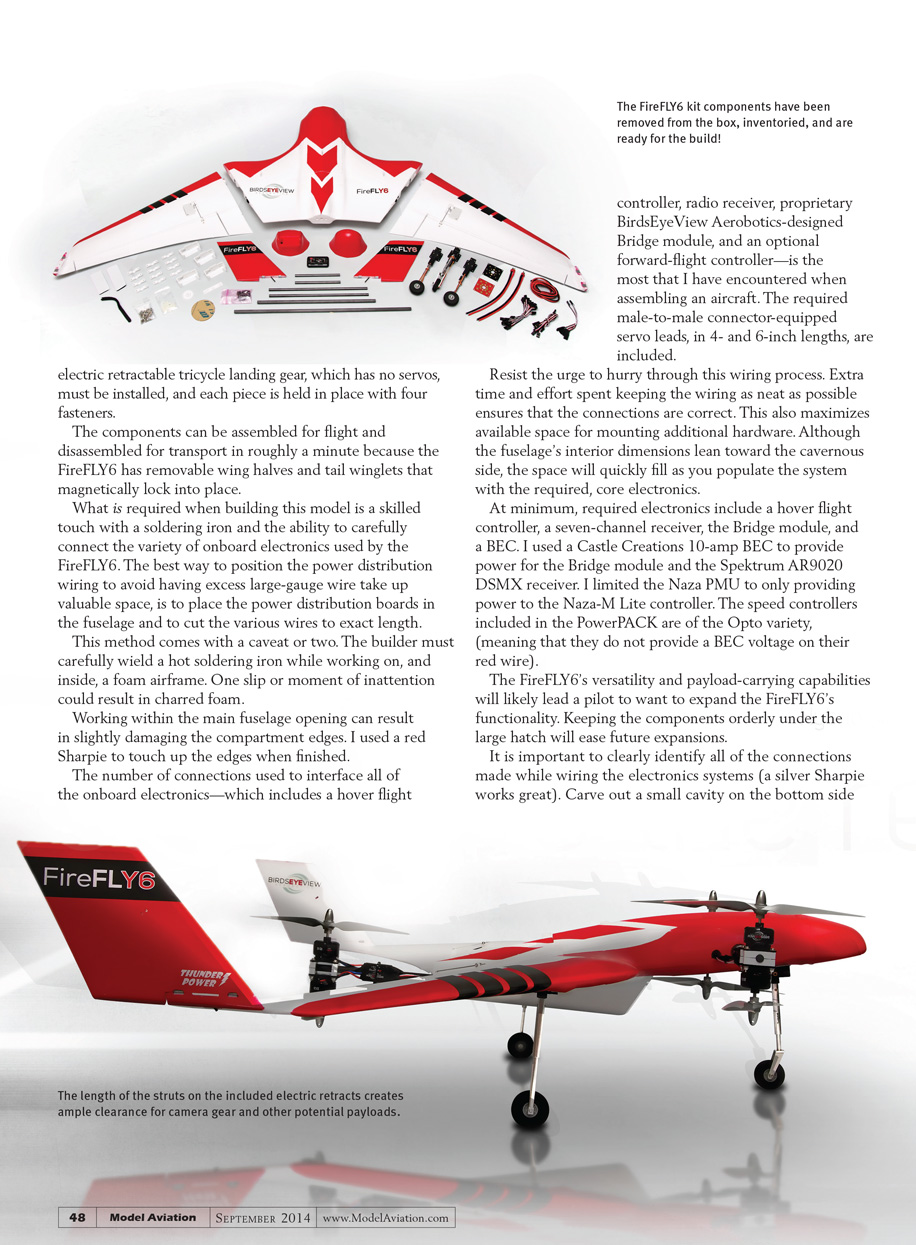
The engineering behind the FireFLY6 is evident as soon as you begin unpacking the aircraft from its compact container. Given its nearly 60-inch wingspan, BirdsEyeView Aerobotics did an amazing job of packing the components into a box that has a small footprint. Most of the contents are packed within the top section of the foam cradle. After you have removed and inventoried all of them, the cradle needs to be removed and flipped to access the rest of the components.
The wing servos and control rods are preinstalled. The electric retractable tricycle landing gear, which has no servos, must be installed, and each piece is held in place with four fasteners.
The components can be assembled for flight and disassembled for transport in roughly a minute because the FireFLY6 has removable wing halves and tail winglets that magnetically lock into place.
What is required when building this model is a skilled touch with a soldering iron and the ability to carefully connect the variety of onboard electronics used by the FireFLY6. The best way to position the power-distribution wiring to avoid having excess large-gauge wire take up valuable space is to place the power-distribution boards in the fuselage and to cut the various wires to exact length.
This method comes with a caveat or two. The builder must carefully wield a hot soldering iron while working on, and inside, a foam airframe. One slip or moment of inattention could result in charred foam.
Working within the main fuselage opening can result in slightly damaging the compartment edges. I used a red Sharpie to touch up the edges when finished.
The number of connections used to interface all of the onboard electronics—which includes a hover flight controller, radio receiver, proprietary BirdsEyeView Aerobotics–designed Bridge module, and an optional forward-flight controller—is the most that I have encountered when assembling an aircraft. The required male-to-male connector-equipped servo leads, in 4- and 6-inch lengths, are included.
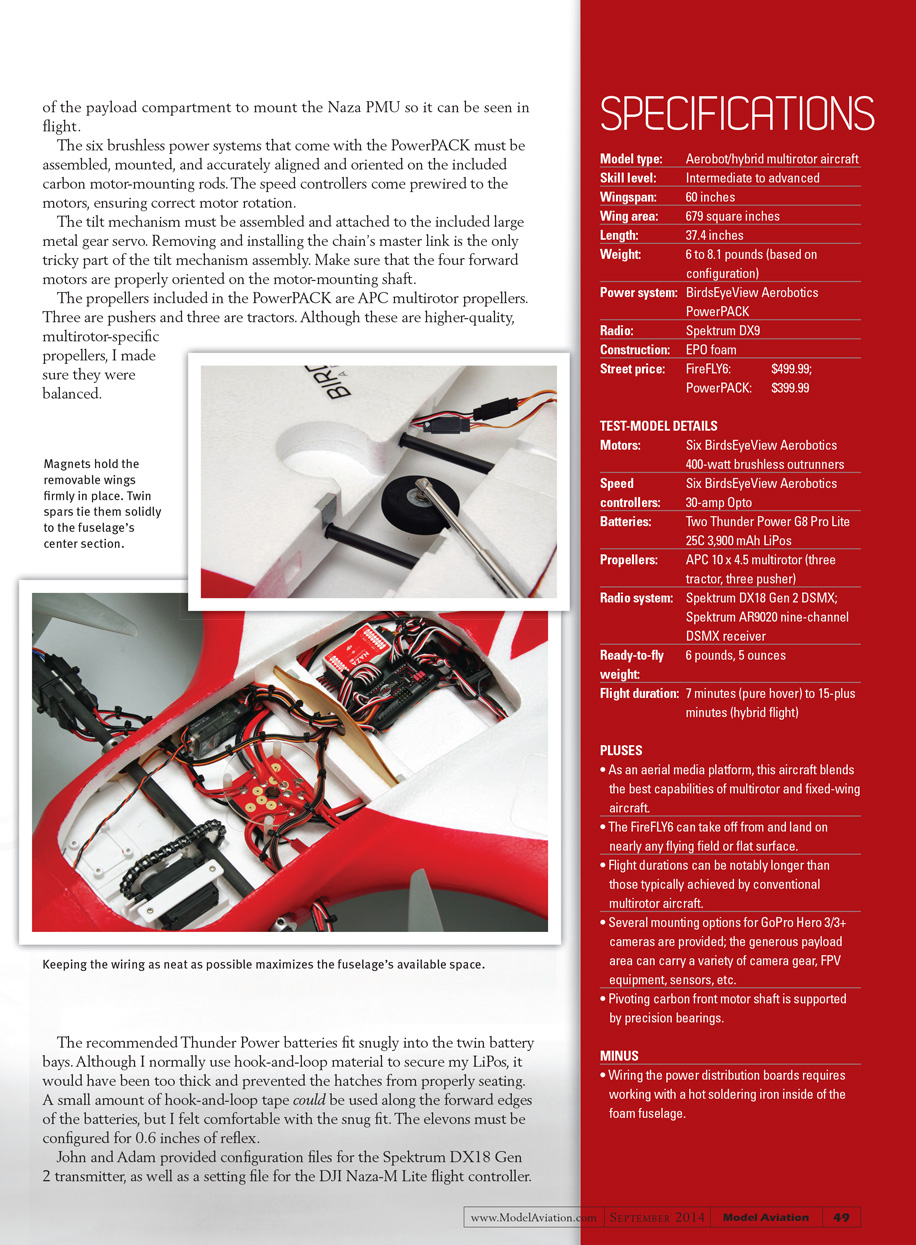
Resist the urge to hurry through this wiring process. Extra time and effort spent keeping the wiring as neat as possible ensures that the connections are correct. This also maximizes available space for mounting additional hardware. Although the fuselage’s interior dimensions lean toward the cavernous side, the space will quickly fill as you populate the system with the required core electronics.
At minimum, required electronics include a hover flight controller, a seven-channel receiver, the Bridge module, and a BEC. I used a Castle Creations 10-amp BEC to provide power for the Bridge module and the Spektrum AR9020 DSMX receiver. I limited the Naza PMU to only providing power to the Naza-M Lite controller. The speed controllers included in the PowerPACK are of the Opto variety (meaning they do not provide a BEC voltage on their red wire).
The FireFLY6’s versatility and payload-carrying capabilities will likely lead a pilot to want to expand the aircraft’s functionality. Keeping the components orderly under the large hatch will ease future expansions.
It is important to clearly identify all of the connections made while wiring the electronics systems (a silver Sharpie works great). Carve out a small cavity on the bottom side of the payload compartment to mount the Naza PMU so it can be seen in flight.
The six brushless power systems that come with the PowerPACK must be assembled, mounted, and accurately aligned and oriented on the included carbon motor-mounting rods. The speed controllers come prewired to the motors, ensuring correct motor rotation.
The tilt mechanism must be assembled and attached to the included large metal-gear servo. Removing and installing the chain's master link is the only tricky part of the tilt-mechanism assembly. Make sure that the four forward motors are properly oriented on the motor-mounting shaft.
The propellers included in the PowerPACK are APC multirotor props: three pushers and three tractors. Although these are higher-quality, multirotor-specific propellers, I made sure they were balanced.
The recommended Thunder Power batteries fit snugly into the twin battery bays. Although I normally use hook-and-loop material to secure my LiPos, it would have been too thick and prevented the hatches from properly seating. A small amount of hook-and-loop tape could be used along the forward edges of the batteries, but I felt comfortable with the snug fit. The elevons must be configured for 0.6 inches of reflex.
John and Adam provided configuration files for the Spektrum DX18 Gen 2 transmitter, as well as a setting file for the DJI Naza-M Lite flight controller.
Forward-flight controller (optional)
Although a forward-flight controller is not necessary, I decided to use a 3D Robotics APM universal autopilot for forward flight as part of this review. This allowed several flight modes to be set up, with varying amounts of APM assistance or full-manual forward flight.
BirdsEyeView Aerobotics also supplied a configuration file for the 3D Robotics APM 2.6. These and other configuration files will be available for download as they are developed. Being able to load manufacturer-developed, pretested configurations into the onboard electronics simplifies and expedites assembly and minimizes the chances of something being improperly configured. The individual electronics are not complicated or difficult to program, but there is more going on in the FireFLY6 because of the way they are all interconnected.
SPECIFICATIONS
- Model type: Aerobot / hybrid multirotor aircraft
- Skill level: Intermediate to advanced
- Wingspan: 60 inches
- Wing area: 679 square inches
- Length: 37.4 inches
- Weight: 6 to 8.1 pounds (based on configuration)
- Power system: BirdsEyeView Aerobotics PowerPACK
- Radio: Spektrum DX9
- Construction: EPO foam
- Street price: FireFLY6: $499.99; PowerPACK: $399.99
TEST-MODEL DETAILS
- Motors: Six BirdsEyeView Aerobotics 400-watt brushless outrunners
- Speed controllers: Six BirdsEyeView Aerobotics 30-amp Opto
- Batteries: Two Thunder Power G8 Pro Lite 25C 3,900 mAh LiPos
- Propellers: APC 10 x 4.5 multirotor (three tractor, three pusher)
- Radio system: Spektrum DX18 Gen 2 DSMX; Spektrum AR9020 nine-channel DSMX receiver
- Ready-to-fly weight: 6 pounds, 5 ounces
- Flight duration: 7 minutes (pure hover) to 15-plus minutes (hybrid flight)
PLUSES
- As an aerial-media platform, this aircraft blends the best capabilities of multirotor and fixed-wing aircraft.
- The FireFLY6 can take off from and land on nearly any flying field or flat surface.
- Flight durations can be notably longer than those typically achieved by conventional multirotor aircraft.
- Several mounting options for GoPro Hero 3/3+ cameras are provided; the generous payload area can carry a variety of camera gear, FPV equipment, sensors, etc.
- Pivoting carbon front motor shaft is supported by precision bearings.
MINUSES
- Wiring the power-distribution boards requires working with a hot soldering iron inside the foam fuselage.
Flying
Large CG markers are molded into the wing’s underside. I positioned the recommended Thunder Power packs in the forward part of the battery compartments, and then added approximately 30 grams of ballast.
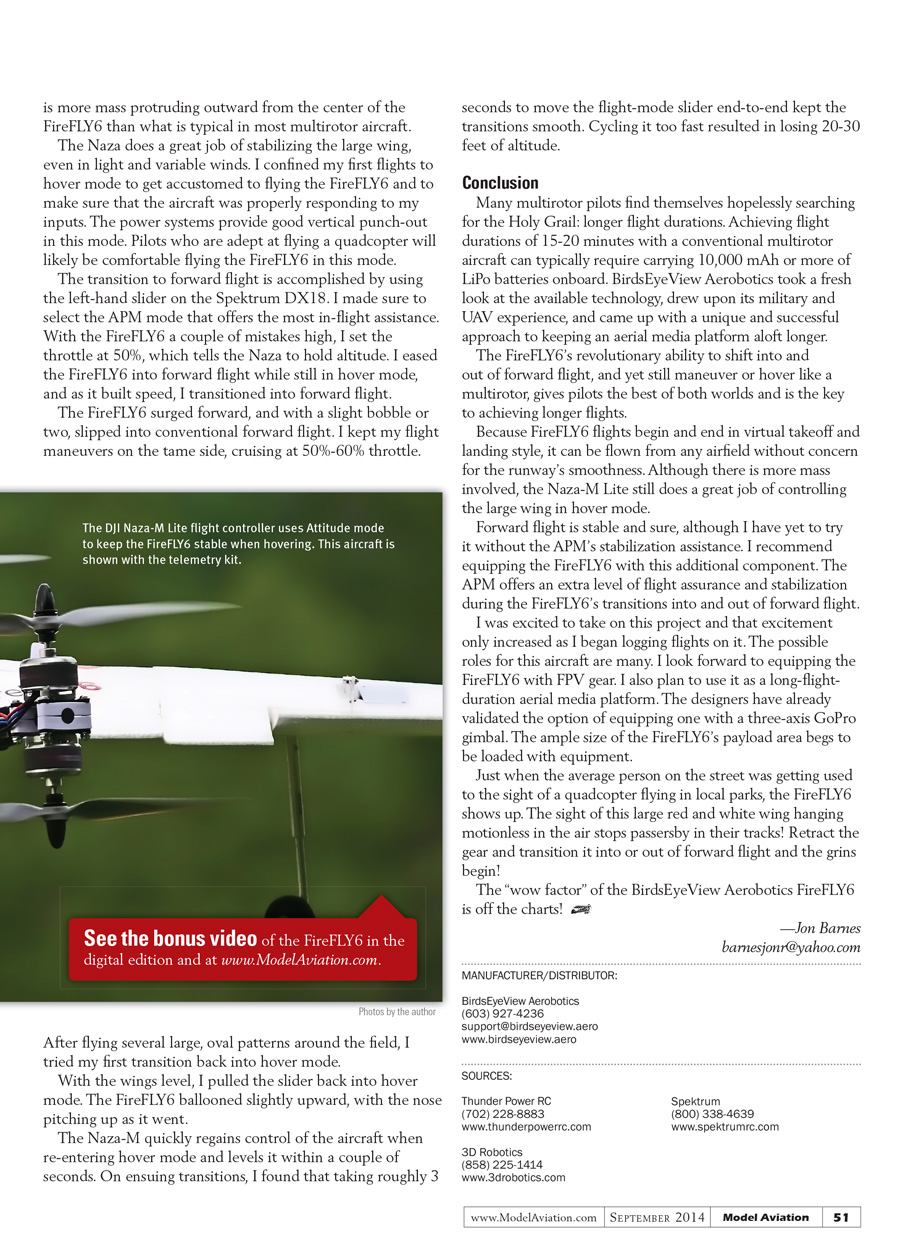
I have flown other multirotors using the Naza-M Lite flight controller and I trust its capabilities. BirdsEyeView Aerobotics provides recommended initial gain settings for the Naza. The Naza GPS is not used in the FireFLY6, so it only provides attitude control. The manufacturer recommends that you level the aircraft when initializing power. I accomplished this by sticking one of the two flight batteries under the nose gear.
With a final verification of all systems, I armed the ESCs and pushed the throttle to roughly 35%. The FireFLY6 rolled forward until the nose gear lifted off, at which point the Naza held the airframe level.
The electric retracts are operated by using the right-hand slider. The sight of the tricycle gear slowly pulling up into the underside of the FireFLY6 looks cool!
Subsequent liftoffs were accomplished with a quick push of throttle to limit the amount of forward rollout. There is more mass protruding outward from the center of the FireFLY6 than is typical in most multirotor aircraft.
The Naza does a great job of stabilizing the large wing, even in light and variable winds. I confined my first flights to hover mode to get accustomed to flying the FireFLY6 and to make sure that the aircraft was properly responding to my inputs. The power systems provide good vertical punch in this mode. Pilots who are adept at flying a quadcopter will likely be comfortable flying the FireFLY6 in hover mode.
The transition to forward flight is accomplished by using the left-hand slider on the Spektrum DX18. I made sure to select the APM mode that offers the most in-flight assistance. With the FireFLY6 a couple of mistakes high, I set the throttle at 50%, which tells the Naza to hold altitude. I eased the FireFLY6 into forward flight while still in hover mode, and as it built speed, I transitioned into forward flight.
The FireFLY6 surged forward, and with a slight bobble or two, slipped into conventional forward flight. I kept my flight maneuvers on the tame side, cruising at 50%–60% throttle.
After flying several large, oval patterns around the field, I tried my first transition back into hover mode. With the wings level, I pulled the slider back into hover mode. The FireFLY6 ballooned slightly upward, with the nose pitching up as it went.
The Naza-M quickly regains control of the aircraft when re-entering hover mode and levels it within a couple of seconds. On ensuing transitions, I found that taking roughly 3 seconds to move the flight-mode slider end-to-end kept the transitions smooth. Cycling it too fast resulted in losing 20–30 feet of altitude.
Conclusion
Many multirotor pilots find themselves hopelessly searching for the Holy Grail: longer flight durations. Achieving flight durations of 15–20 minutes with a conventional multirotor aircraft can typically require carrying 10,000 mAh or more of LiPo batteries onboard. BirdsEyeView Aerobotics took a fresh look at the available technology, drew upon its military and UAV experience, and came up with a unique and successful approach to keeping an aerial-media platform aloft longer.
The FireFLY6’s revolutionary ability to shift into and out of forward flight, and yet still maneuver or hover like a multirotor, gives pilots the best of both worlds and is the key to achieving longer flights.
Because FireFLY6 flights begin and end in vertical takeoff and landing style, it can be flown from any airfield without concern for the runway’s smoothness. Although there is more mass involved, the Naza-M Lite still does a great job of controlling the large wing in hover mode.
Forward flight is stable and sure, although I have yet to try it without the APM’s stabilization assistance. I recommend equipping the FireFLY6 with this additional component. The APM offers an extra level of flight assurance and stabilization during the FireFLY6’s transitions into and out of forward flight.
I was excited to take on this project and that excitement only increased as I began logging flights on it. The possible roles for this aircraft are many. I look forward to equipping the FireFLY6 with FPV gear. I also plan to use it as a long-flight-duration aerial-media platform. The designers have already validated the option of equipping one with a three-axis GoPro gimbal. The ample size of the FireFLY6’s payload area begs to be loaded with equipment.
Just when the average person on the street was getting used to the sight of a quadcopter flying in local parks, the FireFLY6 shows up. The sight of this large red-and-white wing hanging motionless in the air stops passersby in their tracks! Retract the gear and transition it into or out of forward flight and the grins begin.
The "wow factor" of the BirdsEyeView Aerobotics FireFLY6 is off the charts!
—Jon Barnes [email protected]
Transcribed from original scans by AI. Minor OCR errors may remain.

