
Blade 350 QX BNF
Greg Alderman <[email protected]>
When I was asked to write a review of the Blade 350 QX quadcopter, my first thought was no — it’s only another little quad and what more can be said? In hindsight, I’m glad I said yes. The 350 QX is fun and flies great!
With the current popularity of multirotor aircraft, I will not go over the basics of flying one. Instead I’ll cover the more specific flight-mode features of the Blade 350 QX: Smart Mode, Stability Mode, and Agility Mode. The 350 QX also has a Return Home (RH) function that can be manually initiated or automatically initiated upon loss of transmitter signal.
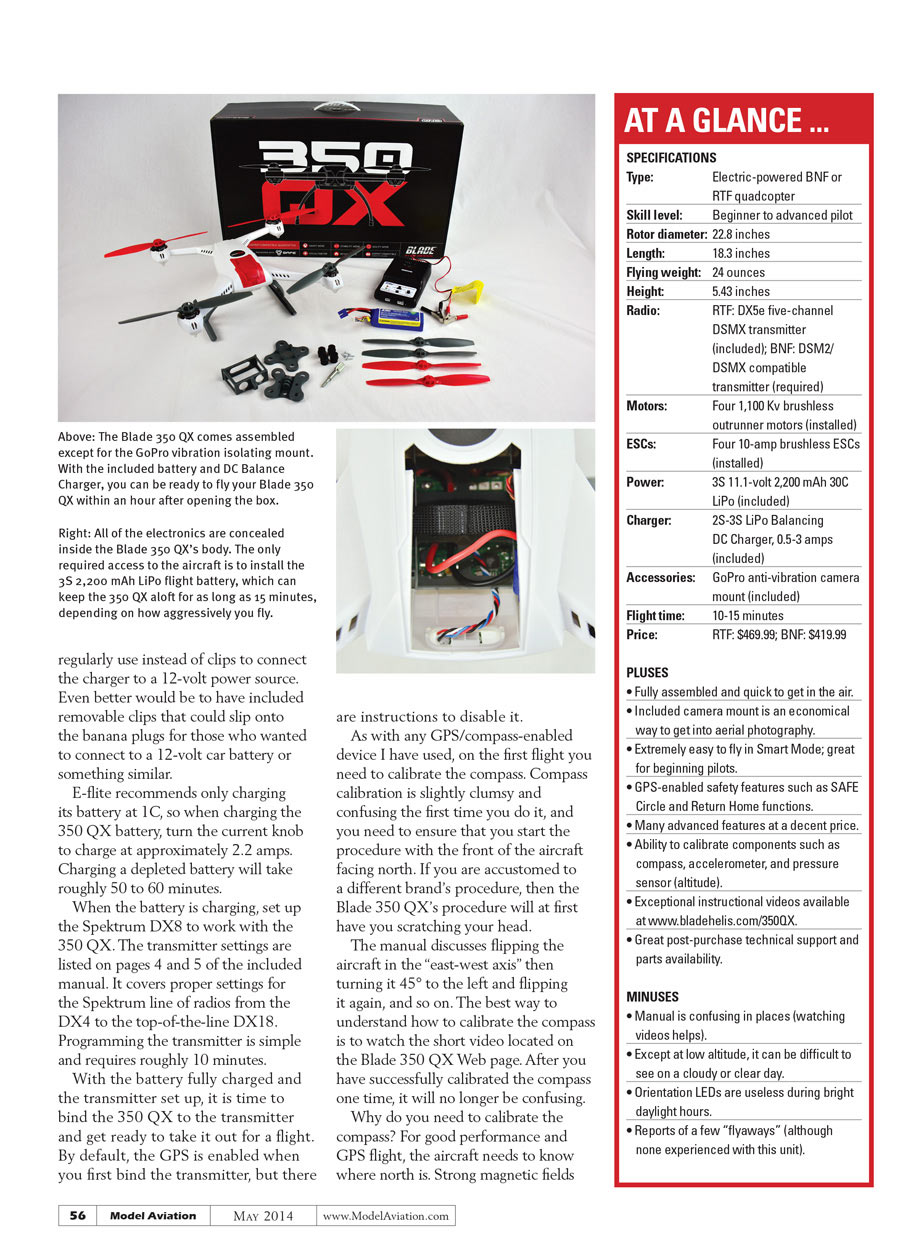
As with most Blade RTF and BNF products, the 350 QX comes in a nice shipping and storage box. Upon opening it you get a fully built, tested, GPS-enabled quadcopter.
What’s in the box
- Blade 350 QX (fully assembled)
- Quick-Start Guide (printed manual)
- 30C 3S 2,200 mAh LiPo flight battery
- 2–3S LiPo Balance DC Charger
- Spare set of propellers
- Isolation mount for mounting a GoPro camera
- (BNF version sent to me — binds to a Spektrum DX8. The RTF version includes a Spektrum DX5 transmitter.)
The printed manual included is a quick-start guide but provides enough information to safely get your 350 QX into the air. An in-depth manual is available online (see Sources). You’ll also find many technical and training videos that show calibration procedures and other maintenance tasks.
Charger
The supplied DC Balance Charger impressed me. It supplies up to 3 amps of charging power to either a 2S or 3S battery and works perfectly with the included 3S 2,200 mAh battery. You can also charge other small two- or three-cell LiPo batteries with JST-XH balance connectors.
I would have preferred plain banana plugs instead of clips to connect the charger to a 12-volt power source. Removable clips that slip onto banana plugs would be even better. E-flite recommends charging its battery at 1C, so for the 2,200 mAh battery set the charger to about 2.2 amps. Charging a depleted battery will take roughly 50–60 minutes.
Transmitter setup and binding
Set up the Spektrum transmitter before flight. The Quick-Start Guide lists transmitter settings for Spektrum radios (DX4 through DX18). Programming the transmitter is simple and takes roughly 10 minutes.
With a fully charged battery and the transmitter set up, bind the 350 QX to the transmitter. By default, GPS is enabled when you first bind; instructions to disable it are provided in the manual. As with any GPS/compass-enabled device, you must calibrate the compass on the first flight.
Compass calibration
Compass calibration can be slightly clumsy and confusing the first time. Start the procedure with the front of the quad facing north. The manual describes flipping the aircraft on the east–west axis, turning it 45° to the left, flipping again, and so on. If that sounds confusing, watch the short calibration video on the Blade 350 QX webpage — it makes the steps clear. Once you’ve successfully calibrated the compass once, it won’t be confusing again.
Why calibrate the compass? For good GPS performance the aircraft needs to know where north is. Strong magnetic fields can corrupt the calibration. If you set the quad down near a strong magnetic field — for example, close to a large brushless motor in another aircraft — that motor’s magnetic field could degrade the compass calibration. That might change the compass heading by a few degrees or, in extreme cases, by 180° or more.
You’ll usually notice a bad compass calibration in flight. If the quad wanders off at an angle when you are flying straight away from yourself, land and recalibrate the compass.
First flight — Smart Mode
The manual recommends that the first flight or two be performed in Smart Mode.
- Turn on your transmitter.
- Turn the 350 QX on. Ensure throttle is at minimum and throttle trim is centered.
- After powering up, the status light flashes green while the system obtains a GPS lock. This takes about 30–90 seconds. When the light stops flashing and turns solid green, the quad is ready.
- Step back 15–20 feet to give yourself the SAFE Circle.
- Start the motors by pushing the rudder (yaw) stick fully left, then fully right, then back to center. After a couple of seconds the motors will start at a slow idle.
- Bring the throttle to roughly mid-stick to lift into a 6–10 foot hover.
In Smart Mode you fly in Stick Relativity: the direction the nose was facing when you started the motors and the GPS coordinates at that moment are logged as the Home point. In Stick Relativity, stick inputs are relative to you — push the right stick away and the quad moves away from you, push left and it moves to your left, etc. This makes it very easy for beginners who don’t want to worry about which way the nose is pointing.
Smart Mode limits speed and altitude. Maximum altitude is about 150 feet. From a hover in Smart Mode, full throttle will slowly climb to roughly 150 feet and stop; returning throttle to mid-stick will descend to an intermediate altitude, and further down to land.
Smart Mode also enforces the SAFE Circle: the quad will not fly into the circle. It will fly to the edge of the circle and stop even if you keep the stick pulled.
Stability Mode
Stability Mode retains automatic self-leveling and Position Hold (GPS holds position when sticks are released), but you have direct throttle control. With more throttle the quad can move quickly or climb very fast; you are no longer limited to the 150-foot maximum altitude of Smart Mode.
In this mode the 350 QX can move very fast and can quickly appear small and hard to see. Two ways to recover if that happens:
- Switch back to Smart Mode and pull the stick toward you; the aircraft will return.
- Activate the RH (Return Home) switch; the aircraft will fly back and land at the Home spot logged when the motors were started.
The big difference vs. Smart Mode is that in Stability Mode you must “fly the nose” (control heading like a traditional helicopter or airplane) and manage motor thrust directly. Most pilots will prefer this mode after they learn the controls — it’s a lot more fun than Smart Mode.
Agility Mode
Agility Mode gives the pilot maximum aircraft agility. The quad can flip and roll in this mode. There is no self-level feature and you have full motor control. Agility Mode should only be used by experienced pilots; for them it’s great fun.
Return Home (RH)
RH is a useful safety feature though not a flight mode. Each time you start the motors the 350 QX records the direction it is facing and its GPS location as Home.
- If the pilot manually activates RH or the aircraft loses transmitter signal, it will immediately return and land at the logged Home spot.
- This is very helpful if you lose orientation while flying — flip the switch and it will come home.
Remember: every time you stop the motors and restart them a new direction and Home spot are logged. This can cause issues if, for example, you land in Smart Mode with the nose pointed toward you and stop the motors. If you restart the motors without turning the nose away, and then push the stick forward, the aircraft will fly right at you. Pay attention to where the nose is pointing when you start the motors.
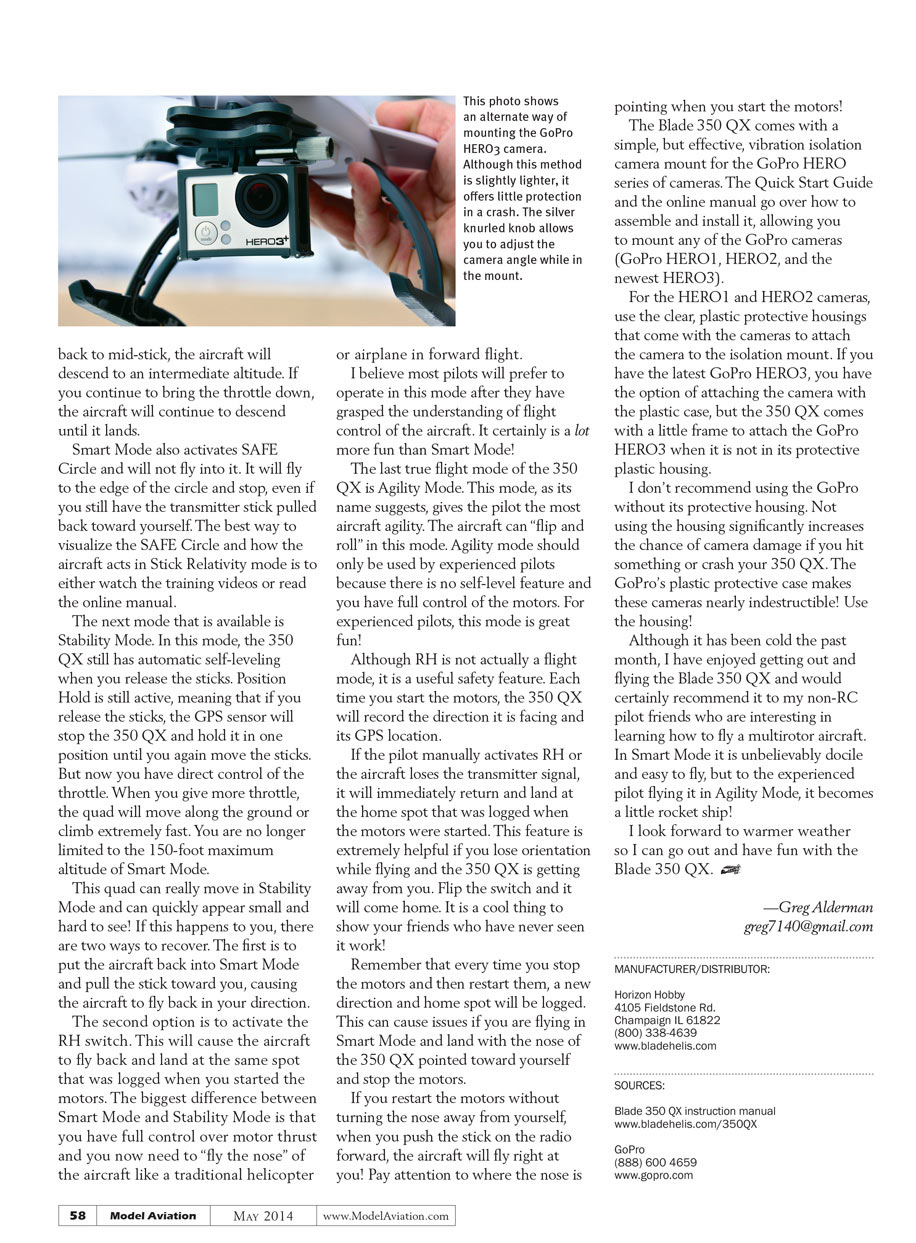
Camera mount
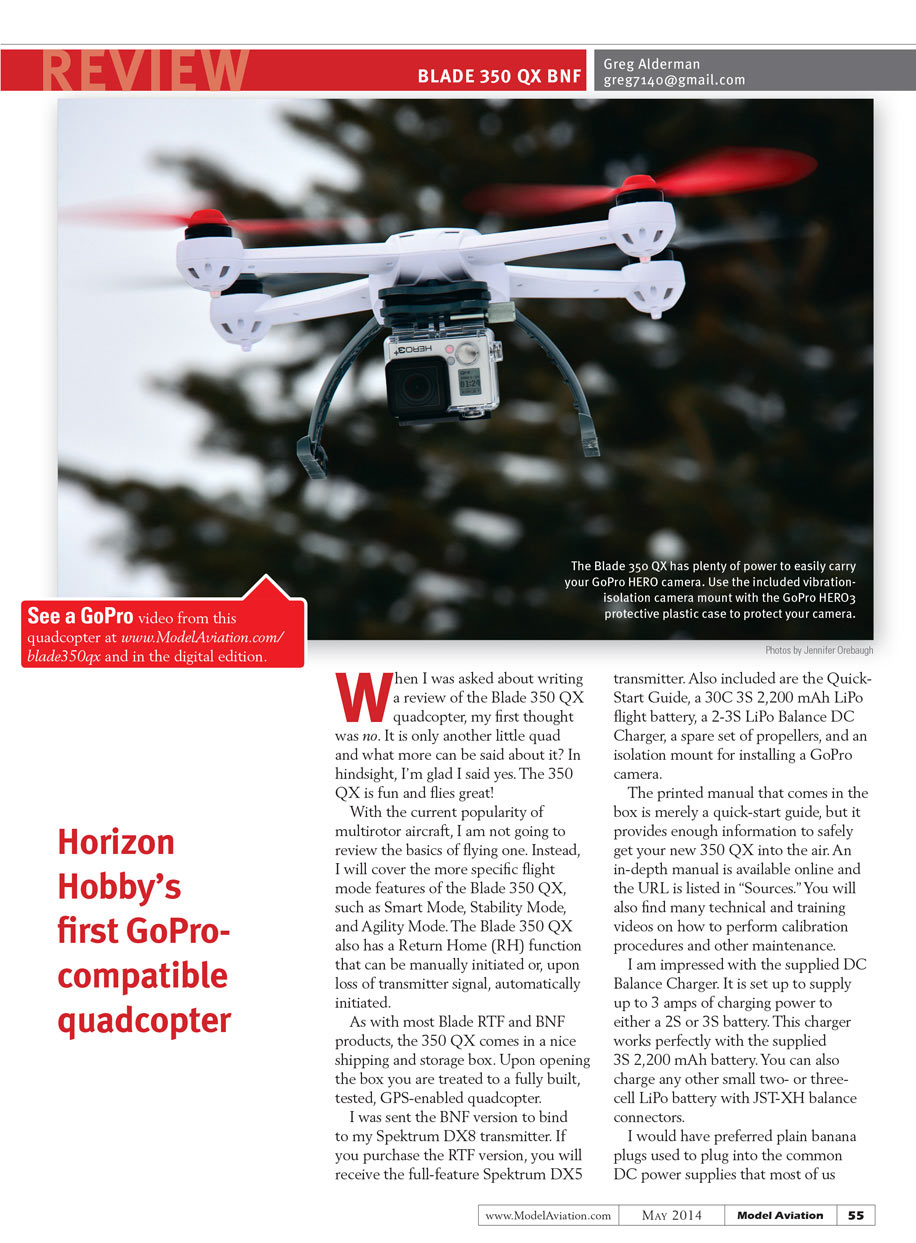
The Blade 350 QX comes with a simple but effective vibration-isolation mount for GoPro HERO cameras.
- For GoPro HERO1 and HERO2, use the clear plastic protective housings that come with the cameras to attach them to the isolation mount.
- For the GoPro HERO3, you can attach it with the plastic case or use the small frame provided to mount the camera without its protective housing.
I don’t recommend using the GoPro without its protective housing: not using the housing significantly increases the chance of camera damage in a crash. The GoPro’s plastic protective case makes these cameras nearly indestructible — use the housing.
Conclusion
Although it has been cold the past month, I’ve enjoyed flying the Blade 350 QX and would recommend it to non-RC friends who want to learn multirotor flying. In Smart Mode it is unbelievably docile and easy to fly; in Agility Mode it becomes a little rocket ship for experienced pilots. I look forward to warmer weather so I can get out and have more fun with the 350 QX.
—Greg Alderman [email protected]
Manufacturer / Distributor
Horizon Hobby 4105 Fieldstone Rd. Champaign, IL 61822 (800) 338-4639 www.bladehelis.com
Sources
- Blade 350 QX instruction manual — www.bladehelis.com/350QX
- GoPro — (888) 600-4659 — www.gopro.com
Transcribed from original scans by AI. Minor OCR errors may remain.

