
Blind Nut Installer-2007/03
By Jerry Smith
A lead on a knuckle-busting job
The blind nut is used excessively in the model industry. It is made from soft metal with sometimes less-than-perfect threads, is easily cross-threaded, and is easy to install — that is, most of the time.
Blind nuts are plentiful in ARFs and in their hardware packs for holding on hatches, canopies, wing hold-downs, landing gear, and engine mounts. They generally come preinstalled for everything but engine mounts, which need specific dimensions for the particular size engine you intend to install.
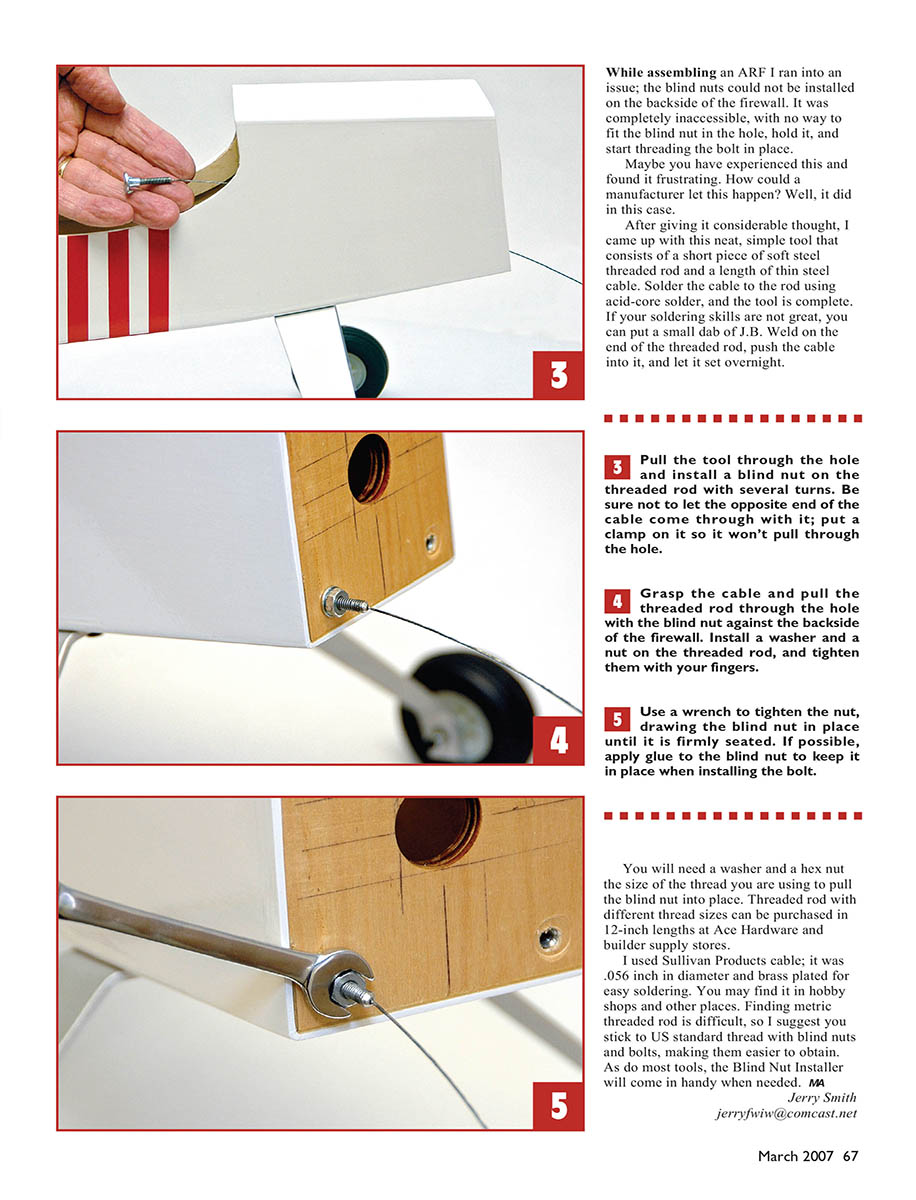
While assembling an ARF I ran into an issue: the blind nuts could not be installed on the backside of the firewall. It was completely inaccessible, with no way to fit the blind nut in the hole, hold it, and start threading the bolt in place. After giving it considerable thought, I came up with a neat, simple tool to solve the problem.
How to do it
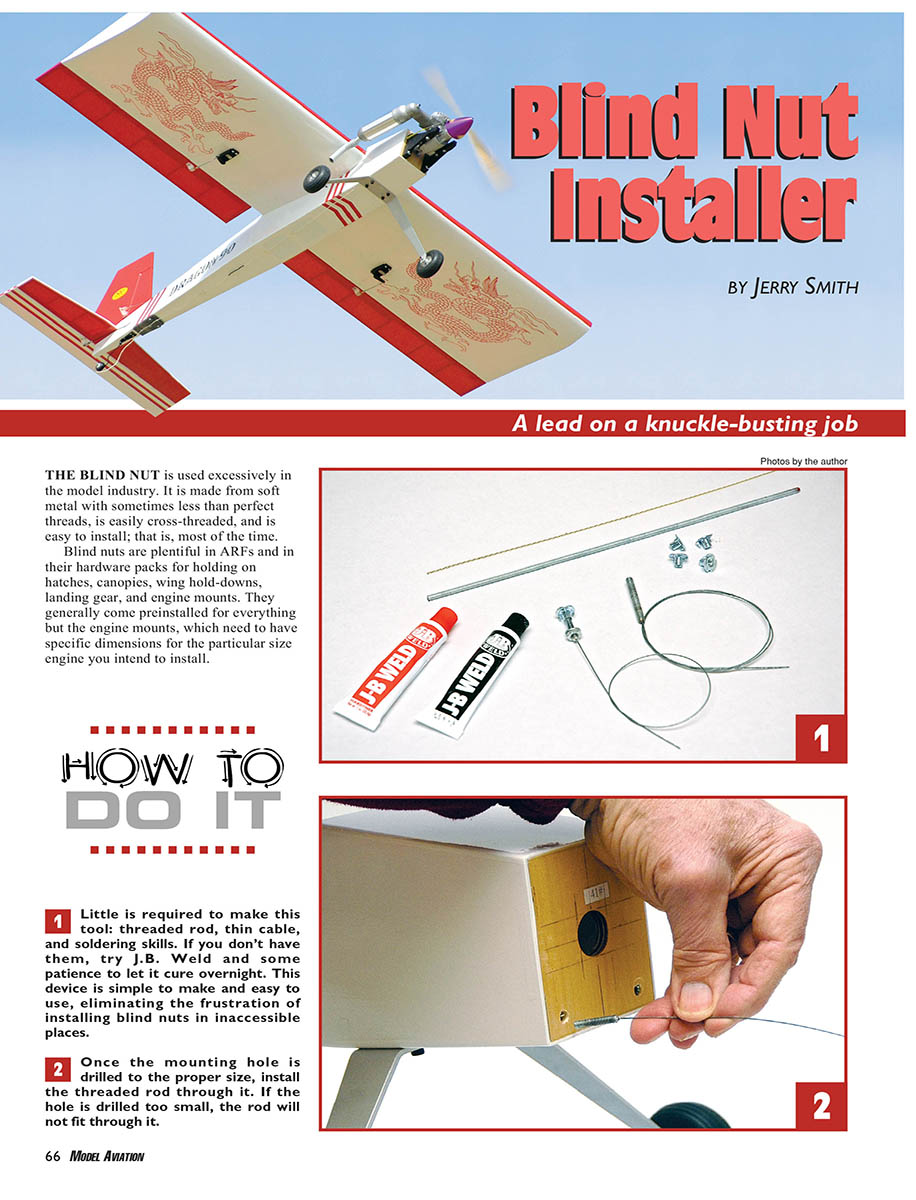
- Materials and construction
- You need a short piece of soft steel threaded rod, a length of thin steel cable, and soldering skills.
- Solder the cable to the rod using acid-core solder. If your soldering skills are not great, put a small dab of J.B. Weld on the end of the threaded rod, push the cable into it, and let it cure overnight. Either method completes the tool.
- If you prefer, J.B. Weld alone can work; just allow plenty of time for it to set.
- Prepare the hole
- Drill the mounting hole to the proper size. If the hole is drilled too small, the threaded rod will not fit.
- Assemble the tool and blind nut
- Feed the threaded rod and attached cable through the hole from the accessible side. Be careful not to let the opposite end of the cable pull through the hole; clamp it so it won't slip.
- Install a blind nut onto the threaded rod with several turns, leaving the blind nut against the threaded rod on the inaccessible side.
- Pull and seat the blind nut
- Grasp the cable and pull the threaded rod through the hole until the blind nut is against the backside of the firewall.
- Install a washer and a nut on the threaded rod and tighten them by hand to hold the blind nut in place.
- Final tightening and securing
- Use a wrench to tighten the nut, drawing the blind nut into place until it is firmly seated.
- If possible, apply glue to the blind nut to keep it in place when installing the bolt.
You will need a washer and a hex nut matching the thread size of the rod you are using to pull the blind nut into place. Threaded rod of different thread sizes can be purchased in 12-inch lengths at Ace Hardware and builder supply stores.
I used Sullivan Products cable; it was .056 inch in diameter and brass plated for easy soldering. You may find it in hobby shops and other outlets. Finding metric threaded rod is difficult, so I suggest sticking to U.S. standard thread with blind nuts and bolts, making replacements easier to obtain. Like most handy tools, the Blind Nut Installer will come in useful when you need it.
MA Jerry Smith [email protected]
Transcribed from original scans by AI. Minor OCR errors may remain.

