

Building Wingtips
By Bob Hunt
The details are what usually make one model stand out from others on the field. One of the most often overlooked details is wingtip design and execution. Finishing the end of a wing with a distinctive tip shape, which is also well crafted, adds a great deal of character to an airplane.
This photo-essay-style procedure shows an easy method for making a flat-plate-type wingtip.
Materials and tools
- Tip plate and tip rib
- Tip template or French curve
- Square
- 1/4"–3/8" balsa (5/16" recommended for rails)
- Balsa blocks for fillers
- Aliphatic resin (yellow woodworker's glue, e.g., Titebond)
- Cyanoacrylate (CA) for tack-gluing
- Clamps or T-pins
- #26 whittler's blade
- Small sanding block and professional emery boards
- Hobby gouge or router
- Spindle sanding drum (for lightening holes)
- Hobby knife
- Drill or cutting tool for starting lightening holes
Procedure
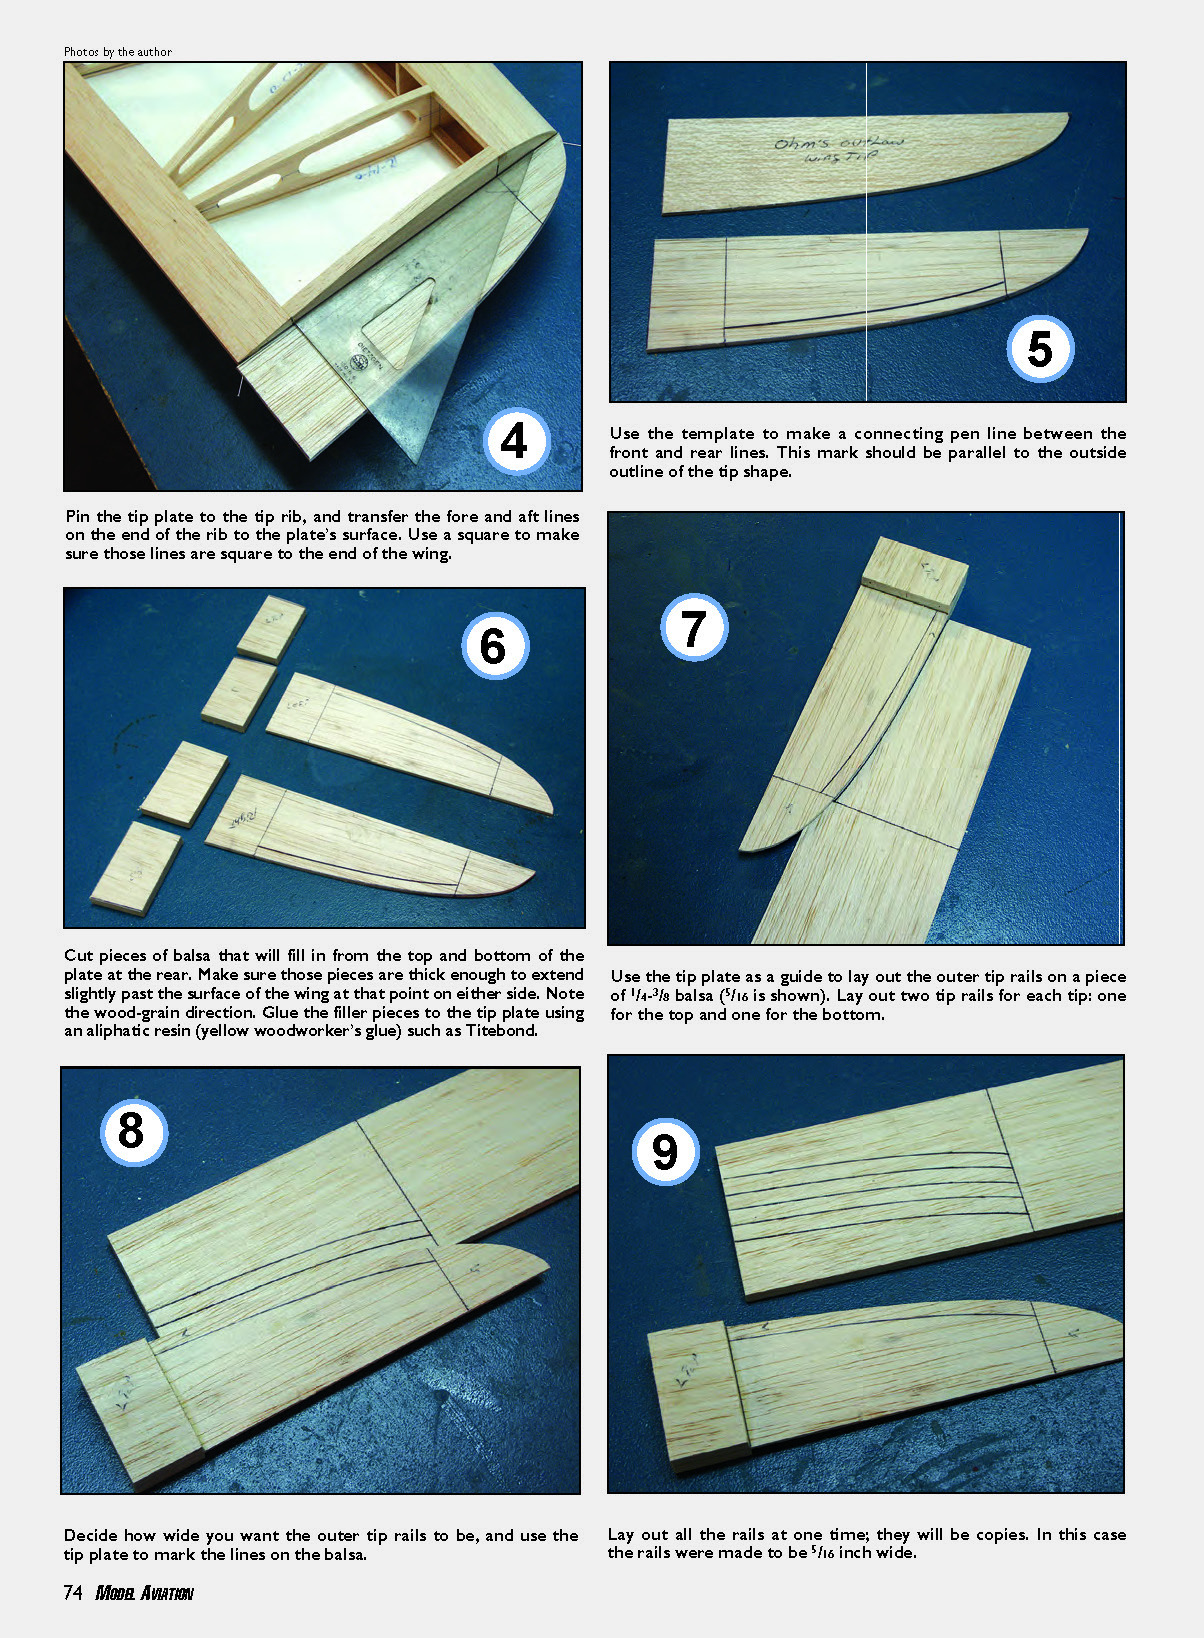
- Pin the tip plate to the tip rib. Transfer the fore and aft lines from the end of the rib onto the plate's surface. Use a square to ensure those lines are square to the end of the wing.
- Use the template to draw a connecting pen line between the front and rear lines. This mark should be parallel to the outside outline of the tip shape.
- Cut pieces of balsa to fill in from the top and bottom of the plate at the rear. Make sure these filler pieces are thick enough to extend slightly past the surface of the wing at that location on either side. Note the wood-grain direction. Glue the filler pieces to the tip plate using aliphatic resin (Titebond).
- Use the tip plate as a guide to lay out the outer tip rails on a sheet of 1/4"–3/8" balsa (5/16" shown). Lay out two tip rails for each tip: one for the top and one for the bottom. Decide how wide you want the outer tip rails to be and mark the lines on the balsa. In this example the rails were made 5/16" wide.
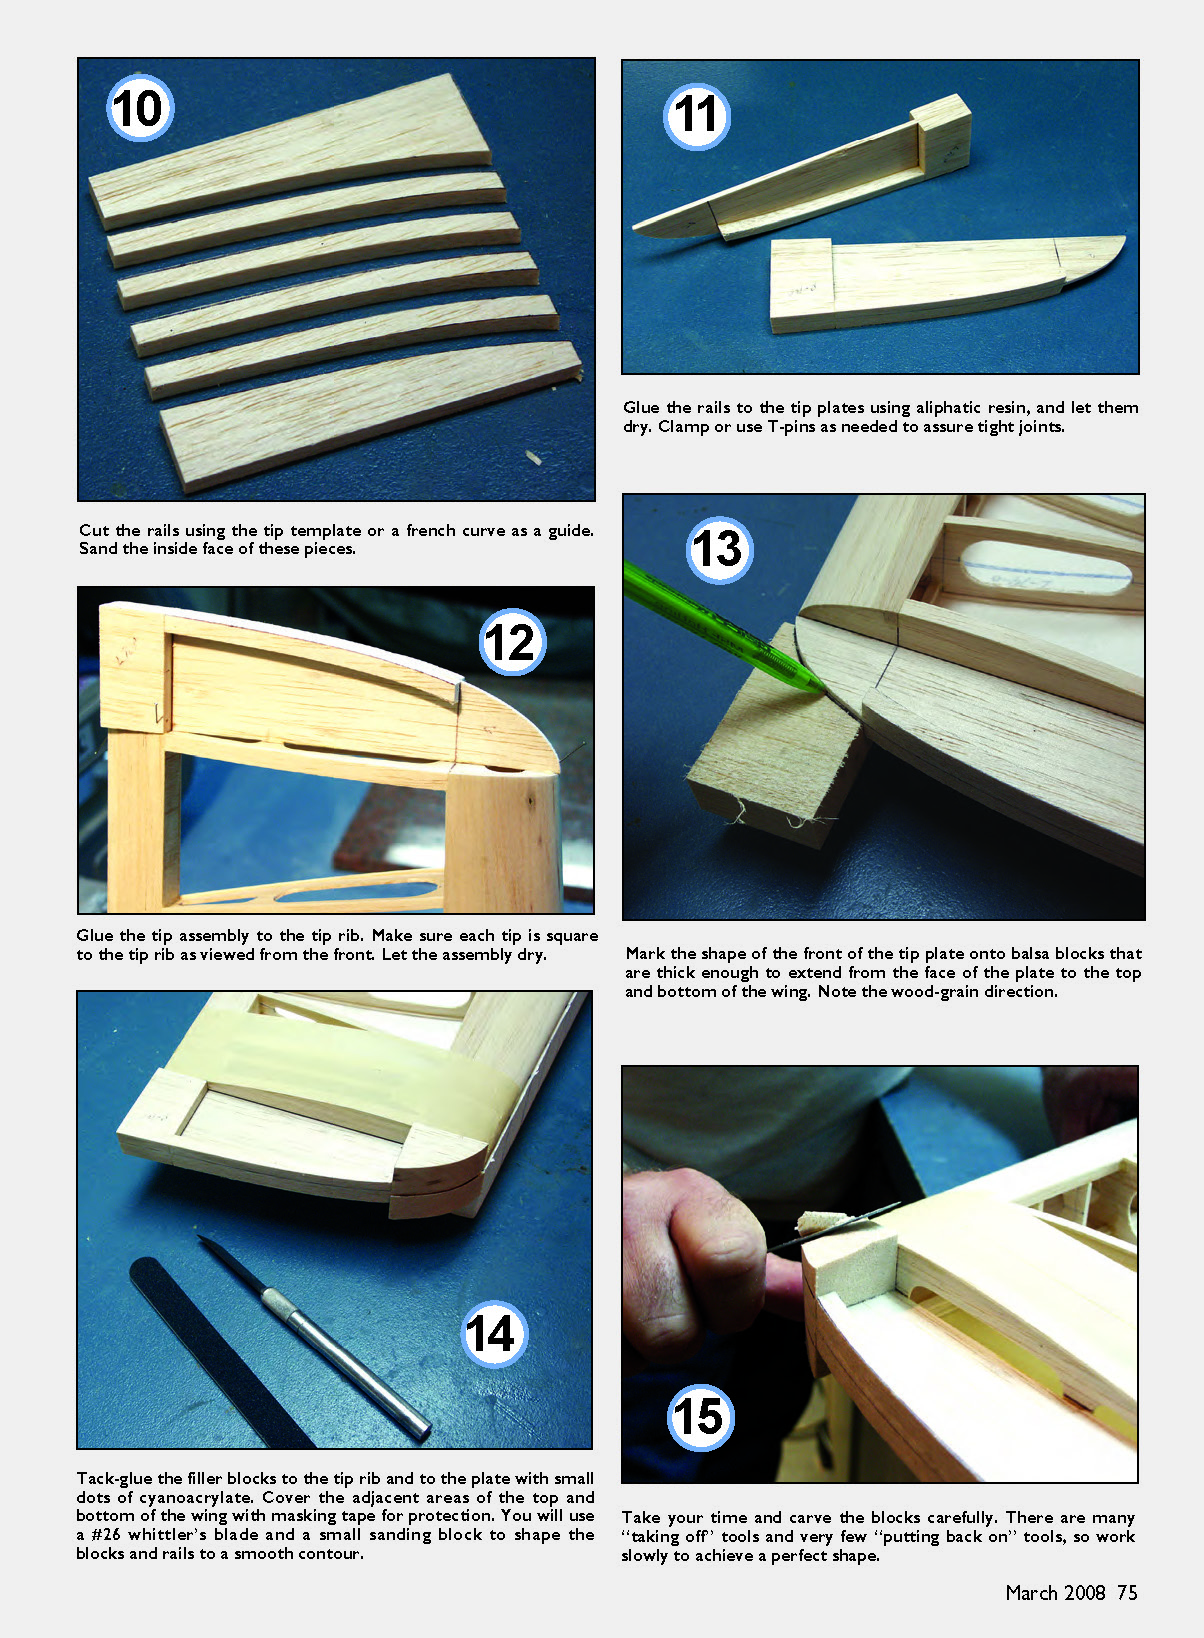
- Cut the rails using the tip template or a French curve as a guide. Sand the inside face of these pieces so they mate neatly to the plate and filler.
- Glue the rails to the tip plates with aliphatic resin and let them dry. Clamp or use T-pins as needed to ensure tight joints.
- Glue the completed tip assembly to the tip rib. From the front view, make sure each tip is square to the tip rib. Allow the assembly to dry fully.
- Mark the shape of the front of the tip plate onto balsa blocks thick enough to extend from the face of the plate to the top and bottom of the wing. Pay attention to wood-grain direction.
- Tack-glue the filler blocks to the tip rib and to the plate with small dots of CA. Cover adjacent areas of the top and bottom of the wing with masking tape for protection. You will use a #26 whittler's blade and a small sanding block to shape the blocks and rails to a smooth contour.
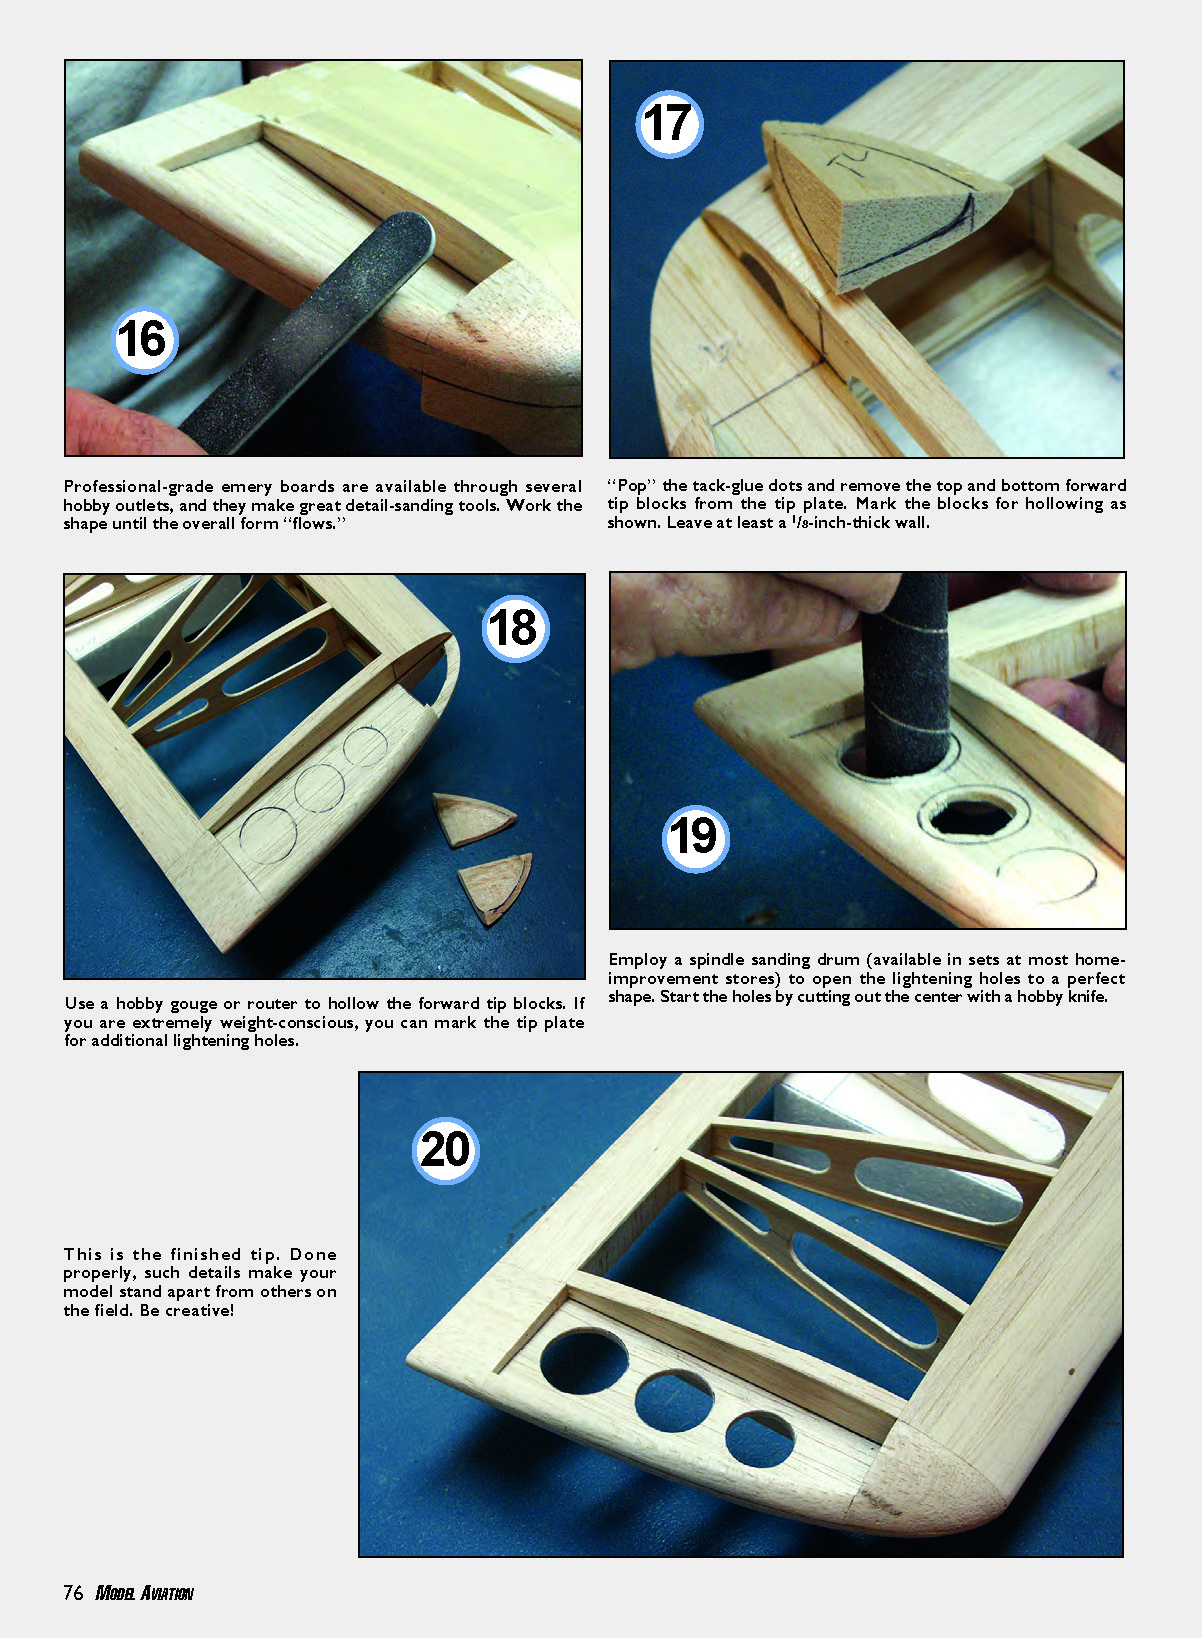
- Carve the blocks carefully. Work slowly — there are many "taking off" tools and very few "putting back on" tools. Use professional-grade emery boards or fine sanding tools for detail sanding. Continue until the overall form flows smoothly.
- Pop the tack-glue dots and remove the top and bottom forward tip blocks from the tip plate. Mark the blocks for hollowing as required; leave at least a 1/8" thick wall.
- Hollow the forward tip blocks with a hobby gouge or router. If weight is a concern, mark the tip plate for additional lightening holes. Start the holes by cutting out the center with a hobby knife, then employ a spindle sanding drum (available at home-improvement stores) to open the lightening holes to the final shape.
- Final sand and refine the shape until it flows with the wing. Be creative with the final contouring and finishes.
This is the finished tip. Done properly, such details make your model stand apart from others on the field.
Transcribed from original scans by AI. Minor OCR errors may remain.

