
CA cements and solvents - 2012/08
Bob Aberle <[email protected]>
Q552
Q552: I find that my CA cements tend to thicken and become unusable with time. I tried adding some CA solvent to the cement and it came back to its original consistency. It seems to work okay, but I’m afraid to put it to the test and actually use it on my airplanes. Do you know if this restored cement can be used reliably, and if not, what is the best way to keep CA cement over a long period of time so it will not thicken?
A552
Although I have some suggestions of my own, I asked this question of a true expert, Pat Tritle, who is a model airplane kit manufacturer and a columnist for Flying Models magazine. He gave his thoughts about this question and a related item; both use common acetone as the solvent.
Pat stores his CA cement in a refrigerator in a large 12- to 16-ounce bottle. He dispenses this refrigerated cement first into a 2-ounce bottle and lets that come up to room temperature. From there he transfers the CA into a 1-ounce bottle for actual use. If the CA tends to thicken in the heat of summer, he thins it with a little acetone.
Because acetone is a solvent, you must be careful how much you use. That’s why it is good to try the CA on a test strip to make sure it still cures properly when the accelerator is applied.
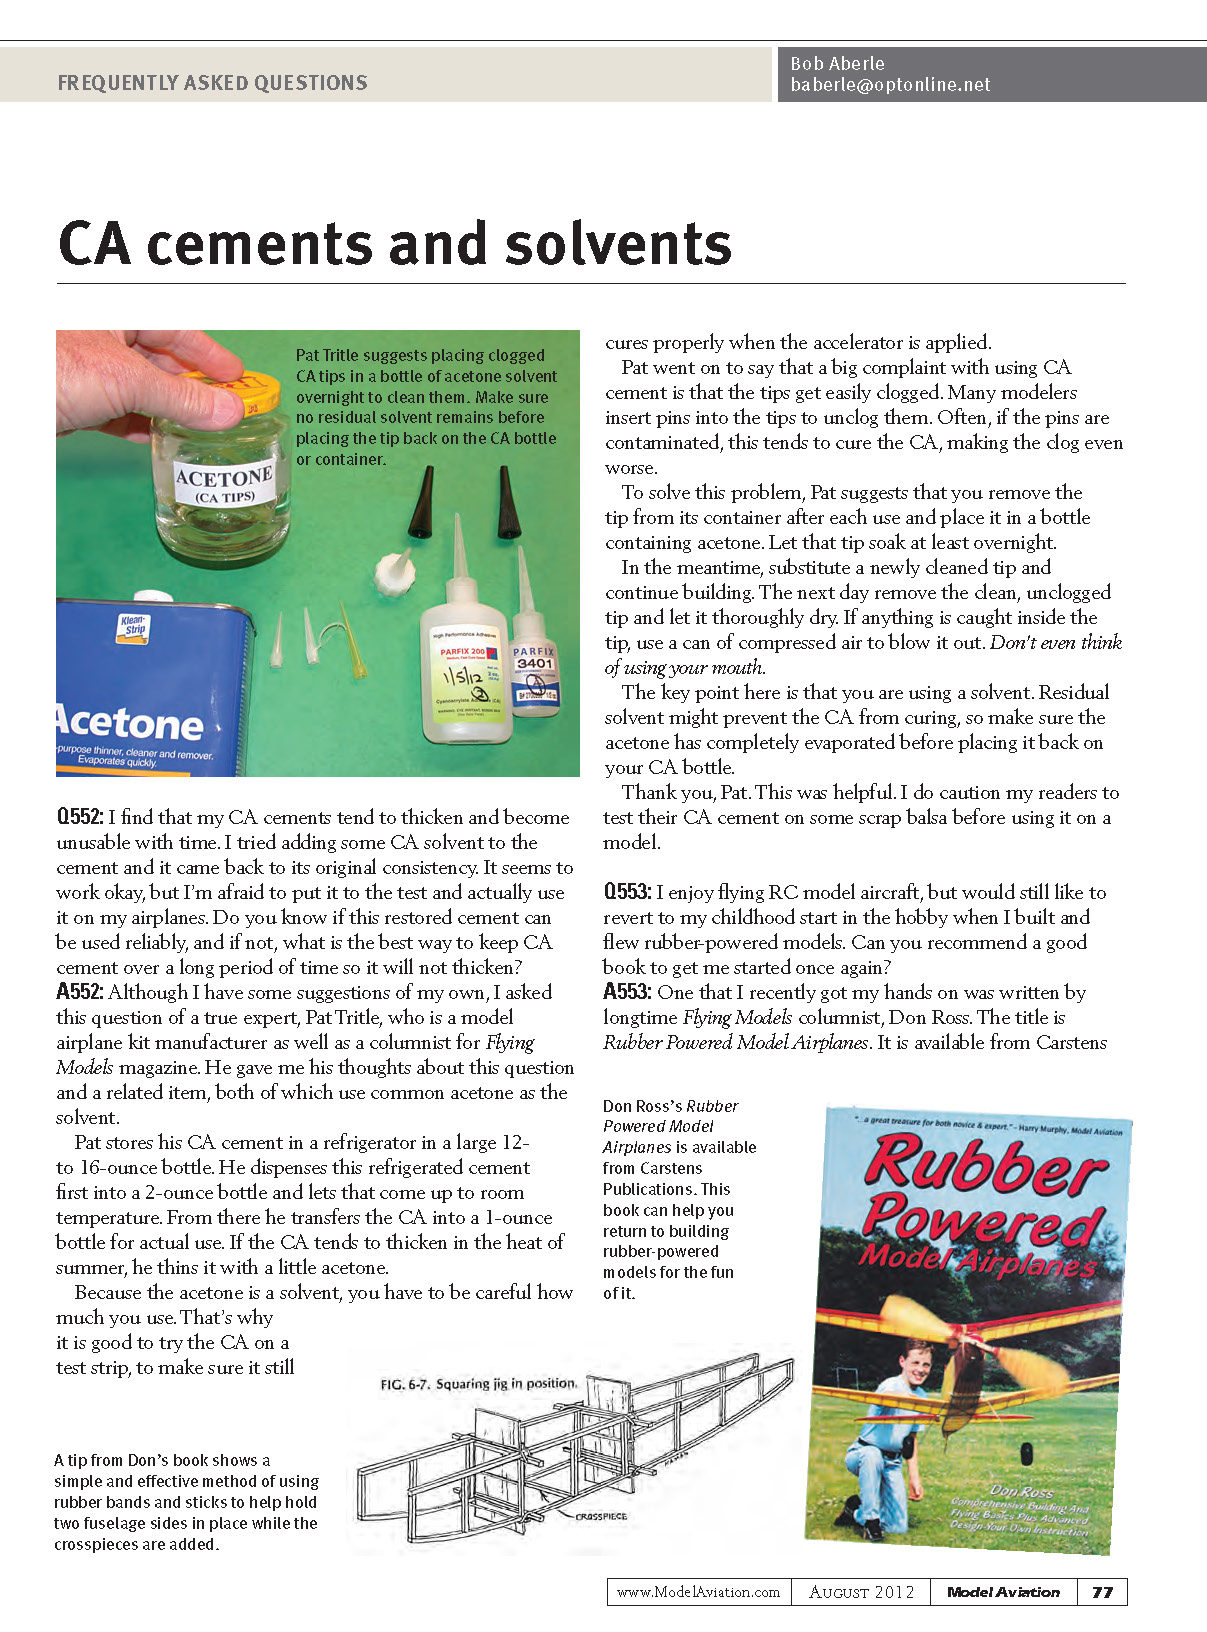
A big complaint with using CA cement is that the tips get easily clogged. Many modelers insert pins into the tips to unclog them. Often, if the pins are contaminated, this tends to cure the CA and make the clog even worse.
To solve this problem, Pat suggests removing the tip from its container after each use and placing it in a bottle containing acetone. Let that tip soak at least overnight. In the meantime, substitute a newly cleaned tip and continue building. The next day remove the clean, unclogged tip and let it thoroughly dry. If anything is caught inside the tip, use a can of compressed air to blow it out. Don’t even think of using your mouth.
The key point is that you are using a solvent. Residual solvent might prevent the CA from curing, so make sure the acetone has completely evaporated before placing the tip back on your CA bottle.
I thank Pat for his help. I also caution readers to test their CA cement on some scrap balsa before using it on a model.
Q555
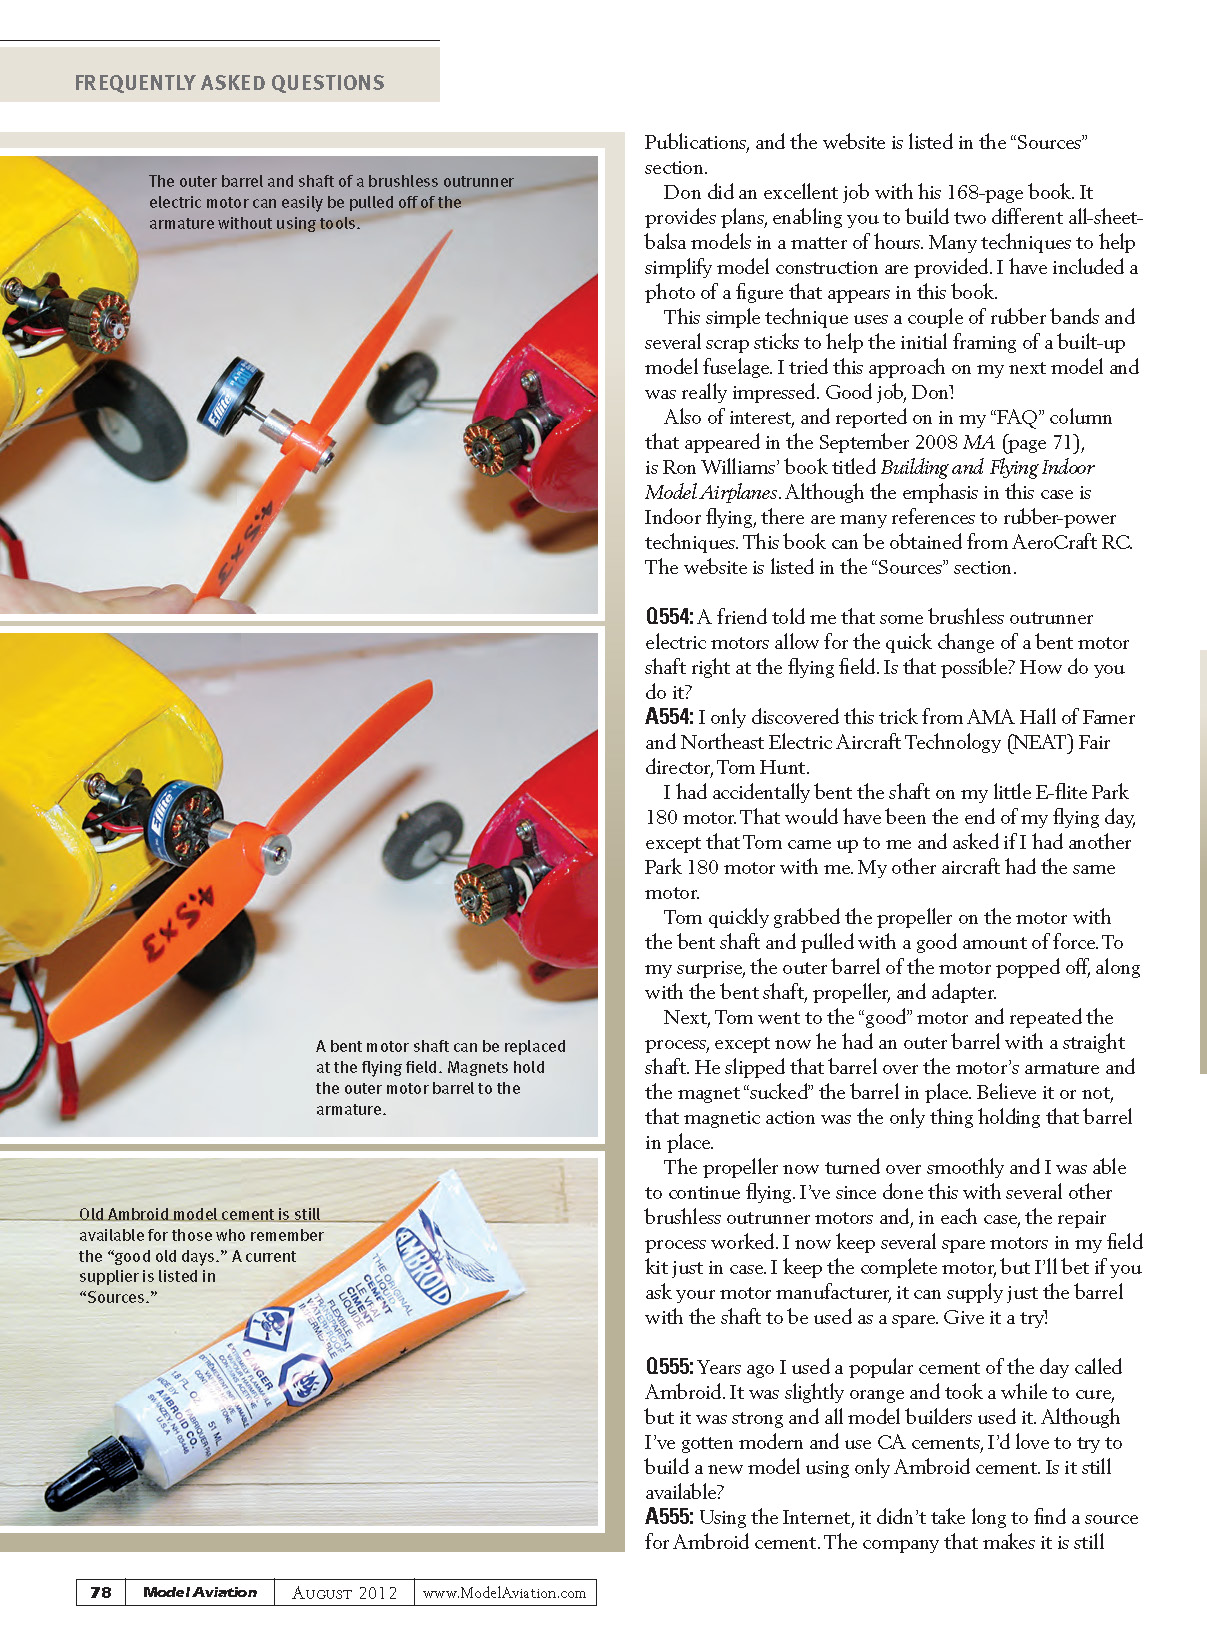
Q555: Years ago I used a popular cement of the day called Ambroid. It was slightly orange and took a while to cure, but it was strong and all model builders used it. Although I've gotten modern and use CA cements, I'd love to try to build a new model using only Ambroid cement. Is it still available?
A555
Using the Internet, it didn't take long to find a source for Ambroid cement. The company that makes it is still alive and well in the town of Swanzey, New Hampshire.
I found a distributor that carries the 3.2-ounce tubes of Ambroid for $5 each. With a minimum shipping and handling charge of $5, it isn't cheap, but it is comparable to a 2-ounce bottle of CA cement.
The company that distributes it is Northwoods Canoe Company of Atkinson, Maine. See the Sources section for contact details.
Q556
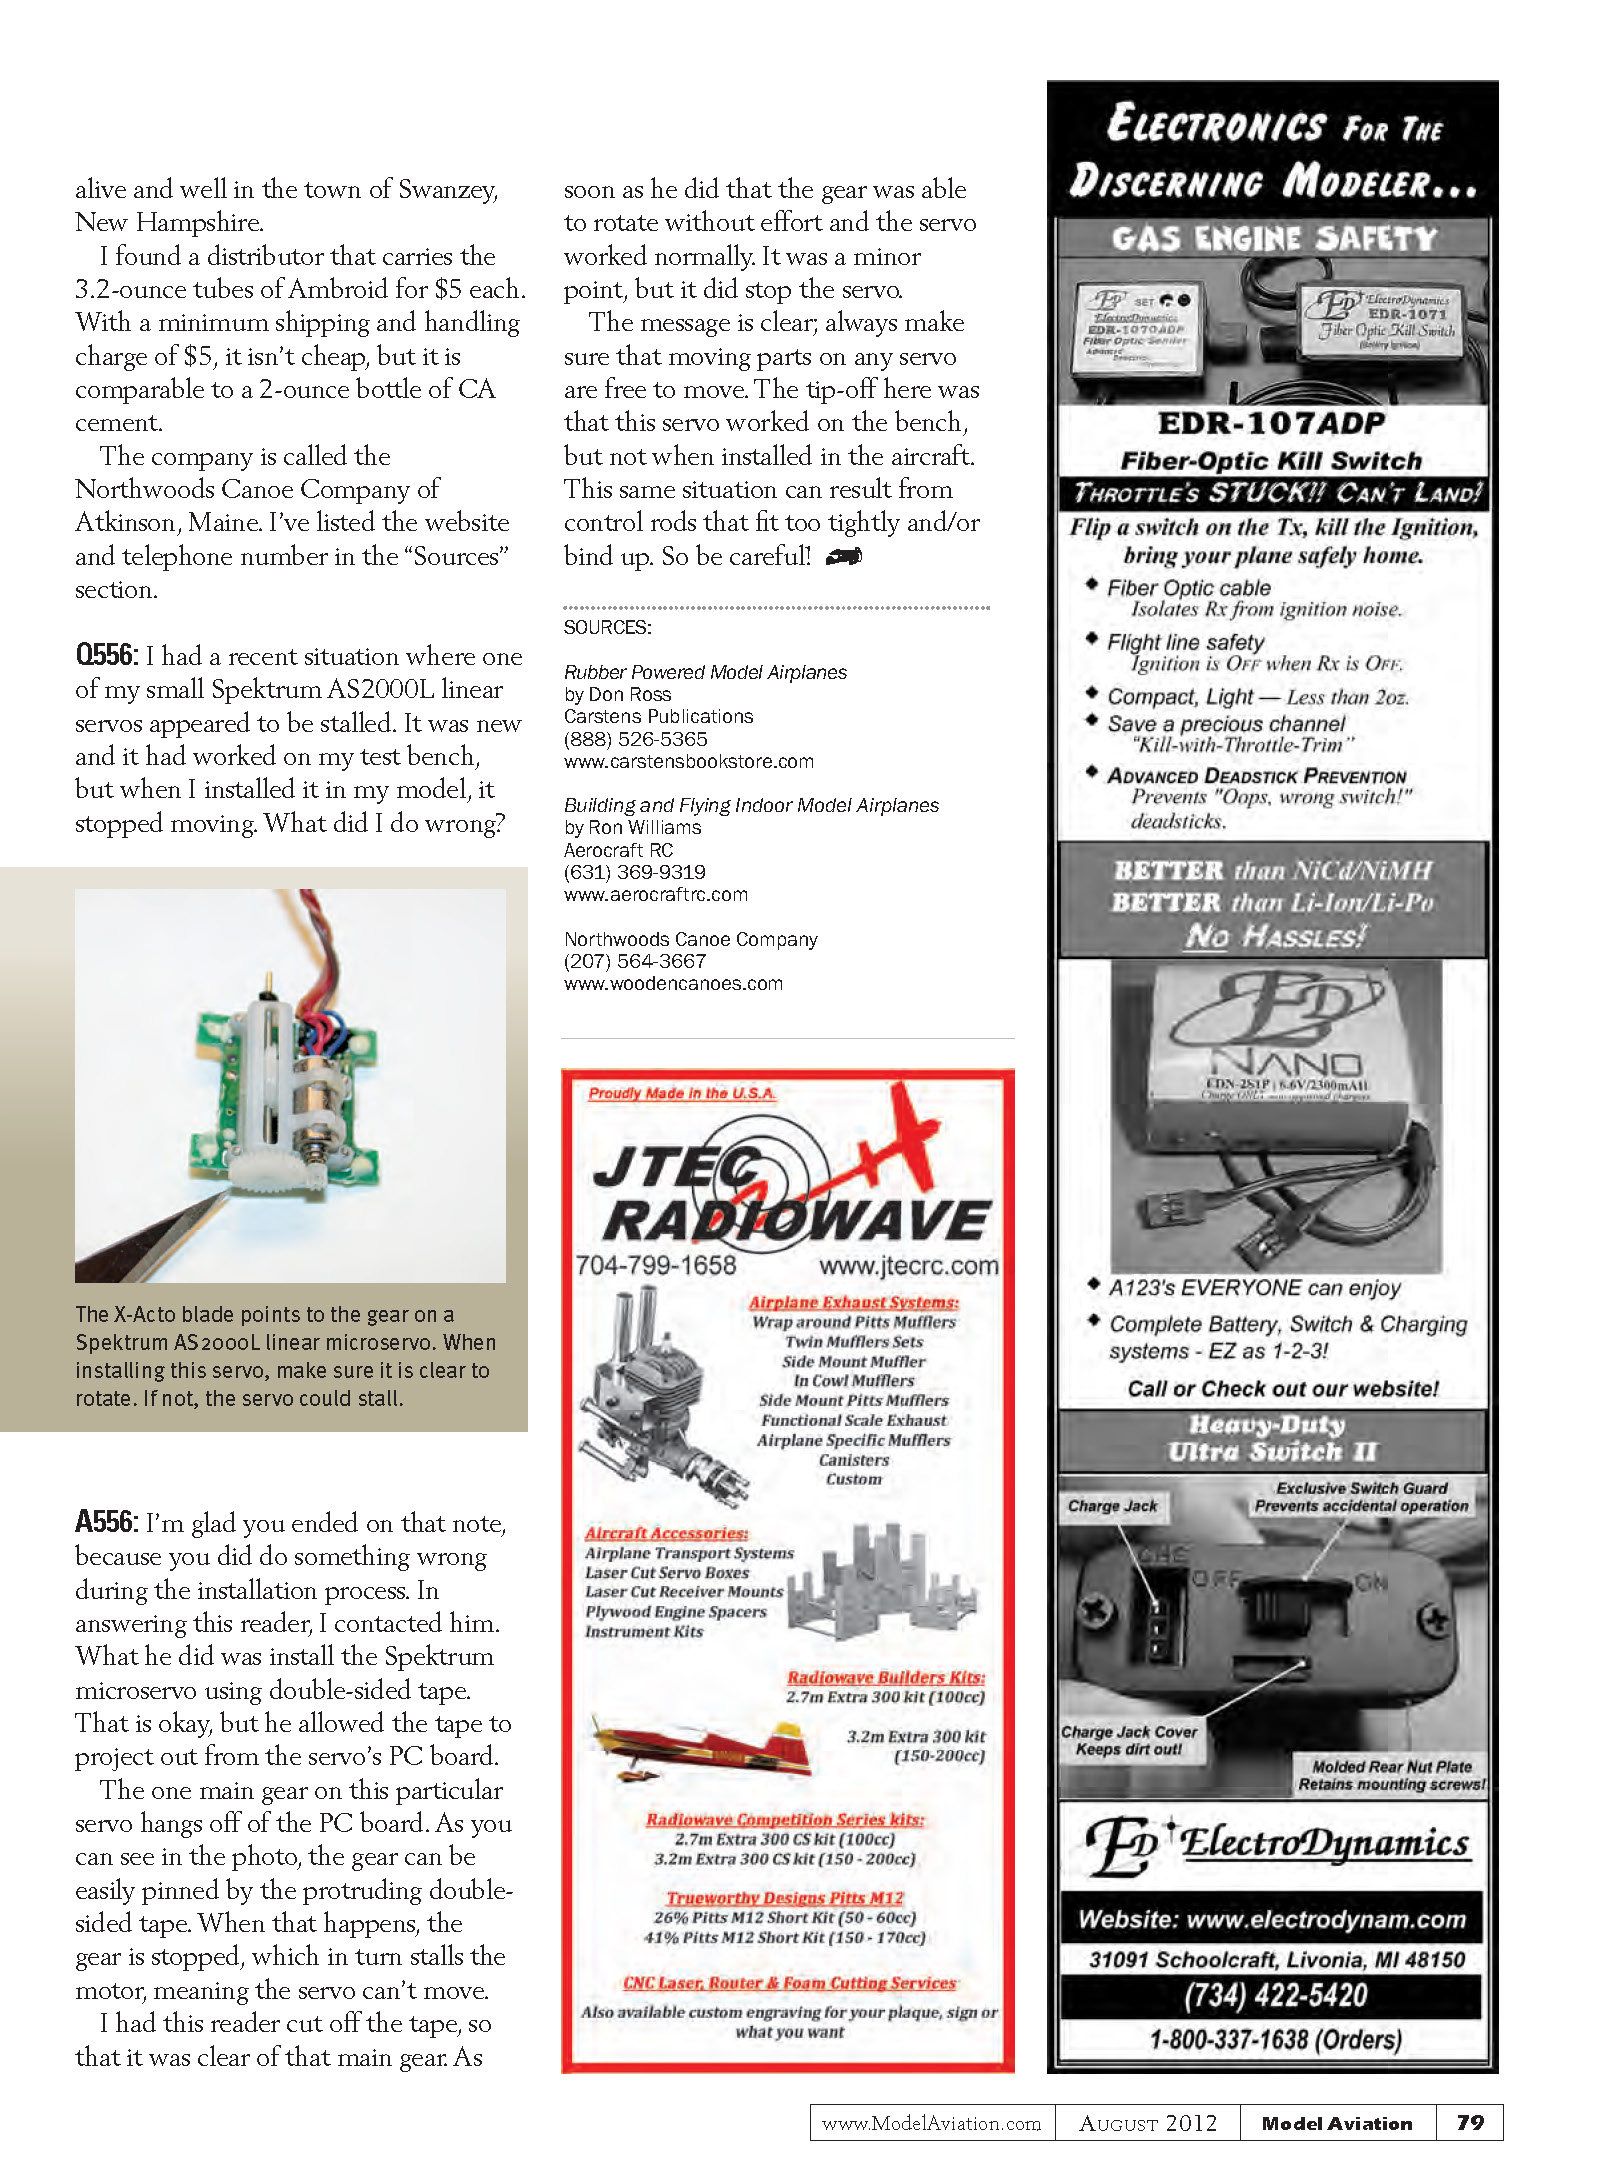
Q556: I had a recent situation where one of my small Spektrum AS2000L linear servos appeared to be stalled. It was new and it had worked on my test bench, but when I installed it in my model, it stopped moving. What did I do wrong?
A556
You did something wrong during the installation process. I contacted the reader and discovered he had installed the Spektrum microservo using double-sided tape. That is acceptable, but he allowed the tape to project out from the servo's PC board.
The main gear on this particular servo hangs off the PC board. The gear can be easily pinned by protruding double-sided tape. When that happens, the gear is stopped, which stalls the motor and prevents the servo from moving. I had the reader cut off the projecting tape so it was clear of the main gear. As soon as he did that, the gear rotated freely and the servo worked normally. It was a minor point, but it stopped the servo.
The message is clear: always make sure that moving parts on any servo are free to move. The tip-off here was that the servo worked on the bench but not when installed in the aircraft. The same situation can result from control rods that fit too tightly or bind. So be careful.
SOURCES
- Rubber Powered Model Airplanes — Don Ross
Carstens Publications (888) 526-5365 www.carstensbookstore.com
- Building and Flying Indoor Model Airplanes — Ron Williams
Aerocraft RC (631) 369-9319 www.aerocraftrc.com
- Northwoods Canoe Company
(207) 564-3667 www.woodencanoes.com
Transcribed from original scans by AI. Minor OCR errors may remain.

