

Capturing Models Digitally
Mark Lanterman
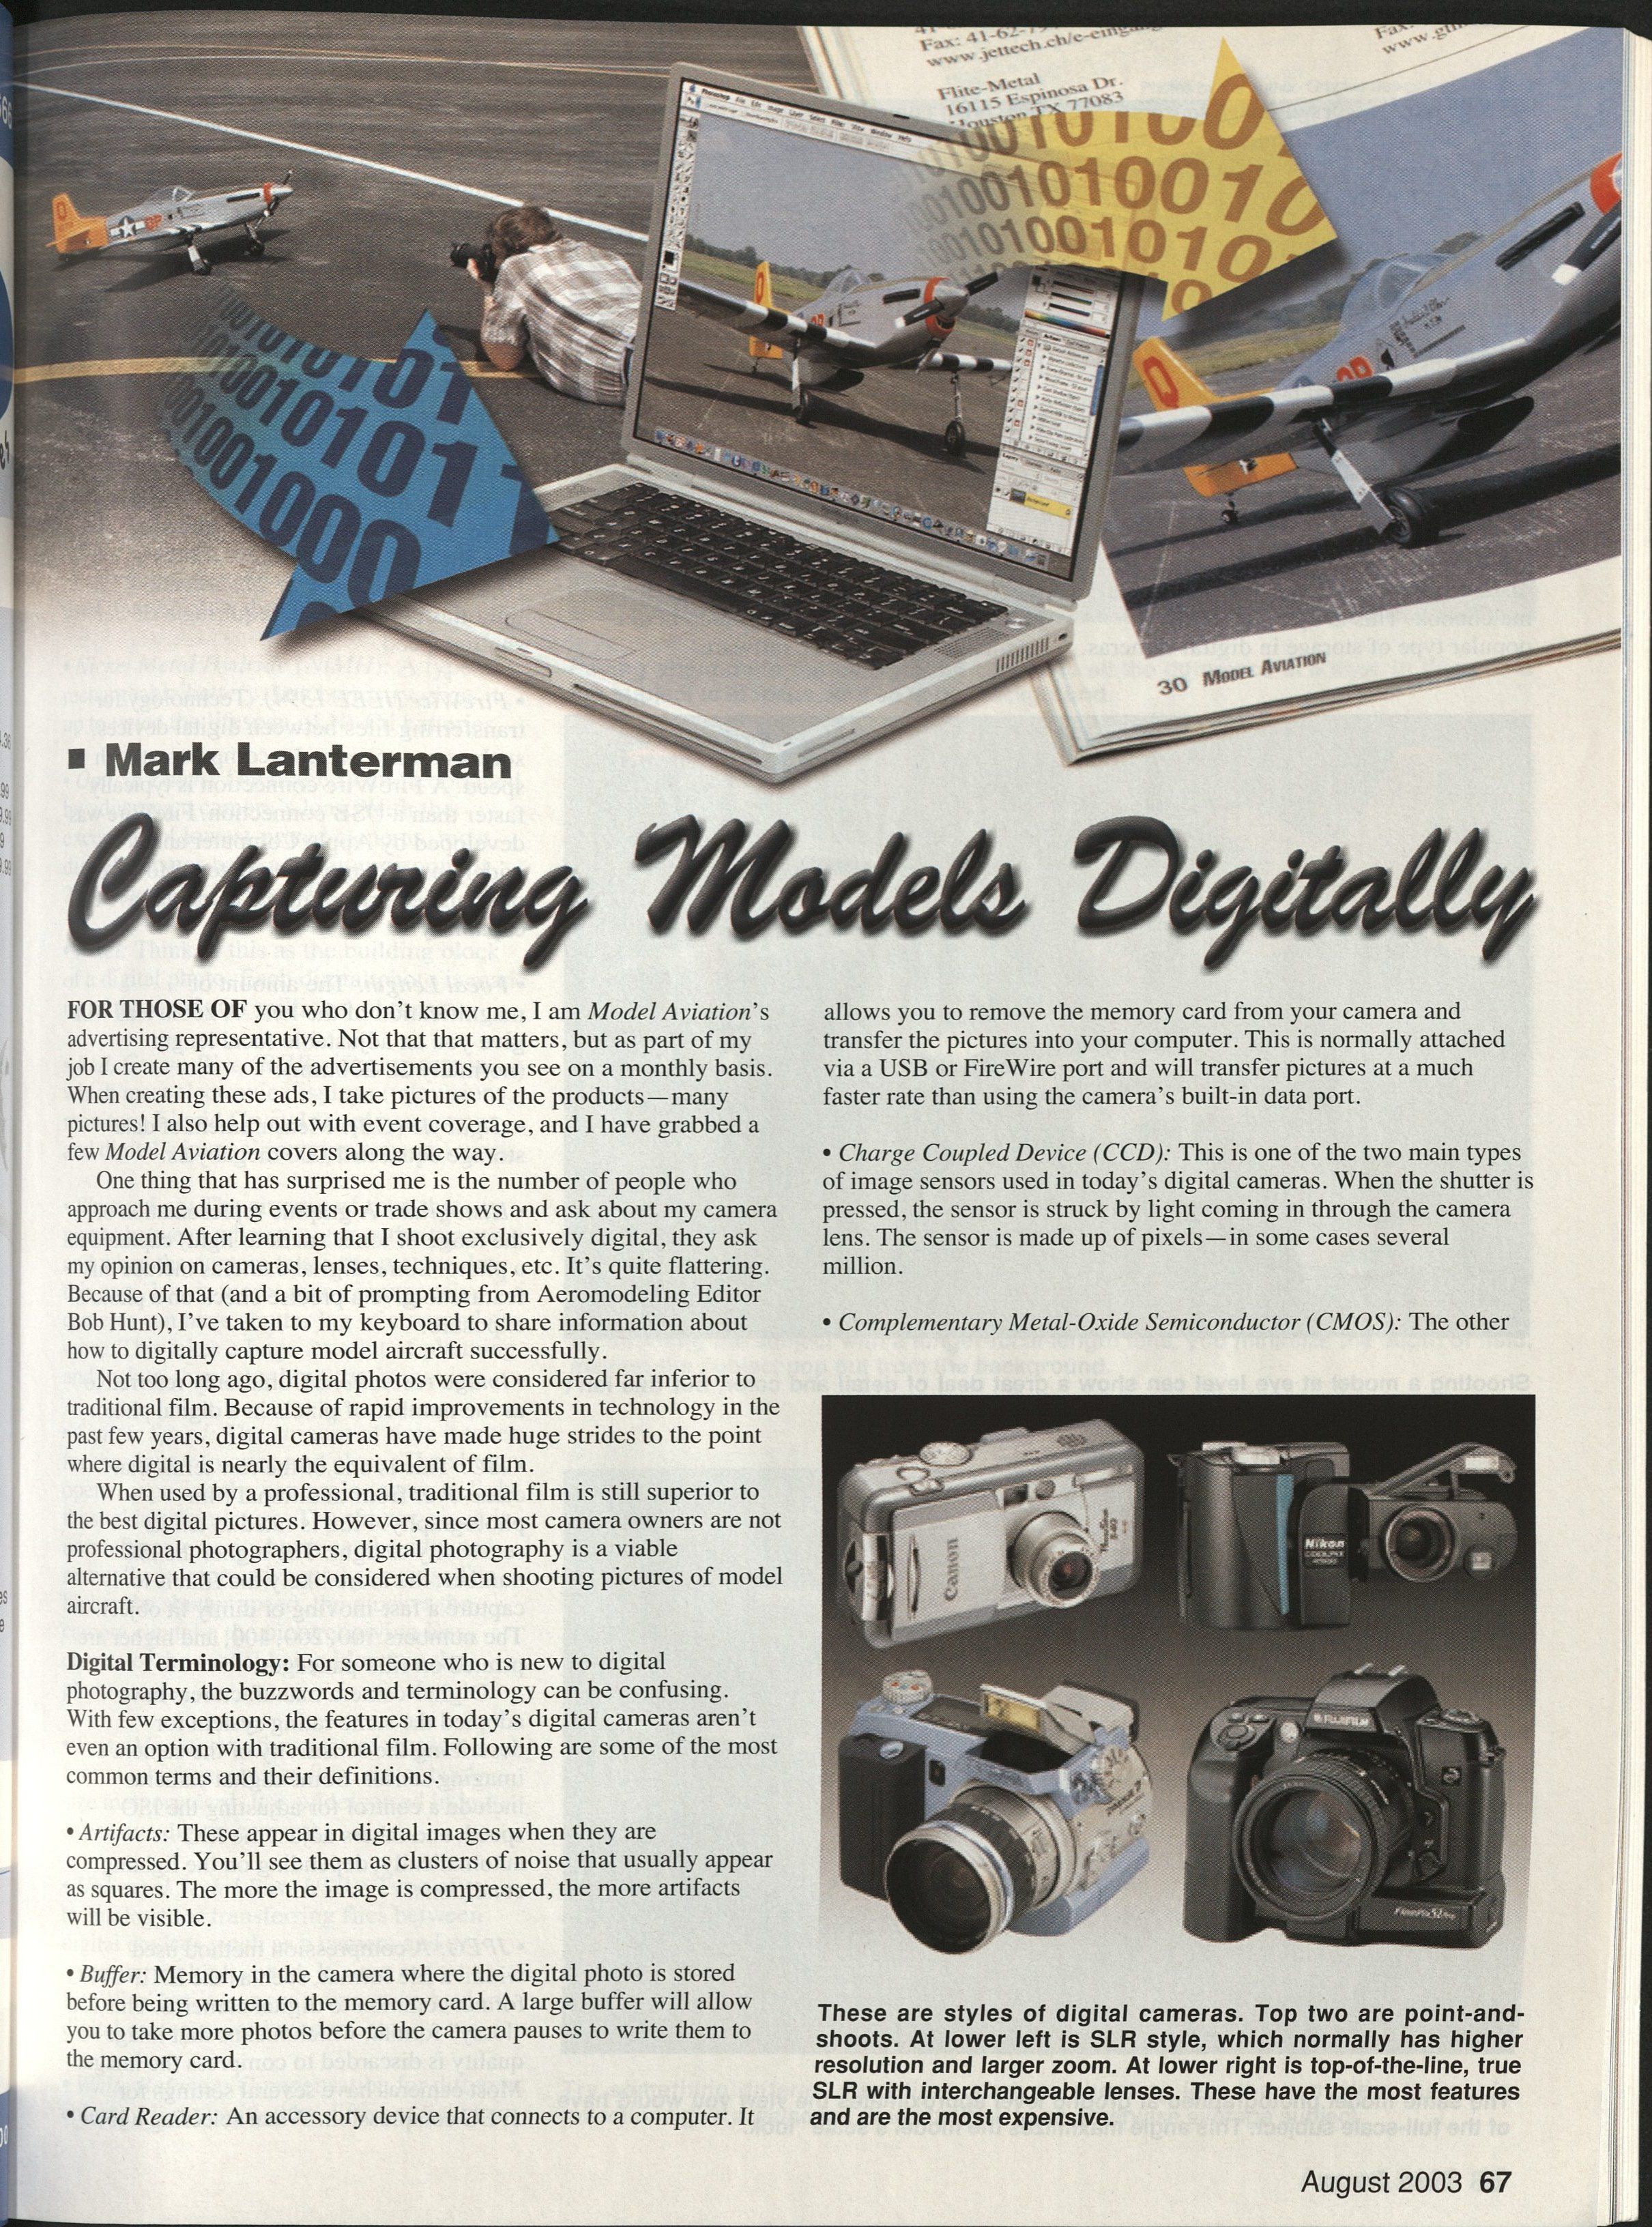
For those of you who don't know me, I am Model Aviation's advertising representative. Not that that matters, but as part of my job I create many of the advertisements you see on a monthly basis. When creating these ads, I take pictures of the products—many pictures! I also help out with event coverage, and I have grabbed a few Model Aviation covers along the way.
One thing that has surprised me is the number of people who approach me during events or trade shows and ask about my camera equipment. After learning that I shoot exclusively digital, they ask my opinion on cameras, lenses, techniques, etc. It's quite flattering. Because of that (and a bit of prompting from Aeromodeling Editor Bob Hunt), I've taken to my keyboard to share information about how to digitally capture model aircraft successfully.
Not too long ago, digital photos were considered far inferior to traditional film. Because of rapid improvements in technology in the past few years, digital cameras have made huge strides to the point where digital is nearly the equivalent of film.
When used by a professional, traditional film is still superior to the best digital pictures. However, since most camera owners are not professional photographers, digital photography is a viable alternative that could be considered when shooting pictures of model aircraft.
Digital Terminology
- Artifacts: These appear in digital images when they are compressed. You'll see them as clusters of noise that usually appear as squares. The more the image is compressed, the more artifacts will be visible.
- Buffer: Memory in the camera where the digital photo is stored before being written to the memory card. A large buffer will allow you to take more photos before the camera pauses to write them to the memory card.
- Card Reader: An accessory device that connects to a computer. It allows you to remove the memory card from your camera and transfer the pictures into your computer. This is normally attached via a USB or FireWire port and will transfer pictures at a much faster rate than using the camera's built-in data port.
- Charge Coupled Device (CCD): One of the two main types of image sensors used in today's digital cameras. When the shutter is pressed, the sensor is struck by light coming in through the camera lens. The sensor is made up of pixels—in some cases several million.
- Complementary Metal-Oxide Semiconductor (CMOS): The other of the two main types of image sensors used in today's digital cameras. Although it's not as widely used as CCD sensors, it works much the same way.
- Cyan, Magenta, Yellow, Black (CMYK): A process used in printing, sometimes referred to as four-color process. Model Aviation (as well as most other magazines) is printed using this technique. All digital photos must be converted to this process to print correctly.
- CompactFlash: The most common type of memory card. There are two kinds: Type I and Type II. Although they vary in thickness, both are roughly the size of a matchbook. This is by far the most popular type of storage in digital cameras. They also come in a wide variety of sizes, as large as 1 gigabyte (1,000 megabytes).
- Depth of Field (DOF): The portion of the image which is in focus. The shorter the focal length, the greater the DOF. The camera's f-stop also affects the DOF. A larger opening (smaller f-stop) will give a short DOF, and a smaller opening (larger f-stop) will give a larger DOF.
- Digital Zoom: Magnification obtained by electronically enlarging the photo. Many cameras can do this, but it should be used only when no other options exist. Enlarging a photo in this manner causes extreme loss of image quality, resulting in jagged, fuzzy photos. In most cases the photo can be enlarged with much better results using computer software.
- Dots Per Inch (dpi): A measurement of a digital camera, printer, monitor, etc., used to describe its resolution. Most computer monitors are 72 dpi, and most printed photos (such as in this magazine) are 300 dpi. The higher the dpi, the greater the resolution of the device.
- F-stop: Inside the camera's lens is an aperture that works just like the iris in your eye. The size of the opening can be changed automatically or manually, depending on the camera. The amount of the opening is given a number, or f-stop. Lower numbers (e.g., f-2.8) will allow more light through the lens, allowing you to take the shot using a higher shutter speed. Higher numbers (e.g., f-22) will allow less light through the lens, requiring a slower shutter speed.
- FireWire (IEEE 1394): Technology for transferring files between digital devices, such as a camera and a computer, at high speed. A FireWire connection is typically faster than a USB connection. FireWire was developed by Apple Computer and is widely used in many computers. However, only higher-priced digital cameras have this capability.
- Focal Length: The amount of magnification of the lens. A zoom lens will give you an adjustable focal length (normally 28–200mm).
- Gigabyte (GB): Measurement of data storage equal to 1,000 megabytes.
- Histogram: A graphic representation of the range of tones (dark to light) captured in a photo. Some digital cameras include this feature to give a precise check on a photo's exposure.
- Image resolution: Commonly referred to as the number of pixels in a digital photo.
- ISO: This is one of the few terms that came over from traditional film photography. Film is rated to tell its sensitivity to light. The higher the ISO number, the more likely the film is to capture a fast-moving or dimly lit object. The numbers 100, 200, 400, and higher are printed on film packages. Digital-camera manufacturers have adopted the same rating system for describing the sensitivity of the camera's imaging sensor. Some digital cameras include a control for adjusting the ISO speed, and others adjust the ISO automatically, depending on the lighting conditions.
- JPEG: A compression method used within a file format, such as the EXIF-JPEG format common to digital cameras. This is a "lossy" format, which means that image quality is discarded to compress the image. Most cameras have several settings for JPEG compression. When selecting a low-compression (high-quality) setting, the loss of image quality is not as noticeable.
- Media: The storage vehicles on which digital photos are recorded. Digital photography storage media include CompactFlash and SmartMedia cards, Sony’s Memory Stick, and CDs and DVDs.
- Megabyte (MB): A measurement of data storage equal to 1,024 kilobytes.
- Megapixel: A measurement of a camera’s imaging sensor. One megapixel equals one million pixels.
- Memory Stick: This chewing-gum-size memory card was developed by Sony and is used in most of its digital cameras.
- Nickel Metal Hydride (NiMH): A type of rechargeable battery. Its chemistry gives it up to twice the lifespan of Ni-Cd batteries.
- Optical Zoom: The magnification obtained by adjusting a camera’s lens. With the exception of the lowest-priced cameras, most digital cameras have a minimum zoom of 2x. Some go as high as 10x.
- Pixel: Think of this as the building block of a digital photo. Each digital photo is made up of thousands (or millions) of these.
- Red, Green, Blue (RGB): The system in which most electronic displays (televisions, monitors, LCD screens, and digital cameras’ imaging sensors) work.
- Shutter Lag: The amount of time that passes between when you press the trigger and when the camera takes the picture. In this case, less is more; many inexpensive cameras can have shutter lag of a second or more. This takes a huge amount of planning and luck to shoot anything that’s moving.
- Shutter Speed: The amount of time it takes for the shutter to open and close. The shutter opens, exposing the camera’s sensor to light, thus taking the picture. The shutter speed is normally automatic, but it can be adjusted manually on more advanced cameras. The higher the shutter speed, the quicker the camera can take the picture, giving less chance of the model being blurry in the photo.
- SmartMedia: Another type of storage format which is a wafer-thin, matchbook-size memory card. It is widely used in less-expensive digital cameras.
- Universal Serial Bus (USB): Technology for transferring files between digital devices, such as a camera and a computer, at high speed. It’s not as fast as FireWire, but it is more commonly used in digital cameras, card readers, etc.
- White Balance: Compensation for different colors of light emitted by different light sources (including the sun). Not all digital cameras have this, but it is a great feature to have. If you've ever taken indoor photos and had them come out with a green or blue tint, using white balance can compensate for this and produce natural tones.
Advantages of Digital Photography
- Digital photography gives immediate results. Almost all digital cameras on the market today have Liquid Crystal Display (LCD) screens to give you immediate feedback on your photos. Most LCD screens show the image in real time, allowing you to compose and shoot without having to look through a tiny viewfinder. The screen also allows you to play back previously taken images so you can make sure you have the shot you want before leaving for home.
Since there's no film developing with digital photos, the images are ready to be uploaded to the computer as soon as you arrive home. There they can be cropped, edited, and printed within minutes.
- Digital photography can offer outstanding control over your images. As you become more familiar with your digital camera, you can explore features such as white balance, ISO sensitivity, fill flash, and more. You can do all of this by pushing a few buttons or rotating a few controls. And since digital cameras give immediate results, you'll know instantly whether or not your experiment worked.
Once the files are transferred to your computer, photo-editing software will give you the chance to sharpen and enhance your photos. A high-end software package such as Photoshop can give you the ability to add outstanding special effects to your pictures.
- Digital photography lets you shoot as much as you like. The only limits are the size of your memory card and the life of your batteries. With a couple of good-size 64 MB, 128 MB, or larger memory cards and a couple sets of rechargeable batteries, you can literally shoot all day long, taking hundreds of pictures without stopping.
- Digital photography is more affordable than film in the long run. The initial cost of getting started in digital photography is more than traditional film. A good digital camera, a few sets of rechargeable batteries, and a couple of memory cards can cost $1,000 or more. However, you have all you need once you purchase these items. With digital, you basically spend everything up front. With film, you pay the cost of film, the cost of developing, and the cost of making prints during the life of the equipment.
Choosing a Digital Camera
There are hundreds of digital cameras out there, from simple point-and-shoot models up to expensive 35-millimeter (mm) SLR (Single Lens Reflex) equivalents with interchangeable lenses.
Which one is right for you? It depends on two things: the type(s) of photos you want to take and what they'll be used for. Types of photos are as follows.
- Ground Shots: Any shot where you can get close to the subject; e.g., a model sitting on the ground, someone posing with a model, shots of subjects in the pits, etc. Most digital cameras can adequately take ground shots. Being close to the subject eliminates the need for a large zoom. These photos are normally taken outside, so white balance is not as critical. There's usually not a great deal of action in these pictures, so a high ISO or high shutter speed may be unnecessary.
- Action Shots: As the name implies, these are photos in which the subject is moving; e.g., a model taking off or landing, action in the pits, etc. These pictures require a bit more in a camera. Since the subject is in motion, higher shutter speeds and higher ISO settings are required to "freeze" the scene. If you're photographing a model landing or taking off, you'll need a bit of zoom since you won't be very close to the aircraft. These photos will normally be taken outside, so white balance may not be critical. You'll need a camera with a minimum of shutter lag to help capture the moment.
- Flying (or Flight) Shots: These are photos in which the model is flying in the air, usually at full speed and often at a fair distance from the camera. This is where you need the biggest zoom lens you can find. I recommend taking flying shots with a minimum lens of 200mm. You'll need a camera with minimum shutter lag, higher shutter speeds, and higher ISO settings.
- Miscellaneous Shots: This includes shots of indoor free flight and electric models, museums, trade shows, and club meetings. For such photos you need a little bit of everything. Since these environments are poorly lit, high ISOs (or a flash) are mandatory. Zoom can help you "reach out" and fill the frame with the subject. Since indoor venues contain a wide variety of light sources (incandescent, fluorescent, halogen, etc.), the biggest feature you'll need is white balance; it will ensure that what you capture on film will have the same color balance as what you see with your eyes.
What will you do with the photos? The medium through which you share your photos will have a bearing on the resolution (number of megapixels) your digital camera should have.
If you're shooting only to send photos via e-mail or post them on the Internet, most any resolution of camera will do. Most computer screens run at a resolution of 72 dpi, so a small 2-megapixel camera can take a photo that is larger than a computer monitor can display.
However, if you're going to print your photos on one of today's higher-quality color printers, in a club newsletter, or in a magazine, things change quite a bit. The biggest difference is that the camera's resolution is more critical.
Although there are a few exceptions, the general rule is that to get the best-quality print from your photo, it must be printed at a resolution of 300 dpi. To figure out how big a photo from a camera can be requires a little math.
I'll use a 3-megapixel camera to illustrate. Most cameras of this resolution are roughly 2,048 pixels wide and 1,536 pixels high (refer to the camera's specifications to learn the sensor's size). To figure the largest high-resolution photo the camera can produce, divide the width by 300 and divide the height by 300. In this case you end up with a 300 dpi photo that is roughly 5 x 7 inches. The larger the camera's sensor, the bigger this highest-resolution image can be.
If you want to print larger photos, such as for an 8 x 11-inch magazine cover, you'll need to shoot with a minimum of a 5- or 6-megapixel camera. As you'll read later, the camera I use to shoot magazine covers can take a high-resolution photo that is roughly 11 x 14 inches.
Sometimes computer software can enlarge digital photos without losing too much of the original quality. Programs such as Photoshop and Genuine Fractals can easily enlarge photos, but you must take care when doing this.
What do I use?
I carry two digital cameras when I'm covering an event. I have a small, 3-megapixel camera with a 3x zoom which I use for many of the ground shots. It doesn't have all of the bells and whistles of more advanced cameras, but it takes good, sharp photos (as large as 5 x 7 inches) with a minimum amount of effort. The LCD screen on the back can be rotated so I can hold the camera at all sorts of angles while keeping my clothes cleaner and making my life a bit easier.
The camera I use most is a 6-megapixel SLR which uses interchangeable lenses carried over from traditional 35mm equipment. Although this camera is quite expensive, its long list of features gives me the best chance to capture high-resolution photos in any condition (pictures up to 11 x 14 inches or smaller photos which can be tightly cropped). I carry two lenses for this camera: a 28–200mm zoom for the ground and close-in shots and a 170–500mm zoom to capture models in the air or a candid shot across the field.
In each camera there's an IBM Microdrive: a tiny hard drive in the case of a CompactFlash card but with a huge capacity (up to 1 GB). This gives me the capability to shoot hundreds of photos during an event without running out of storage room.
I also have a couple dozen rechargeable AA NiMH batteries that I use for power. Each of the cameras takes four batteries at a time, and I can easily go through a couple of sets a day when I'm busy shooting. Using NiMH batteries instead of Nickel Cadmiums (Ni-Cds) gives me longer shooting time—sometimes up to twice as long. (Many cameras require specially shaped batteries made by the manufacturer. In this case, it would be a good idea to purchase an extra or two.)
What camera do I recommend?
Regardless of the camera(s) you choose, you'll never find one that does it all. Even the most expensive SLRs don't have every feature in one package. The best compromise is to find a camera that will shoot the majority of the pictures you want to take and do a good job.
These days, probably the best compromise is a 4- to 6-megapixel SLR-style camera with a 6x (or longer) zoom lens. I recommend that the camera use CompactFlash cards for storage. A movable LCD screen makes taking some photos easier, such as low-to-the-ground shots or those over a crowd. Other nice features are user-adjustable white balance and at least a two-frames-per-second frame burst mode.
Probably the most important feature to consider is the shutter's lag time. It's common for lower- and midrange cameras to have lag times upward of a half second or more. The lower the lag time, the more likely it is that you'll be able to capture what you're after.
I would generally consider cameras from manufacturers such as Canon, Fuji, Minolta, Nikon, and Olympus. Among these manufacturers there are easily a dozen cameras that meet the criteria I've mentioned in the previous paragraphs.
When choosing your camera, there is one other thing I advise: do your homework. Visit your local camera shop and use the Internet. The best site I have seen is Digital Photography Review (www.dpreview.com). Every brand of digital camera is independently reviewed in extreme detail. I make it a point to visit this site at least once a week to read about what's new.
Using Digital Photography in the Field
There are no hard-and-fast rules in composition since everyone's taste in art is different, but a few guidelines will help you improve your photos.
- Ask yourself why you are photographing a particular model; don't shoot just to shoot.
- Make sure that what you're shooting will appeal to others.
- Make the subject as large as possible in the frame. This will not only give you a larger, sharper picture, but it will show more details.
- Keep the horizon level. Nothing ruins a perfect shot quicker than a tilted horizon.
- Don't shoot using a shutter speed that is too high. Doing so will "freeze" the propeller/rotor, making the model look as if the engine has quit. Balance the need to keep the model sharp and have the propeller/rotor slightly blurred. (When shooting ducted-fan or turbine-powered models, shoot as fast as you can since there's no propeller to worry about.)
- The easiest way to get a great picture of a model in action is normally during takeoff or landing. The aircraft is slower then than at any other time during the flight. It is also usually closer, making it easier to fill the frame.
- When photographing a flying model, try to compose the shot so that there are a few clouds, trees, or some smoke to give the image a sense of depth. There's nothing more boring than a model against a simple blue sky. (Don't have too much in the background either; the photo will be too busy, making it harder for the viewer to focus attention on the subject.)
Almost every camera on the market will average the scene, giving you a nicely exposed sky with a dark model in it. This is where your camera's under-/overexposure feature comes in. When shooting against the sky (or other bright background), set the camera to overexpose 1/2 to 1 f-stop. You'll have to experiment a bit to find the optimal setting, but having instant results with an LCD screen makes that easy!
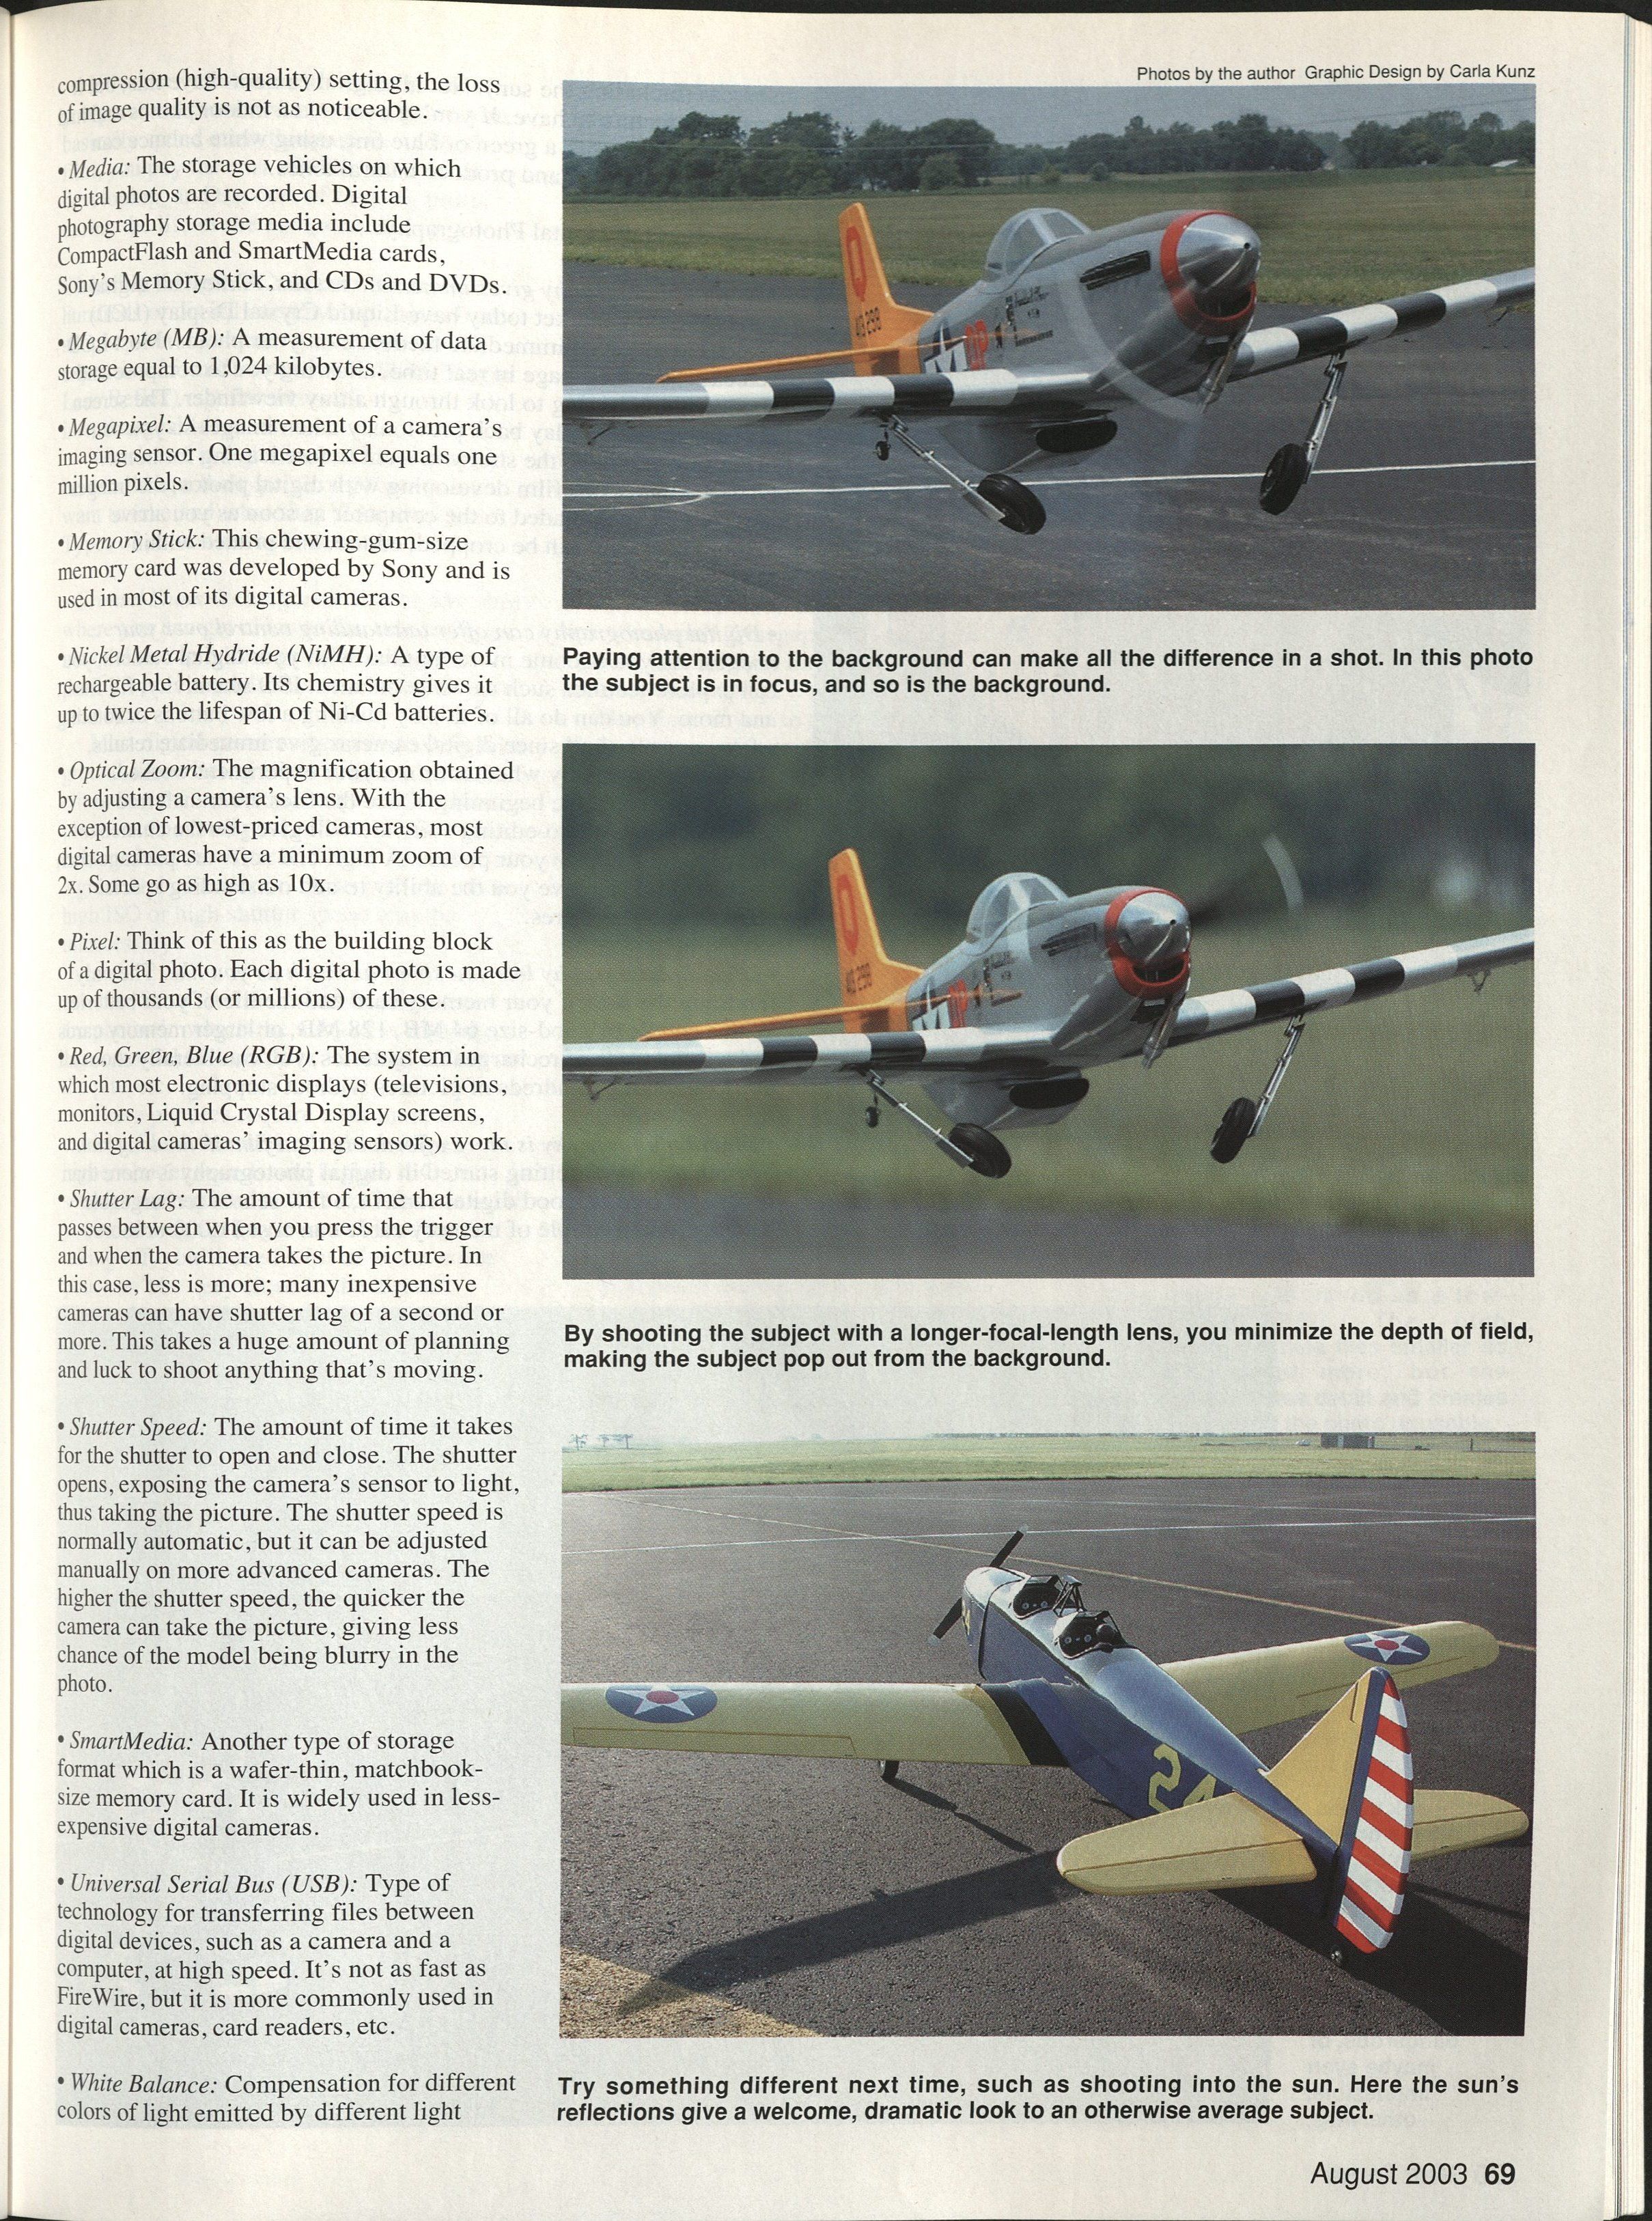
- Watch the background. Although it's not always easy, pay attention to what is behind your subject. There's nothing worse than capturing a great shot of your friend holding his new model, only to learn later that a telephone pole is growing out of his head!
Other things to watch out for are signs, buildings, cars, people's legs, and even shadows from objects outside of the camera's view. The ideal foreground and background will have minimum clutter so that nothing will distract from the subject.
- Situate yourself so that the sun is behind you and over your shoulder as you face the model. If the model isn't facing the correct way, ask the owner to reposition it for you.
As I mentioned, digital photography gives you the opportunity to try things and get instant feedback. You know on the spot whether a shot worked or not, and you'll have the chance to fix it as needed. Following are a few artistic shots to try.
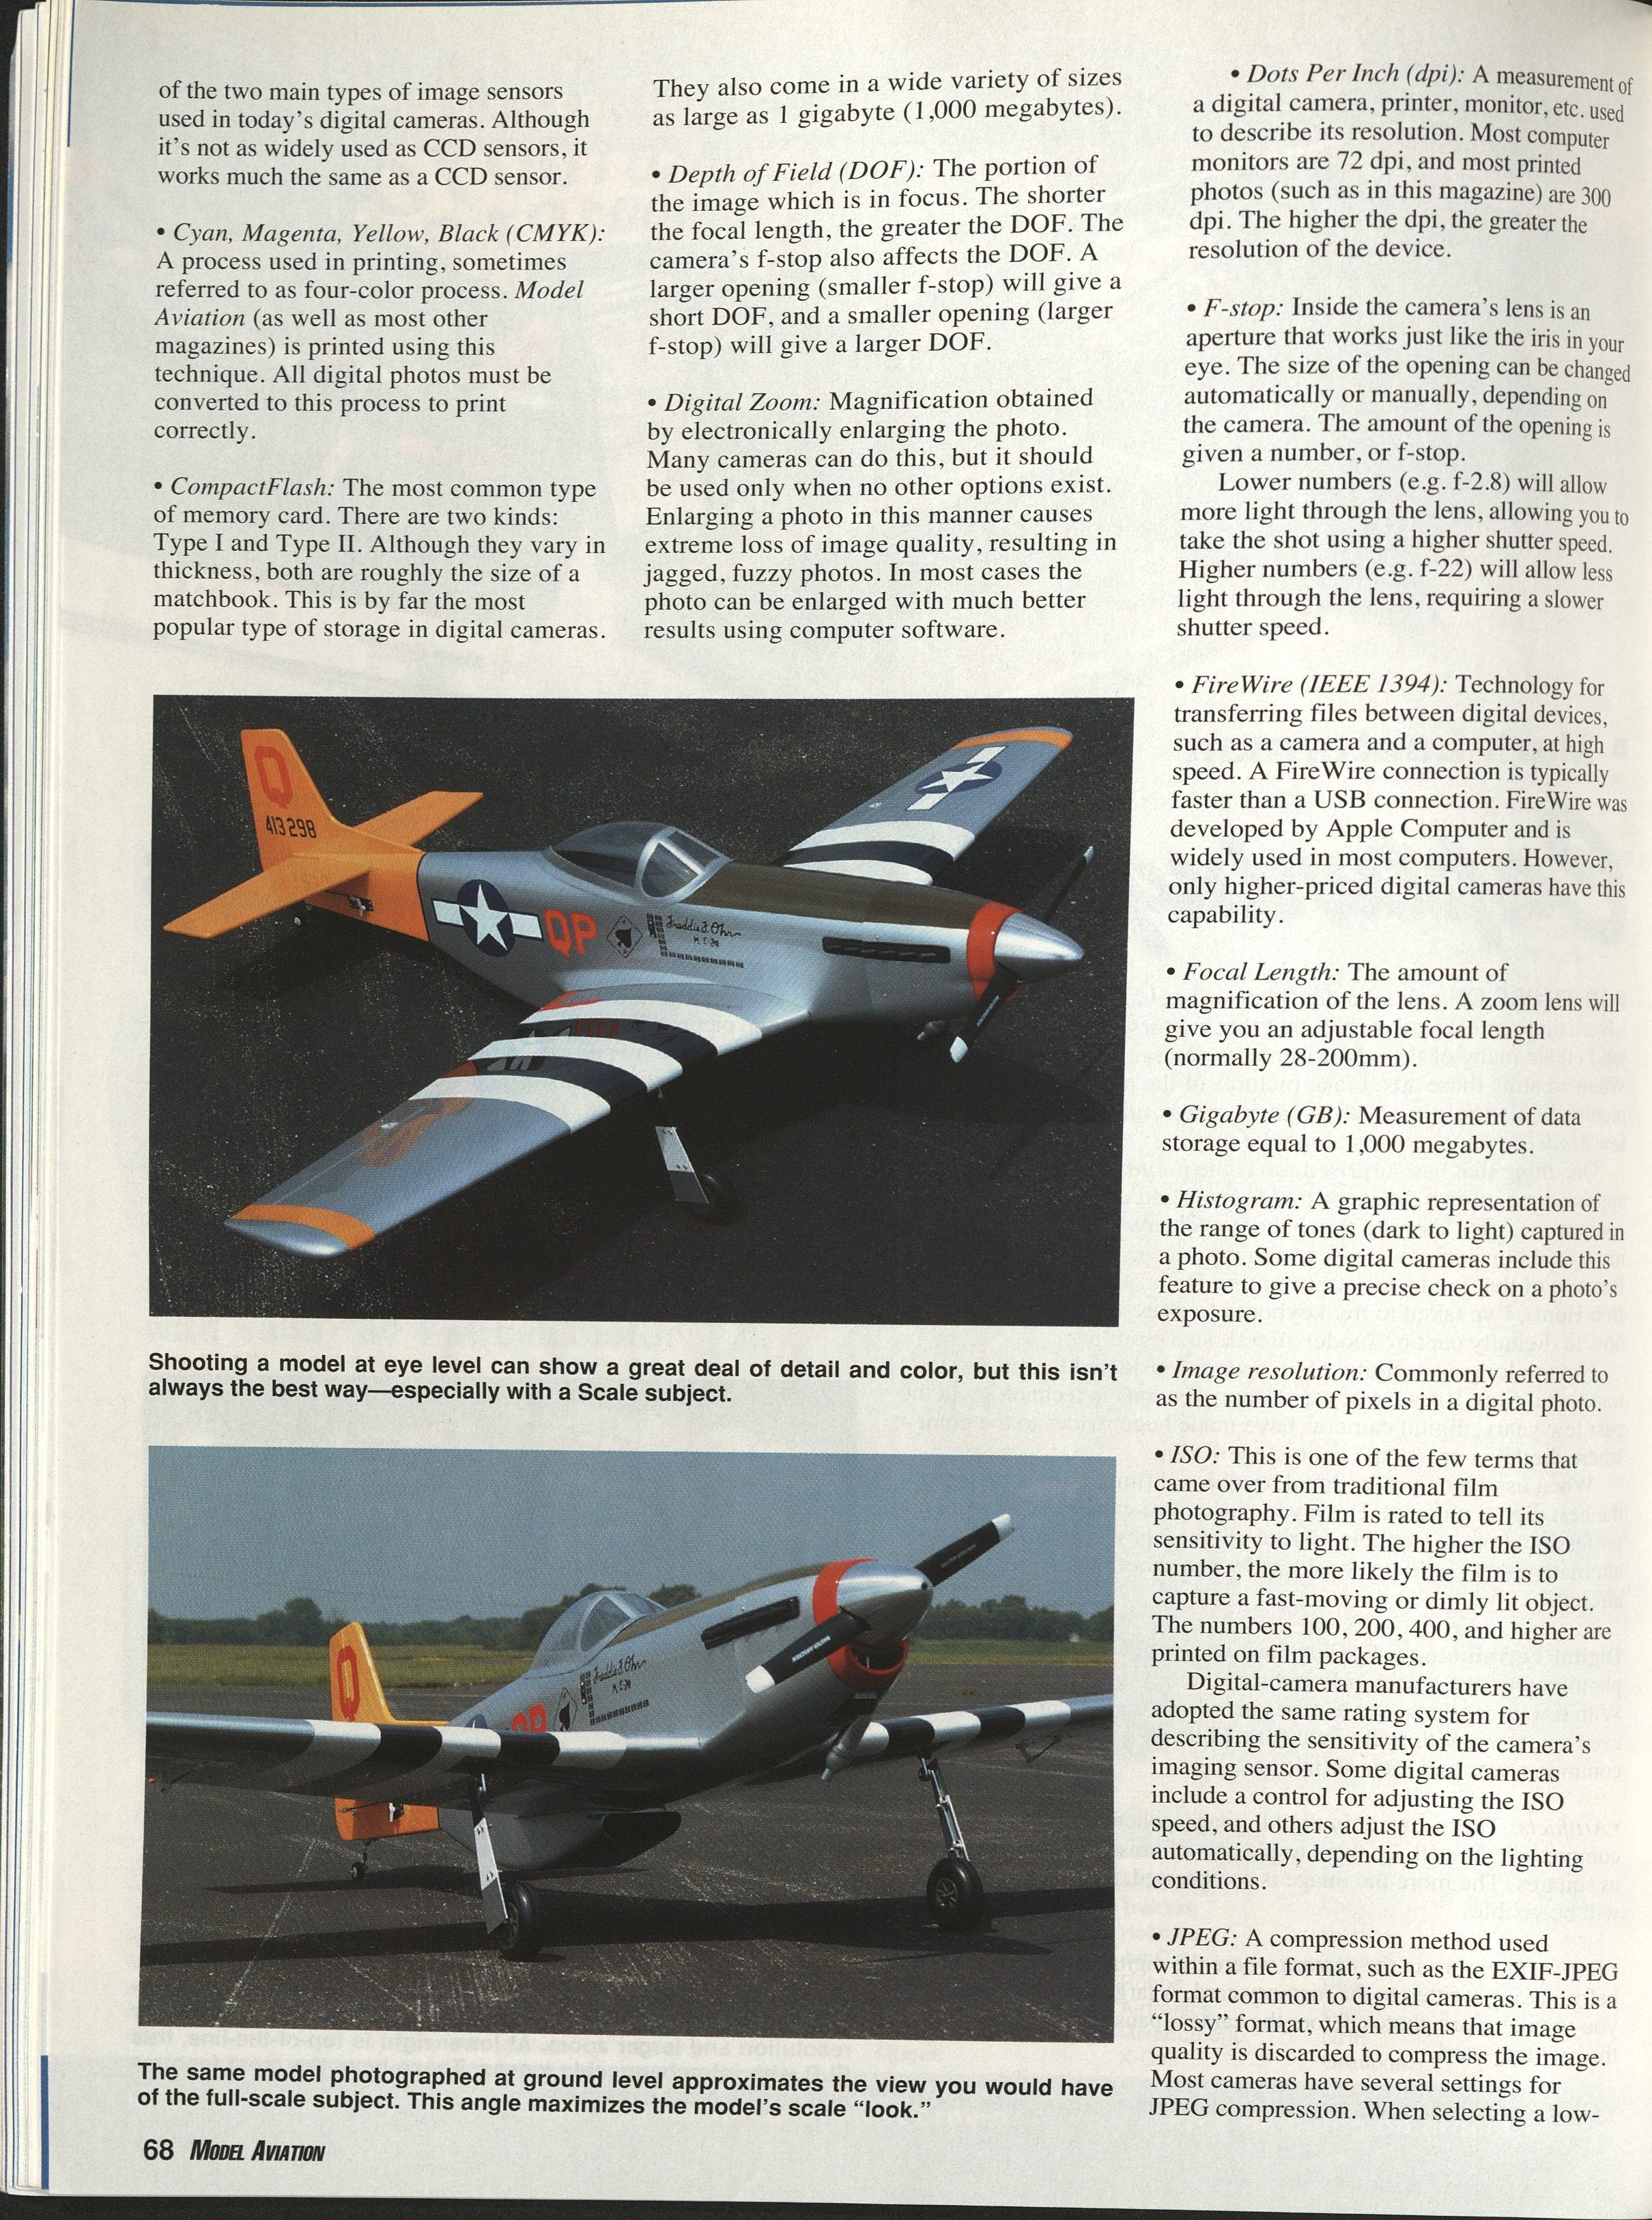
- Shoot models on the ground from a low perspective. This gives an appealing view when done correctly, especially with scale models. The lower perspective makes the model appear more "full-scale," drawing the viewer into the photo. Also, there's no contest when comparing a stark runway with a scene showing the runway, grass, and sky.
- Whenever possible, shoot your subject with as long a focal length (maximum zoom) as possible. Doing this means that you might have to back off from your subject, but the technique will shorten the depth of field and make your subject jump out from the background.
- When trying something artistic, the sun's position isn't quite as critical. There are times when I've had great results with the sun to the side or even in front of me. Be careful when trying these shots; lens flares can show up, making the photo useless.
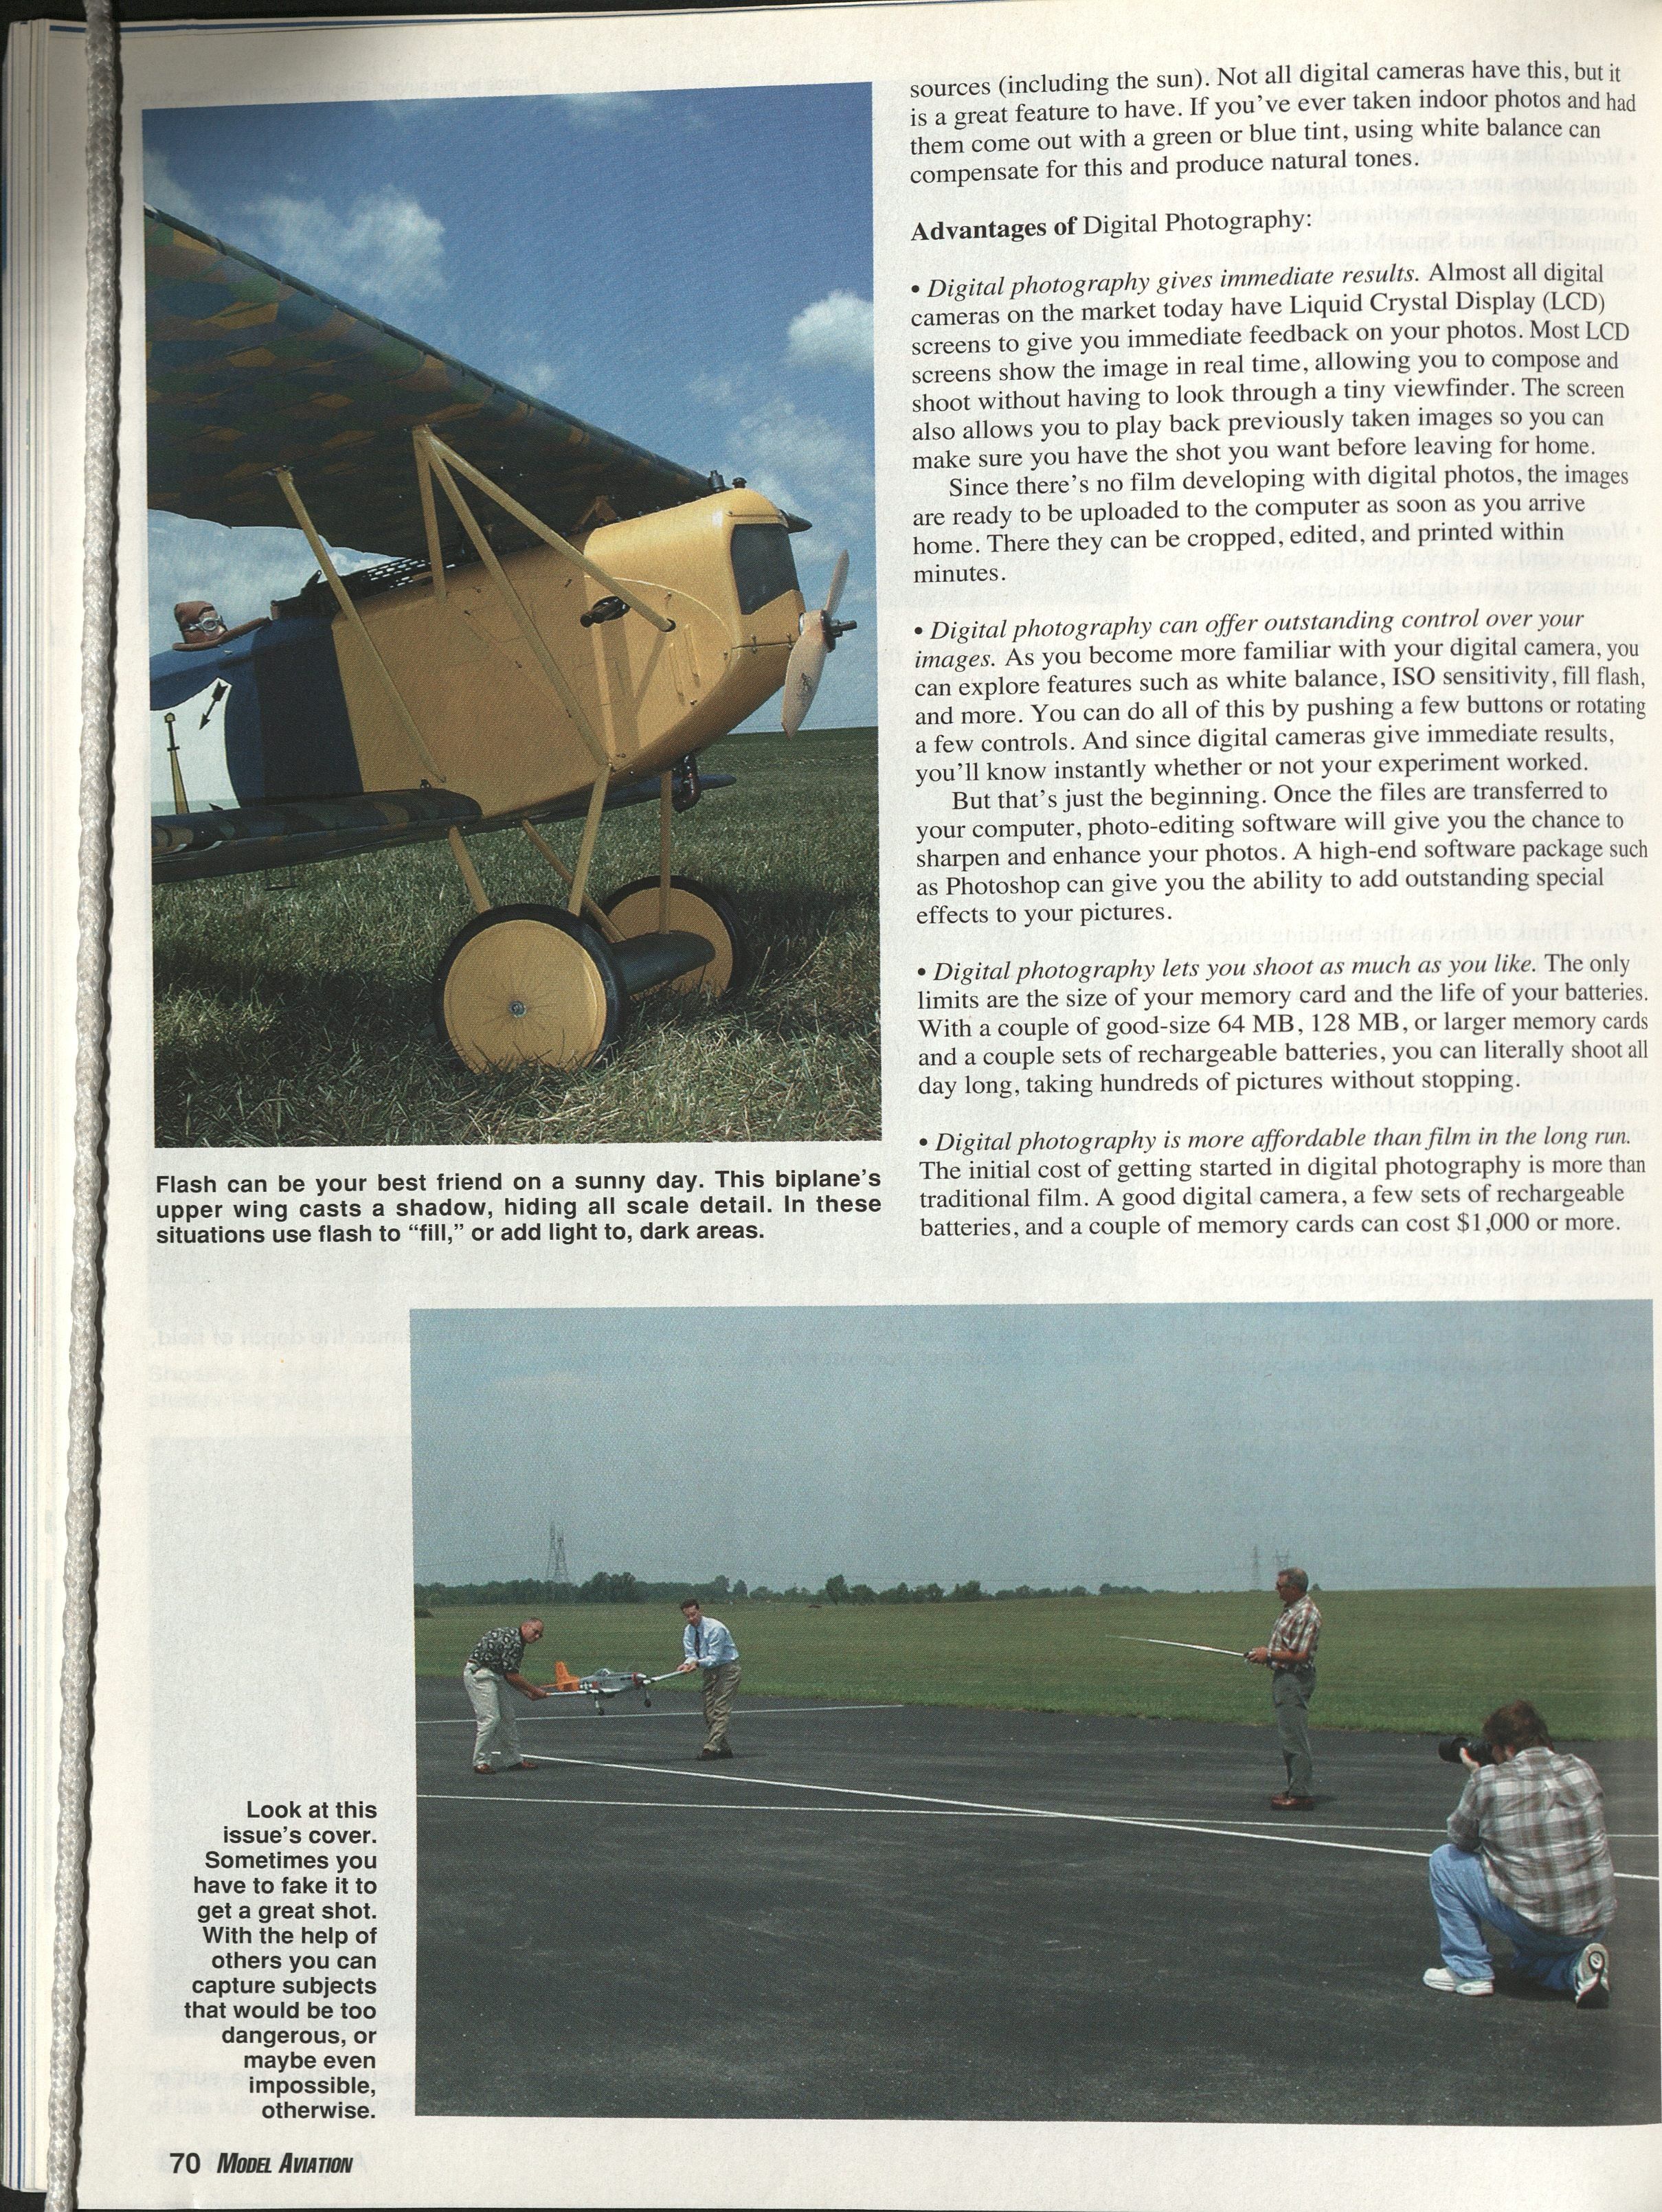
- Many times you can get a great result by using your camera's flash as a "fill flash." This technique will brighten the shadows, showing details that are not visible without it.
- If a particular shot is too difficult to achieve normally, try posing it. I've included a posed photograph used to capture a Mustang at takeoff. You see the model just after it has lifted off of the ground, with the engine running and the retracts on the way up. (See this month's cover for the finished shot.)
This shot was set up with the help of two other people. The photographer typically works the transmitter, but since a third person was handy I asked for his help as well. Following is a breakdown of how this cover was photographed.
- Before assembling the model, the retract servo was moved into position with the retracts partially retracted.
- The model was assembled, leaving the retract servo unplugged.
- With the radio on, the model was fueled and the engine was started. (The model can't be set on the ground with partially retracted gear, so we used a cradle.)
- With one assistant holding each wingtip, the model is held just above the runway in a takeoff position. (Make sure the engine is running as close to idle as possible; higher rpm settings will make the model hard to hold safely.)
- When composing the shot, position the camera as far from the model as possible, then zoom in to decrease the depth of field. Make sure that your assistants and their shadows aren't visible in the shot.
- Consider a million other things, such as the position of the sun, the background, dirt on the runway, etc. The best advice is to take your time and make sure things are right before you shoot. Review the images before you leave the field; that way you're sure to have just what you want.
- I'd be remiss if I didn't mention those AMA staffers who helped me with this shoot. Michael Smith is on the port wing, and Rob Kurek is starboard. Jay Mealy is working the transmitter, and Bob Hunt took the setup shots.
Digital Photography Mistakes
- Purchasing a camera with a resolution that's too low and/or doesn't have enough features. Make a list of what you need the camera to do (only what you really want), compare available cameras to your list, and find the one that meets the most of your needs.
- Choosing an image size that is too small. Although you can store more photos by choosing a smaller size, this limits your choices in using your photos. As a general rule, digital photos cannot be enlarged successfully. Because of this, if you take small photos, they can only be printed small. Enlarging photos will make them fuzzy and jagged. You can reduce larger photos using a computer.
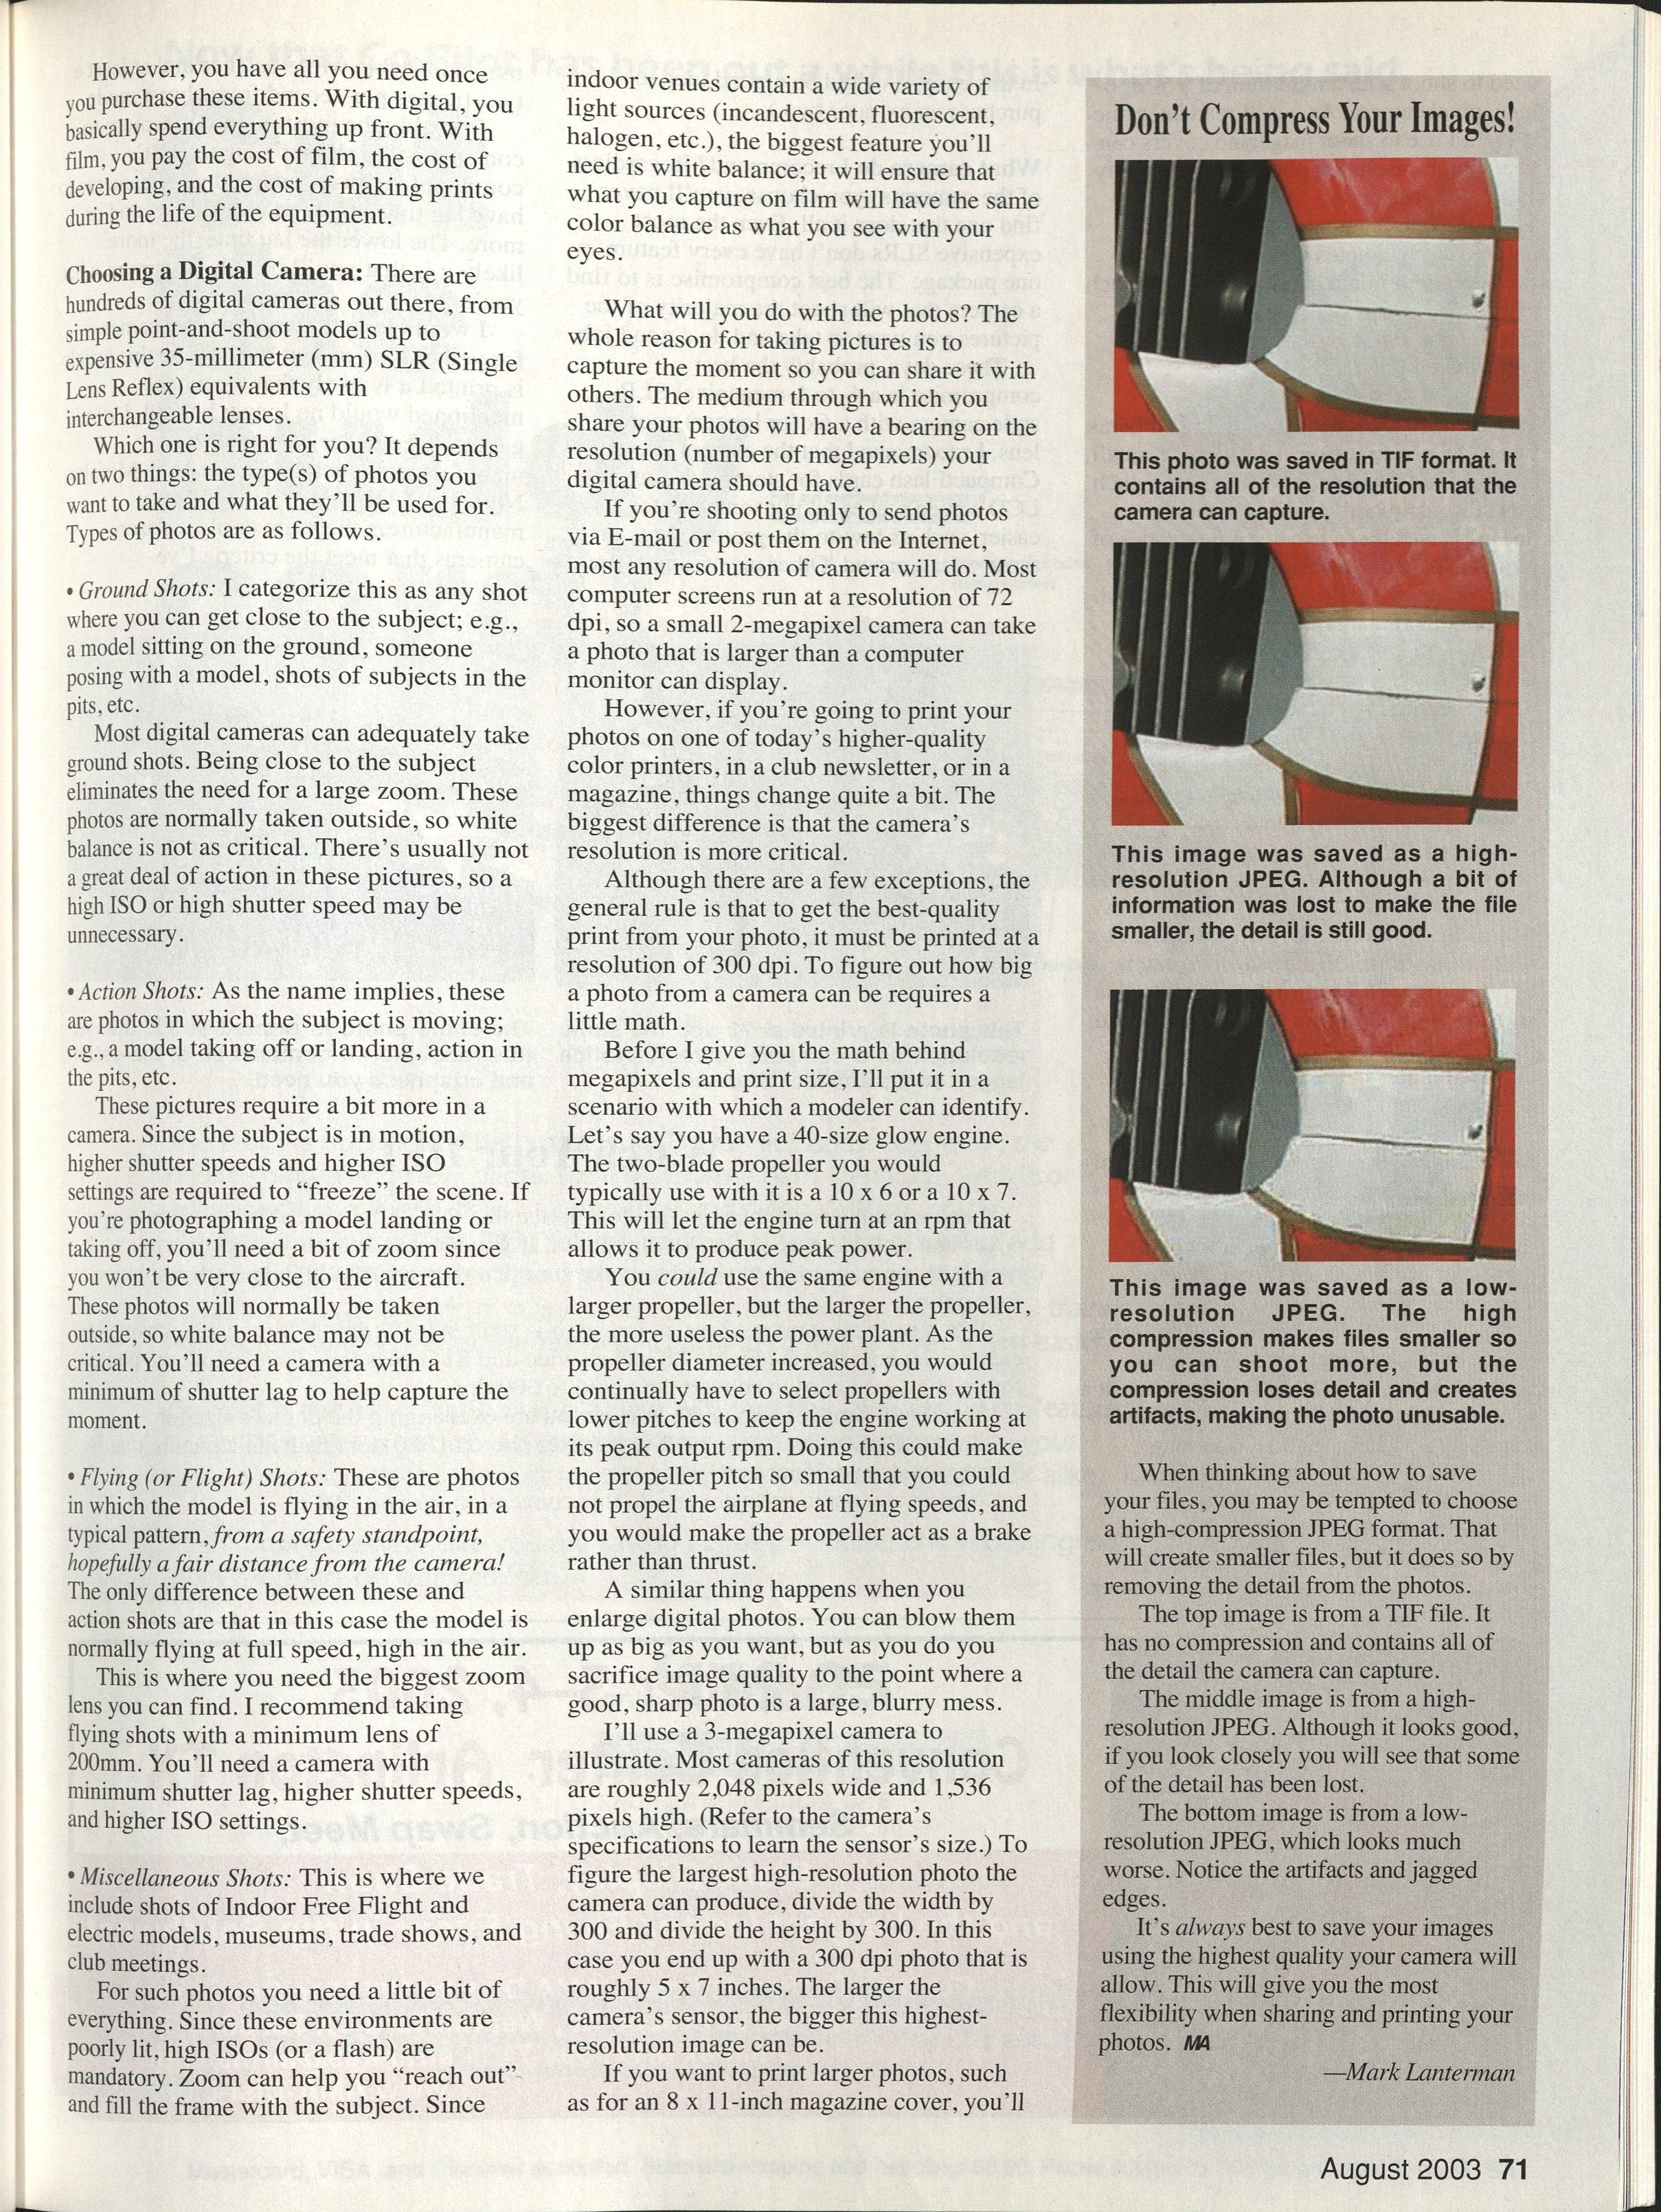
- Setting the image compression too high. Image compression settings can shrink file size by discarding parts of the image. Because of this detail loss, the photo will never be as sharp as it could be. Always shoot on the highest JPEG or TIFF setting to give you maximum flexibility with your photos.
- Relying on computer software to fix everything. You might have seen movies and television shows in which computer users can make outstanding photos and enlargements of the smallest, most blurry picture. In real life, that just doesn't happen. You can make huge improvements in your photos—such as increasing sharpness, color balance, contrast, etc.—but don't expect miracles; a bad photo will always be a bad photo.
- Running out of power. Make sure that your batteries are fully charged and that you bring a spare set (or two). There's nothing worse than running out of power partway through a day's shooting. Many manufacturers make portable chargers that plug into your car's 12-volt accessory socket so you can recharge your batteries at the field.
- Removing a memory card from the camera too early. Never remove a memory card (or the batteries) while the camera is writing a photo to the memory card. If you're shooting with a higher-resolution camera (5 or 6 megapixels), it can take several seconds before the photo is stored. If you remove the memory card during this process, you will lose the current photo and you may damage the memory card to the point that it has to be replaced. Also, make it a rule to turn off your camera before removing or inserting a memory card and batteries.
Digital photography is a great way to capture our hobby. Never before has all of this functionality been at our fingertips. When used correctly, you will be able to capture events, models, and moments in time as never before.
As time and space allows, more in-depth photography tips will be featured in future issues of Model Aviation. Hopefully you'll be shooting like a pro, and maybe your work will be published on a Model Aviation cover or two. MA
Mark Lanterman 5655 David Pl. Fairfield, OH 45014 [email protected]
Watch Your DPI!
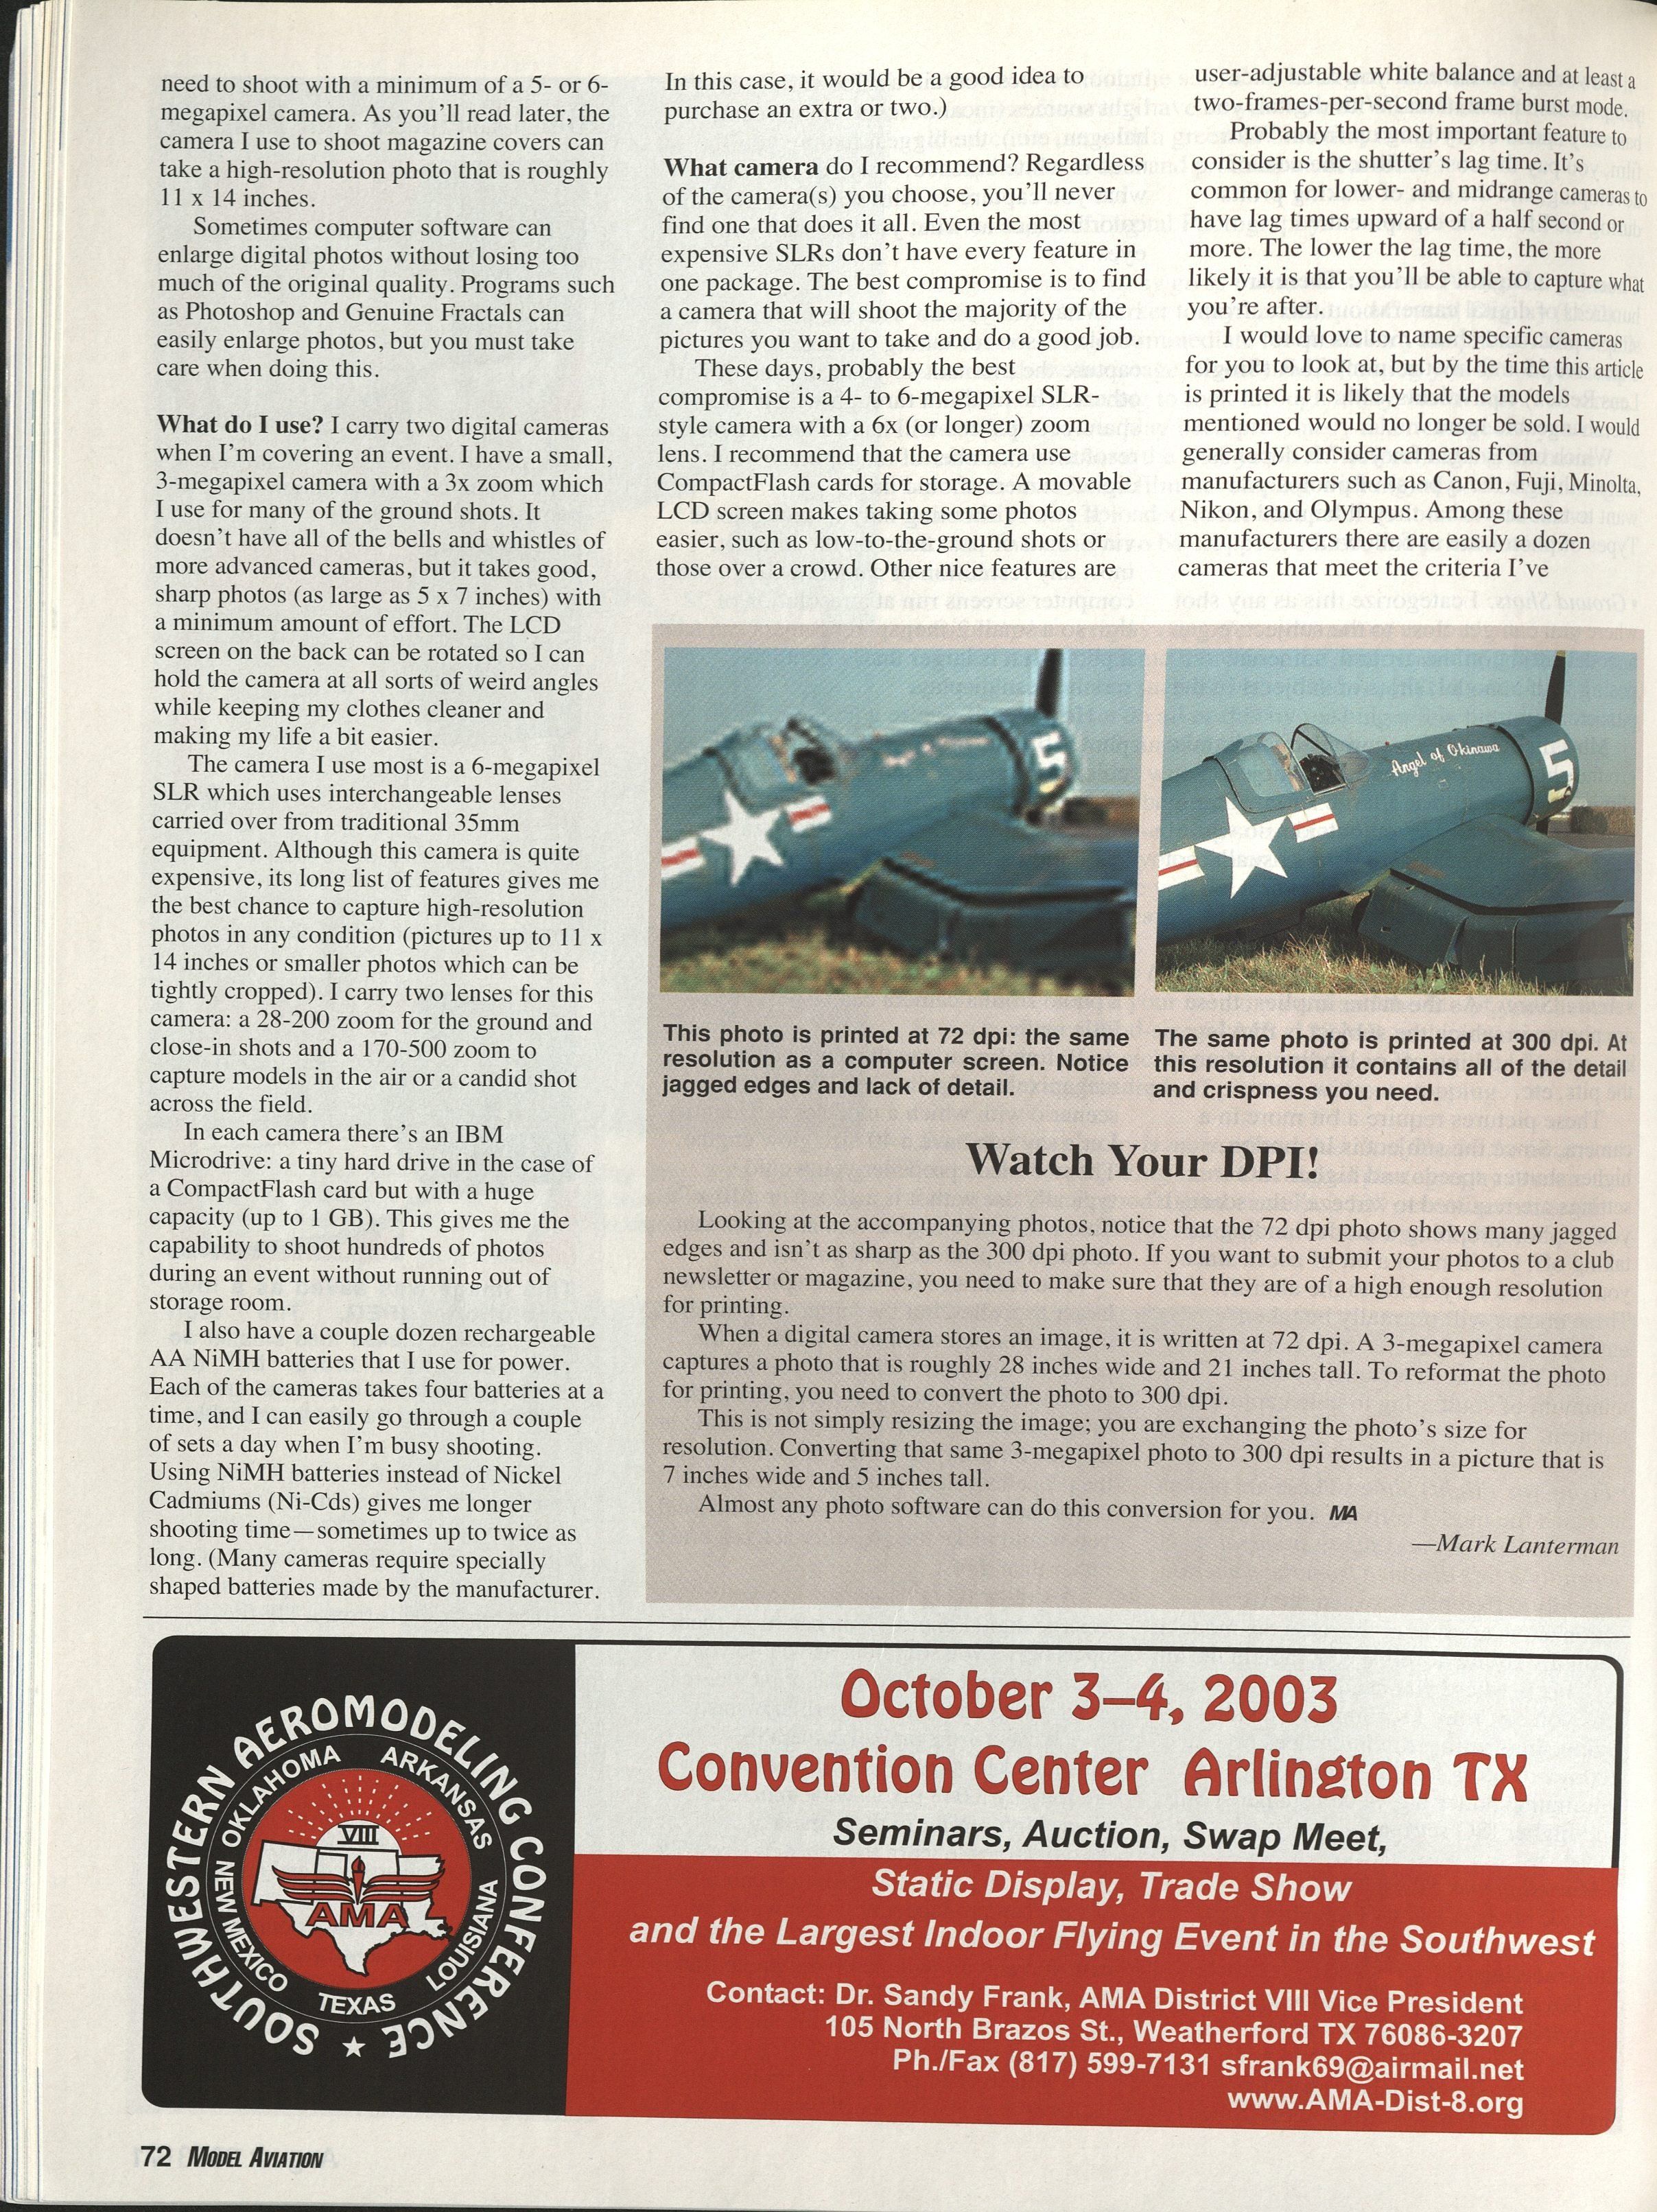
Looking at the accompanying photos, notice that the 72 dpi photo shows many jagged edges and isn't as sharp as the 300 dpi photo. If you want to submit your photos to a club newsletter or magazine, you need to make sure that they are of a high enough resolution for printing.
When a digital camera stores an image, it is written with pixel dimensions (not a fixed print dpi). A 3-megapixel camera captures a photo that is roughly 2,048 pixels wide and 1,536 pixels high. At 72 dpi this would equate to a very large printed size, but to reformat the photo for printing at 300 dpi you must convert the pixel dimensions to the desired print resolution.
This is not simply resizing the image; you are exchanging the photo's size for resolution. Converting that same 3-megapixel photo to 300 dpi results in a picture that is about 7 inches wide and 5 inches tall.
Almost any photo software can do this conversion for you.
—Mark Lanterman
Sources
- Adobe Systems, Inc. (Photoshop) — (800) 833-6687 — www.adobe.com
- Apple Computer (FireWire) — (800) MY-APPLE — www.apple.com
- Canon — (800) OK-Canon — www.usa.canon.com
- Digital Photography Review — www.dpreview.com
- Fuji — (800) 800-FUJI — www.fujifilm.com
- IBM — (800) IBM-4YOU — www.ibm.com/us/
- LizardTech (Genuine Fractals) — (206) 652-5211 — www.lizardtech.com
- Minolta — (201) 825-4000 — www.minoltausa.com
- Olympus — (800) 622-6372 — www.olympusamerica.com
- Sony — (800) 222-SONY — www.sony.com
Transcribed from original scans by AI. Minor OCR errors may remain.

