
Carl Goldberg EP Falcon
Jay Smith
MY FIRST RC airplane was a Carl Goldberg Eagle 2 built from a kit. At approximately the same time, another Carl Goldberg kit—the Falcon 56, which was a follow-up to the Falcon Jr.—was quite popular. Only a kid at the time, I remember the Falcon 56 well but never had the opportunity to own or fly one.
Fortunately, some of the Goldberg line of aircraft is making a comeback under the name "Carl Goldberg Classics." The first release in the series is the Falcon EP ARF, which combines what was great about the Falcon line into an easy-building, electric-powered model made from Pro-Formance foam.
Some who remember the Falcon line of aircraft from the 1960s and 1970s might question why it was released in foam and not balsa; the following from the Carl Goldberg website does a great job of explaining the intent of the release:
"Introduced in 1962, the Goldberg Falcon was a mainstay at the flying field—becoming the plane that took countless numbers of R/C pilots from the beginning stages into basic aerobatics.
"The Falcon has now been re-engineered with today's technology, including foam construction and brushless electric power. But the Falcon's classic profile and gentle flight characteristics are just like you remember them ... only better."
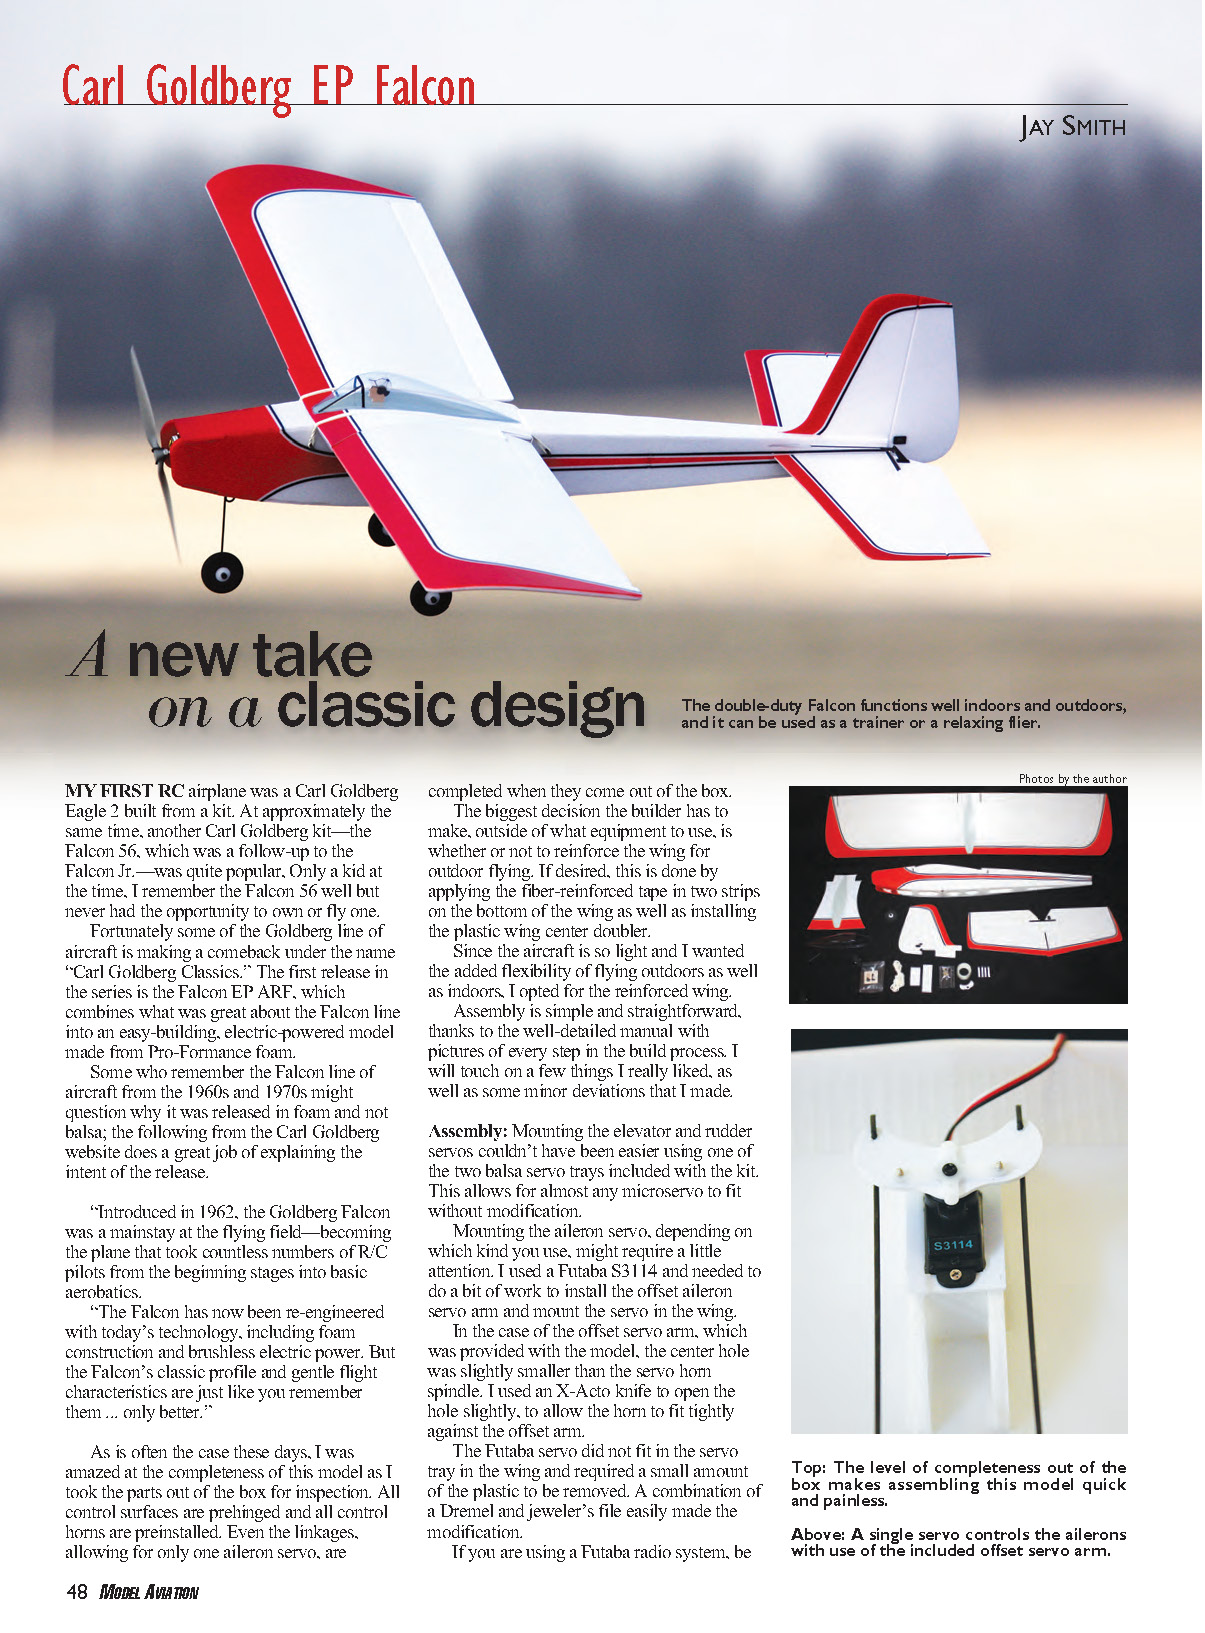
As is often the case these days, I was amazed at the completeness of this model as I took the parts out of the box for inspection. All control surfaces are pre-hinged and all control horns are preinstalled. Even the linkages, allowing for only one aileron servo, are completed when they come out of the box.
The biggest decision the builder has to make, outside of what equipment to use, is whether or not to reinforce the wing for outdoor flying. If desired, this is done by applying the fiber-reinforced tape in two strips on the bottom of the wing as well as installing the plastic wing center doubler.
Since the aircraft is so light and I wanted the added flexibility of flying outdoors as well as indoors, I opted for the reinforced wing.
Assembly is simple and straightforward, thanks to the well-detailed manual with pictures of every step in the build process. I will touch on a few things I really liked, as well as some minor deviations that I made.
Assembly
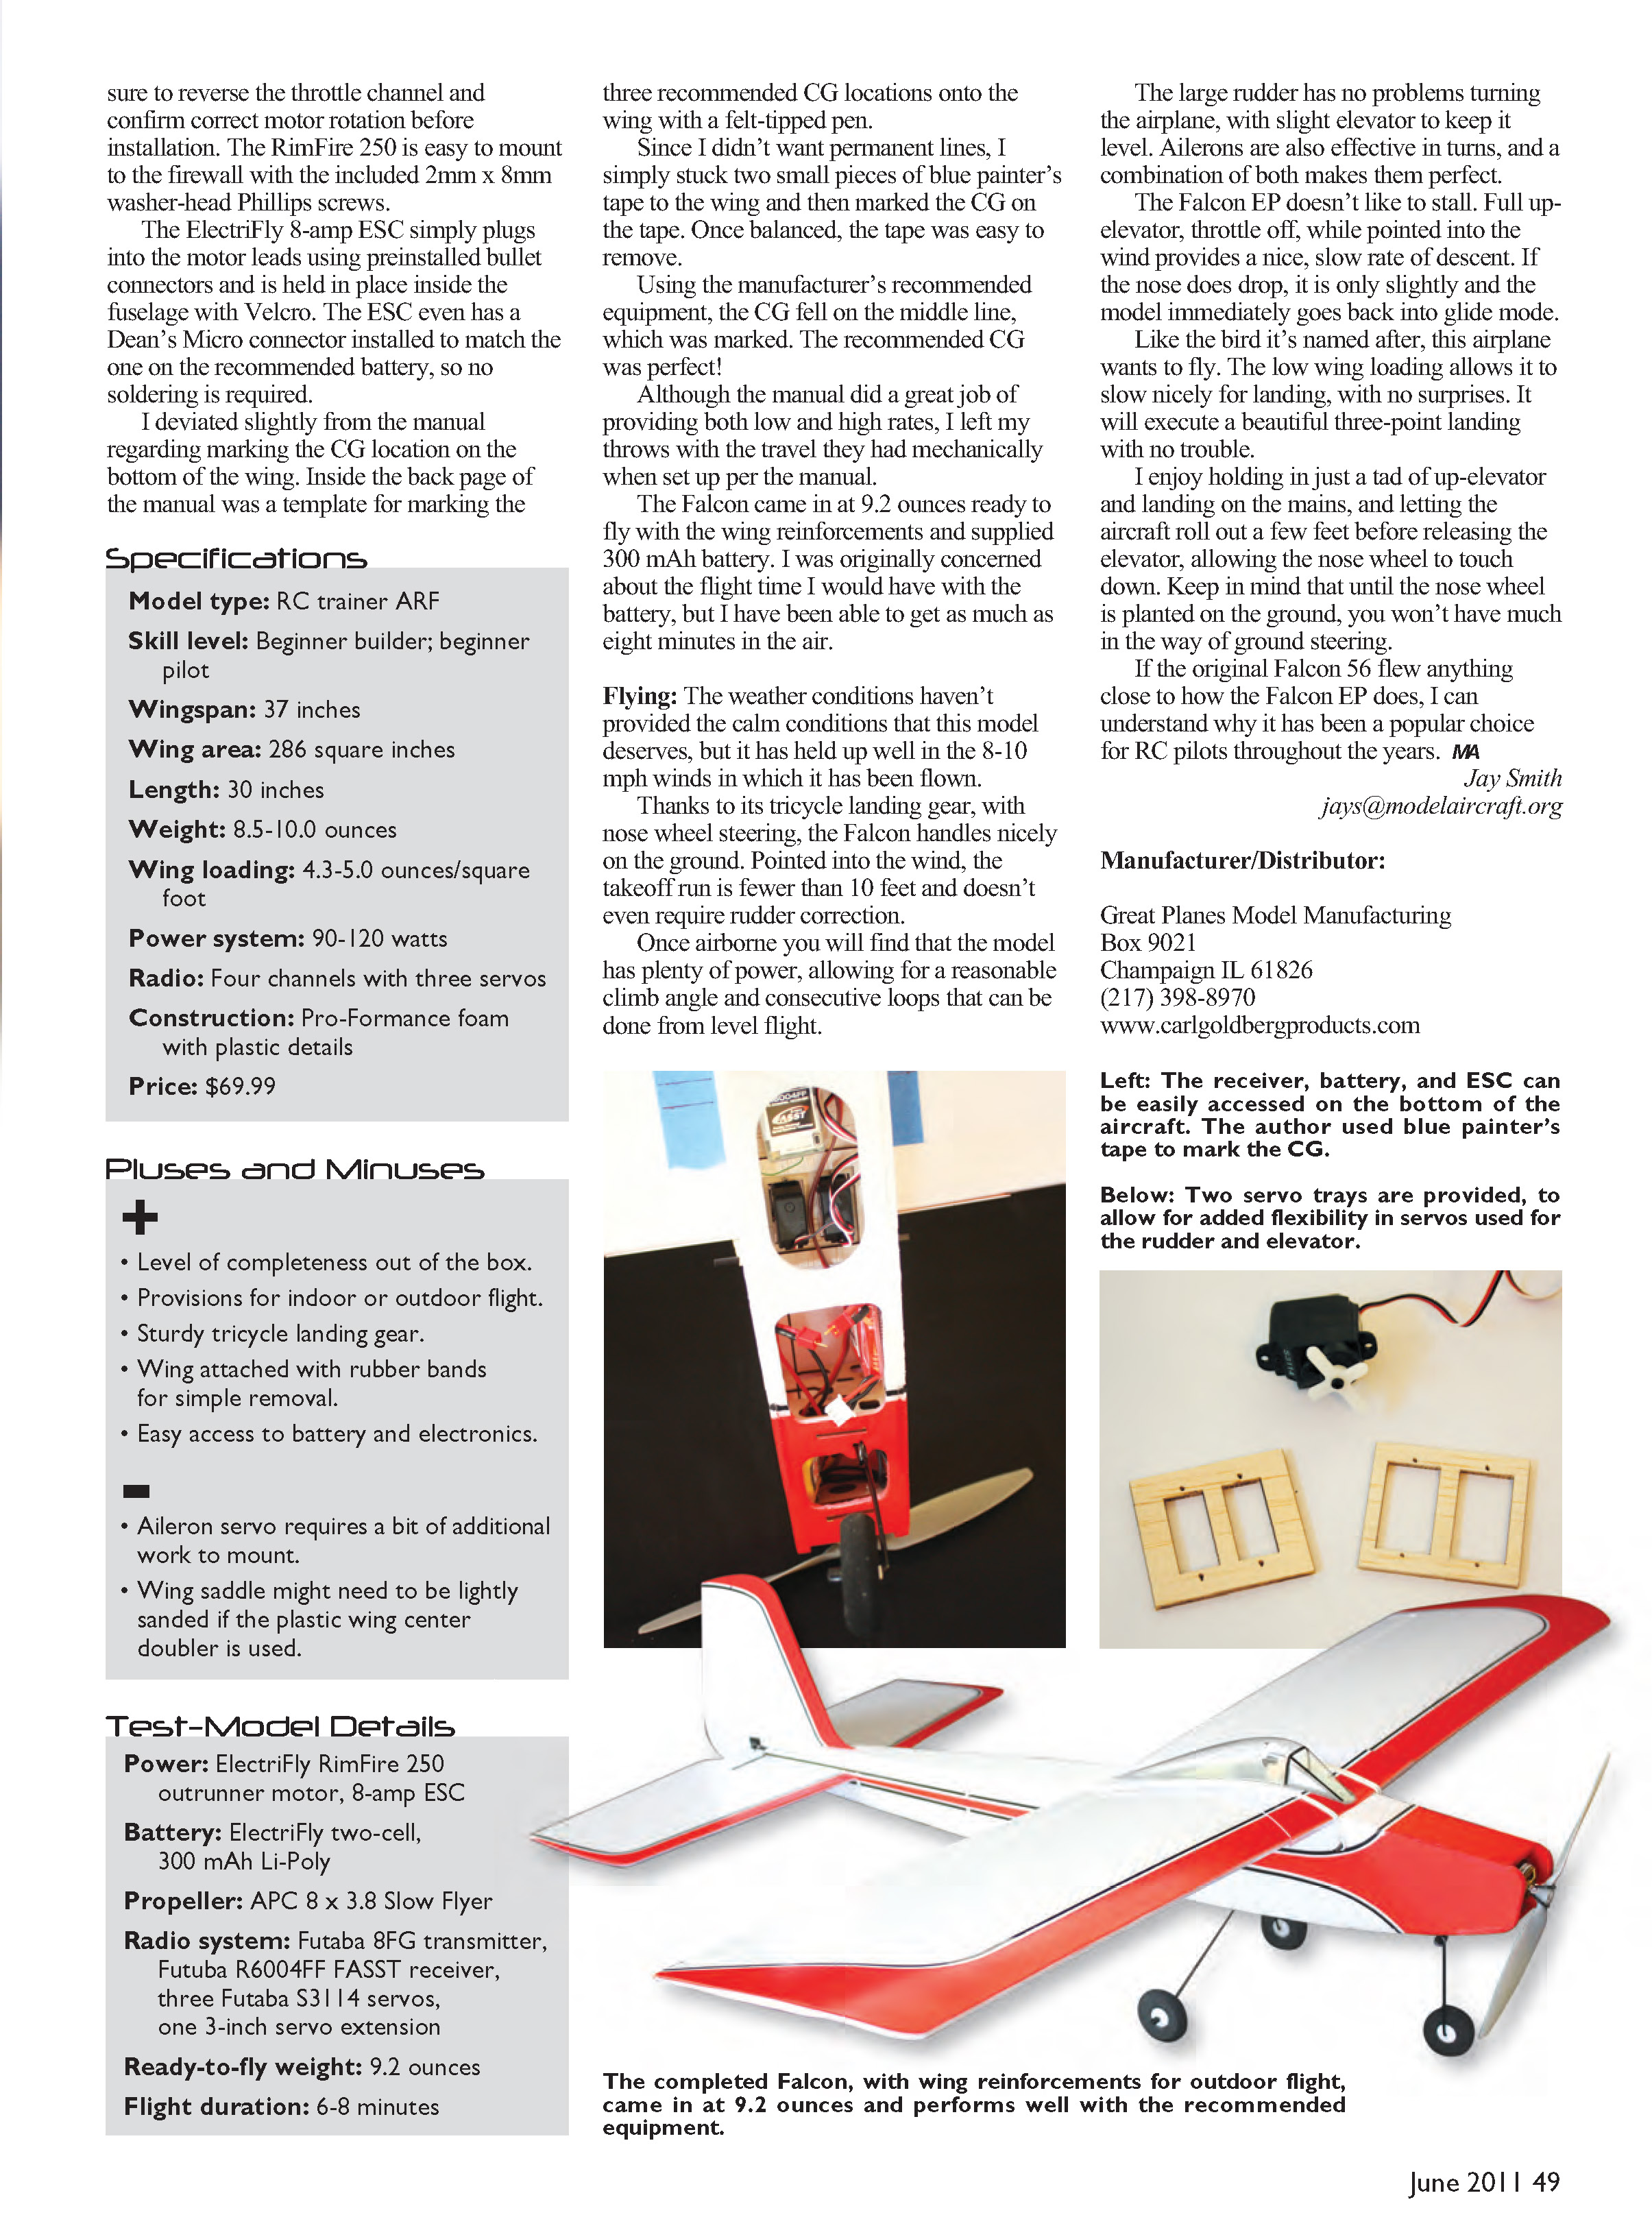
Mounting the elevator and rudder servos couldn't have been easier using one of the two balsa servo trays included with the kit. This allows for almost any microservo to fit without modification.
Mounting the aileron servo, depending on which kind you use, might require a little attention. I used a Futaba S3114 and needed to do a bit of work to install the offset aileron servo arm and mount the servo in the wing. In the case of the offset servo arm provided with the model, the center hole was slightly smaller than the servo horn spindle. I used an X-Acto knife to open the hole slightly, to allow the horn to fit tightly against the offset arm.
The Futaba servo did not fit in the servo tray in the wing and required a small amount of the plastic to be removed. A combination of a Dremel and jeweler's file easily made the modification.
If you are using a Futaba radio system, be sure to reverse the throttle channel and confirm correct motor rotation before installation. The RimFire 250 motor is easy to mount to the firewall with the included 2 mm x 8 mm washer-head Phillips screws.
The ElectriFly 8-amp ESC simply plugs into the motor leads using preinstalled bullet connectors and is held in place inside the fuselage with Velcro. The ESC even has a Deans Micro connector installed to match the one on the recommended battery, so no soldering is required.
I deviated slightly from the manual regarding marking the CG (center of gravity) location on the bottom of the wing. Inside the back page of the manual was a template for marking the three recommended CG locations onto the wing with a felt-tipped pen.
Since I didn’t want permanent lines, I simply stuck two small pieces of blue painter’s tape to the wing and then marked the CG on the tape. Once balanced, the tape was easy to remove.
Using the manufacturer’s recommended equipment, the CG fell on the middle line, which was marked. The recommended CG was perfect!
Although the manual did a great job of providing both low and high rates, I left my throws with the travel they had mechanically when set up per the manual.
The Falcon came in at 9.2 ounces ready to fly with the wing reinforcements and the supplied 300 mAh battery. I was originally concerned about flight time with that battery, but I have been able to get as much as eight minutes in the air.
Flying
The weather conditions haven’t provided the calm conditions that this model deserves, but it has held up well in the 8–10 mph winds in which it has been flown.
Thanks to its tricycle landing gear, with nose-wheel steering, the Falcon handles nicely on the ground. Pointed into the wind, the takeoff run is fewer than 10 feet and doesn’t even require rudder correction.
Once airborne you will find that the model has plenty of power, allowing for a reasonable climb angle and consecutive loops that can be done from level flight.
The large rudder has no problems turning the airplane, with slight elevator to keep it level. Ailerons are also effective in turns, and a combination of both makes them perfect.
The Falcon EP doesn’t like to stall. Full up-elevator, throttle off, while pointed into the wind provides a nice, slow rate of descent. If the nose does drop, it is only slightly and the model immediately goes back into glide mode.
Like the bird it’s named after, this airplane wants to fly. The low wing loading allows it to slow nicely for landing, with no surprises. It will execute a beautiful three-point landing with no trouble.
I enjoy holding in just a tad of up-elevator and landing on the mains, then letting the aircraft roll out a few feet before releasing the elevator, allowing the nose wheel to touch down. Keep in mind that until the nose wheel is planted on the ground, you won’t have much in the way of ground steering.
If the original Falcon 56 flew anything close to how the Falcon EP does, I can understand why it has been a popular choice for RC pilots throughout the years.
Jay Smith [email protected]
Manufacturer/Distributor
Great Planes Model Manufacturing Box 9021 Champaign, IL 61826 (217) 398-8970 www.carlgoldbergproducts.com
Specifications
- Model type: RC trainer ARF
- Skill level: Beginner builder; beginner pilot
- Wingspan: 37 inches
- Wing area: 286 square inches
- Length: 30 inches
- Weight: 8.5–10.0 ounces (reportedly 9.2 oz RTF with reinforced wing and 300 mAh battery)
- Wing loading: 4.3–5.0 ounces per square foot
- Power system: 90–120 watts
- Radio: Four channels with three servos
- Construction: Pro-Formance foam with plastic details
- Price: $69.99
Transcribed from original scans by AI. Minor OCR errors may remain.

