
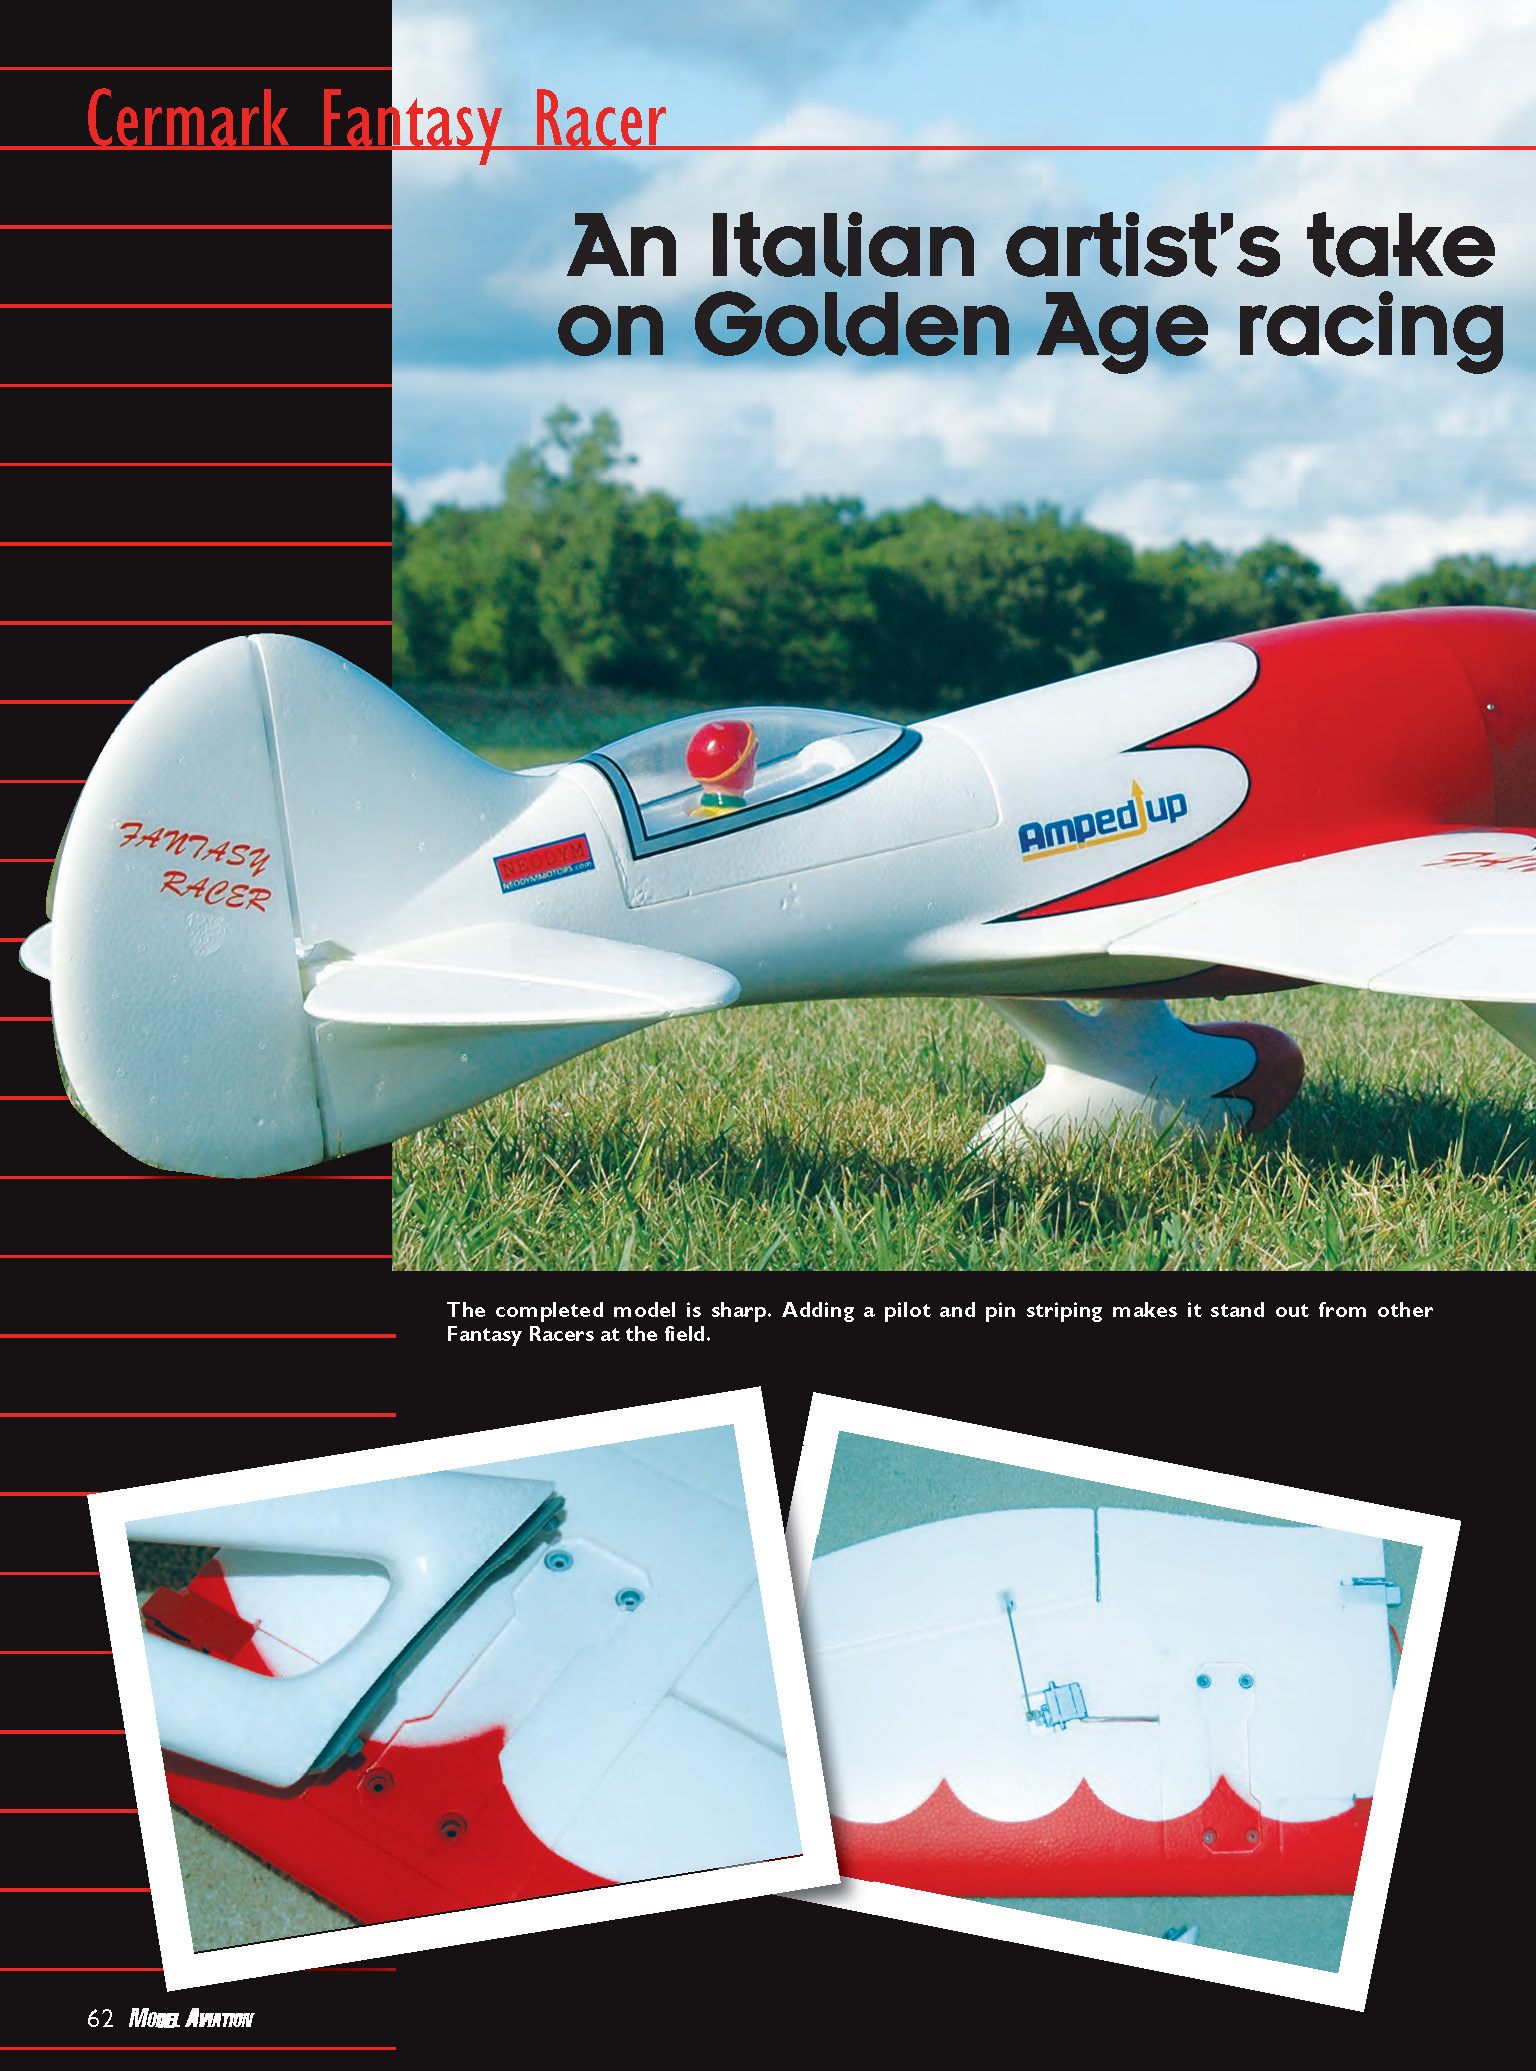
Cermark Fantasy Racer
An Italian artist's take on Golden Age racing
The Fantasy Racer was inspired by Italian artist Mirco Pecoran’s Gee Bee R-3. Three versions are available: RTF (ready-to-fly) complete with radio system and battery; BNF (bind-and-fly), which is minus the radio and receiver; and PNP (plug-and-play), which lets you use your own radio system and battery. The model used in this review is the PNP version.
The 36-page, six-language manual covers the different versions. Cermark has added a single-page addendum with important additional information.
Primary construction is EPP (EPO) foam with plastic reinforcements.
Finishing touches
After completing the Fantasy Racer, I decided that black striping tape to separate the red scallops from the white surfaces would add a nice touch. It is much easier to apply the striping while the pieces are apart; only the line between the fuselage and the wing is best done after the wings are attached. I used black vinyl sign material — it is thin, extremely flexible, and has an aggressive adhesive, so plan ahead and carefully apply the stripes only once. I cut the vinyl to the desired width and put it in place.
After the stripes were added, the canopy looked empty without a pilot. A visit to Flight Line Hobby in Lake Orion, Michigan, resulted in a Hangar 9 (HAN9101) pilot figure that matched the size and color.
Because the canopy was already attached, getting the pilot into place required some creativity. Using the SWG method (scientific wild guess), I cut the foam from the bottom, pushed the pilot into place, and glued it with epoxy. If you choose to add a pilot, be careful — there’s little room between the bottom of the canopy hatch and the top of the servos. Make sure the servos move freely when the canopy is in place.
Total time from start to finish, including installing the pilot and the striping, was roughly three hours. About a third of that time was spent on the striping. I started the Fantasy Racer after dinner and it was ready to fly before bedtime.
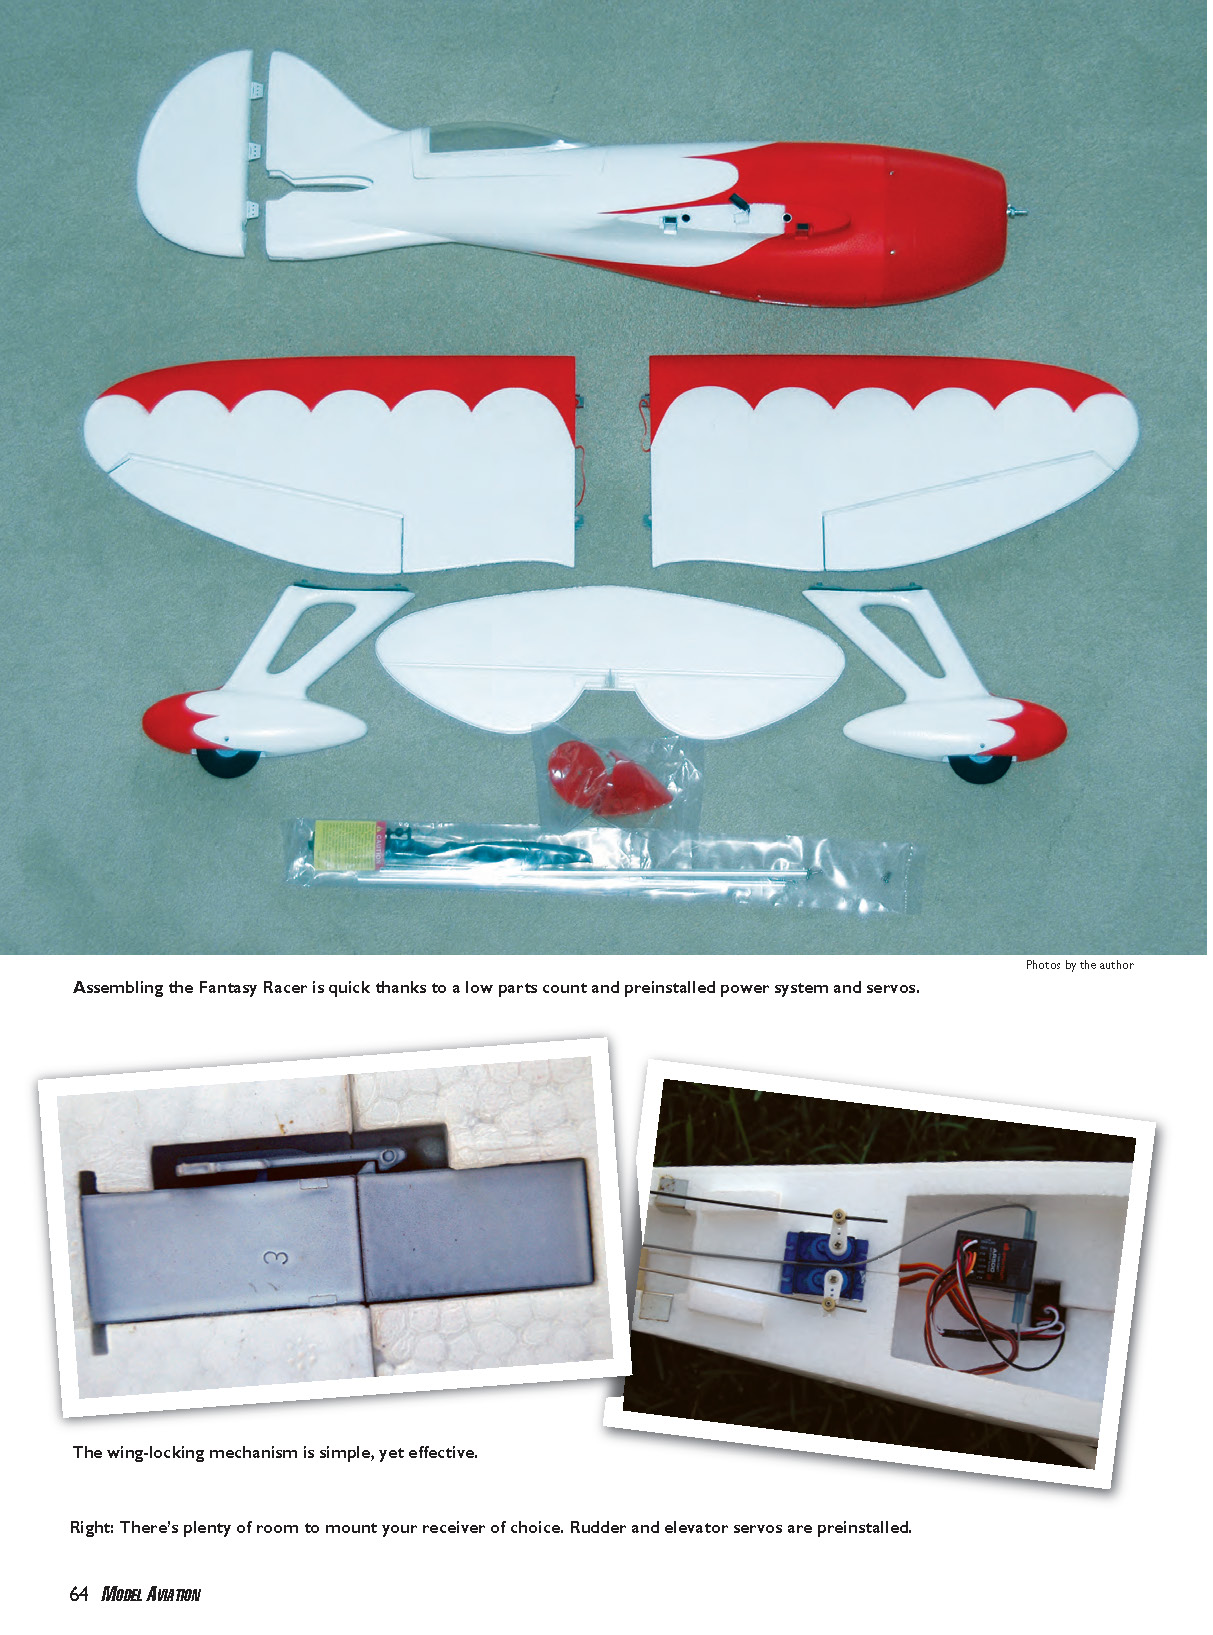
Assembly and setup
The servos, motor, and ESC are preinstalled. Per the addendum, I checked and added a bit of epoxy to the control horn attachments. I test-fit the tail wheel bracket then epoxied it to the fuselage before the rudder was attached.
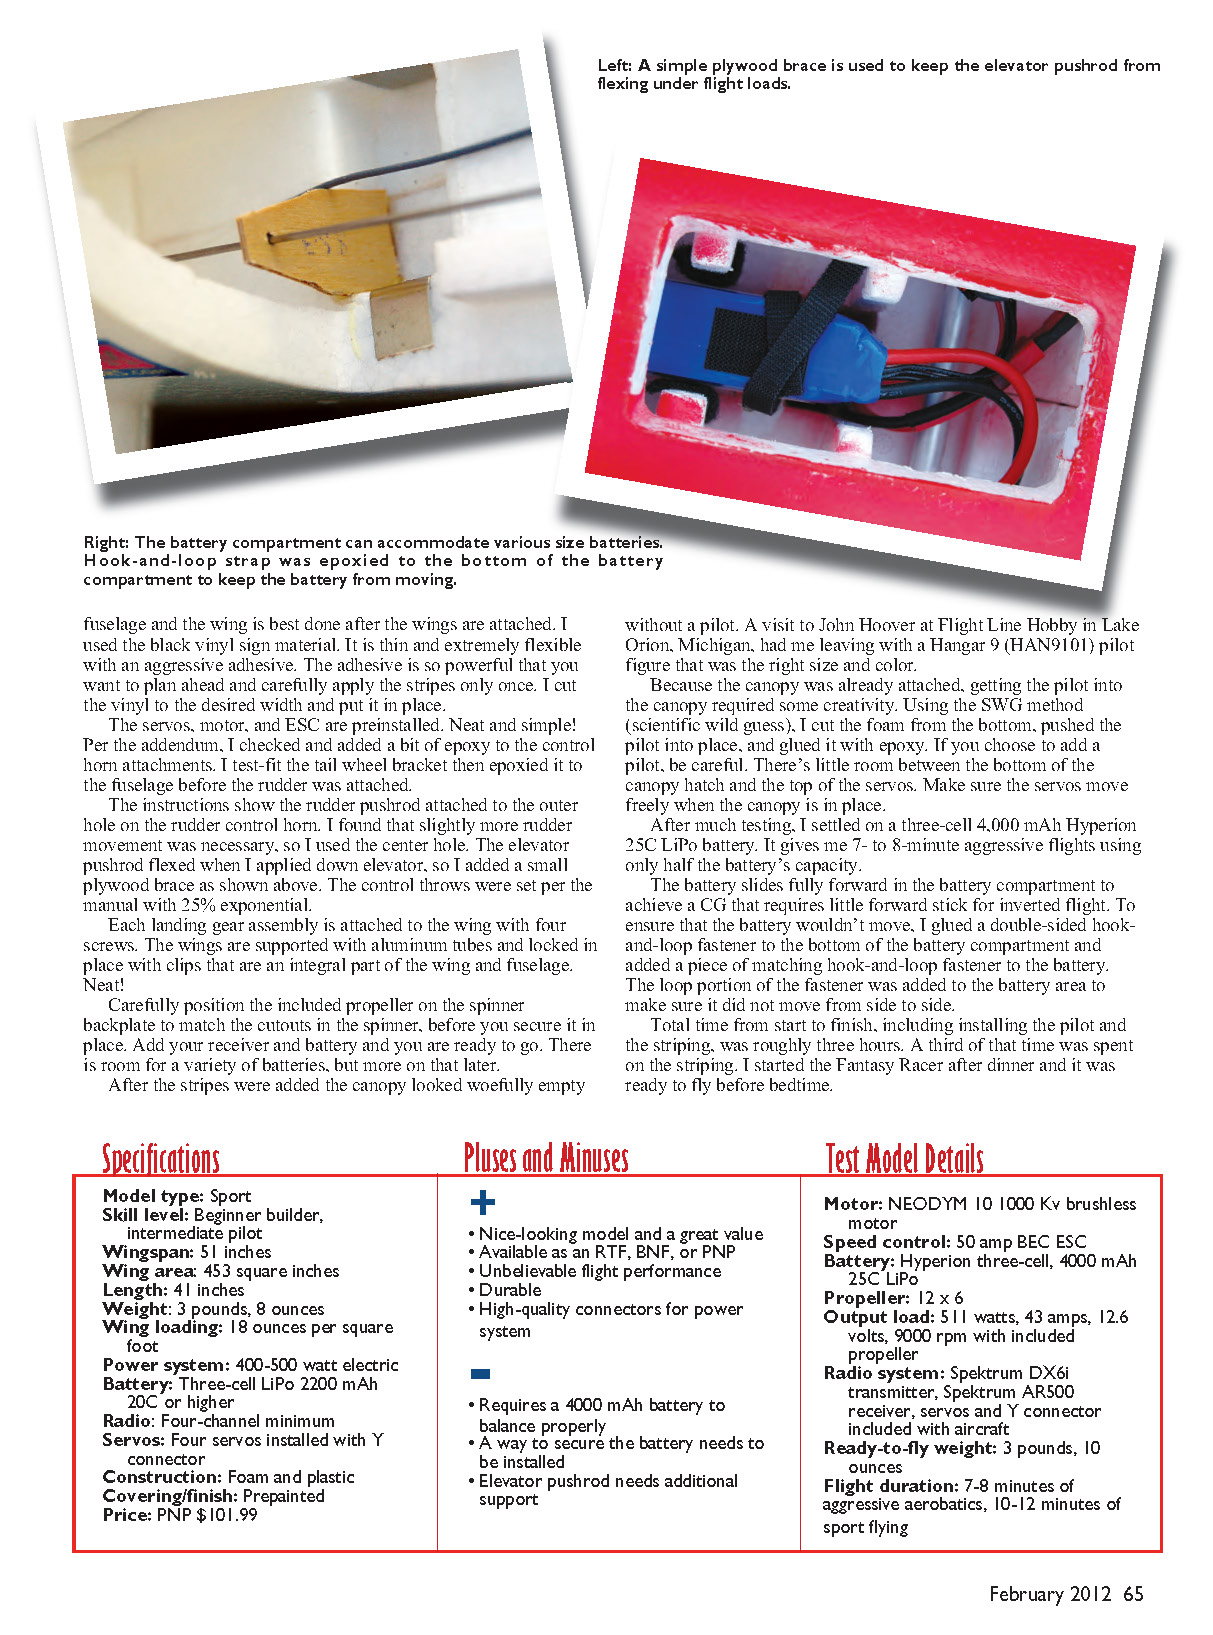
The instructions show the rudder pushrod attached to the outer hole on the rudder control horn. I found that slightly more rudder movement was necessary, so I used the center hole. The elevator pushrod flexed when I applied down elevator, so I added a small plywood brace. Control throws were set per the manual with 25% exponential.
Each landing gear assembly is attached to the wing with four screws. The wings are supported with aluminum tubes and locked in place with clips that are an integral part of the wing and fuselage.
Carefully position the included propeller on the spinner backplate to match the cutouts in the spinner before you secure it in place. Add your receiver and battery and you are ready to go. There is room for a variety of batteries, but more on that later.
To secure the battery, I glued a double-sided hook-and-loop fastener to the bottom of the battery compartment and added the matching fastener to the battery. The loop portion was also added to the battery area to prevent side-to-side movement.
After much testing, I settled on a three-cell, 4000 mAh Hyperion 25C LiPo battery. It gives me 7 to 8 minutes of aggressive flights using only about half the battery’s capacity. The battery slides fully forward in the battery compartment to achieve a CG that requires little forward stick for inverted flight.
Specifications
- Model type: Sport
- Skill level: Beginner builder, intermediate pilot
- Wingspan: 51 inches
- Wing area: 453 square inches
- Length: 41 inches
- Weight: 3 pounds, 8 ounces
- Wing loading: 18 ounces per square foot
- Power system: 400–500 watt electric
- Battery: Three-cell LiPo, 2200 mAh 20C or higher (tester used 4000 mAh 25C)
- Radio: Four-channel minimum
- Servos: Four servos installed with Y connector
- Construction: Foam and plastic
- Covering/finish: Prepainted
- Price: PNP $101.99
Pluses and Minuses
Pluses
- Nice-looking model and a great value
- Available as an RTF, BNF, or PNP
- Unbelievable flight performance
- Durable
- High-quality connectors for power system
Minuses
- Requires a 4000 mAh battery to balance properly
- A way to secure the battery needs to be installed (not preinstalled)
- Elevator pushrod needs additional support
Test Model Details
- Motor: NEODYM 10, 1000 Kv brushless motor
- Speed control: 50 amp BEC ESC
- Battery: Hyperion three-cell, 4000 mAh 25C LiPo
- Propeller: 12 x 6
- Output load: 511 watts, 43 amps, 12.6 volts, 9000 rpm with included propeller
- Radio system: Spektrum DX6i transmitter, Spektrum AR500 receiver; servos and Y connector included with aircraft
- Ready-to-fly weight: 3 pounds, 10 ounces
- Flight duration: 7–8 minutes of aggressive aerobatics, 10–12 minutes of sport flying
Flying
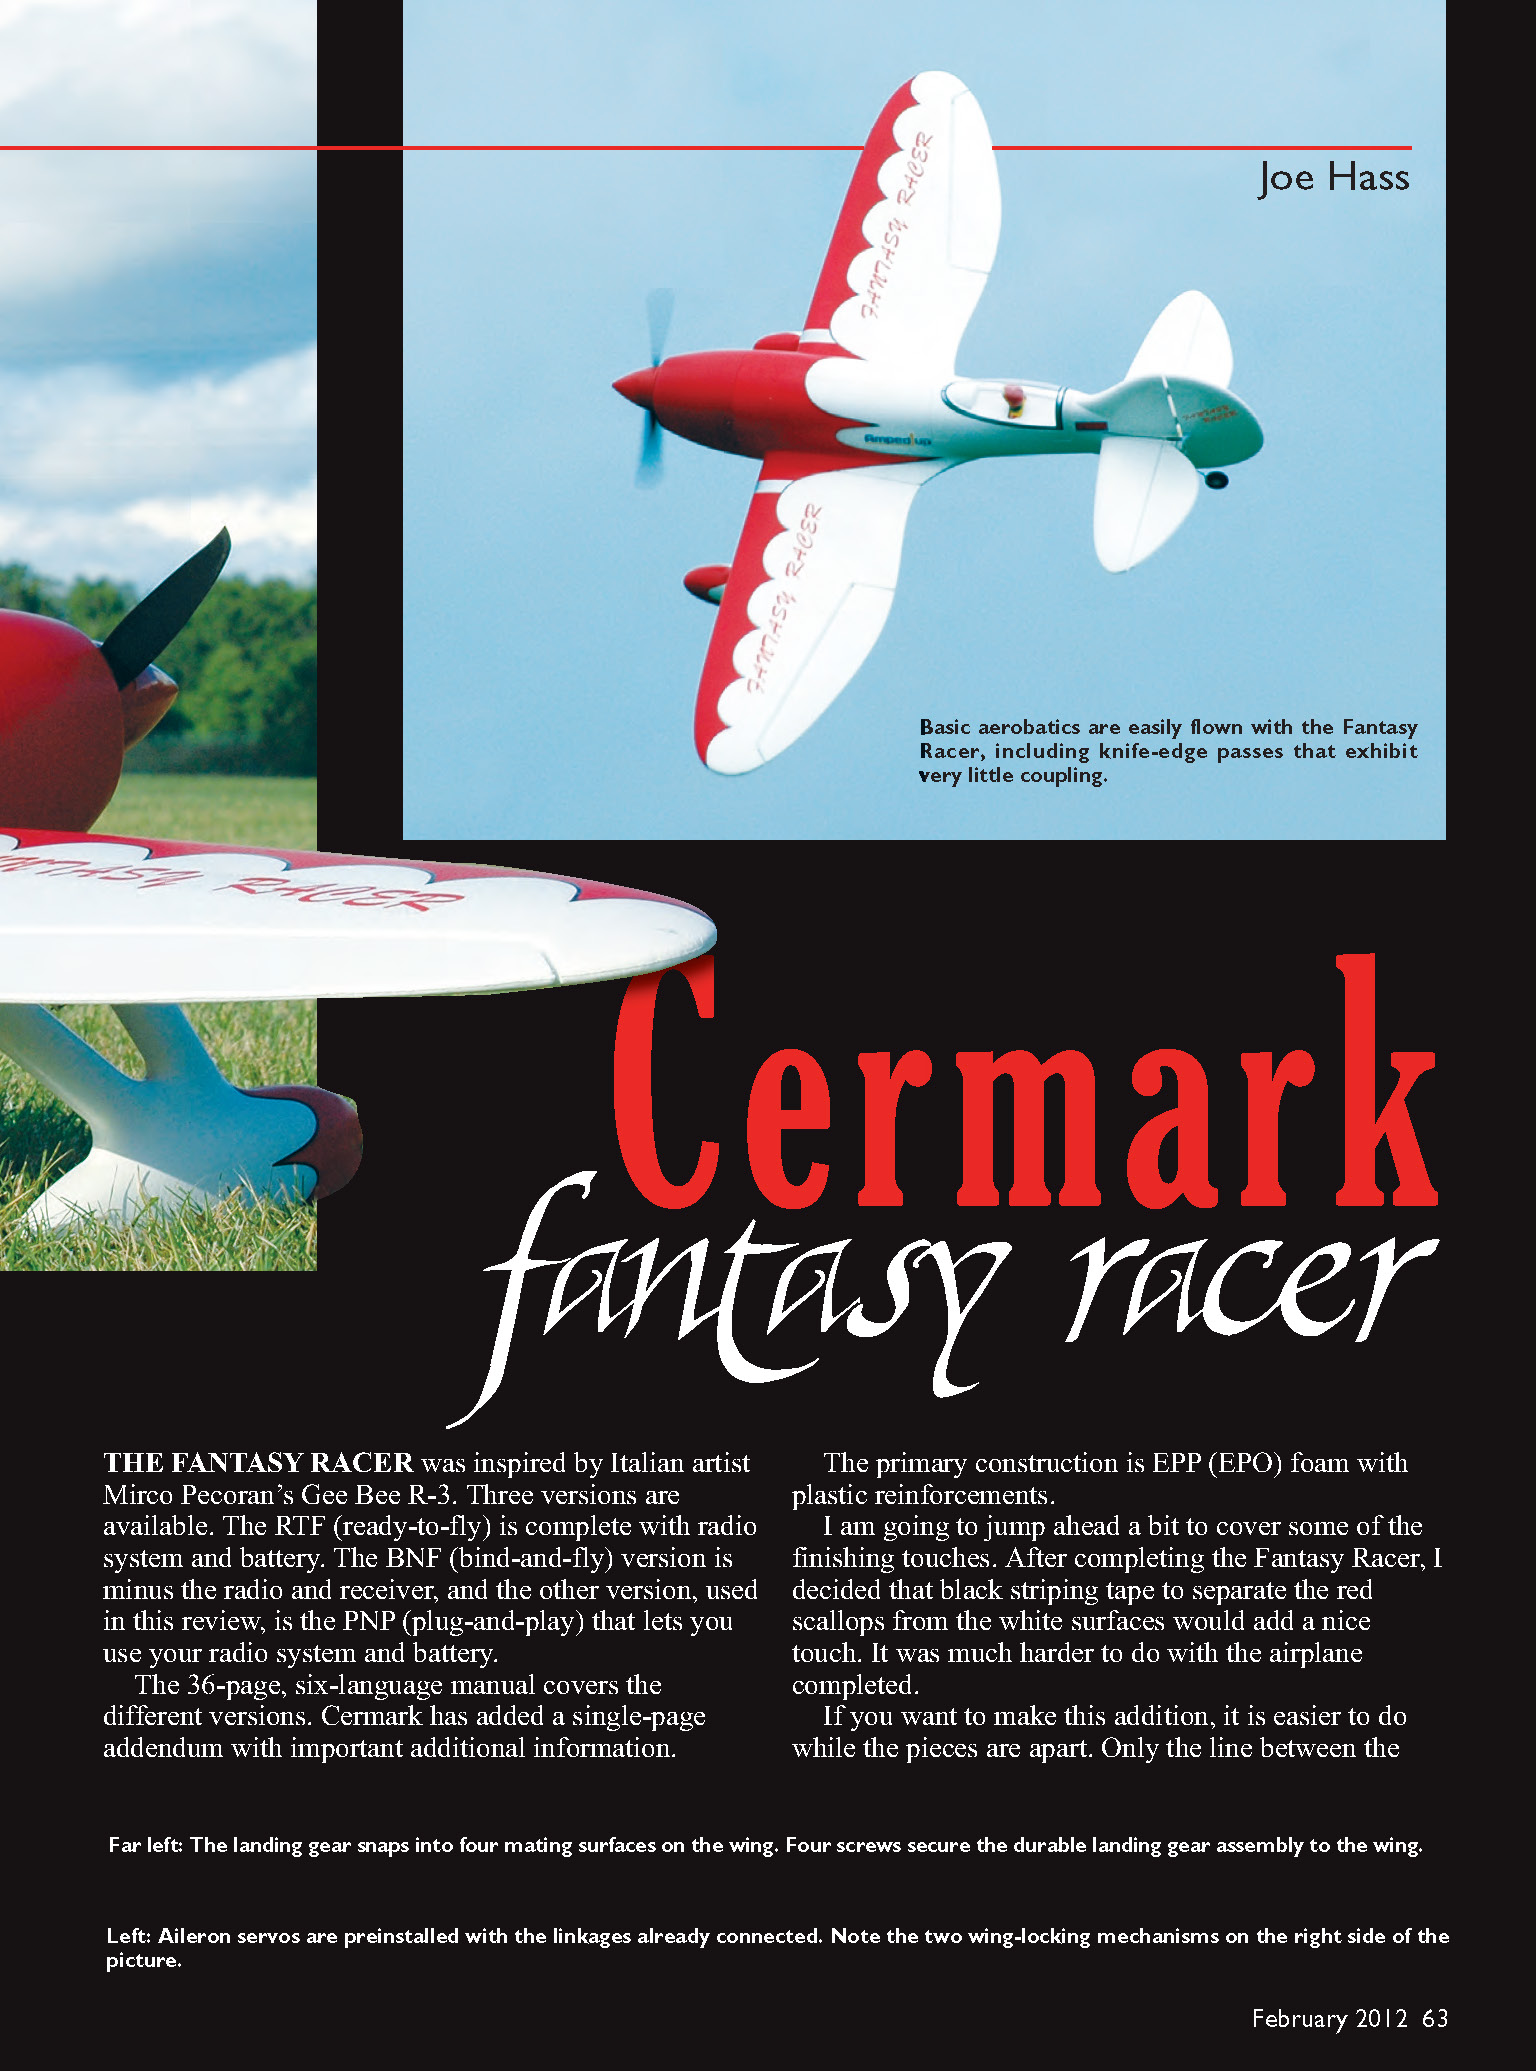
After the usual control and taxi tests, I was ready for the first flight. Positioned on the center of the grass runway, I slowly advanced the throttle while holding full up elevator. As the speed increased, I released the up elevator and the tail came up in a scale fashion. A little more throttle and a touch of up elevator and the Fantasy Racer was airborne.
A click of right aileron and a click of down elevator was all that was required for trim. A quick climb to altitude provided a chance to try a stall. I did not notice any adverse characteristics; the stall had a gentle break and there was no tendency to fall off on either wing.
Loops were easy from level flight. Rolls were amazingly axial. Inverted flight required a touch of down elevator. Before long I set up for a landing to check things out and recharge the battery.
On short final at approximately 4 feet off the ground, I chopped the throttle — big mistake. Instantly the Fantasy Racer almost stopped and stalled, impacting the wheel pants. I walked over expecting to see missing chunks of foam and broken plastic parts on the landing gear. Amazingly, there was only some paint worn away on the front of the wheel pants; everything else was perfect. This is one durable machine.
With a fully charged battery, another scalelike takeoff was completed. While the battery was still fresh, I tried some knife-edge flight. Solid knife-edge flight was easy in either direction with no adverse coupling. Four-point rolls were crisp and scalelike.
I attempted another landing, this time with power. The rate of descent was controlled by the throttle with only the slightest touch of up elevator to break the descent. After the main landing gear was solidly on the ground, I reduced the throttle and the tail dropped. I taxied back for another takeoff.
Maintaining power until the main gear touched, I performed a touch-and-go and smoothly took off again. Climbing back to altitude, I tried a spin. The Fantasy Racer needs to fully stall before a spin starts. It takes roughly a quarter turn to stop the spin after the controls are neutralized. Rolling circles, avalanches, and stall turns were easily accomplished.
I solicited the help of a local competitor, my son Chris, for the flight photos. Given the aircraft's unique design, he was pleasantly surprised at the wide flight envelope.
Conclusion
The Fantasy Racer is a great value with excellent flight performance and durability. You can get in the air quickly and will be pleased with the total package. Cermark has a winner; give it a try! MA
Sources
- Cermark
(562) 906-0808 www.cermark.com
- Empire RC
(480) 982-0909 www.empirerc.com
- Apple Barrel Paint
(800) 842-4197 www.plaidonline.com
- Hangar 9
(800) 338-4639 www.hangar-9.com
- Spektrum
(800) 338-4639 www.spektrumrc.com
Transcribed from original scans by AI. Minor OCR errors may remain.

