
Auto body paint systems
by Bob Hunt
The response to the discussions in this column about DuPont ChromaBase paints and how to use them in painting CL Stunt models has been overwhelming. It seems that many modelers have been contemplating the use of either basecoat/clearcoat car paint systems, or water-based paint systems as a replacement or alternative to the use of model airplane dope.
I've received correspondence from readers, many calls from friends about the subject, questions about the paint, and stories from those who have been experimenting with it for years. The consensus is that there are many paint systems out there that can be used in place of dope for finishing our models. The correspondence also suggested to me that there is a thirst for more detailed information on the subject.
I've had discussions with friends who are active in the automotive painting/collision repair industry, which has convinced me that I've only scratched the surface of this. The experiences I've had with the ChromaBase paints have been to use them over traditional model airplane dope-based fillers and primers. I had not used any of the auto body-type primers or fillers, in part because of a horrible experience that I had many years ago.
I was finishing a new CL Stunt model for use at the 1969 Nats. I opted to use a lacquer-based primer as a filler coat. It went on great and sanded extremely well, but after I had applied the dope color coats and the trim colors, I applied several coats of clear model airplane dope as a top coat. The clear reacted with the auto body filler coat and "bled" through the colors, ruining the finish and effectively keeping me from flying at that Nats. That experience soured me on experimenting with anything other than traditional model finishes for many years.
In the interim, lacquer-based auto paint systems have all but disappeared. The new basecoat/clearcoat systems are more volatile organic compound-compliant and seem to be much easier to apply. Now I'm using a basecoat/clearcoat system, and I have no worries that the auto body-type primer will bleed through the color coat when the clear is applied.
Auto Primer
My friend, Lou Wolgast, is an accomplished auto body technician, and an expert builder, finisher, and CL Stunt pilot. He showed up at the Vintage Stunt Championships (VSC) last year with a version of his gorgeous, original-design Fury that was resplendent in a high-gloss red finish.
Lou and I spoke about that model and it turns out that it was painted using the DuPont ChromaBase basecoat/clearcoat system. Lou also used the DuPont Nasson primer. I asked him why he opted to use that primer instead of a dope-based type and he told me something that I had not thought of: the multipart (primer/activator/reducer) auto primers do not shrink! That alone is reason enough to use them. Dope-based primers shrink over time and reveal grain and seams, and even promote twisting of the airframe components. Today's multipart auto primers do not.
Buddy Wieder and I went to the local auto paint store that I mentioned in my January column and asked my technician friend, Dean Metzger, about the DuPont primer. He suggested that we use the store-brand primer, which he told us was being used by virtually all of the local body shops. Apparently this primer has all the properties of the higher-priced types, but at substantial savings.
Dean has not yet led me wrong, so we took his advice and bought a gallon of the proprietary three-part primer. It was to be mixed as four parts primer to one part activator to one-to-two parts reducer. Dean told us that if we had a well-prepared and flaw-free base that we could use more reducer (up to two parts) and achieve a more even flow out of the product and obtain a thinner and lighter result.
Dean was again on the money. Buddy and I mixed 6 ounces of material and painted my new Classic model, a Gene Schaffer-designed Oosa-Amma. The primer was applied using an inexpensive, siphon-feed spray gun, and it went on beautifully. The directions said to let it cure for at least three hours, and we let it sit for roughly six.
Sanding was done using #400-grit wet-or-dry (silicon carbide) sandpaper and a thin foam block. The foam block ensures that the surface will be sanded evenly with no finger pressure points and, if, while sanding, an adjacent part is inadvertently hit, there will be no damage. The foam block will crush and prevent any dings or dents. I dry-sanded the primer.
I sanded all the material I could off of the airframe. The only primer left on the model was that which filled the minor imperfections in the model’s surface. For those who have sanded talcum powder and dope filler coat in the past, I’d say that you will find the effort required to sand the auto primer roughly the same.
Lou reminded me to mention that if you are spraying the primer on over an open-bay surface with ribs and cap strips, be sure to thin the primer slightly more and use much less on the covered areas. If you spray a too-thick coat over the open-bay areas, you risk cutting the covering at the edge of a rib or cap strip with sandpaper as you remove the primer. A thin coat of primer will fill in any open weave on the silkspan or Polyspan and will be much easier to sand.
Lou told me that you can usually purchase the primer in one of several colors. Use the color primer that is closest to the actual base color with which you will paint the airplane, making it easier for the color to cover in fewer, thinner coats.
This presupposes that you will only sand the surface of the primer smooth and not actually sand through to the basecoats.
Lou said that there are tints available to allow the user to custom-make a primer color that will be as close to the eventual color coats as possible. Primer is heavy, and I prefer to sand it all off, leaving only the low spots filled.
I use 0.2-ounce-per-square-yard carbon mat to cover my models and I fill that with several coats of non-shrinking airplane dope, sanding between every other coat. The carbon is black, and when the primer is sanded off of the model, most of the surface remains black. That can be difficult to cover with a light color such as white or yellow.
Blocking Coat
In the past I sprayed on a thin “blocking” coat consisting of Polar Gray and white model airplane dope. This blocking coat brings the model to a color value that is nearly white and allows fewer coats of white paint to be applied to achieve the desired results.
The blocking coat also allows you to inspect the model’s surface for any minor imperfections. These imperfections can be filled with spot putty, sanded smooth, and have an additional blocking coat sprayed on to achieve a constant color over the entire model.
My new method is to use a coat of ChromaBase silver paint as the blocking coat instead of the dope-based blocking coat. It makes sense to use auto paints as soon as possible and stay with those products to ensure that there will be no incompatibility problems. Additionally, the silver paint will show off minor imperfections in the model’s surface even better than the Polar Gray and white dope mix.
As I mentioned in the past two “CL Stunt” columns, ChromaBase paints will harden to a shell-like surface finish after approximately 48 hours; that surface can then be burnished with a Scotch-Brite Ultra Fine pad before applying any additional color or trim. In the case of the silver ChromaBase paint, it allows you to achieve a virtually perfect surface on which to paint because the silver blocks out the blotchy surface of the sanded primer/carbon fiber and also magnifies any microscopic imperfections.
After applying the thin coat of silver and then burnishing it, you will be able to fix even the most minor imperfections by using the edge of a single-edge razor blade to apply spot putty into the areas that need attention. You can then block sand the glazing compound to match the surface, and spot in more silver to regain the one-color look.
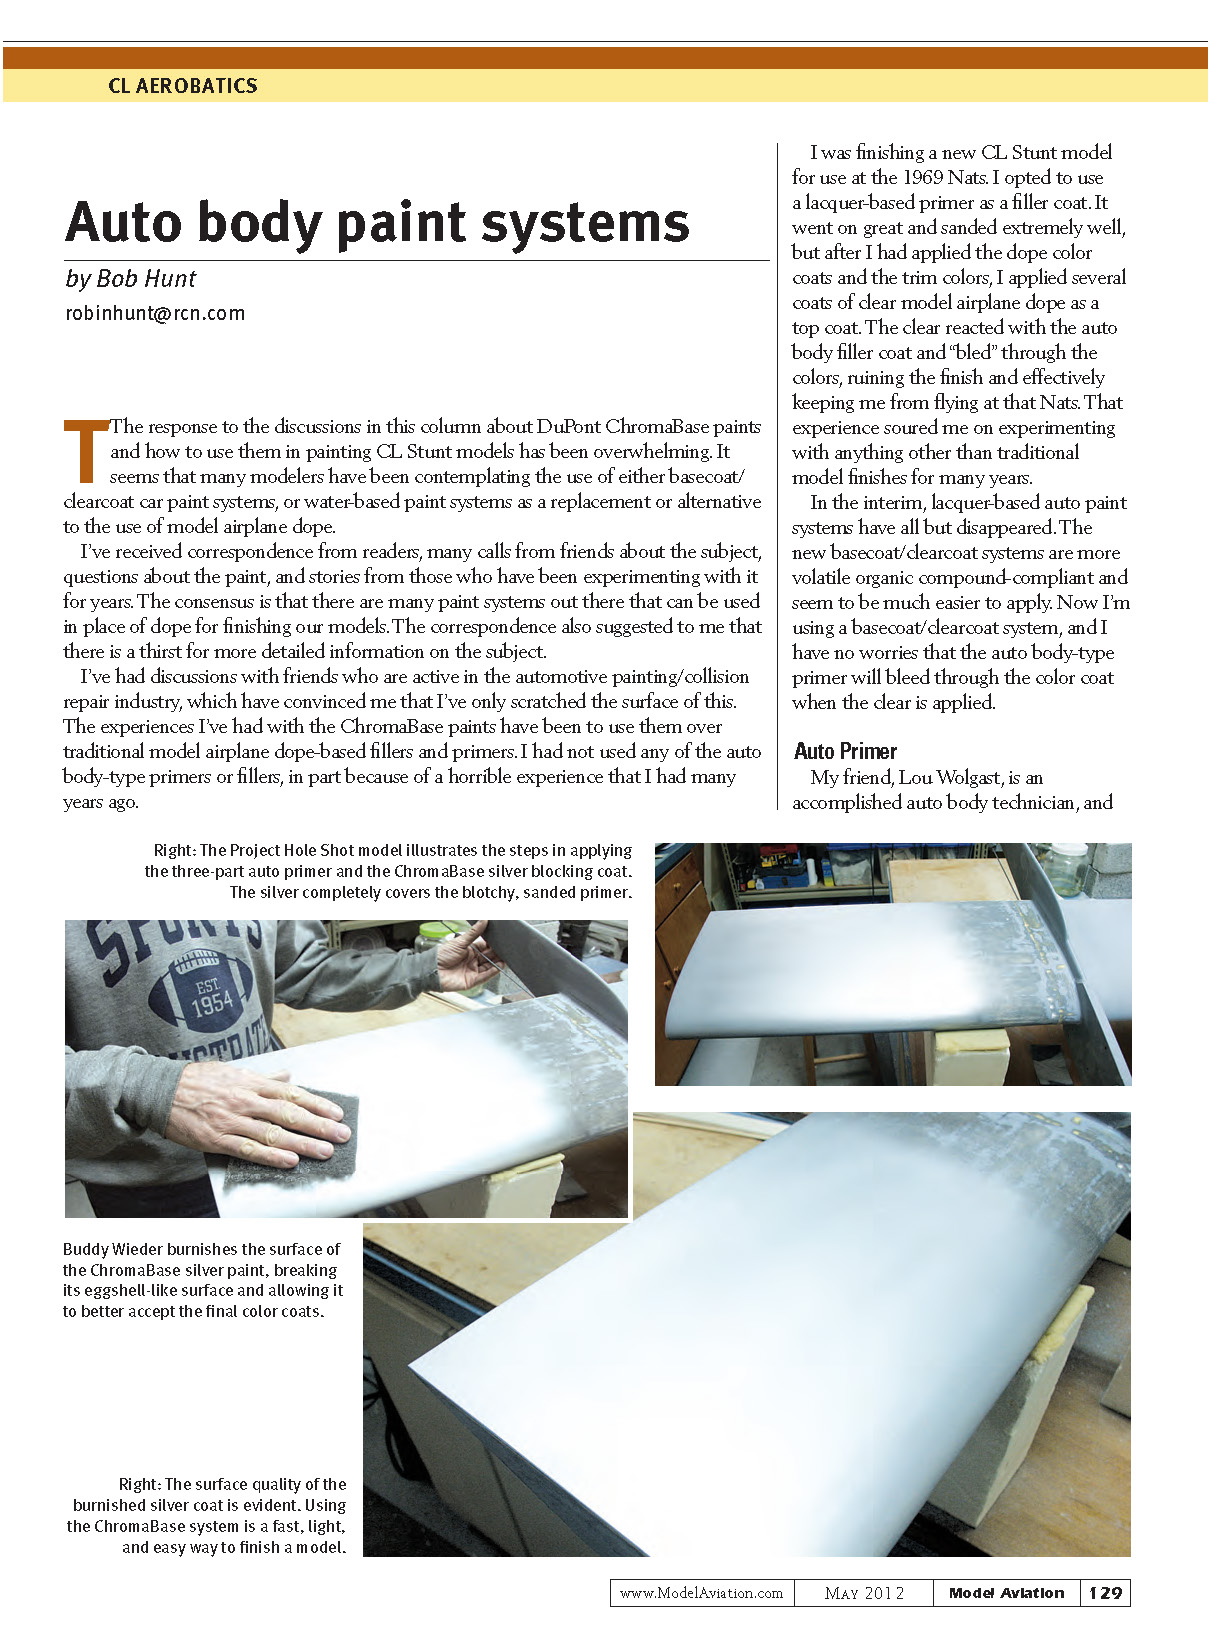
Before trying it on a front-line model, Buddy and I shot the Project Hole Shot model with the auto body three-part primer, sanded the top of one wing panel thoroughly, and then shot a thin coat of ChromaBase silver paint onto the outer half of the primed and sanded panel. We burnished the surface of the silver with the Scotch-Brite pad. The next step would be to apply the finish-color coat. I have included a couple of pictures of the sequence on the Hole Shot to show just how simple, quick, and effective this system is.
Step-by-Step Finishing Procedure
Several people have asked for a step-by-step finishing procedure for the ChromaBase and other basecoat/clearcoat systems. Here’s what I’ve come up with to this point for a typical foam-wing-equipped model. I’m certain that this procedure will be tweaked in the months and years to come, but I’m confident that this sequence will yield impressive, light, and quick results.
- Finish-sand the model thoroughly using #400 grit sandpaper and a foam block.
- Apply two coats of Randolph Non-Tautening butyrate dope.
- Cover the model with 0.2-ounce-per-square-yard carbon mat using 80% to 90% thinned dope.
- Sand the model’s surface smooth and apply two coats of moderately thinned butyrate dope.
- Sand the surface smooth, apply two more coats of dope, and then sand the surface smooth one last time.
- Apply a coat of three-part auto body primer and let it cure.
- Sand the primer off using #400 wet-or-dry sandpaper and a foam block.
- Apply a thin coat of ChromaBase silver paint (I use the silver color coded LM5880K). Let this coat cure for 48 hours.
- Burnish the surface of the silver using a Scotch-Brite Ultra Fine pad (Part #37448).
- Fill any minor imperfections using 3M Acryl-Green Spot Putty or a similar product. Then block sand the putty smooth. Recoat the putty-filled spot and sanded areas with another thin coat of silver then burnish those areas again with the Scotch-Brite pad.
- Spray on the basecoat color using ChromaBase paint.
- After 48 hours, you can burnish the surface of the color with the Scotch-Brite pad.
- Apply trim and any surface detailing (decals, vinyl appliqués, etc.).
- Shoot on a coat of DuPont ChromaClear (I prefer the G2-779S Multi-Mix clear) or a similar two-part automotive clear.
- Let the clear cure overnight, then sand the surface dull using 2,000-grit sandpaper and soapy water.
- Buff the model using a fine compound.
Final cautions
A few final cautions are in order. Be sure to use only original-formula (blue) Windex as a cleaner before using any of the above-listed products. Follow all of the safety precautions when using any type of catalyzed paints such as the three-part primer and the ChromaBase clears.
I’ll report on new finishing procedures and products as they become known and proven. Next time we’ll get back to some other aspects of building and flying CL Stunt models.
Till then, fly Stunt!
SOURCES
DuPont ChromaSystems Paints http://bit.ly/omdzpr
3M/Scotch-Brite (888) 364-3577 www.3m.com
Precision Aerobatics Model Pilots Association www.control-line.org
Transcribed from original scans by AI. Minor OCR errors may remain.

