
No copper, bronze, or metallic brown ...
by Bob Hunt [email protected]
In my last column, I related some of the trials and tribulations associated with rebuilding and refinishing my Crossfire Extreme. Not only did I complete the project, but the resurrected model flew even better than it had before the redo; it performed so well that I captured a third-place finish in the Open division in CL Aerobatics at the 2012 Nats. I'm pleased with that!
I left off last time discussing the ChromaSeal product that goes on after the three-part auto body primer has been sanded. ChromaSeal adheres well to the airframe and it also grips to the top coats of the ChromaBase paint. This eliminates a tendency for the tape to pull up the substrate during the trimming process.
Sand as much of the ChromaSeal off of the model as possible, leaving only a thin coat of it in place to avoid unnecessary weight on the model.
A minimal amount of white ChromaBase paint was required to cover the ChromaSeal on the Crossfire Extreme. I used the white-tinted ChromaSeal. It also comes in light and dark gray. After the ChromaBase white had dried for 24 hours, I scuffed the surface using a 3M Ultra Fine Scotch-Brite pad. Don't omit this step if you plan to use the ChromaBase system; the trim colors won't adhere properly to the basecoat if you do not properly scuff it.
Buddy Wieder discovered this the hard way on his new Ryan's Eagle. He forgot to scuff the basecoats of color. When he shot on the trim, it pulled up in large sheets when he removed the tape. He remasked and repainted at the 11th hour, scuffing the surface of the model as he proceeded. He finally shot the trim successfully, and he was rewarded at the Nats with 18 points in appearance.
After I had the basecoat of color shot and scuffed on the Crossfire Extreme, it was time to apply the trim colors. I didn't use copper, bronze, or metallic brown in my trim scheme for perhaps the first time in nearly 40 years! I instead used a color scheme that I'd been considering for a few years.
Several years ago, I flew an EU-1A in Advanced RC Pattern at the Nats. That model was used in the Flying Models series "Project Pattern." Dean Pappas and I joined forces in the 1980s to construct, finish, and trim a representative fiberglass and foam RC Pattern model, and then report on the build in a step-by-step series.
That aircraft was painted in the U.S. Air Force Thunderbirds show team scheme, and it showed up well in the air. I have always wanted to put that scheme on a CL Aerobatics model and I wanted to show my patriotism, so a red, white, and blue scheme seemed appropriate.
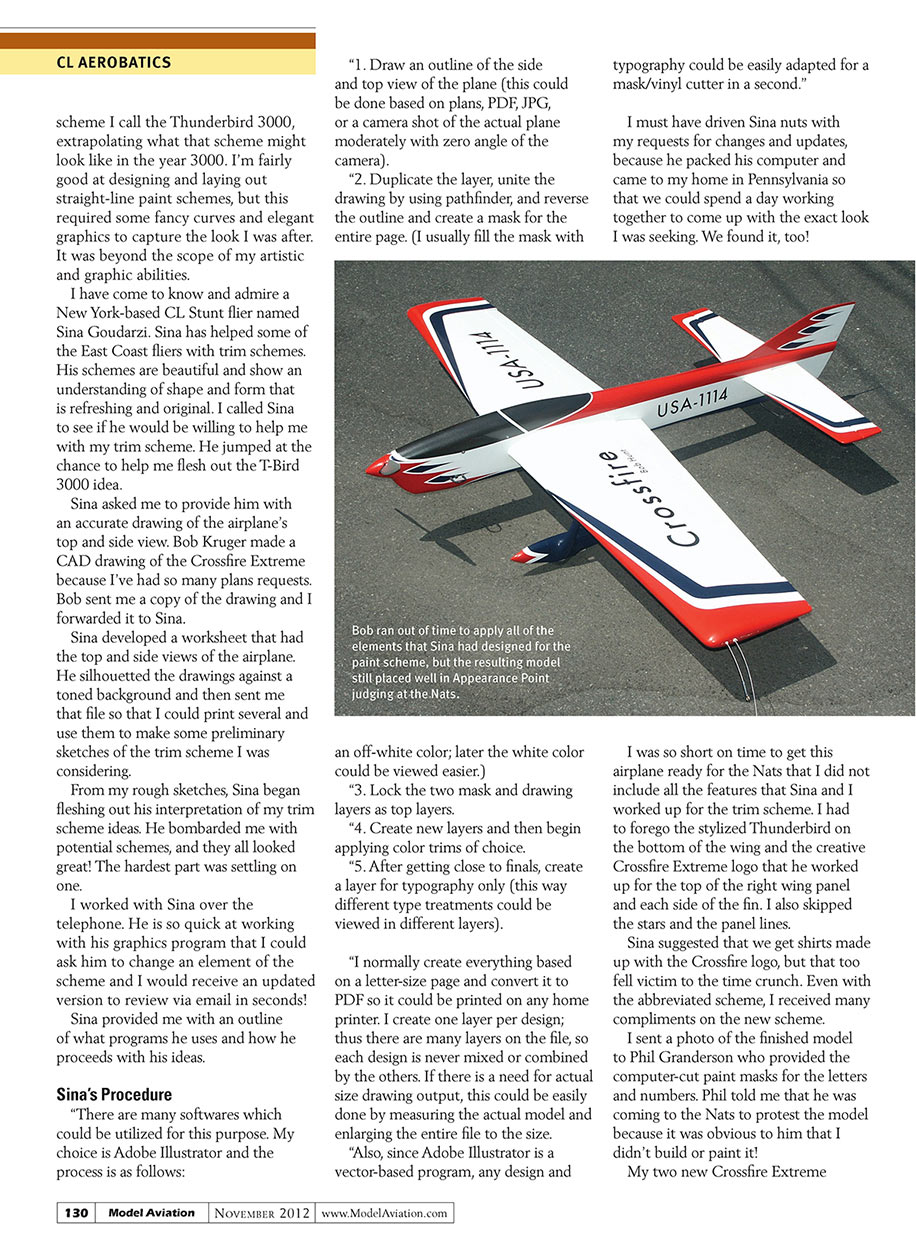
I decided that the Thunderbird design could be modified and maybe even enhanced, so I came up with a scheme I call the Thunderbird 3000, extrapolating what that scheme might look like in the year 3000. I'm fairly good at designing and laying out straight-line paint schemes, but this required some fancy curves and elegant graphics to capture the look I was after. It was beyond the scope of my artistic and graphic abilities.
I have come to know and admire a New York–based CL Stunt flier named Sina Goudarzi. Sina has helped some of the East Coast fliers with trim schemes. His schemes are beautiful and show an understanding of shape and form that is refreshing and original. I called Sina to see if he would be willing to help me with my trim scheme. He jumped at the chance to help me flesh out the T-Bird 3000 idea.
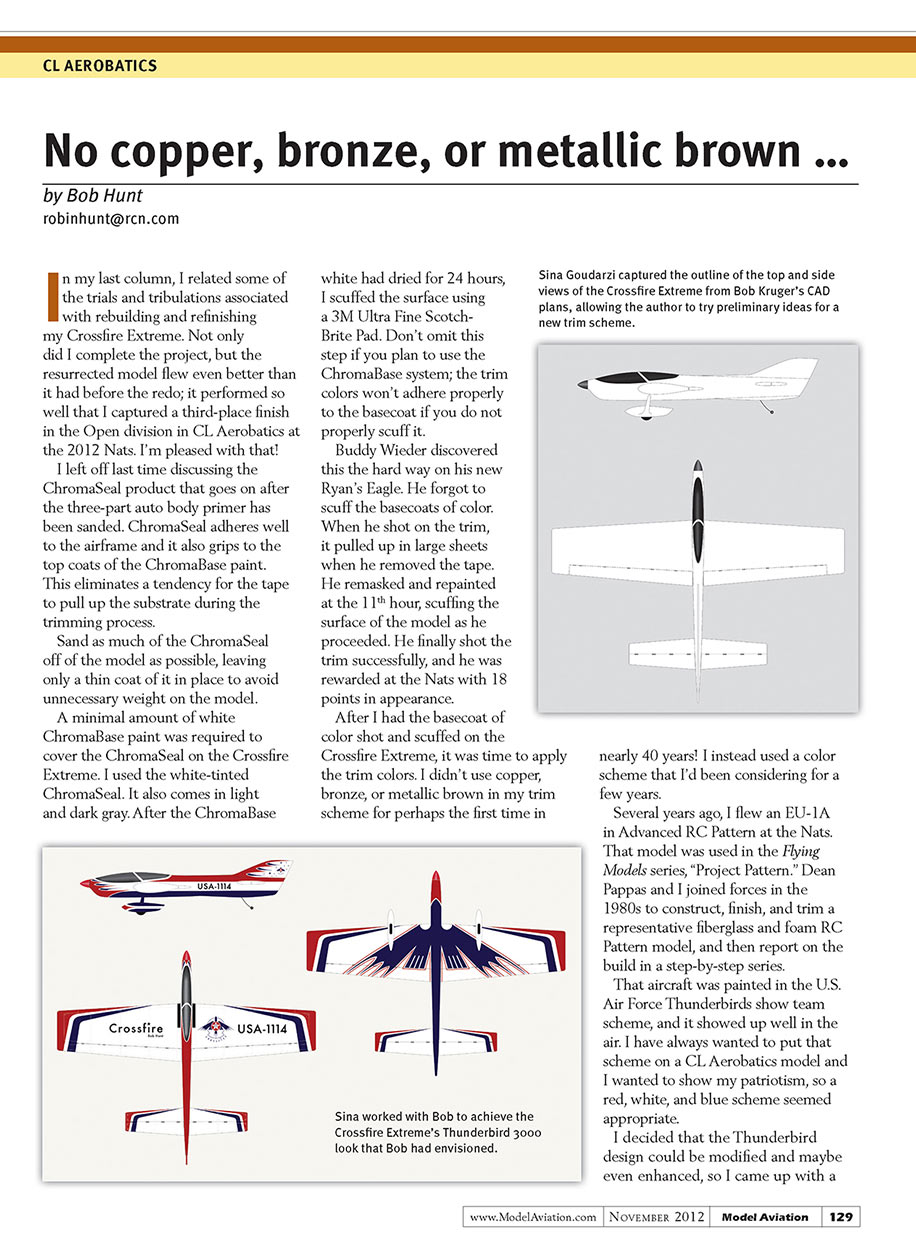
Sina asked me to provide him with an accurate drawing of the airplane's top and side view. Bob Kruger made a CAD drawing of the Crossfire Extreme because I've had so many plans requests. Bob sent me a copy of the drawing and I forwarded it to Sina.
Sina developed a worksheet that had the top and side views of the airplane. He silhouetted the drawings against a toned background and then sent me that file so that I could print several and use them to make some preliminary sketches of the trim scheme I was considering.
From my rough sketches, Sina began fleshing out his interpretation of my trim scheme ideas. He bombarded me with potential schemes, and they all looked great! The hardest part was settling on one.
I worked with Sina over the telephone. He is so quick at working with his graphics program that I could ask him to change an element of the scheme and I would receive an updated version to review via email in seconds!
Sina provided me with an outline of what programs he uses and how he proceeds with his ideas.
Sina's Procedure
There are many software packages that could be utilized for this purpose. My choice is Adobe Illustrator and the process is as follows:
- Draw an outline of the side and top view of the plane (this could be done based on plans, PDF, JPG, or a camera shot of the actual plane with a zero angle of the camera).
- Duplicate the layer, unite the drawing by using Pathfinder, reverse the outline and create a mask for the entire page. (I usually fill the mask with an off-white color; later the white color could be viewed easier.)
- Lock the two mask and drawing layers as top layers.
- Create new layers and then begin applying color trims of choice.
- After getting close to finals, create a layer for typography only (this way different type treatments could be viewed in different layers).
I normally create everything based on a letter-size page and convert it to PDF so it can be printed on any home printer. I create one layer per design; thus there are many layers on the file, so each design is never mixed or combined with the others. If there is a need for actual-size drawing output, this can be easily done by measuring the actual model and enlarging the entire file to the size.
Also, since Adobe Illustrator is a vector-based program, any design and typography can be easily adapted for a mask/vinyl cutter in a second.
I must have driven Sina nuts with my requests for changes and updates, because he packed his computer and came to my home in Pennsylvania so that we could spend a day working together to come up with the exact look I was seeking. We found it, too!
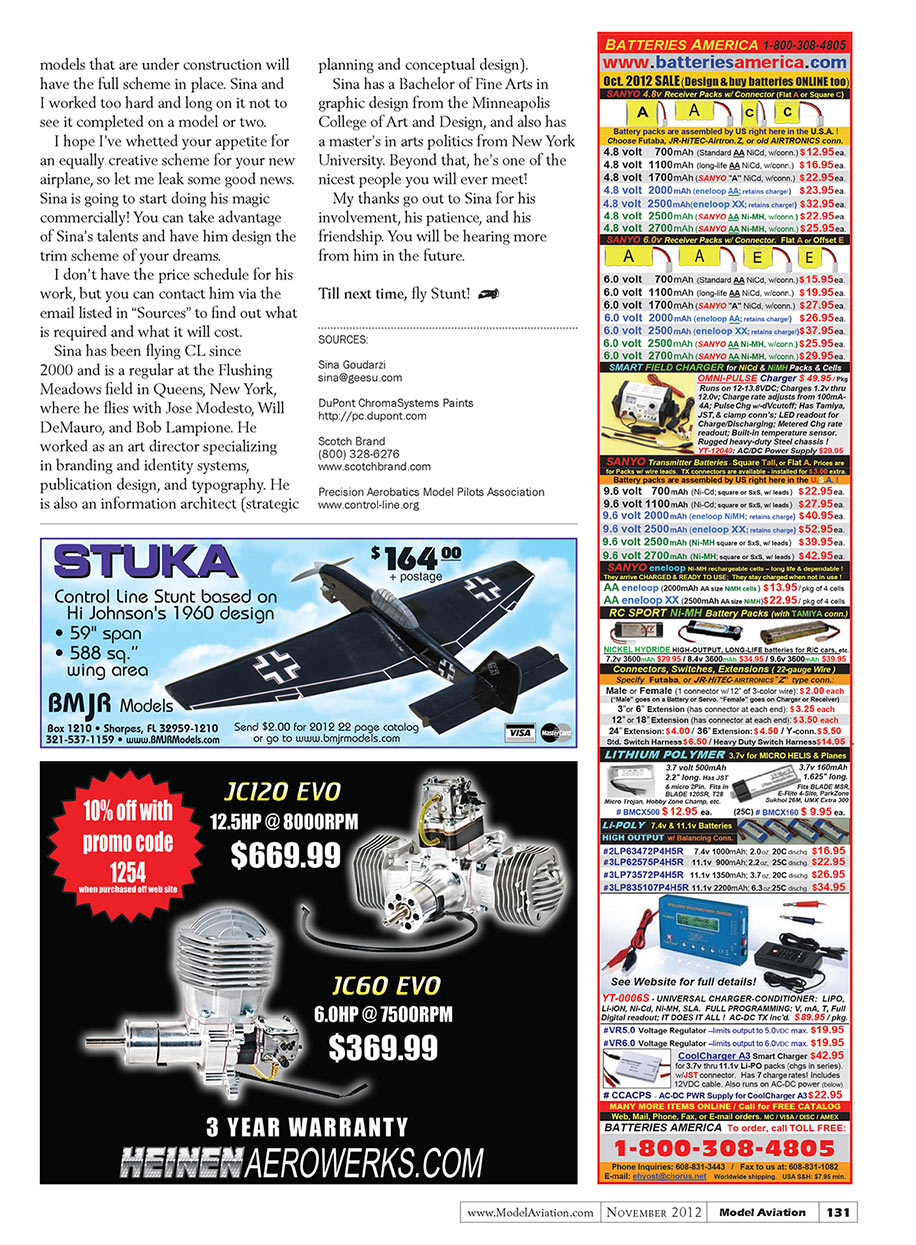
I was so short on time to get this airplane ready for the Nats that I did not include all the features that Sina and I worked up for the trim scheme. I had to forego the stylized Thunderbird on the bottom of the wing and the creative Crossfire Extreme logo that he worked up for the top of the right wing panel and each side of the fin. I also skipped the stars and the panel lines.
Sina suggested that we get shirts made up with the Crossfire logo, but that too fell victim to the time crunch. Even with the abbreviated scheme, I received many compliments on the new scheme.
I sent a photo of the finished model to Phil Granderson who provided the computer-cut paint masks for the letters and numbers. Phil told me that he was coming to the Nats to protest the model because it was obvious to him that I didn't build or paint it!
My two new Crossfire Extreme models that are under construction will have the full scheme in place. Sina and I worked too hard and long on it not to see it completed on a model or two.
I hope I’ve whetted your appetite for an equally creative scheme for your new airplane, so let me leak some good news. Sina is going to start doing his magic commercially! You can take advantage of Sina’s talents and have him design the trim scheme of your dreams.
I don’t have the price schedule for his work, but you can contact him via the email listed in “Sources” to find out what is required and what it will cost.
Sina has been flying CL since 2000 and is a regular at the Flushing Meadows field in Queens, New York, where he flies with Jose Modesto, Will DeMauro, and Bob Lampione. He worked as an art director specializing in branding and identity systems, publication design, and typography. He is also an information architect (strategic planning and conceptual design).
Sina has a Bachelor of Fine Arts in graphic design from the Minneapolis College of Art and Design, and also has a master’s in arts politics from New York University. Beyond that, he’s one of the nicest people you will ever meet!
My thanks go out to Sina for his involvement, his patience, and his friendship. You will be hearing more from him in the future.
Till next time, fly Stunt!
SOURCES:
Sina Goudarzi [email protected]
DuPont ChromaSystems Paints http://pc.dupont.com
Scotch Brand (800) 328-6276 www.scotchbrand.com
Precision Aerobatics Model Pilots Association www.control-line.org
Transcribed from original scans by AI. Minor OCR errors may remain.

