
An exercise in dry-flying
by Bob Hunt [email protected]
I left off last time with a "dry-flying" exercise. Dry-flying is when you hold a handle in your hand and simulate flying the maneuvers without having to leave your shop or living room. I hope that you practiced inside and outside dry loops. If not, then you have some virtual twists in your lines by now.
Are you comfortable with loops and scribing a perfectly round shape with your arm and hand? Then it's time to move on to the squares.
Squares are more about the legs than the corners. Try to scribe a perfectly square shape using your outstretched arm as a sighting and scribing device. It's unimportant at this point to induce the control to simulate the corners. Simply try to achieve a square shape with absolutely straight legs.
When you are comfortable that the legs of your simulated squares are flat and straight, try inducing the correct amount of control to simulate the corners, without slowing down or stopping the movement of your arm through the shape of the maneuver.
Many years ago my good friend John D'Ottavio (who recently turned 91!) gave me a valuable piece of advice about flying square maneuvers. John said, "Fly through the corners, not to the corners."
The object is to make the model turn smoothly through the corner and then blend perfectly into the next leg. Too often I see pilots fly a leg of a square and when they come to a corner they suddenly "yank" the handle to make the model turn abruptly. The result generally is either an overturned or underturned corner. When this happens, the illusion of a perfect shape is lost and unrecoverable.
The idea is to turn an exact amount of corner that will place the centerline of the model's fuselage in line with the next leg of the square. Again, square maneuvers are more about the straight legs than the corners!
Years ago the AMA rule book listed the corner radii of the square maneuvers as 5 feet. That was an arbitrary number that George Aldrich, the designer of our pattern, came up with in 1957. George often said that he wished that he had simply indicated that the model should perform a tight, but smooth, corner in the square maneuvers. The rule book was amended by vote of the Control Line Aerobatics Contest Board a few years ago to indicate that in a square maneuver the model should perform a "tight radius." There is no listed radius requirement in feet. Read the rule book in detail each year to know what changes might have been made and to again familiarize yourself with what we are supposed to be doing.
A brief thought here—corners will begin to have a tighter radius as you get comfortable with fluidly making the airplane turn from one leg of the maneuver to another, placing the model exactly on path. Corners will improve in time with proper technique.
The next step in our dry-flying routine is the triangle. This is the most-often misshaped maneuver. The tendency is to either overturn the first corner or underturn it, make the shape too "flat" (squashed down in appearance), or too "peaky" (narrow and tall). Either way, the shape is lost and, again, unrecoverable. The more you study the actual shape of the triangle that you are supposed to be flying, the better your competition scores will be.
The idea is to scribe the exact shape desired, but to do so requires much more practice and thought. As mentioned in my May 2014 MA column, the muscles in your flying arm will stretch and contract as you fly the maneuvers. If you are performing a simple inside loop (and you are right-handed and flying counterclockwise), you will be stretching your arm and shoulder muscles on the ascending portion of the loop and contracting them on the descending portion. The loop is not very wide, so the amount of stretching and contracting is minimal in single maneuvers. Double maneuvers are a different matter. In the Horizontal Eight, if you are facing the center of the maneuver when you begin it, you will experience the same type of stretching and contracting of the muscles as you did in the simple round loop.
When you come to the intersection point after the inside loop portion of the Figure Eight and begin the outside loop, you will experience much more stretching. Stop here and give that a try. Focus on how much more tension is in your arm and shoulder muscles during the outside loop portion of the maneuver than on the inside portion.
Because of this, the outside loop portion of the eight will typically have a smaller radius than the inside loop because our arms are mounted on either side of our bodies and not in the center. The intersection point will usually move to the left as the outside loop portion is completed.
There are two ways to deal with this problem. The first is to realize that the problem is there and simply practice not letting the outside portion of the maneuver become smaller in radius than the inside. If you are aware of the stretch and learn to deal with it, you will do fine.
Another method is to position your body so that your arm (the one holding the handle) is facing the center of the maneuver at the start point. By doing this, the stretching and contracting of the muscles will be equal for both loops that constitute a Figure Eight. Unfortunately, this can't be done when performing a Vertical Eight or Overhead Eight.
CL Aerobatics 2014/07
unless you have an antigravity device...
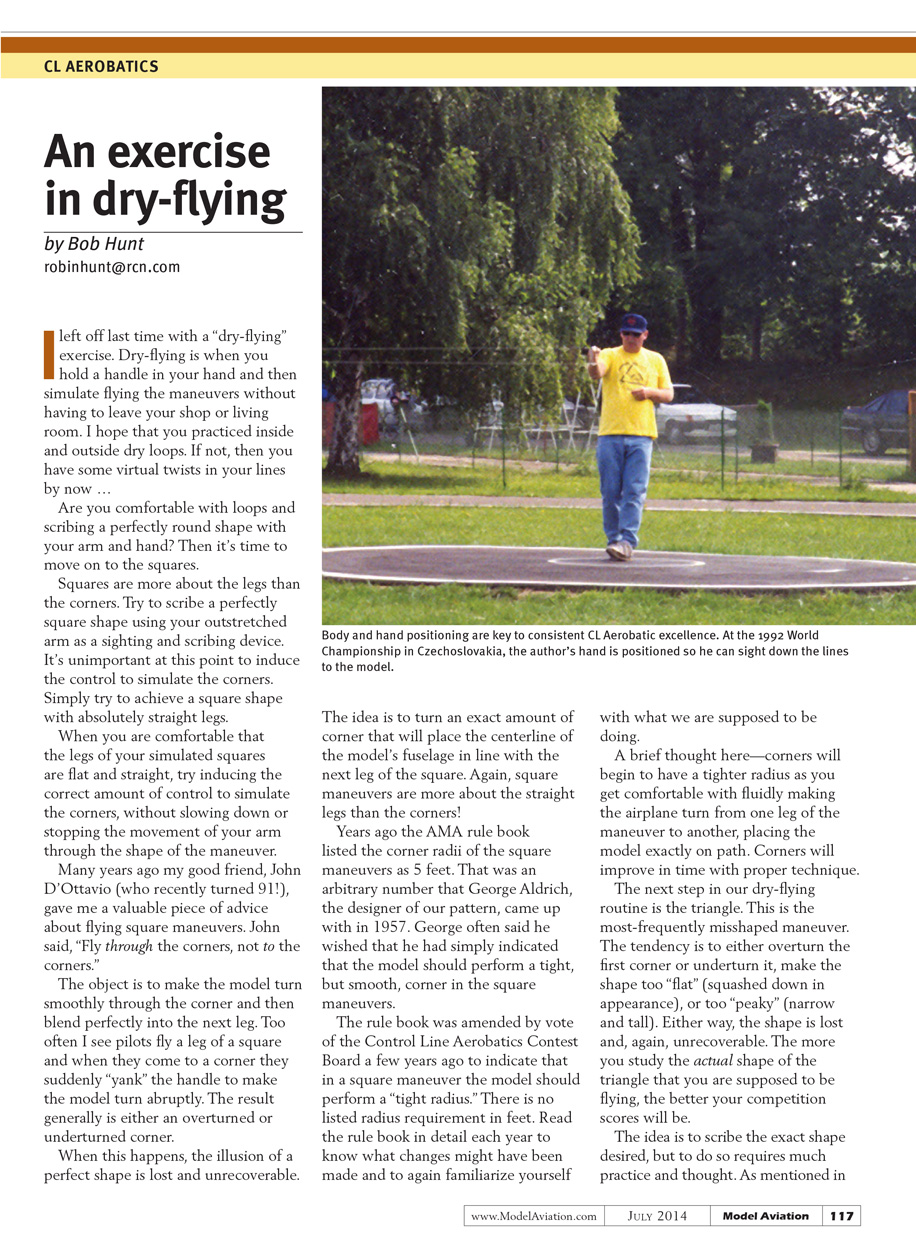
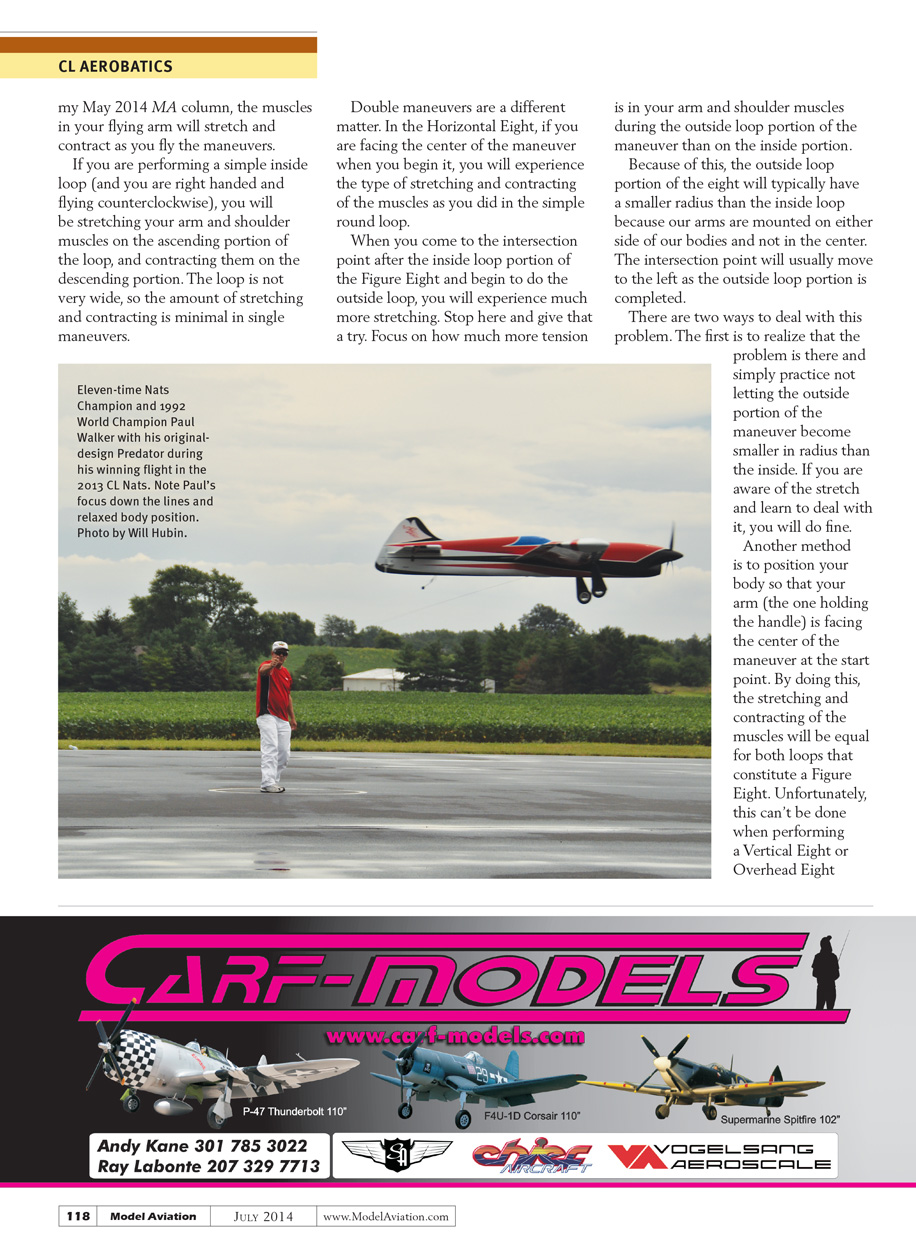
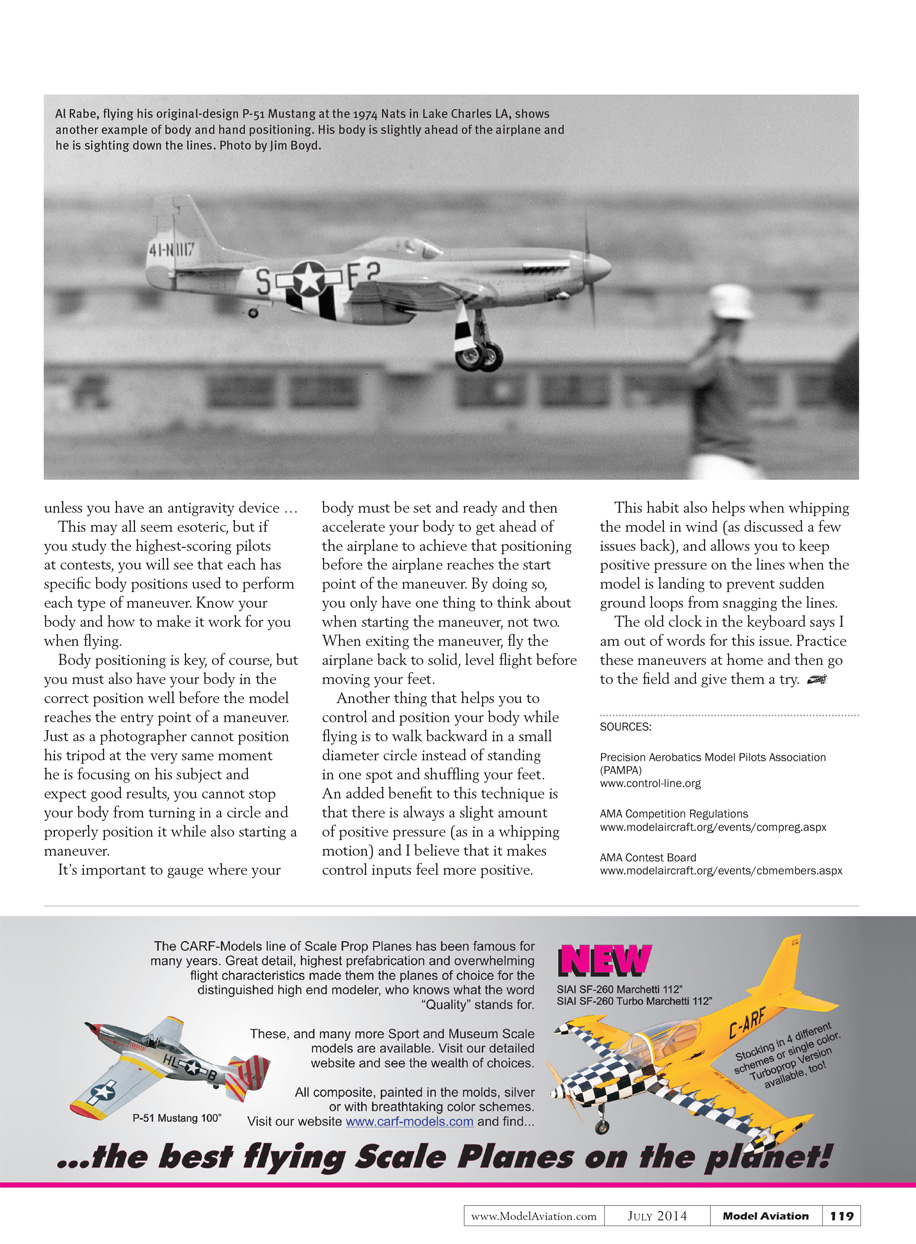
This may all seem esoteric, but if you study the highest-scoring pilots at contests, you will see that each has specific body positions used to perform each type of maneuver. Know your body and how to make it work for you when flying.
Body positioning is key, of course, but you must also have your body in the correct position well before the model reaches the entry point of a maneuver. Just as a photographer cannot position his tripod at the very same moment he is focusing on his subject and expect good results, you cannot stop your body from turning in a circle and properly position it while also starting a maneuver.
It's important to gauge where your body must be set and ready and then accelerate your body to get ahead of the airplane to achieve that positioning before the airplane reaches the start point of the maneuver. By doing so, you only have one thing to think about when starting the maneuver, not two. When exiting the maneuver, fly the airplane back to solid, level flight before moving your feet.
Another thing that helps you to control and position your body while flying is to walk backward in a small-diameter circle instead of standing in one spot and shuffling your feet. An added benefit to this technique is that there is always a slight amount of positive pressure (as in a whipping motion) and I believe that it makes control inputs feel more positive.
This habit also helps when whipping the model in wind (as discussed a few issues back), and allows you to keep positive pressure on the lines when the model is landing to prevent sudden ground loops from snagging the lines.
The old clock in the keyboard says I am out of words for this issue. Practice these maneuvers at home and then go to the field and give them a try.
SOURCES
- Precision Aerobatics Model Pilots Association (PAMPA)
- AMA Competition Regulations
www.modelaircraft.org/events/compreg.aspx
- AMA Contest Board
www.modelaircraft.org/events/cbmembers.aspx
Transcribed from original scans by AI. Minor OCR errors may remain.

