
Level laps
Byline
by Bob Hunt [email protected]
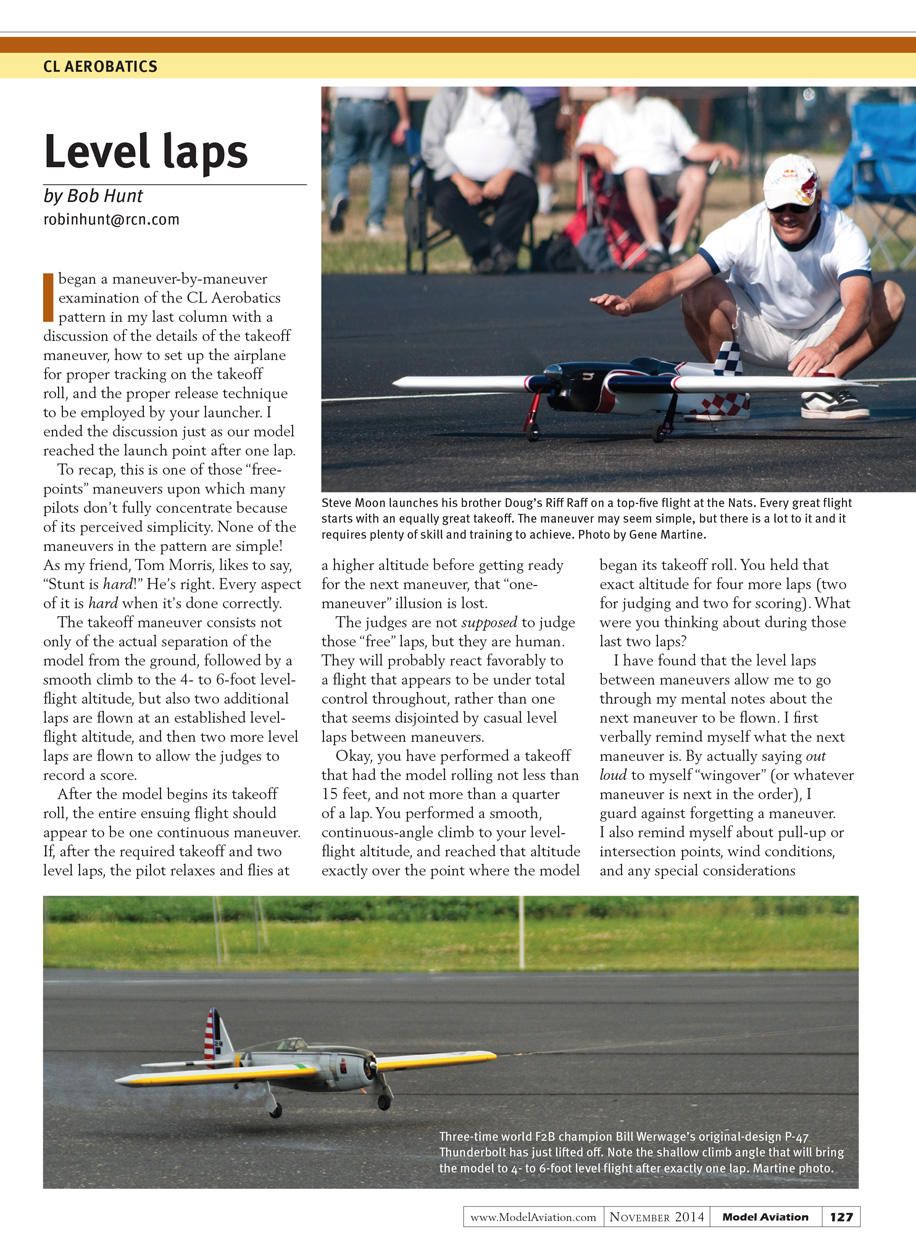
I began a maneuver-by-maneuver examination of the CL Aerobatics pattern in my last column with a discussion of the details of the takeoff maneuver: how to set up the airplane for proper tracking on the takeoff roll and the proper release technique to be employed by your launcher. I ended the discussion just as our model reached the launch point after one lap.
To recap, this is one of those “free-points” maneuvers upon which many pilots don’t fully concentrate because of its perceived simplicity. None of the maneuvers in the pattern are simple! As my friend Tom Morris likes to say, “Stunt is hard!” He’s right. Every aspect of it is hard when it’s done correctly.
Takeoff and level laps
The takeoff maneuver consists not only of the actual separation of the model from the ground and a smooth climb to the 4–6 foot level-flight altitude, but also:
- two established level-flight laps after reaching altitude (for judging), and
- two additional level laps to allow the judges to record a score.
After the model begins its takeoff roll, the entire ensuing flight should appear to be one continuous maneuver. If, after the required takeoff and the two level laps, the pilot relaxes and flies at a higher altitude before getting ready for the next maneuver, that “one-maneuver” illusion is lost.
Judges are not supposed to judge those “free” laps, but they are human. They will probably react more favorably to a flight that appears to be under total control throughout, rather than one that seems disjointed by casual level laps between maneuvers.
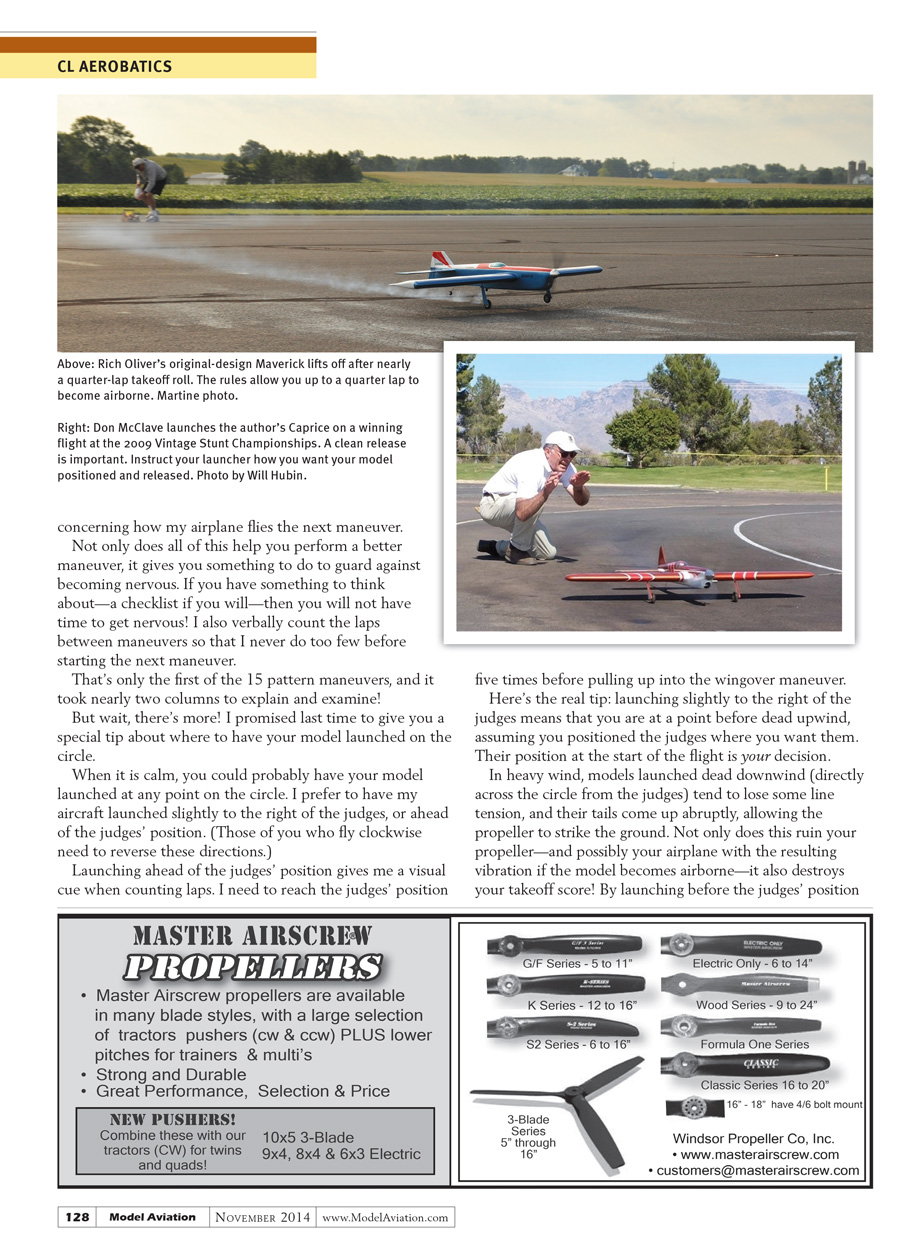
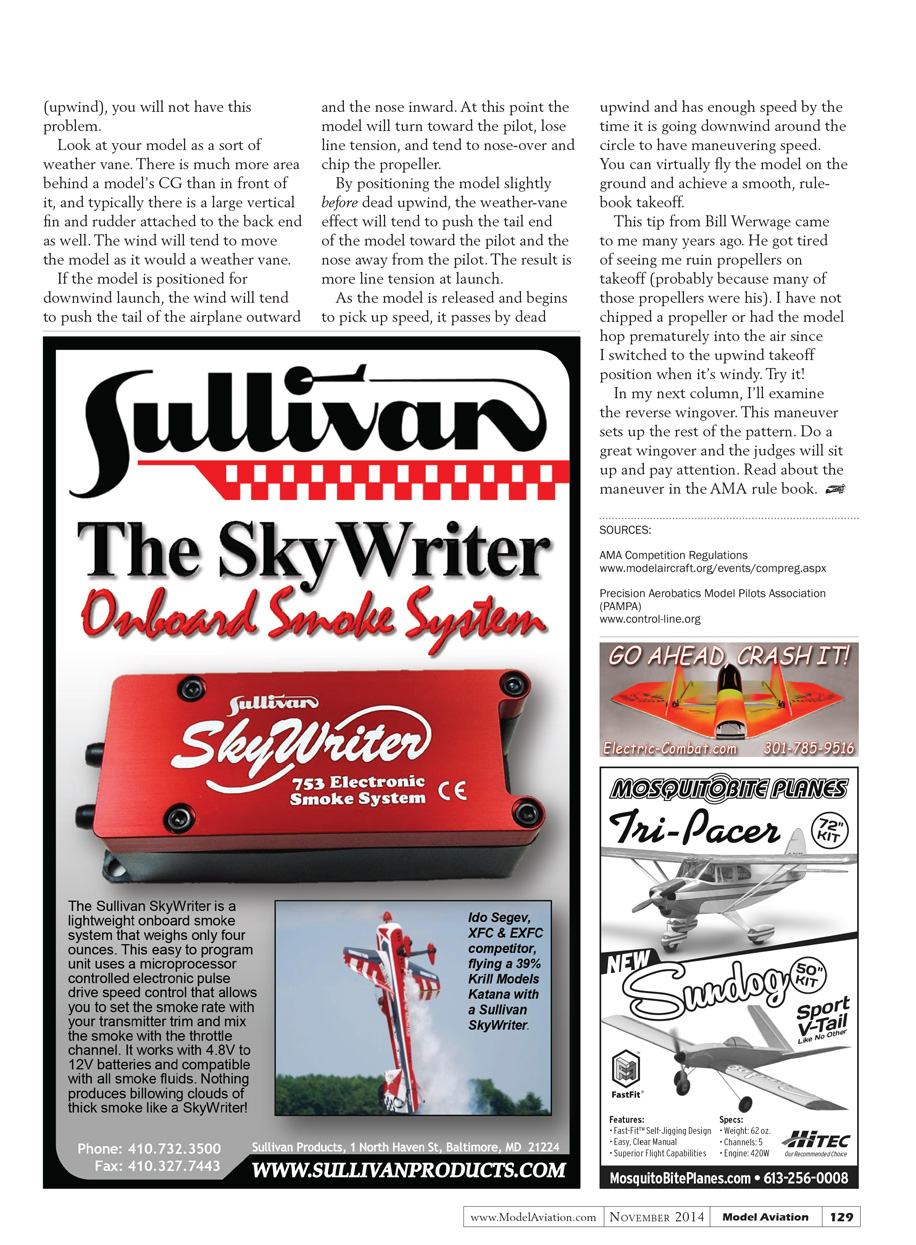
Okay: you have performed a takeoff that had the model rolling not less than 15 feet and not more than a quarter of a lap. You performed a smooth, continuous-angle climb to your level-flight altitude, and reached that altitude exactly over the point where the model began its takeoff roll. You held that exact altitude for four more laps (two for judging and two for scoring). What were you thinking about during those last two laps?
Mental checklist during level laps
I have found the level laps between maneuvers allow me to run through my mental notes about the next maneuver. My routine:
- Verbally remind myself what the next maneuver is. By actually saying out loud the name of the next maneuver (for example, “wingover”) I guard against forgetting it.
- Remind myself about pull-up or intersection points, wind conditions, and any special considerations concerning how my airplane flies that maneuver.
- Verbally count the laps between maneuvers so I never do too few before starting the next one.
Not only does this prepare you to perform a better maneuver, but it gives you something to do to guard against becoming nervous. If you have a checklist to run through, you won’t have time to get nervous.
That’s only the first of the 15 pattern maneuvers, and it took nearly two columns to explain and examine!
Launch-point tip
When it is calm, you could probably have your model launched at any point on the circle. I prefer to have my aircraft launched slightly to the right of the judges, or ahead of the judges’ position. (Those of you who fly clockwise should reverse these directions.)
- Launching ahead of the judges’ position gives me a visual cue when counting laps. I need to reach the judges’ position five times before pulling up into the wingover maneuver.
- Launching slightly to the right of the judges means you are at a point before dead-upwind (assuming you positioned the judges where you want them). Their position at the start of the flight is your decision.
In heavy wind, models launched dead downwind (directly across the circle from the judges) tend to lose some line tension and their tails can come up abruptly, allowing the propeller to strike the ground. Not only does this ruin your propeller — and possibly your airplane with the resulting vibration if the model becomes airborne — it also destroys your takeoff score. By launching before the judges’ position (upwind), you will not have this problem.
Why the upwind launch works
Think of your model as a sort of weather vane. There is much more area behind a model’s center of gravity than in front of it, and typically a large vertical fin and rudder are attached to the rear. The wind will tend to move the model like a weather vane.
- If the model is positioned for downwind launch, the wind will tend to push the tail outward and the nose inward. At this point the model will turn toward the pilot, lose line tension, and tend to nose-over and chip the propeller.
- By positioning the model slightly before dead upwind, the weather-vane effect will tend to push the tail toward the pilot and the nose away from the pilot. The result is more line tension at launch.
As the model is released and begins to pick up speed, it passes dead upwind and will have enough speed by the time it goes downwind around the circle to achieve maneuvering speed. You can virtually fly the model on the ground and achieve a smooth, rule-book takeoff.
This tip came from Bill Werwage many years ago. He got tired of seeing me ruin propellers on takeoff (probably because many of those propellers were his). I have not chipped a propeller or had the model hop prematurely into the air since I switched to the upwind takeoff position when it’s windy. Try it!
In my next column I’ll examine the reverse wingover. This maneuver sets up the rest of the pattern. Do a great wingover and the judges will sit up and pay attention. Read about the maneuver in the AMA rule book.
SOURCES
- AMA Competition Regulations: www.modelaircraft.org/events/compreg.aspx
- Precision Aerobatics Model Pilots Association (PAMPA): www.control-line.org
Transcribed from original scans by AI. Minor OCR errors may remain.

