
CL Combat
Rich von Lopez, 8334 Colegio Dr., Los Angeles CA 90045
IN THE LAST column, I mentioned that I had done a lot of building during the summer and into the fall.
I have been paying close attention to the engine-mount block for use with metal engine mounts. I have been using metal mounts in FAI (Federation Aeronautique Internationale) designs for 14 or 15 years.
My original inspiration to work with this type of mounting system came from Myles Lawrence, an innovative Southern California Combat pilot. Myles had machined a set of mounts to work with Rossi .15s and Fox .15s. He used threaded aluminum spacers that the mounts bolted to from top and bottom. This made for a solid mounting system.
At that time, the mounts had one set of holes, so there was no adjustability built in to balance the model.
My first engine-mounting blocks were made of balsa with 1/16 plywood reinforcements on the top, bottom, and sides. After a number of runs and several bolting of engines to the model, the mounting block would be compressed and the metal mounts would no longer be parallel or true. This would put extra stress on the engine or mounts. The problem could be fixed by adding shims to the engine-mount block, but this was an additional bit of work to keep the model airworthy.
Then I shifted to using white pine wood in conjunction with a balsa center rib. The front of the center rib had an oak pin at the front, and the back end was made of balsa. This was one extra step in building the rib, and sometimes in a crash the rib would break at the glue joint.
As time went by, the white pine would also compress and need to be shimmed, just like the all-balsa engine-mount block. In addition to compressing, the pine blocks would split when the model was crashed.
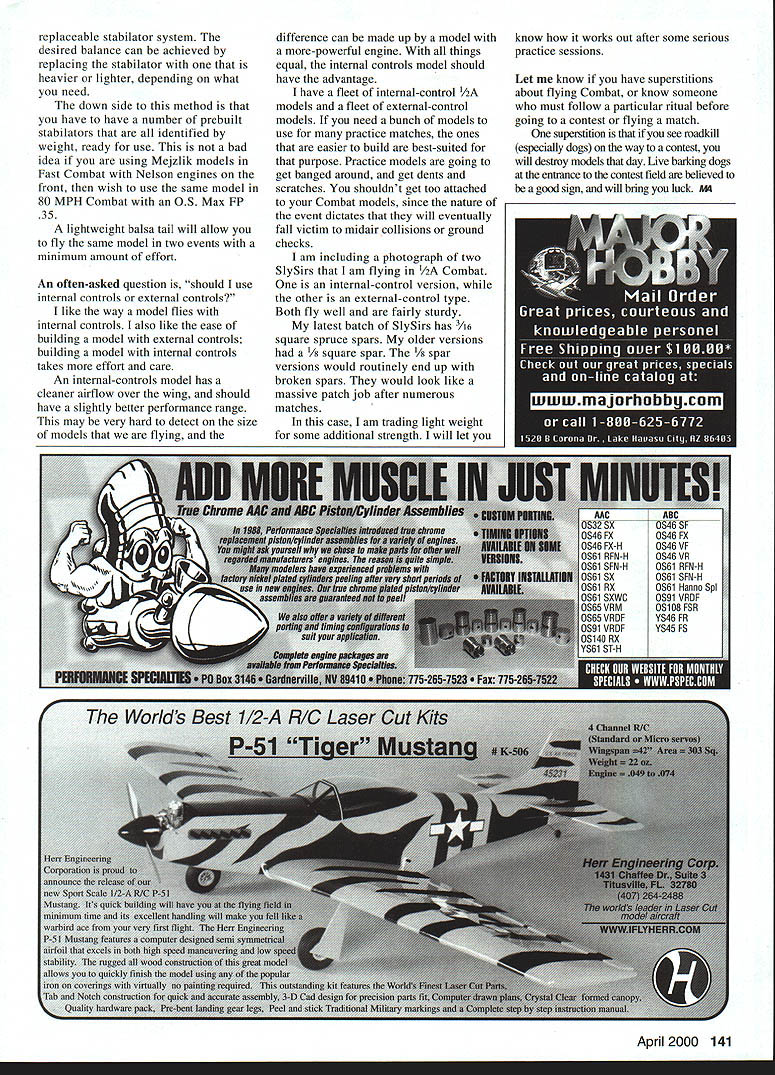
One technique I have been using to prevent the pine from splitting is to wrap braided nylon fishing line around the mounting block. It is a great deal of work, because you need to drill a hole and carve trenches in the mount block so the braided line will be flush with the mounting and gluing surfaces. You also need to do additional sanding and gluing.
I have included a photograph of one of my current center-sections to give you a clearer idea of what I do. I was doing the same thing on my 1/2A models, until I discovered that 1/2 x 3/4 maple engine-mount stock is the perfect dimension for the width I use. Since there is so little material used—1 3/4, to be exact—the extra weight compared to the white pine was not much of a concern. The bonus of having an engine-mount block that would not compress or split was worth the extra couple of grams.
All of my current 1/2A models utilize the maple engine-block system. Knock on wood, there have been no failures. Combat pilots know that means that something else will break on the model.
There are a number of ways to set up metal engine mounts to give you a considerable amount of adjustment, so that all of your models will balance the way you like them. This is quite an advantage over the way Combat fliers used to do things. In the old days, we built the model and hoped that it would balance. Sometimes we would build two or three of the same model, and each would fly a little differently. The weight of the model would be to blame for the difference in flying characteristics.
If you scratch-built and paid close attention to wood weights and density, you could minimize the differences from one model to the next. There was nothing you could do if you were building from kits.
I would often purchase two double Voodoo kits and build all four models at the same time. Then I was left wondering why one model flew much better than the others.
If you can get an accurate gram scale, you will see that there can be a tremendous difference in the weight of one sheet of balsa to the next. They can be almost double the difference in weight. If you don't pay close attention, this can cause headaches.
With wooden engine mounts, you lose the ability to adjust the balance of the models without adding weight. Adjustment weights do nothing to add strength to your models. Depending on how much weight you add, the model will lose performance by making the engine work harder to pull the model around.
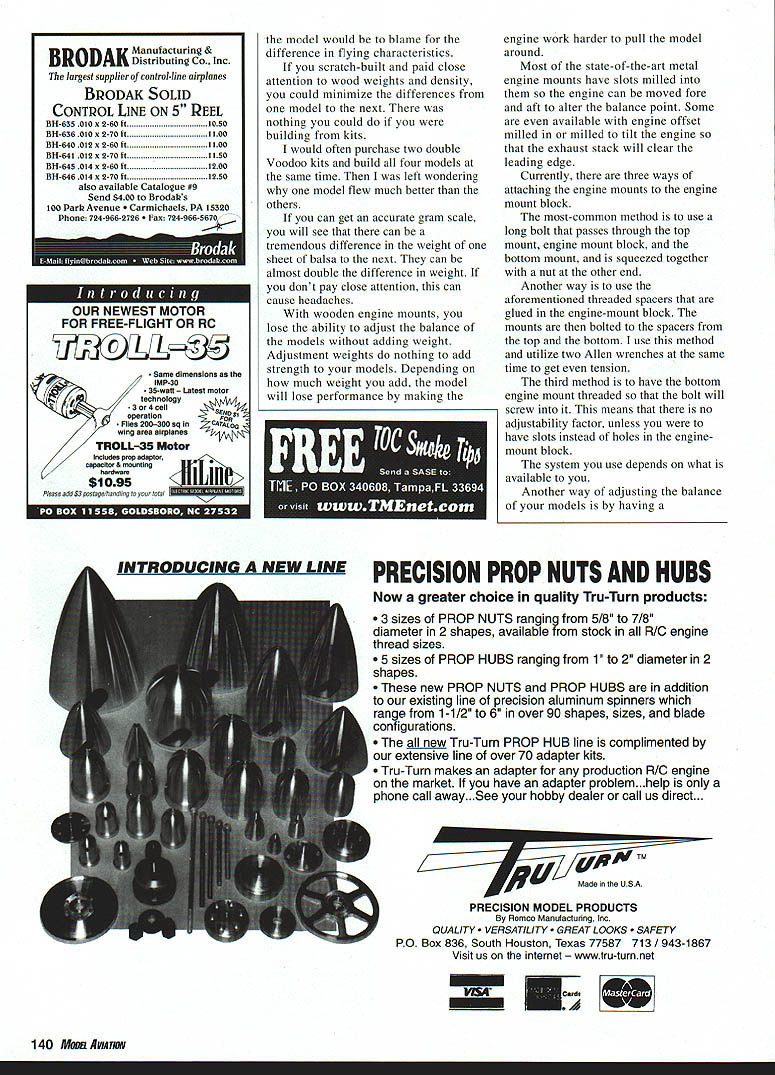
Most of the state-of-the-art metal engine mounts have slots milled into them so the engine can be moved fore and aft to alter the balance point. Some are even available with engine offset milled in or milled to tilt the engine so that the exhaust stack will clear the leading edge.
Methods of attaching engine mounts
Currently, there are three ways of attaching the engine mounts to the engine-mount block:
- The most common method is to use a long bolt that passes through the top mount, engine-mount block, and the bottom mount, and is squeezed together with a nut at the other end.
- Another way is to use the aforementioned threaded spacers that are glued in the engine-mount block. The mounts are then bolted to the spacers from the top and the bottom. I use this method and utilize two Allen wrenches at the same time to get even tension.
- The third method is to have the bottom engine mount threaded so that the bolt will screw into it. This means that there is no adjustability factor, unless you were to use bolts instead of holes in the engine-mount block.
The system you use depends on what is available to you.
Other adjustment methods
Another way of adjusting the balance of your models is by having a replaceable stabilator system. The desired balance can be achieved by replacing the stabilator with one that is heavier or lighter, depending on what you need.
The downside to this method is that you have to have a number of prebuilt stabilators that are all identified by weight, ready for use. This is not a bad idea if you are using Mezjlik models in Fast Combat with Nelson engines on the front, then wish to use the same model in 80 MPH Combat with an O.S. Max FP .35.
A lightweight balsa tail will allow you to fly the same model in two events with a minimum amount of effort.
Internal vs. external controls
An often-asked question is, "Should I use internal controls or external controls?"
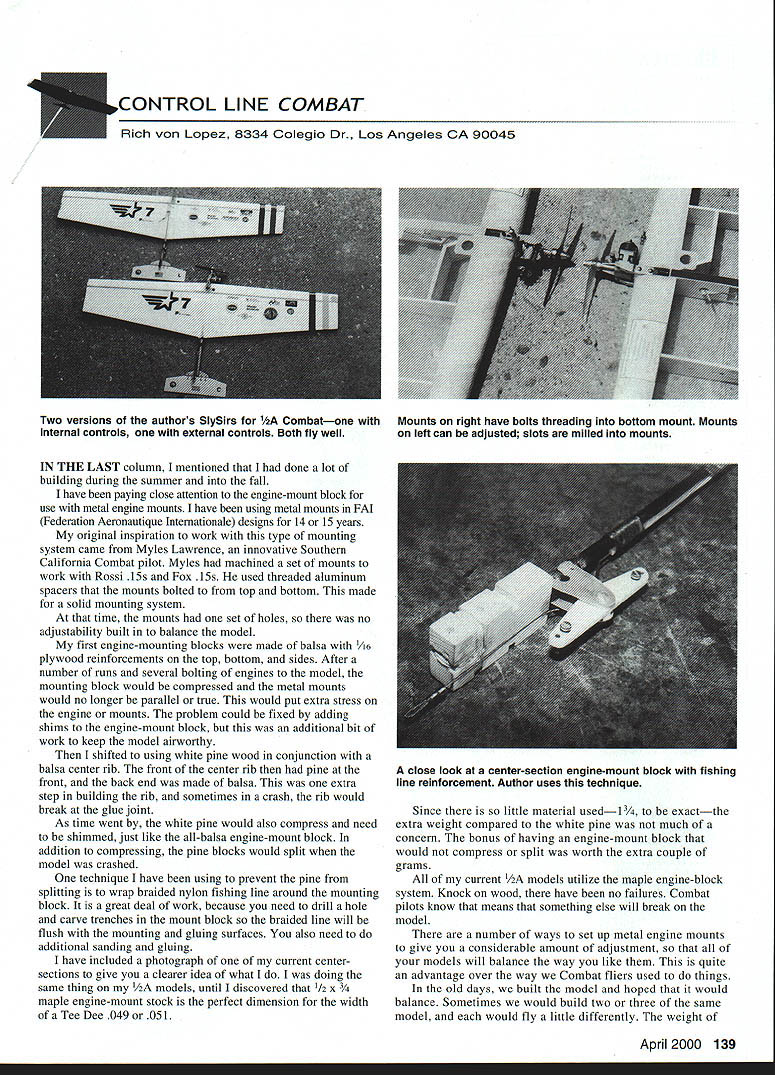
I like the way a model flies with internal controls. I also like the ease of building a model with external controls; building a model with internal controls takes more effort and care.
An internal-controls model has a cleaner airflow over the wing, and should have a slightly better performance range. This may be very hard to detect on the size of models that we are flying, and the difference can be made up by a model with a more-powerful engine. With all things equal, the internal-controls model should have the advantage.
I have a fleet of internal-control 1/2A models and a fleet of external-control models. If you need a bunch of models to use for many practice matches, the ones that are easier to build are best suited for that purpose. Practice models are going to get banged around, and get dents and scratches. You shouldn't get too attached to your Combat models, since the nature of the event dictates that they will eventually fall victim to midair collisions or ground checks.
I am including a photograph of two SlySirs that I am flying in 1/2A Combat. One is an internal-control version, while the other is an external-control type. Both fly well and are fairly sturdy.
My latest batch of SlySirs has 3/16" square spruce spars. My older versions had a 3/8" square spar. The 3/8" spar versions would routinely end up with broken spars. They would look like a massive patch job after numerous matches.
In this case, I am trading light weight for some additional strength. I will let you know how it works out after some serious practice sessions.
Let me know if you have superstitions about flying Combat, or know someone who must follow a particular ritual before going to a contest or flying a match.
One superstition is that if you see roadkill (especially dogs) on the way to a contest, you will destroy models that day. Live barking dogs at the entrance to the contest field are believed to be a good sign, and will bring you luck.
Transcribed from original scans by AI. Minor OCR errors may remain.

