
CONTROL LINE AEROBATICS
By Curt Contrata
6783 Nightwind Cir., Orlando FL 32818 E-mail: [email protected]
Is refinishing a model worth it? I asked Frank McMillan this question last year after he had completed a refinish on one of his Caudrons. His reason for attempting it was that particular model flew extremely well. He explained the process he used and insisted that it was easy to do. Frank was the first person to ever tell me that refinishing a model was something he would do again. Most people have horror stories regarding their experiences and swear that they will never try it again.
There are two basic methods used to remove the existing finish: sanding it off and doing a chemical strip. Having never heard a positive story from someone who had used the sanding method, the chemical strip seemed a much better way to go. Besides, I really don’t enjoy sanding on a model all that much.
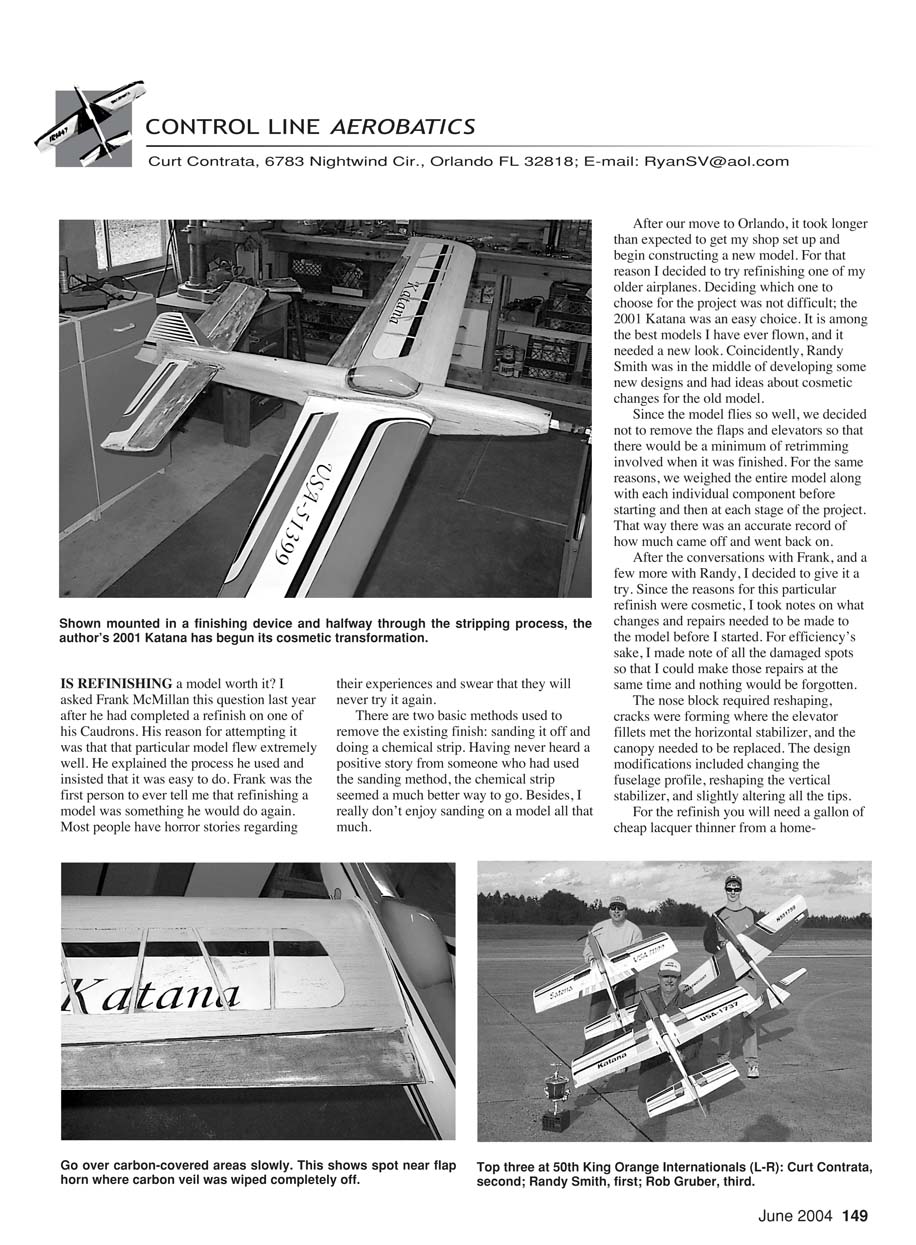
After our move to Orlando, it took longer than expected to get my shop set up and begin constructing a new model. For that reason I decided to try refinishing one of my older airplanes. Deciding which one to choose for the project was not difficult; the 2001 Katana was an easy choice. It is among the best models I have ever flown, and it needed a new look. Coincidentally, Randy Smith was in the middle of developing some new designs and had ideas about cosmetic changes for the old model.
Since the model flies so well, we decided not to remove the flaps and elevators so that there would be a minimum of retrimming involved when it was finished. For the same reasons, we weighed the entire model along with each individual component before starting and then at each stage of the project. That way there was an accurate record of how much came off and went back on.
After the conversations with Frank, and a few more with Randy, I decided to give it a try. Since the reasons for this particular refinish were cosmetic, I took notes on what changes and repairs needed to be made to the model before I started. For efficiency’s sake, I made note of all the damaged spots so that I could make those repairs at the same time and nothing would be forgotten.
The nose block required reshaping, cracks were forming where the elevator fillets met the horizontal stabilizer, and the canopy needed to be replaced. The design modifications included changing the fuselage profile, reshaping the vertical stabilizer, and slightly altering all the tips.
Materials and equipment
- One gallon of cheap lacquer thinner (home-improvement store)
- One roll of Bounty Select-a-Size paper towels
- A proper charcoal-type respirator mask
- A finishing device or model mount (strongly recommended)
Warning statement
This process uses lacquer thinner and produces large amounts of fumes for extended periods. You must use a charcoal-type mask, and make sure your workspace is well ventilated. When you are finished, put the used paper towels outside to gas off; a plastic crate works well as a container for them. Also, be sure to read and observe all the warnings on the can before you start.
The one problem that Frank had was with oil contamination; I did not want to take that chance. On three separate evenings before the stripping process began, I cleaned the model using alcohol, degreaser, and ammonia. Make sure the model is completely clean before you begin stripping any paint. You can start removing the finish anywhere on the model because it will not take long to get a feel for what is involved; you will just need to have a plan. It is possible to go all the way down to bare wood; however, the best part of using this method is that you may stop at any point, back-stepping through the finishing process. The original finish was all Brodak dope, and it seemed to come off in layers with lacquer thinner.
Tear off roughly 20 of the half-sized Select-a-Size paper towels and make a small stack on your bench. Fold one piece in half three times to make it the perfect size and thickness. Place it over the open can of thinner and tip the can for a few seconds. You don't want the thinner to drip; you only want it to wet the folded paper towel through to the other side.
Working on one small area at a time, wipe off the old finish. You will have to continuously flip and unfold/refold the towel until it no longer works; at that point it will still feel wet, but it will be saturated with dope and not thinner. When you feel that the towel is no longer effective, wet a new one and continue the process.
Don't try to wipe too large of an area at once. A flap or elevator is done in three to four sections per side, with each side taking roughly six minutes. You will start slowly with the clear coats; it may take two or three towels for those areas. As soon as you are through the clear, the process will go quickly through color and filler coats.
You will find that you can be aggressive if the substrate is cloth and finishing resin, such as on the nose, and fairly aggressive over surfaces that have silkspan. When mine was finished, the silkspan felt like it does right after the clear is applied and when it is sanded. Scratches will show, but they sand out easily and will be hidden when the new clear is applied.
There will be areas such as repair patches and pieces of sistered wood that will require some filling. A little scraping and sanding will take care of that.
When the finish is off, remove any old silicone, fuel residue, and any construction adhesives. This is where the shop vac with the brush and crevice attachments will be your greatest asset. A toothbrush and lacquer thinner will remove any residue from places that the vacuum will not reach. Now it's ready for the first coat of filler.
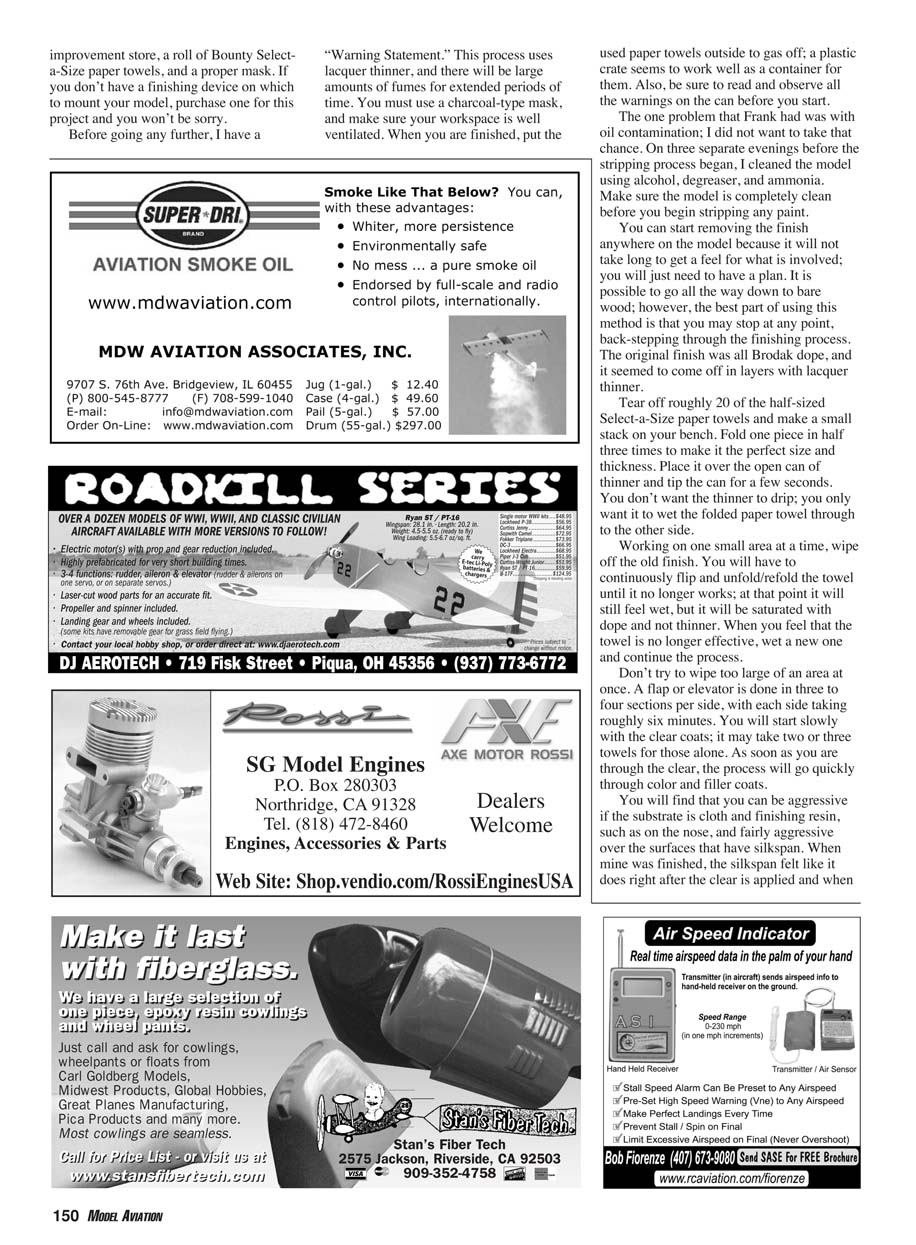
Consider the type of construction used on the model. On surfaces where carbon veil was employed, it is easy to rub a bare spot. If you don't intend to remove the carbon veil, proceed slowly once you get down to the filler-coat layer.
If your model contains foam components, you must exercise extreme caution. The thinner will dissolve the foam it comes in contact with, and even the fumes can cause damage. You need to work a little drier over a sheeted foam surface than over a wooden structure, and be careful around the hinges and any other possible openings.
I began the Katana's strip with a wingtip and followed with the leading edge, trailing edge, center-section sheeting, and the capstrips. A single wing panel averaged just more than 20 minutes to strip. The entire model was completely stripped in just less than four hours, across three sessions.
After leaving it three days to dry out, I carefully checked the model for warps, bowed sheeting, or damage to the foam tail surfaces. I then cut out the wing's silkspan bays and gave the entire model a light sanding.
If you have a model that you think has a second life in it, the method I have described is simple to do and not at all messy. Aside from the fumes, there were no problems.
I learned that it is possible to remove the finish in one area and not affect an adjoining area. Since nothing was ever dripping with thinner, I could control exactly what I was removing. It was easy to imagine a repair in which it would be better to strip and repaint a portion of a model than to add layers of paint to the area.
New ARFs and engines
Last year a couple of Control Line ARF models were introduced, and now there are three more. Brodak Manufacturing is offering:
- A full-fuselage, Classic-legal Oriental
- A Profile Cardinal
- A 1/2A Baby Clown
The company is offering all three ARFs with color choices. There will even be ready-to-finish versions available if you would rather do that part yourself. I looked at the prototypes of these new models, and they appeared to be light and well built. Costs were not established at the time I wrote this, but expect them to be competitive with the others that are currently available.
Responding to the many requests for a lightweight, ball-bearing .40, Randy Smith of Aero Products has developed a new engine from the ground up. With the first edition of his new Ultra Light series of PA engines, Randy is introducing an 8-ounce, rear-exhaust .40; a side-exhaust version is to follow.
The second generation of PAs has also just been introduced. These engines have a new case that has a wider seat for the venturi and exhaust. They also feature new, specially designed bearings with improved seals and an I-beam connecting rod.
Sources
- Aero Products
980 Winnbrook Dr. Dacula GA 30019 (678) 407-9376 www.aeroproduct.net
- Brodak Manufacturing
100 Park Ave. Carmichaels PA 15320 (724) 966-5975 www.brodak.com
Transcribed from original scans by AI. Minor OCR errors may remain.

