
Control Line Aerobatics
Bob Hunt [[email protected]]
Finishing the fuselage on the Hole Shot
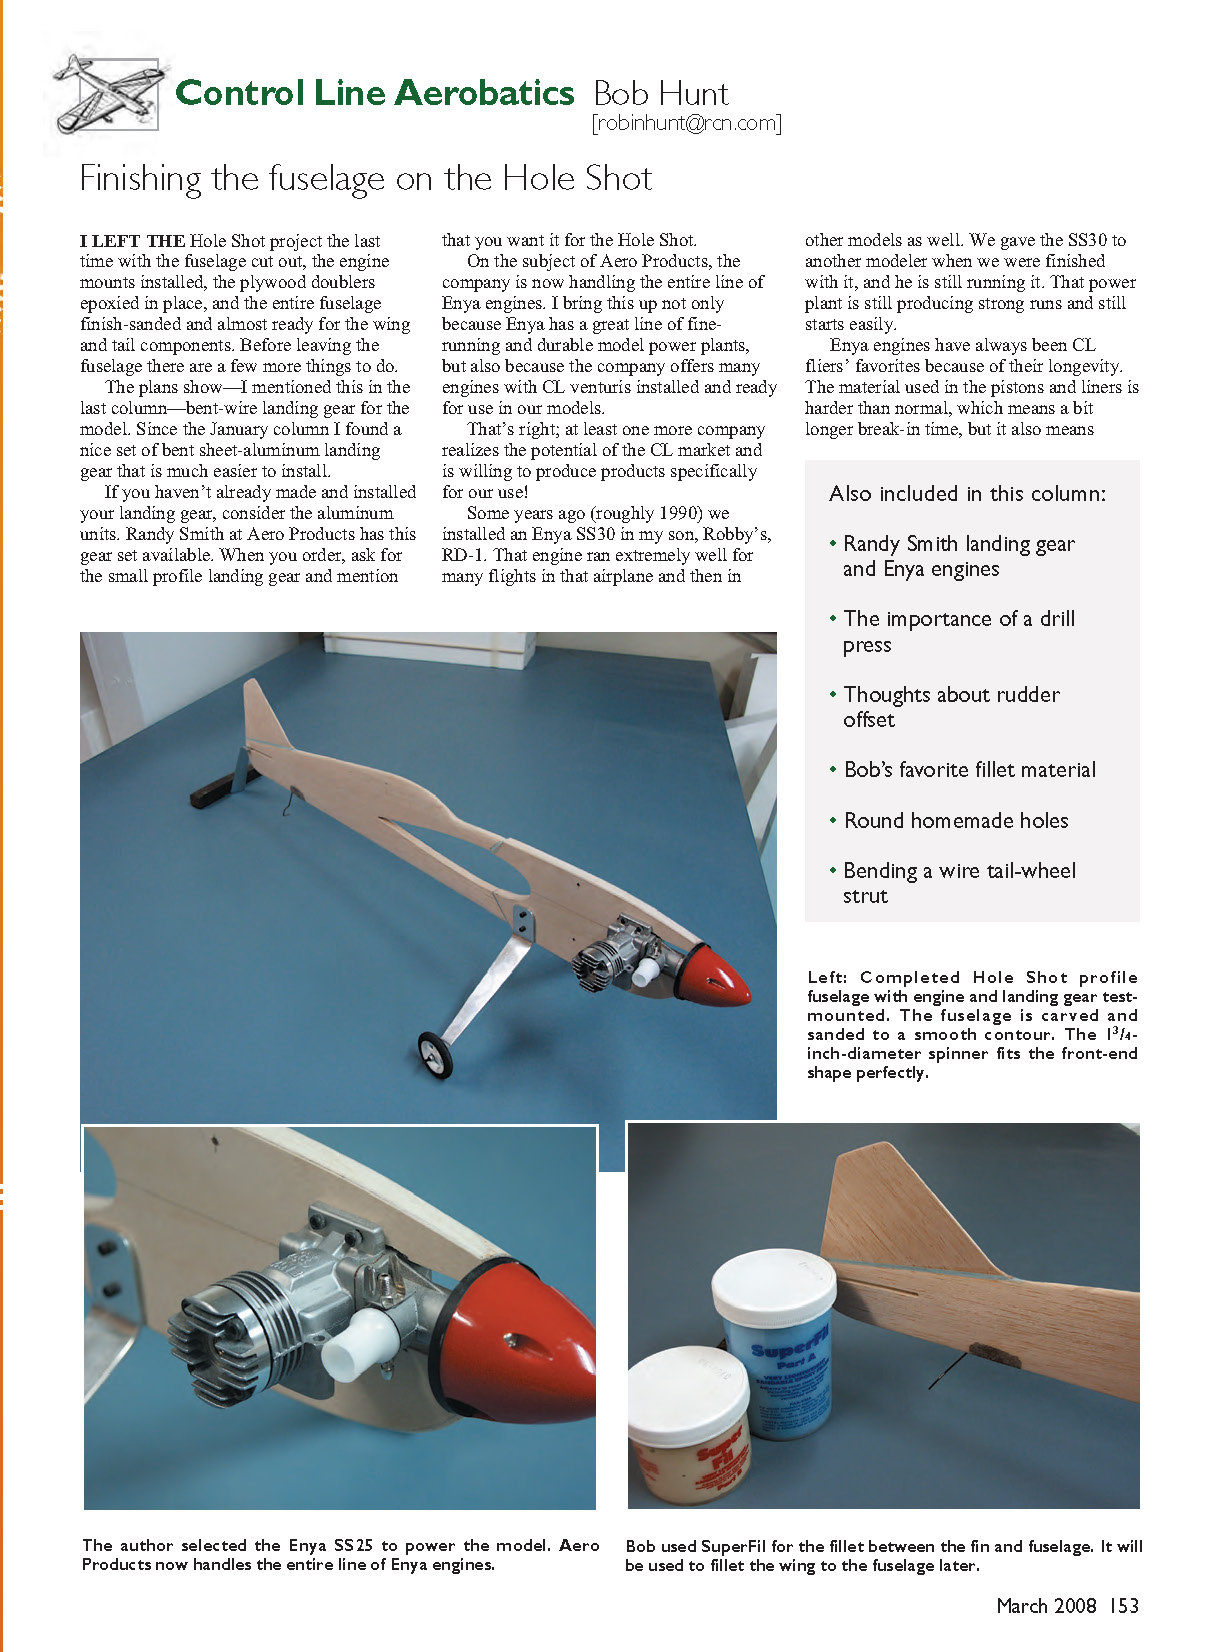
I left the Hole Shot project the last time with the fuselage cut out, the engine mounts installed, the plywood doublers epoxied in place, and the entire fuselage finish-sanded and almost ready for the wing and tail components. Before leaving the fuselage there are a few more things to do.
The plans show— I mentioned this in the last column—bent-wire landing gear for the model. Since the January column I found a nice set of bent sheet-aluminum landing gear that is much easier to install. If you haven't already made and installed your landing gear, consider the aluminum units. Randy Smith at Aero Products has this gear set available. When you order, ask for the small-profile landing gear and mention that you want it for the Hole Shot.
On the subject of Aero Products, the company is now handling the entire line of Enya engines. I bring this up not only because Enya has a great line of fine-running and durable model power plants, but also because the company offers many engines with CL venturis installed and ready for use in our models. That's right; at least one more company realizes the potential of the CL market and is willing to produce products specifically for our use!
Some years ago (roughly 1990) we installed an Enya SS30 in my son Robby's RD-1. That engine ran extremely well for many flights in that airplane and then in other models as well. We gave the SS30 to another modeler when we were finished with it, and he is still running it. That power plant is still producing strong runs and still starts easily.
Enya engines have always been CL fliers' favorites because of their longevity. The material used in the pistons and liners is harder than normal, which means a bit longer break-in time, but it also means longer overall life. The SS30 also exhibited a great 2/4-break CL aerobatics (stunt) run with a 10x4 Rev-Up propeller, with no additional rework required.
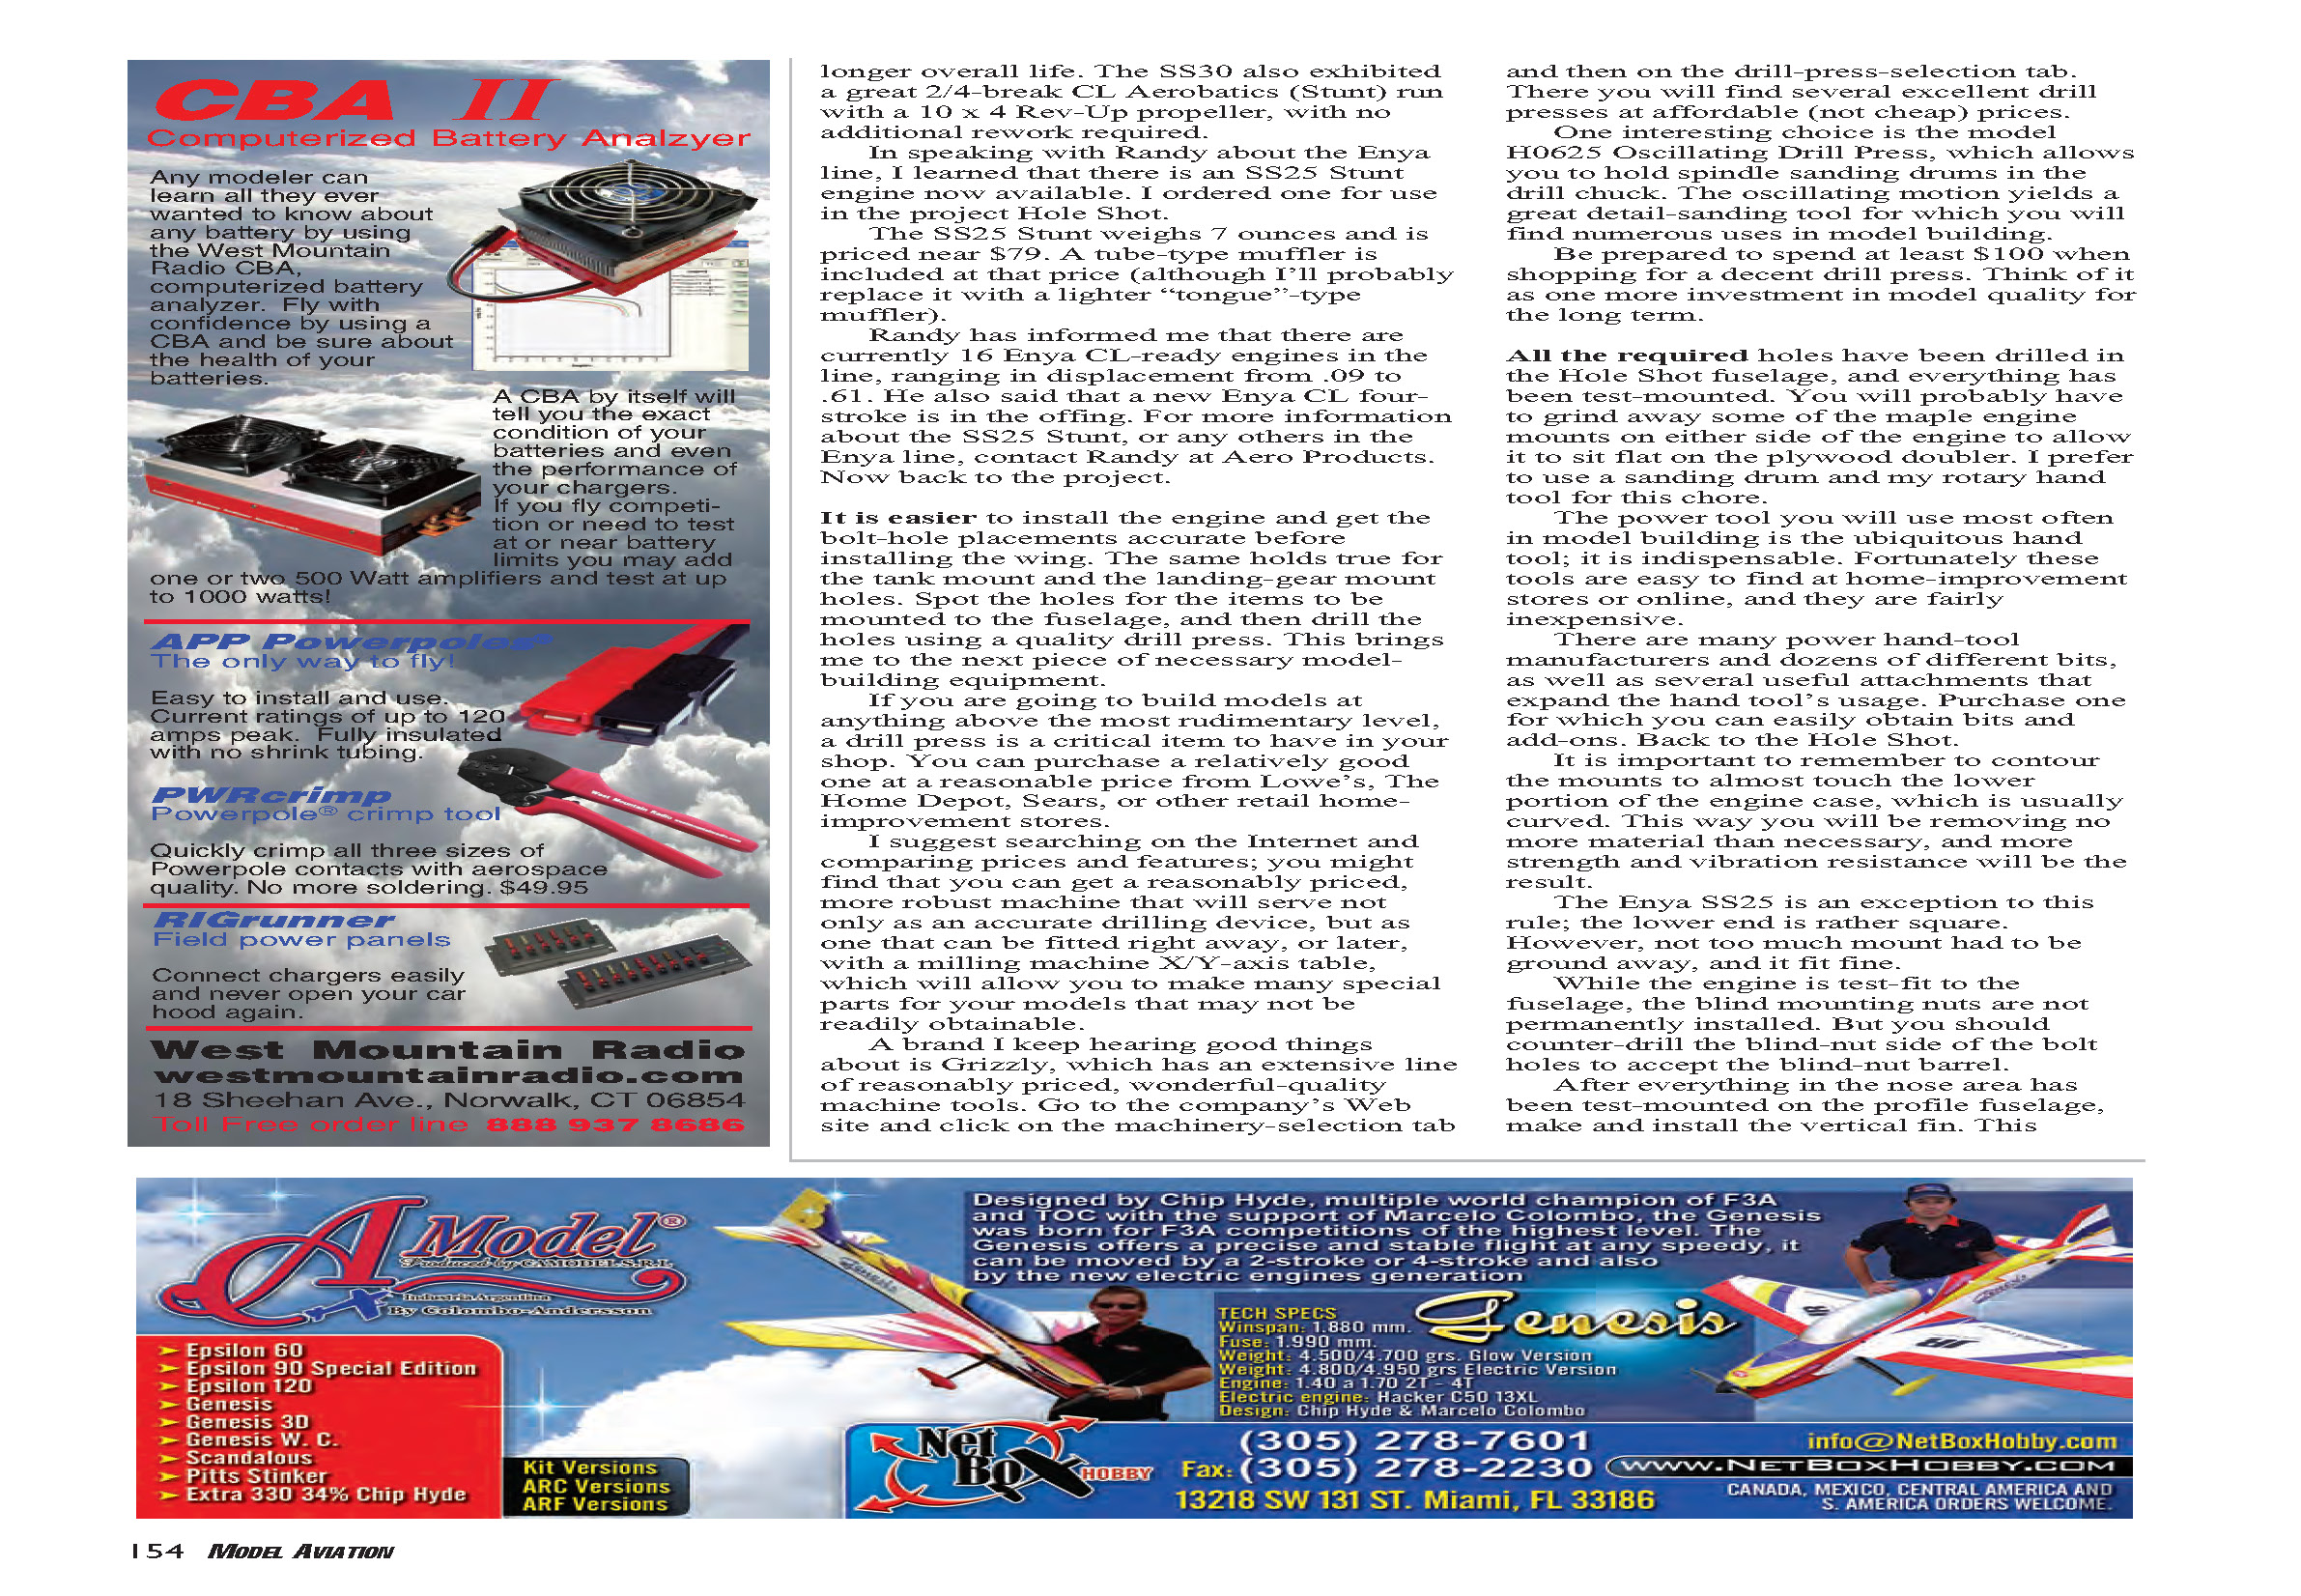
In speaking with Randy about the Enya line, I learned that there is an SS25 Stunt engine now available. I ordered one for use in the project Hole Shot. The SS25 Stunt weighs 7 ounces and is priced near $79. A tube-type muffler is included at that price (although I'll probably replace it with a lighter "tongue"-type muffler). Randy has informed me that there are currently 16 Enya CL-ready engines in the line, ranging in displacement from .09 to .61. He also said that a new Enya CL four-stroke is in the offing. For more information about the SS25 Stunt, or any others in the Enya line, contact Randy at Aero Products.
Now back to the project. It is easier to install the engine and get the bolt-hole placements accurate before installing the wing. The same holds true for the tank mount and the landing-gear mount holes. Spot the holes for the items to be mounted to the fuselage, and then drill the holes using a quality drill press.
This brings me to the next piece of necessary modelbuilding equipment. If you are going to build models at anything above the most rudimentary level, a drill press is a critical item to have in your shop. You can purchase a relatively good one at a reasonable price from Lowe's, The Home Depot, Sears, or other retail home-improvement stores. I suggest searching on the Internet and comparing prices and features; you might find that you can get a reasonably priced, more robust machine that will serve not only as an accurate drilling device, but as one that can be fitted right away, or later, with a milling-machine X–Y-axis table. That will allow you to make many special parts for your models that may not be readily obtainable.
A brand I keep hearing good things about is Grizzly, which has an extensive line of reasonably priced, wonderful-quality machine tools. Go to the company's website and click on the machinery-selection tab and then on the drill-press-selection tab. There you will find several excellent drill presses at affordable (not cheap) prices.
One interesting choice is the model H0625 Oscillating Drill Press, which allows you to hold spindle sanding drums in the drill chuck. The oscillating motion yields a great detail-sanding tool for which you will find numerous uses in model building.
Be prepared to spend at least $100 when shopping for a decent drill press. Think of it as one more investment in model quality for the long term.
Also included in this column:
- Randy Smith landing gear and Enya engines
- The importance of a drill press
- Thoughts about rudder offset
- Bob's favorite fillet material
- Round homemade holes
- Bending a wire tail-wheel strut
All the required holes have been drilled in the Hole Shot fuselage, and everything has been test-mounted. You will probably have to grind away some of the maple engine mounts on either side of the engine to allow it to sit flat on the plywood doubler. I prefer to use a sanding drum and my rotary hand tool for this chore. The power tool you will use most often in model building is the ubiquitous hand tool; it is indispensable. Fortunately these tools are easy to find at home-improvement stores or online, and they are fairly inexpensive.
There are many power hand-tool manufacturers and dozens of different bits, as well as several useful attachments that expand the hand tool's usage. Purchase one for which you can easily obtain bits and add-ons.
It is important to remember to contour the mounts to almost touch the lower portion of the engine case, which is usually curved. This way you will be removing no more material than necessary, and you will have more strength and vibration resistance as a result. The Enya SS25 is an exception to this rule; the lower end is rather square. However, not too much mount had to be ground away, and it fit fine.
While the engine is test-fit to the fuselage, the blind mounting nuts are not permanently installed. But you should counter-drill the blind-nut side of the bolt holes to accept the blind-nut barrel.
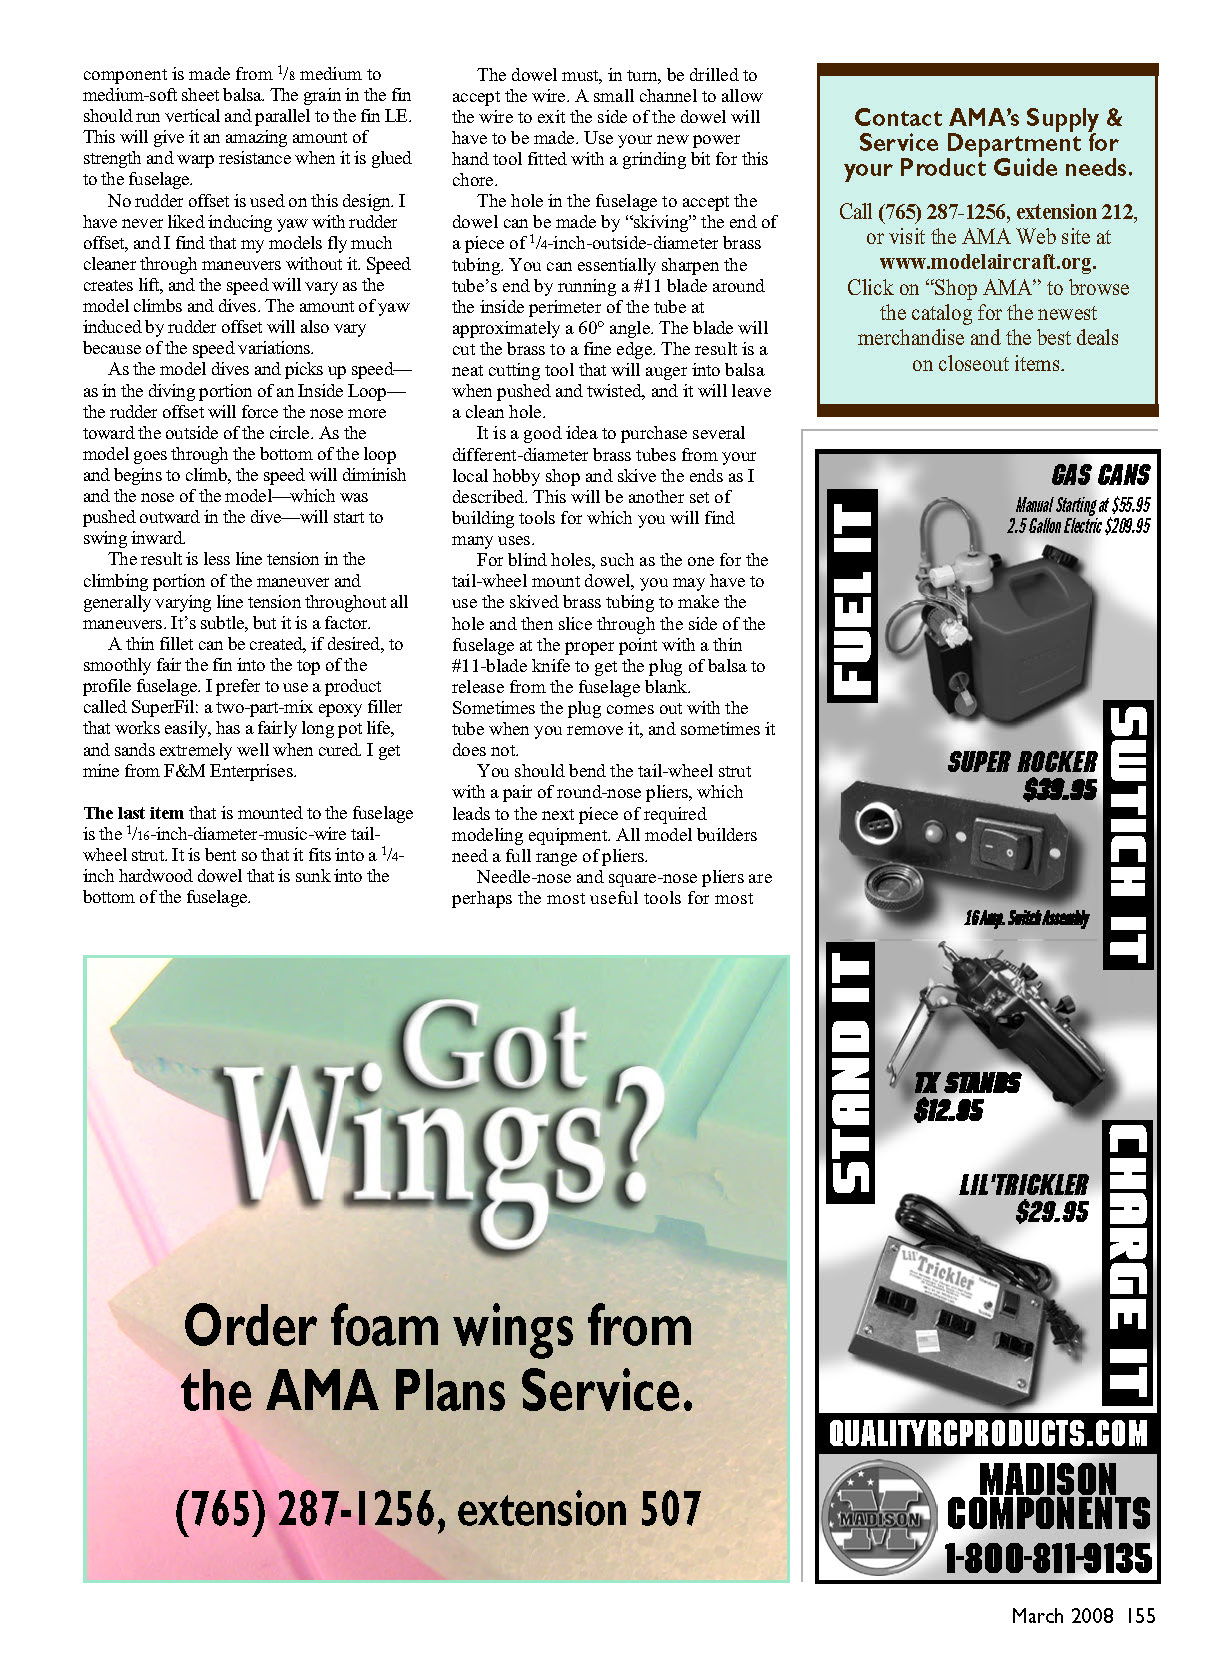
After everything in the nose area has been test-mounted on the profile fuselage, make and install the vertical fin. The component is made from 1/8-inch medium to medium-soft sheet balsa. The grain in the fin should run vertical and parallel to the fin leading edge. This will give it an amazing amount of strength and warp resistance when it is glued to the fuselage.
No rudder offset is used on this design. I have never liked inducing yaw with rudder offset, and I find that my models fly much cleaner through maneuvers without it. Speed creates lift, and the speed will vary as the model climbs and dives. The amount of yaw induced by rudder offset will also vary because of the speed variations.
As the model dives and picks up speed—as in the diving portion of an inside loop—the rudder offset will force the nose more toward the outside of the circle. As the model goes through the bottom of the loop and begins to climb, the speed will diminish and the nose of the model—which was pushed outward in the dive—will start to swing inward.
The result is less line tension in the climbing portion of the maneuver and generally varying line tension throughout all maneuvers. It's subtle, but it is a factor.
A thin fillet can be created, if desired, to smoothly fair the fin into the top of the profile fuselage. I prefer to use a product called SuperFil: a two-part-mix epoxy filler that works easily, has a fairly long pot life, and sands extremely well when cured. I get mine from F&M Enterprises.
The last item that is mounted to the fuselage is the 1/16-inch-diameter music-wire tail-wheel strut. It is bent so that it fits into a 1/4-inch hardwood dowel that is sunk into the bottom of the fuselage. The dowel must, in turn, be drilled to accept the wire. A small channel to allow the wire to exit the side of the dowel will have to be made. Use your power hand tool fitted with a grinding bit for this chore.
The hole in the fuselage to accept the dowel can be made by "skiving" the end of a piece of 1/4-inch-outside-diameter brass tubing. You can essentially sharpen the tube's end by running a #11 blade around the inside perimeter of the tube at approximately a 60° angle. The blade will cut the brass to a fine edge. The result is a neat cutting tool that will auger into balsa when pushed and twisted, and it will leave a clean hole.
It is a good idea to purchase several different-diameter brass tubes from your local hobby shop and skive the ends as I described. This will be another set of building tools for which you will find many uses.
For blind holes, such as the one for the tail-wheel mount dowel, you may have to use the skived brass tubing to make the hole and then slice through the side of the fuselage at the proper point with a thin #11-blade knife to get the plug of balsa to release from the fuselage blank. Sometimes the plug comes out with the tube when you remove it, and sometimes it does not.
You should bend the tail-wheel strut with a pair of round-nose pliers, which leads to the next piece of required modeling equipment. All model builders need a full range of pliers. Needle-nose and square-nose pliers are perhaps the most useful tools for most model-building applications, but they should not be used to bend wire. Bending around a square edge will usually result in a fracture of the wire. You need to bend wire with a slight radius so it won't crack at the point of the bend.
I suggest that you buy at least two pairs of round-nose pliers. One should have fairly small-diameter jaws to bend wire as large as 1/32 inch in diameter, and one pair should have somewhat larger-diameter jaws to bend wire with a diameter as large as 3/32 inch.
I do not recommend using pliers to bend wire that is larger than 3/32 inch in diameter. At that point you will need a dedicated wire bender, which I will discuss in a future column.
After your model's tail-wheel strut is properly bent and the 1/4-inch dowel is imbedded and glued in the fuselage, notch out the bottom of the fuselage aft of the dowel to allow the tail-wheel strut to sit flush. Glue the strut in place using an epoxy-and-microballoon mix.
When the assembly has cured, lightly sand the area smooth and then cover the exposed strut and the adjacent area with a piece of 3/4-ounce fiberglass or .02 carbon mat. This piece can be glued in place using thin cyanoacrylate.
That's it. The fuselage is ready for the wing and tail—or is it? Tune in next time for an interesting twist in this project. MA
Sources
- Aero Products
(678) 407-9376 www.aeroproduct.net
- Grizzly Industrial, Inc.
(800) 523-4777 www.grizzlyimports.com
- F&M Enterprises
(817) 279-8045 www.fm-enterprises.com
Transcribed from original scans by AI. Minor OCR errors may remain.

