
Control Line Aerobatics
Bob Hunt [[email protected]]
The Hole Shot starts looking like a whole airplane.
Our project
Our project, the Hole Shot model, is nearing the point where it will be ready to be assembled into one piece. Last time we installed the control system and glued the wing halves together. The assembly should be dry by now.
The next step in foam-wing construction is to reinforce the center-section wing joint. This is necessary because of the bending loads that this model is likely to encounter. We installed a joiner spar that connects the full-depth spars installed in each wing half, but experience has shown that even more support is required.
There are several options for doing this; the one you choose depends on the type of model you are building (profile or built-up) and the type of finish you intend to apply (paint or heat-shrink film). I have decided to paint the fuselage and tail section of my Hole Shot and use heat-shrink film on the wing panels.
I will paint out onto the wing on either side of the fuselage a couple of inches and then cover the outer portions of the panels with film. This allows me to apply fillets to the wing-to-fuselage joint, which will yield a much stronger and better-looking model. The blend point where the painted area and the film-covered areas meet will be covered with a chordwise accent stripe. I'll discuss the center-joint reinforcement for use with this finishing method later.
Carbon-mat method (for fully painted models)
If you completely paint the model, the center-joint reinforcement is a simple matter of covering the joint twice while applying the 0.2-oz carbon mat to the entire wing. I explained the method of applying the 0.2-oz carbon mat in the May 2008 column.
The idea is to cover half of the wing and let the 0.2-oz carbon mat go across the center joint and stop a couple inches out on the opposite wing panel. After letting the modeling dope dry awhile, sand the edge of the carbon. Cover the other half and, again, overlap the center joint and let the carbon extend a couple inches out onto the first panel that you covered. In this manner, the center joint is double-covered with the carbon mat.
Notes:
- Do not sand the carbon that is covering the center joint. The 0.2-oz mat will not be very thick, but it will be extremely strong.
- Make sure the carbon mat is completely saturated with modeling dope. If it is not fully wetted, the joint will not be strong enough when the dope dries.
I have reinforced the center-sections of several fairly large built-up models using this technique, and they have proven to be extremely rigid and strong. The beauty of this method is there are no cloth-reinforcement edges to blend into the balsa wing sheeting before painting.
Fiberglass-cloth method (for painted fuselage with film-covered wings)
If you use the finishing method described at the beginning (painted fuselage/tail, film-covered outer wing panels), the carbon-mat route could still be used but is not suggested. Instead, I recommend reinforcing the center joint with a strip of 2-ounce-per-square-yard fiberglass cloth.
Materials and preparation:
- Fiberglass-cloth strip, roughly 3–4 inches wide and long enough to go from the wing leading edge (LE) to trailing edge (TE) in one piece.
- Punch a hole in the fiberglass at the appropriate point so it will fit over the bellcrank mount post and lay smoothly against the wing surface.
- Mix a half ounce of epoxy resin. (I use and recommend Z-Poxy Finishing Resin, available from Super Glue Corporation.)
Application steps:
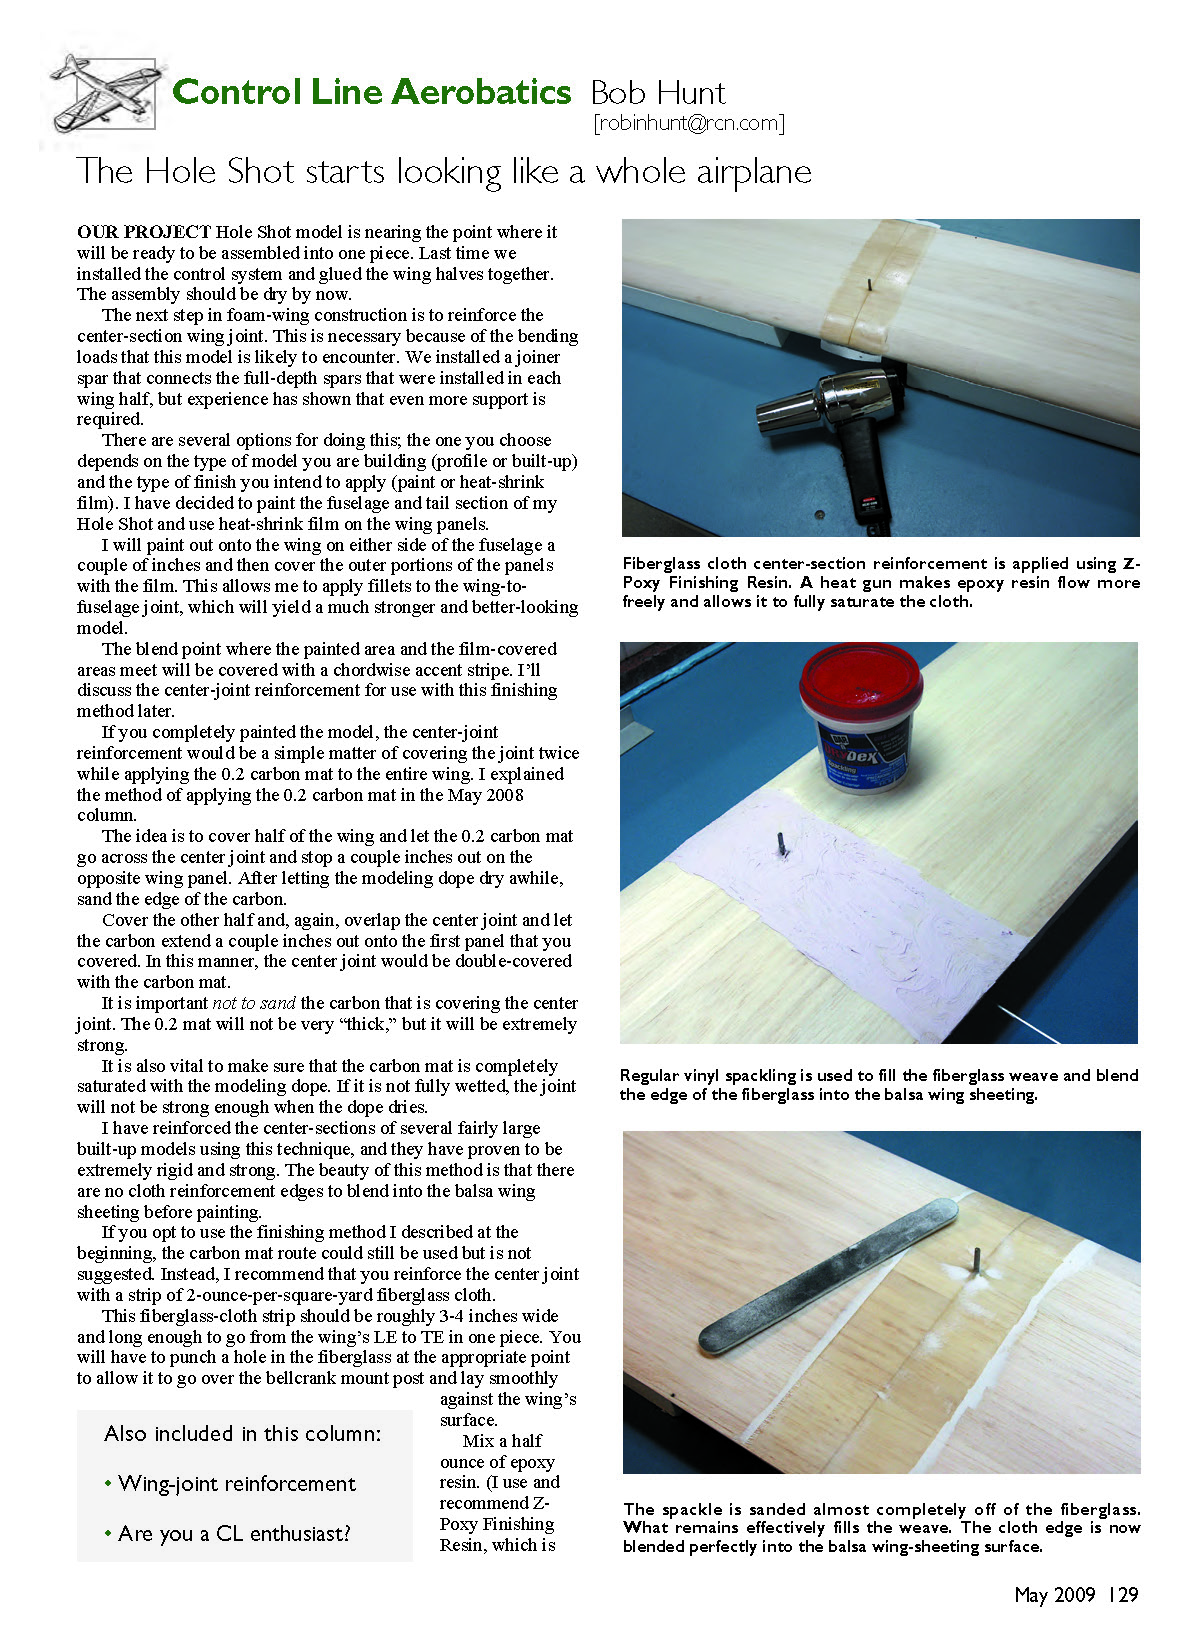
- Using an acid brush, begin applying the epoxy to the fiberglass cloth. Move from front to back and use as little epoxy as possible while still fully saturating the cloth.
- After applying the epoxy, use a modeling heat gun (the type used to apply heat-shrink film) to lightly heat the fiberglassed area. The warmth helps the epoxy flow and fully saturate the cloth.
- Remove excess epoxy with the acid brush as necessary — only enough should be used to fully wet the fiberglass.
- Let the excess fiberglass extend just beyond the wing LE and TE; do not try to trim it while it is wet.
- When the resin has fully cured (overnight is recommended), use a sanding block or heavy-duty emery board to sand against the edge of the cured fiberglass/epoxy strip. The sandpaper will cut off the fiberglass cleanly.
- Repeat the process to apply a fiberglass reinforcing strip to the centerline on the bottom of the wing.
The edges of those strips will be unsightly at this point; they must be blended into the wing surface.
Blending the fiberglass edges
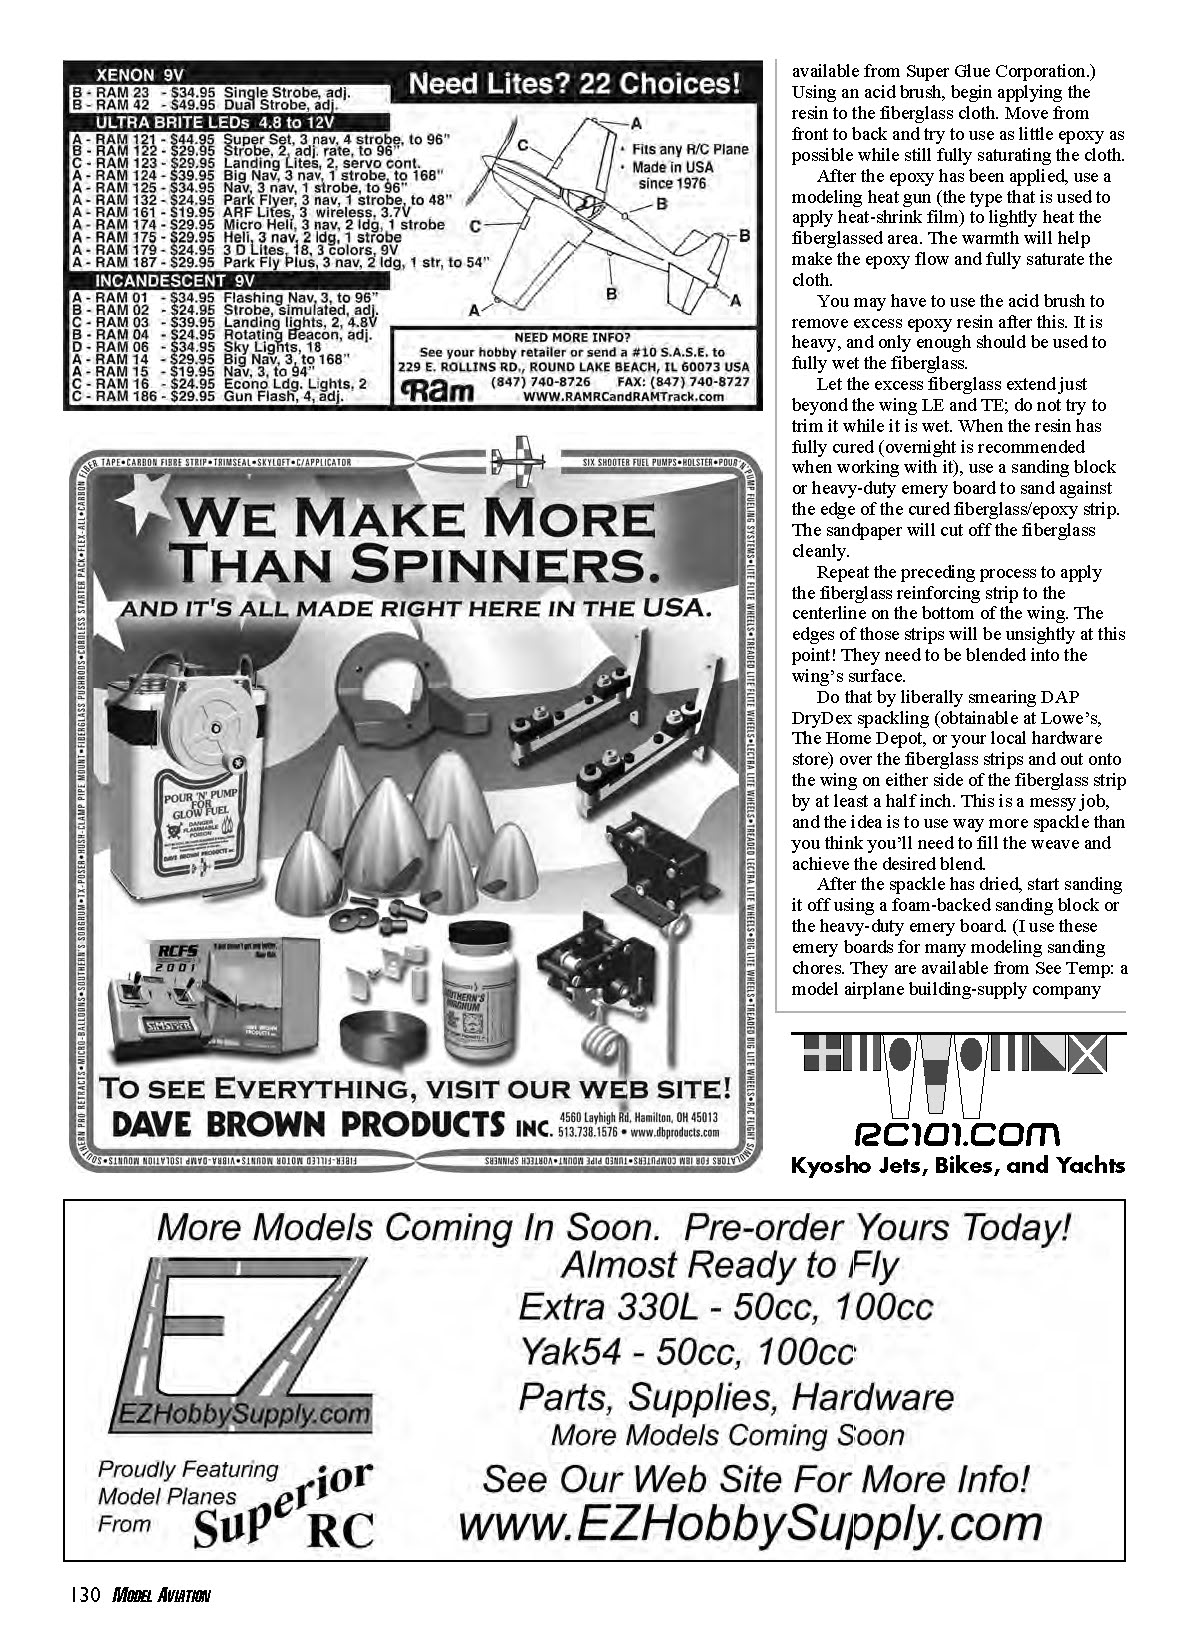
Do the blending by liberally smearing DAP DryDex spackling (available at Lowe's, The Home Depot, or your local hardware store) over the fiberglass strips and out onto the wing on either side of the fiberglass strip by at least a half inch. This is a messy job — use more spackle than you think you'll need to fill the weave and achieve the desired blend.
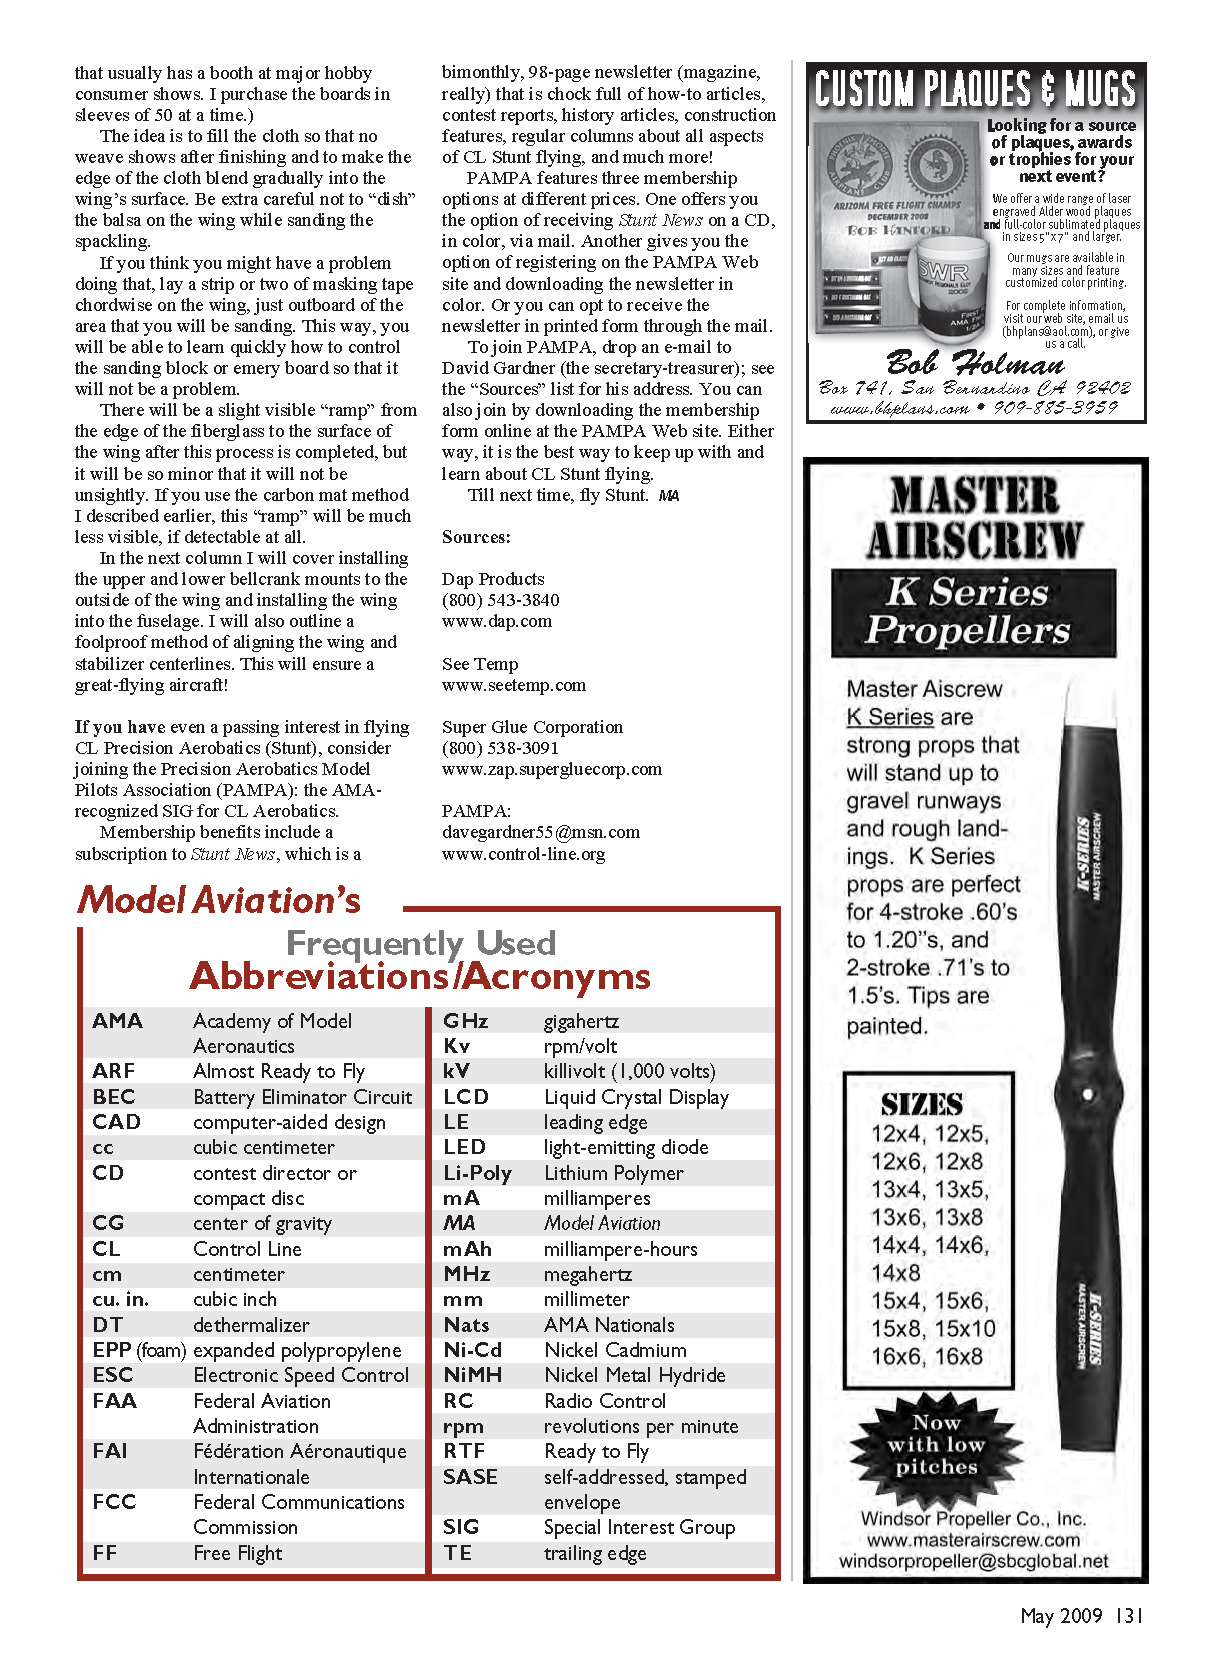
After the spackle has dried, sand it off using a foam-backed sanding block or a heavy-duty emery board. I use these emery boards for many modeling sanding chores; they are available from See Temp.
The spackle is sanded almost completely off the fiberglass; what remains effectively fills the weave. The cloth edge is now blended perfectly into the balsa wing sheeting surface. The idea is to fill the cloth so that no weave shows after finishing and to make the edge of the cloth blend gradually into the wing surface.
Be extra careful not to "dish" the balsa on the wing while sanding the spackling. If you think you might have a problem doing that, lay a strip or two of masking tape chordwise on the wing, just outboard of the area that you will be sanding. This way, you can learn quickly how to control the sanding block or emery board so it will not be a problem.
There will be a slight visible "ramp" from the edge of the fiberglass to the surface of the wing after this process is completed, but it will be so minor that it will not be unsightly. If you use the carbon-mat method described earlier, this ramp will be much less visible, if detectable at all.
Fiberglass cloth center-section reinforcement is applied using Z-Poxy Finishing Resin. A heat gun makes epoxy resin flow more freely and allows it to fully saturate the cloth.
Coming next
In the next column I will cover installing the upper and lower bellcrank mounts to the outside of the wing and installing the wing into the fuselage. I will also outline a foolproof method of aligning the wing and stabilizer centerlines. This will ensure a great-flying aircraft!
If you have even a passing interest in flying CL Precision Aerobatics (Stunt), consider joining the Precision Aerobatics Model Pilots Association (PAMPA), the AMA-recognized SIG for CL Aerobatics.
Membership benefits include a subscription to Stunt News, a bimonthly, 98-page newsletter (magazine, really) chock full of how-to articles, contest reports, history articles, construction features, regular columns about all aspects of CL Stunt flying, and much more. PAMPA features three membership options at different prices:
- Receive Stunt News on CD, in color, via mail.
- Register on the PAMPA website and download the newsletter in color.
- Receive the newsletter in printed form through the mail.
To join PAMPA, drop an e-mail to David Gardner (the secretary-treasurer) at [email protected], or download the membership form online at the PAMPA website. Either way, it is the best way to keep up with and learn about CL Stunt flying.
Till next time, fly Stunt. BH
Sources
- Dap Products
(800) 543-3840 www.dap.com
- See Temp
- Super Glue Corporation (Z-Poxy Finishing Resin)
(800) 538-3091 www.zap.supergluecorp.com
- PAMPA
[email protected] www.control-line.org
Transcribed from original scans by AI. Minor OCR errors may remain.

