
Control Line Aerobatics
Bob Hunt [[email protected]]
Genesis Extreme Electric Retrofit Project report
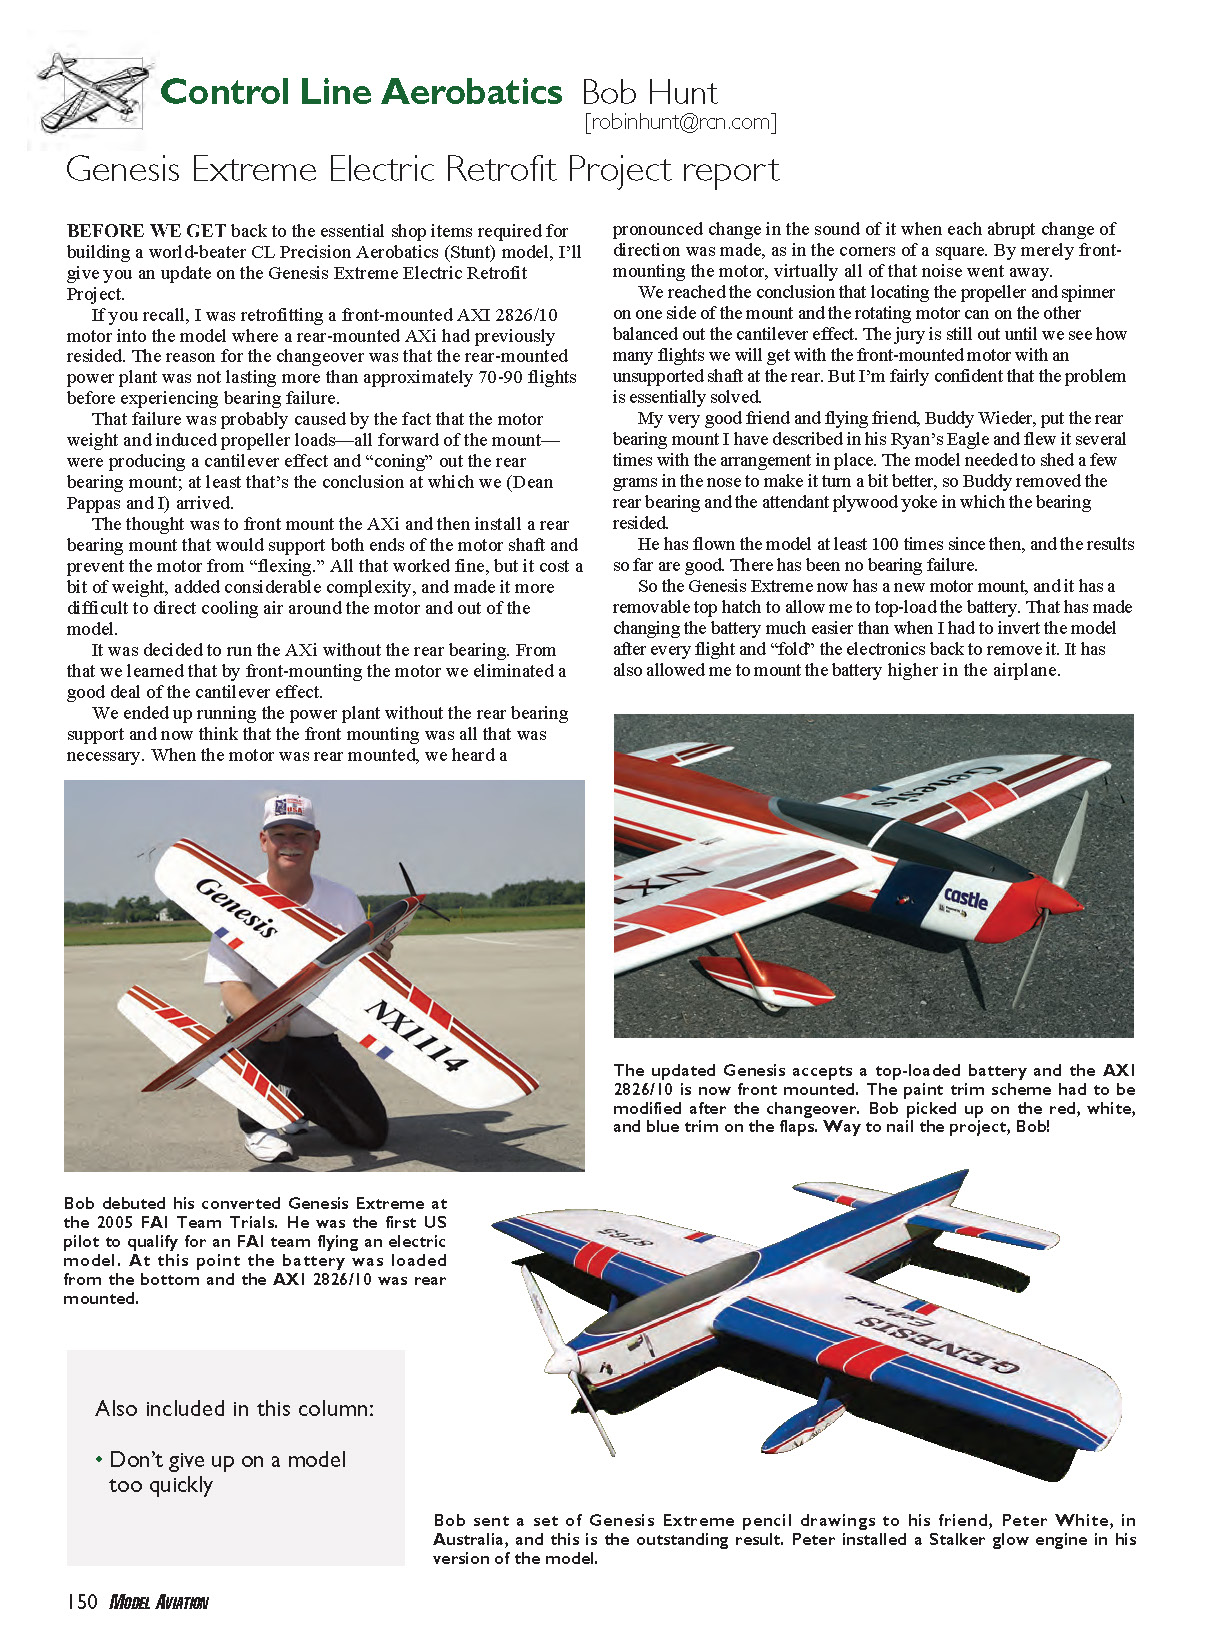
Before we get back to the essential shop items required for building a world-beater CL Precision Aerobatics (Stunt) model, I'll give you an update on the Genesis Extreme electric retrofit project.
If you recall, I was retrofitting a front-mounted AXi 2826/10 motor into the model where a rear-mounted AXi had previously resided. The reason for the changeover was that the rear-mounted power plant was not lasting more than approximately 70–90 flights before experiencing bearing failure.
That failure was probably caused by the fact that the motor weight and induced propeller loads — all forward of the mount — were producing a cantilever effect and "coning" out the rear bearing mount; at least that's the conclusion at which we (Dean Pappas and I) arrived.
The thought was to front-mount the AXi and then install a rear bearing mount that would support both ends of the motor shaft and prevent the motor from "flexing." All that worked fine, but it cost a bit of weight, added considerable complexity, and made it more difficult to direct cooling air around the motor and out of the model.
It was decided to run the AXi without the rear bearing. From that we learned that by front-mounting the motor we eliminated a good deal of the cantilever effect.
We ended up running the power plant without the rear bearing support and now think that the front mounting was all that was necessary. When the motor was rear-mounted, we heard a pronounced change in the sound of it with each abrupt change of direction, as in the corners of a square. By merely front-mounting the motor, virtually all of that noise went away.
We reached the conclusion that locating the propeller and spinner on one side of the mount and the rotating motor can on the other balanced out the cantilever effect. The jury is still out until we see how many flights we will get with the front-mounted motor with an unsupported shaft at the rear, but I'm fairly confident that the problem is essentially solved.
My very good friend and flying buddy, Buddy Wieder, put the rear bearing mount I have described in his Ryan's Eagle and flew it several times with the arrangement in place. The model needed to shed a few grams in the nose to make it turn a bit better, so Buddy removed the rear bearing and the attendant plywood yoke in which the bearing resided.
He has flown the model at least 100 times since then, and the results so far are good. There has been no bearing failure.
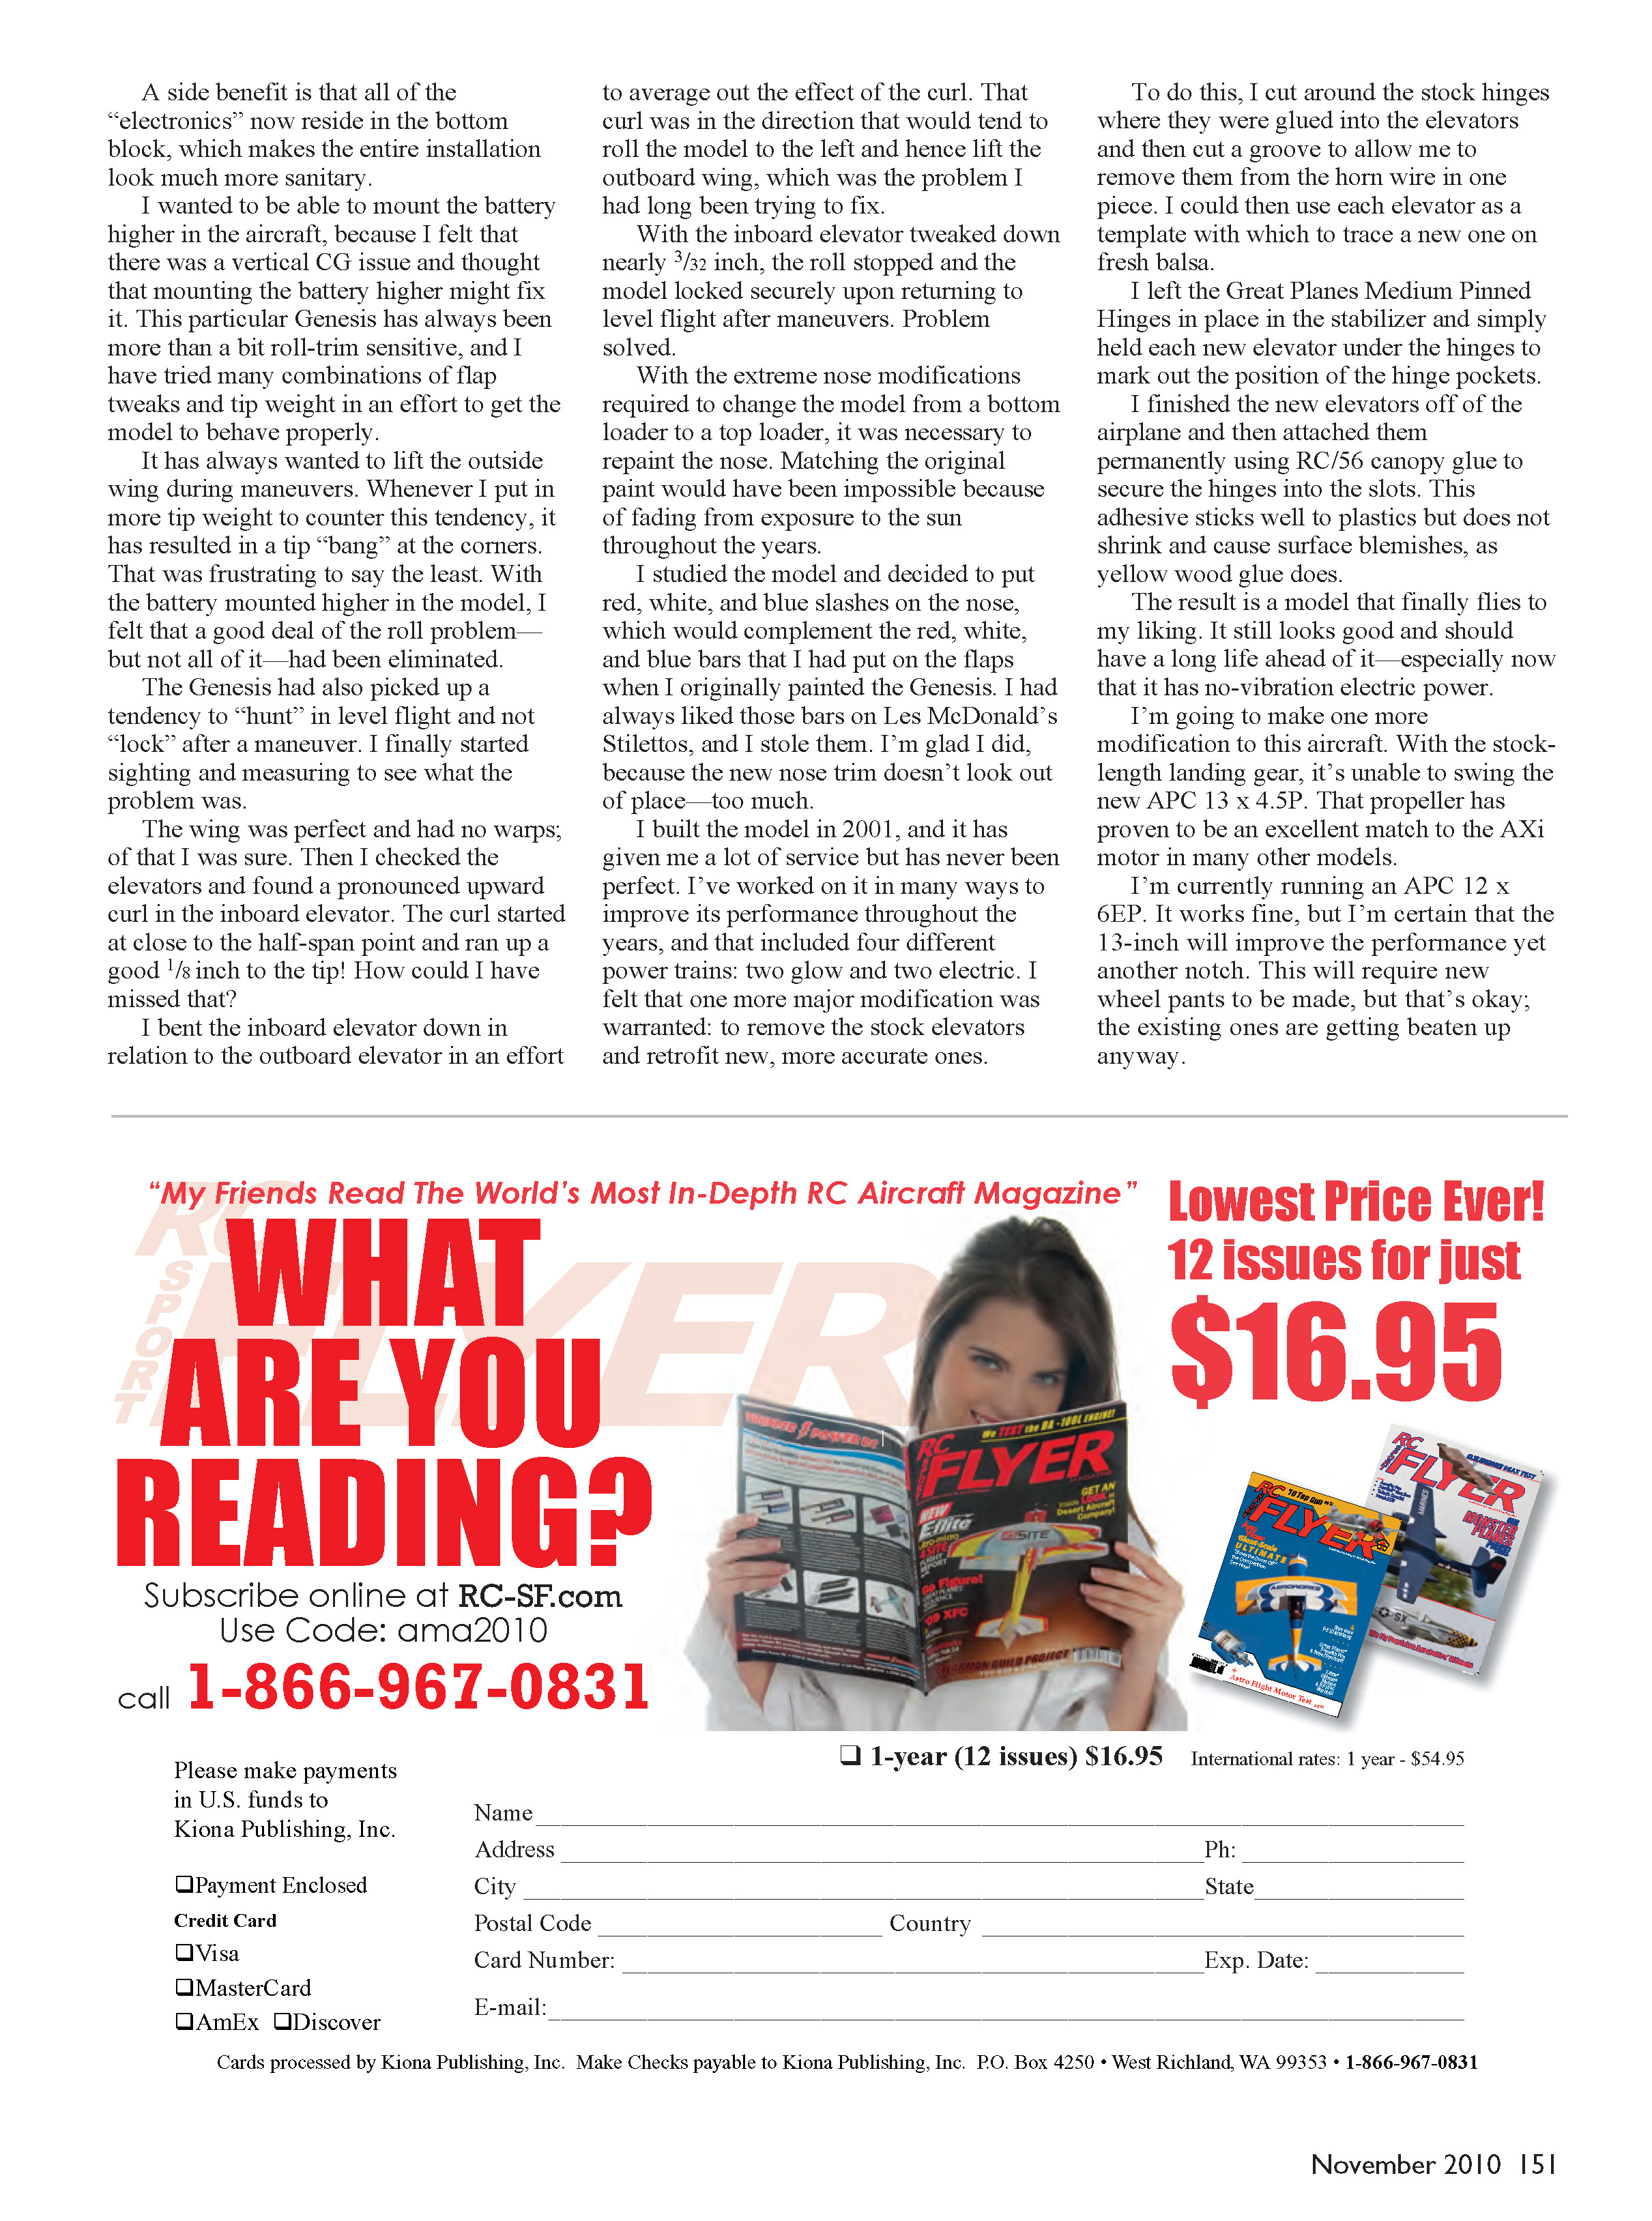
So the Genesis Extreme now has a new motor mount, and it has a removable top hatch to allow me to top-load the battery. That has made changing the battery much easier than when I had to invert the model after every flight and "fold" the electronics back to remove it. It has also allowed me to mount the battery higher in the airplane.
I wanted to be able to mount the battery higher in the aircraft because I felt that there was a vertical CG issue and thought that mounting the battery higher might fix it. This particular Genesis has always been more than a bit roll-trim sensitive, and I have tried many combinations of flap tweaks and tip weight in an effort to get the model to behave properly.
It has always wanted to lift the outside wing during maneuvers. Whenever I put in more tip weight to counter this tendency, it resulted in a tip "bang" at the corners. That was frustrating, to say the least. With the battery mounted higher in the model, I felt that a good deal of the roll problem — but not all of it — had been eliminated.
The Genesis had also picked up a tendency to "hunt" in level flight and not "lock" after a maneuver. I finally started sighting and measuring to see what the problem was.
The wing was perfect and had no warps; of that I was sure. Then I checked the elevators and found a pronounced upward curl in the inboard elevator. The curl started at close to the half-span point and ran up a good 1/8 inch to the tip! How could I have missed that?
I bent the inboard elevator down in relation to the outboard elevator in an effort to average out the effect of the curl. That curl was in the direction that would tend to roll the model to the left and hence lift the outboard wing, which was the problem I had long been trying to fix.
With the inboard elevator tweaked down nearly 3/32 inch, the roll stopped and the model locked securely upon returning to level flight after maneuvers. Problem solved.
With the extreme nose modifications required to change the model from a bottom-loader to a top-loader, it was necessary to repaint the nose. Matching the original paint would have been impossible because of fading from exposure to the sun over the years.
I studied the model and decided to put red, white, and blue slashes on the nose, which would complement the red, white, and blue bars that I had put on the flaps when I originally painted the Genesis. I had always liked those bars on Les McDonald's Stilettos, and I stole them. I'm glad I did, because the new nose trim doesn't look out of place.
I built the model in 2001, and it has given me a lot of service but has never been perfect. I've worked on it in many ways to improve its performance throughout the years, and that included four different power trains: two glow and two electric. I felt that one more major modification was warranted: to remove the stock elevators and retrofit new, more accurate ones.
To do this, I cut around the stock hinges where they were glued into the elevators and then cut a groove to allow me to remove them from the horn wire in one piece. I could then use each elevator as a template with which to trace a new one on fresh balsa.
I left the Great Planes Medium Pinned Hinges in place in the stabilizer and simply held each new elevator under the hinges to mark out the position of the hinge pockets.
I finished the new elevators off the airplane and then attached them permanently using RC/56 canopy glue to secure the hinges into the slots. This adhesive sticks well to plastics but does not shrink and cause surface blemishes as yellow wood glue does.
The result is a model that finally flies to my liking. It still looks good and should have a long life ahead of it — especially now that it has no-vibration electric power.
I'm going to make one more modification to this aircraft. With the stock-length landing gear, it's unable to swing the new APC 13 x 4.5P. That propeller has proven to be an excellent match to the AXi motor in many other models.
I'm currently running an APC 12 x 6EP. It works fine, but I'm certain that the 13-inch will improve the performance yet another notch. This will require new wheel pants to be made, but that's okay; the existing ones are getting beaten up anyway.
I wanted to go through all the trials and tribulations I experienced with the Genesis Extreme to make a point: you should not give up on a model too quickly. Many that are hard to trim or that don't fly as well as you expect might need a bit of thought and a few small modifications to make them perform excellently.
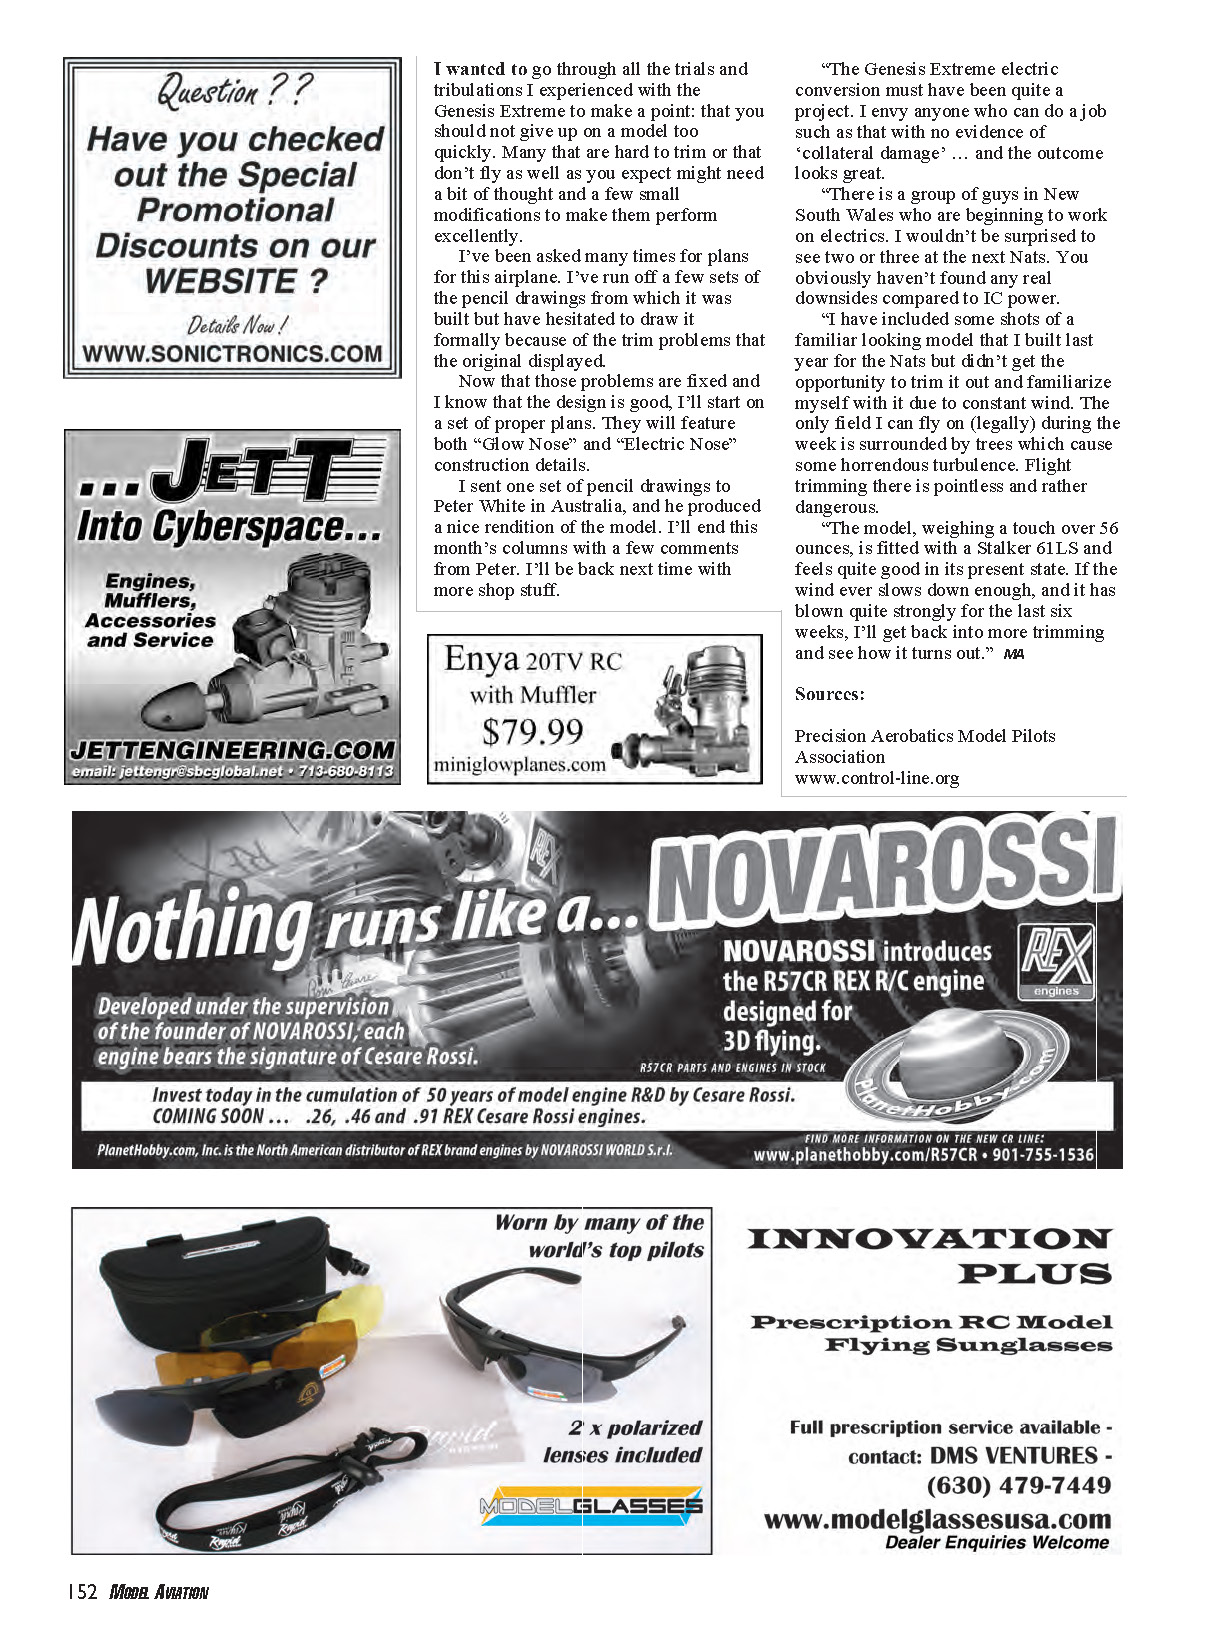
I've been asked many times for plans for this airplane. I've run off a few sets of the pencil drawings from which it was built but have hesitated to draw it formally because of the trim problems that the original displayed.
Now that those problems are fixed and I know that the design is good, I'll start on a set of proper plans. They will feature both "Glow Nose" and "Electric Nose" construction details.
I sent one set of pencil drawings to Peter White in Australia, and he produced a nice rendition of the model. I'll end this month's column with a few comments from Peter. I'll be back next time with more shop stuff.
Comments from Peter White (PW)
"The Genesis Extreme electric conversion must have been quite a project. I envy anyone who can do a job such as that with no evidence of collateral damage ... and the outcome looks great.
"There is a group of guys in New South Wales who are beginning to work on electrics. I wouldn't be surprised to see two or three at the next Nats. You obviously haven't found any real downsides compared to IC power.
"I have included some shots of a familiar-looking model that I built last year for the Nats but didn't get the opportunity to trim it out and familiarize myself with it due to constant wind. The only field I can fly on (legally) during the week is surrounded by trees which cause some horrendous turbulence. Flight trimming there is pointless and rather dangerous.
"The model, weighing a touch over 56 ounces, is fitted with a Stalker 61 LS and feels quite good in its present state. If the wind ever slows down enough, and it has blown quite strongly for the last six weeks, I'll get back into more trimming and see how it turns out." — PW
Sources
- Precision Aerobatics Model Pilots Association
- www.control-line.org
Transcribed from original scans by AI. Minor OCR errors may remain.

