

Control Line Aerobatics
Setting up shop
Bob Hunt [[email protected]]
It's time to revisit my "shop setup" series.
Sometimes the most mundane things can prove to be among the most important things as well. Such is the case with measuring tools and straightedges in model building. Certainly these devices are not nearly as interesting as, say, a hand grinder, a scroll saw, or even a sanding block, but in many cases they prove to be the tools that make the biggest difference in achieving an accurate, well-built model.
Throughout the years, without realizing it consciously, I've acquired a variety of measuring tools and straightedges. Many have been gifts from friends who know of my penchant for, and love of, such tools. Most are just conversation pieces, but a few have become building staples, although these are the more "normal" of their type. Into this mix I'll also throw drawing tools and templates.
My first precision tools were drawing tools that my step-grandfather gave me when I was roughly eight years old. He and my grandmother lived three streets away from my family, and I would visit them almost daily.
It became a ritual for me to spend the weekends there, and I was royally spoiled by both of them. My step-grandfather, who was known to me as "Poppy," was quite wealthy and had made his fortune from his large dental-supply business. By the time I came on the scene he had semi-retired from the business, but he kept a close eye on it and went to his factory every business day to read the mail, sign checks, and such.
I went with Poppy on many occasions to his factory. There were many drawing boards on which the designers drew plans for new products. I was intrigued by their work and spent much time watching them design things. I must have driven them crazy with my myriad questions.
I started to draw cars and airplanes in the evenings that I spent at Poppy's house, and he would carefully look at each one and comment on how much better each was than the one before. I knew that I was getting better at drawing, and was delighted when he presented me with a full set of genuine Dietzgen drawing tools! I knew they were the real thing, because they were the same tools that I watched the designers use at his factory.
I still have that set 54 years later, and it is still intact and complete. It is among my most treasured possessions. Poppy also built a small drawing board for me on which to do my drawings.
Soon after that I began designing and building small gliders, and again Poppy paved the way to success by buying me proper measuring and cutting tools. I owe him a great deal, and I just wanted to share that story because I believe that his interest in my modeling passion, and those tools, are a huge part of the reason that I build straight, accurate models to this day. I'll never forget his kindness, his generosity, and his guidance.
Also included in this column:
- Straightedges
- Triangles and angle finders
- Circle templates
- Combination square
Straightedges: The ubiquitous straightedge may be the most useful tool in your shop. It can be used for many things in model building, but most often it is employed to cut a straight line in a piece of balsa. I never use a factory edge on a piece of balsa. I've found that balsa can have stresses in it that will relieve and cause a "bow" when a piece is cut from a sheet without first trimming the factory edge. In fact, I routinely trim both edges of a fresh sheet of balsa before attempting to cut from it a model part.
Most of the time, and particularly with thicker pieces of balsa (1/4-inch thick and greater), I feel that a band saw does a much better job of relieving stress in a sheet of balsa than does edge trimming with a knife. However, I do use a knife on thinner pieces of balsa (1/32- to 3/16-inch thick pieces).
If you choose to use the band saw method, you will still need to draw a pen line on the balsa to follow while cutting. If you opt to use the knife method, you will need an accurate straightedge against which to cut.
If you saw- or knife-trim the edge, you will then have to true it with a sanding block. I use the long PermaGrit blocks that I have mentioned in a previous column for this chore. I check that trued edge against the straightedge to ensure that it is indeed accurate before use.
You can purchase fairly good straightedges from your local Home Depot or Lowe’s home improvement stores, and many of the mail-order hobby concerns also offer good modeling straightedges. But, to ensure that your work is as perfect as possible, I suggest purchasing a precision straightedge. Sources for these can be found by searching the Web. Type the phrase "precision metal straightedges" in your search bar and you will be surprised how many options there are.
Be aware that a precision 36-inch straightedge will cost anywhere from $50 to $150. A 48-inch precision straightedge will cost substantially more! Believe me, it will be money well spent.
My father had a full machine shop, and in it he had a precision press shear. He made several very nice straightedges on it for me many years ago, and I still use them to this day. I am considering buying a new 48-inch straightedge, however, and I expect to pay upwards of $200 for it!
You will also find much use for a flexible metal straightedge, especially when working on a curved wing surface. Again, a Web search for "precision flexible metal straightedges" will yield a lot of results. Be prepared to spend a few shekels to get a good one.
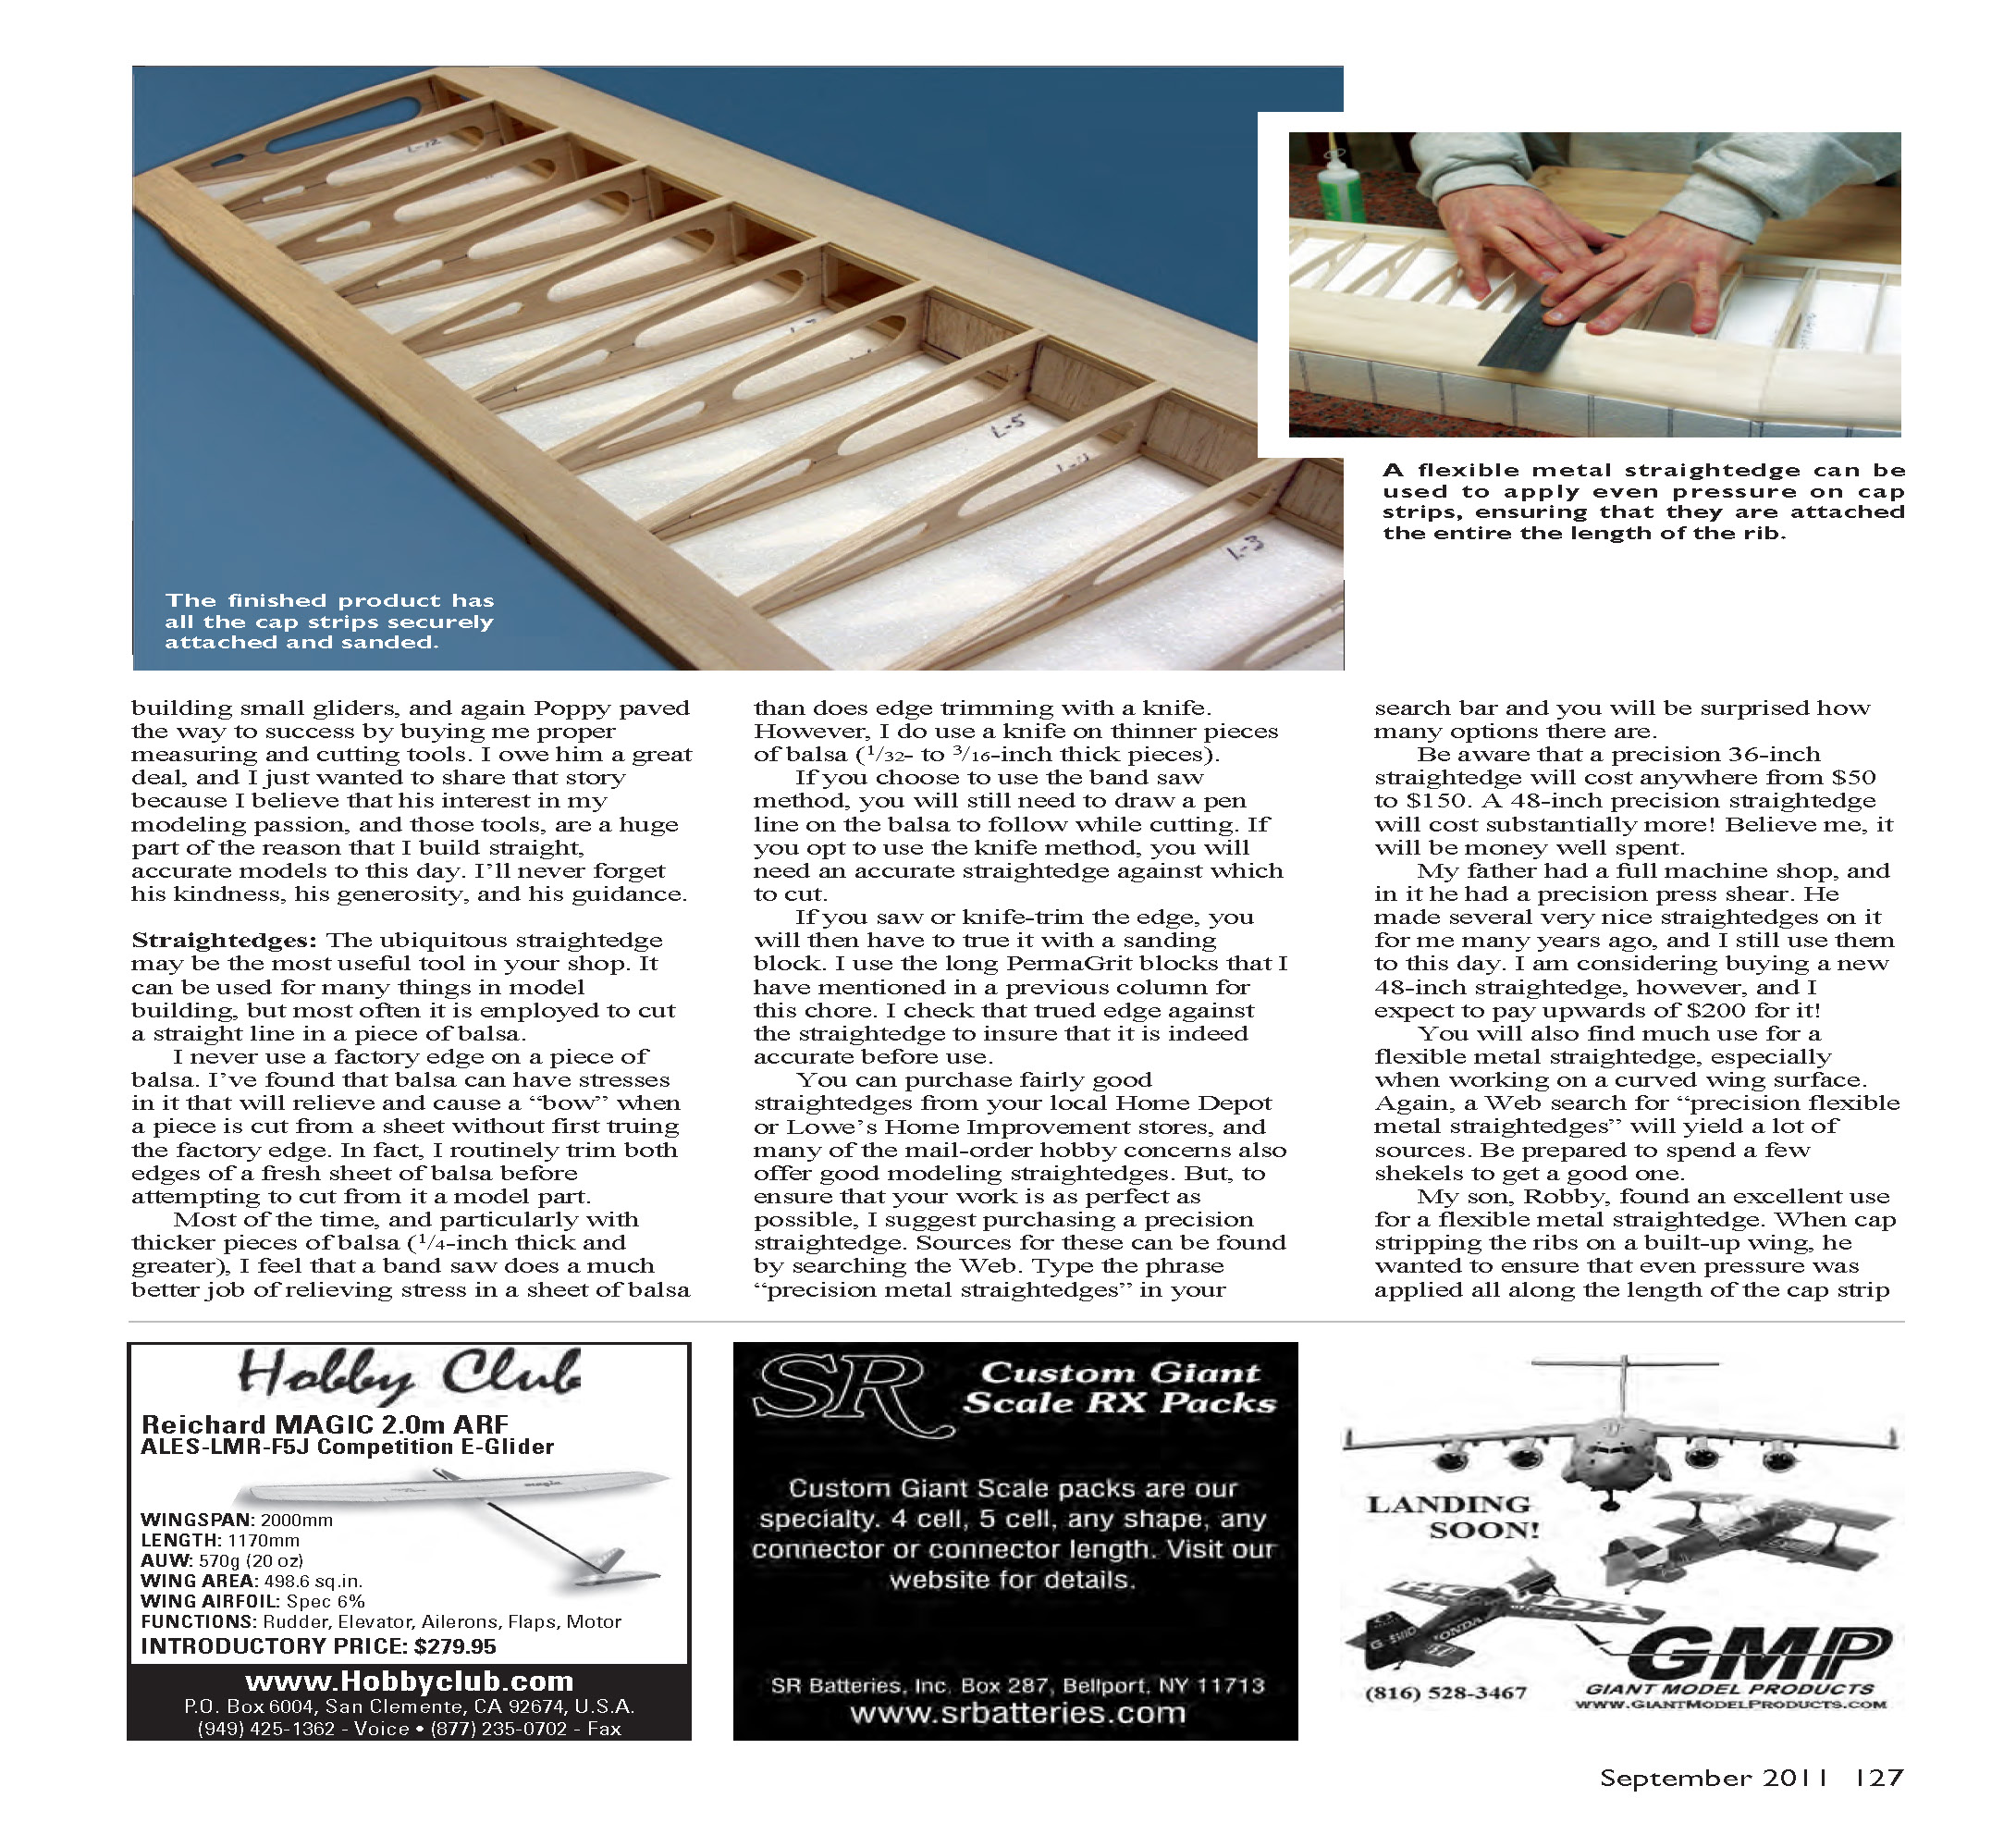
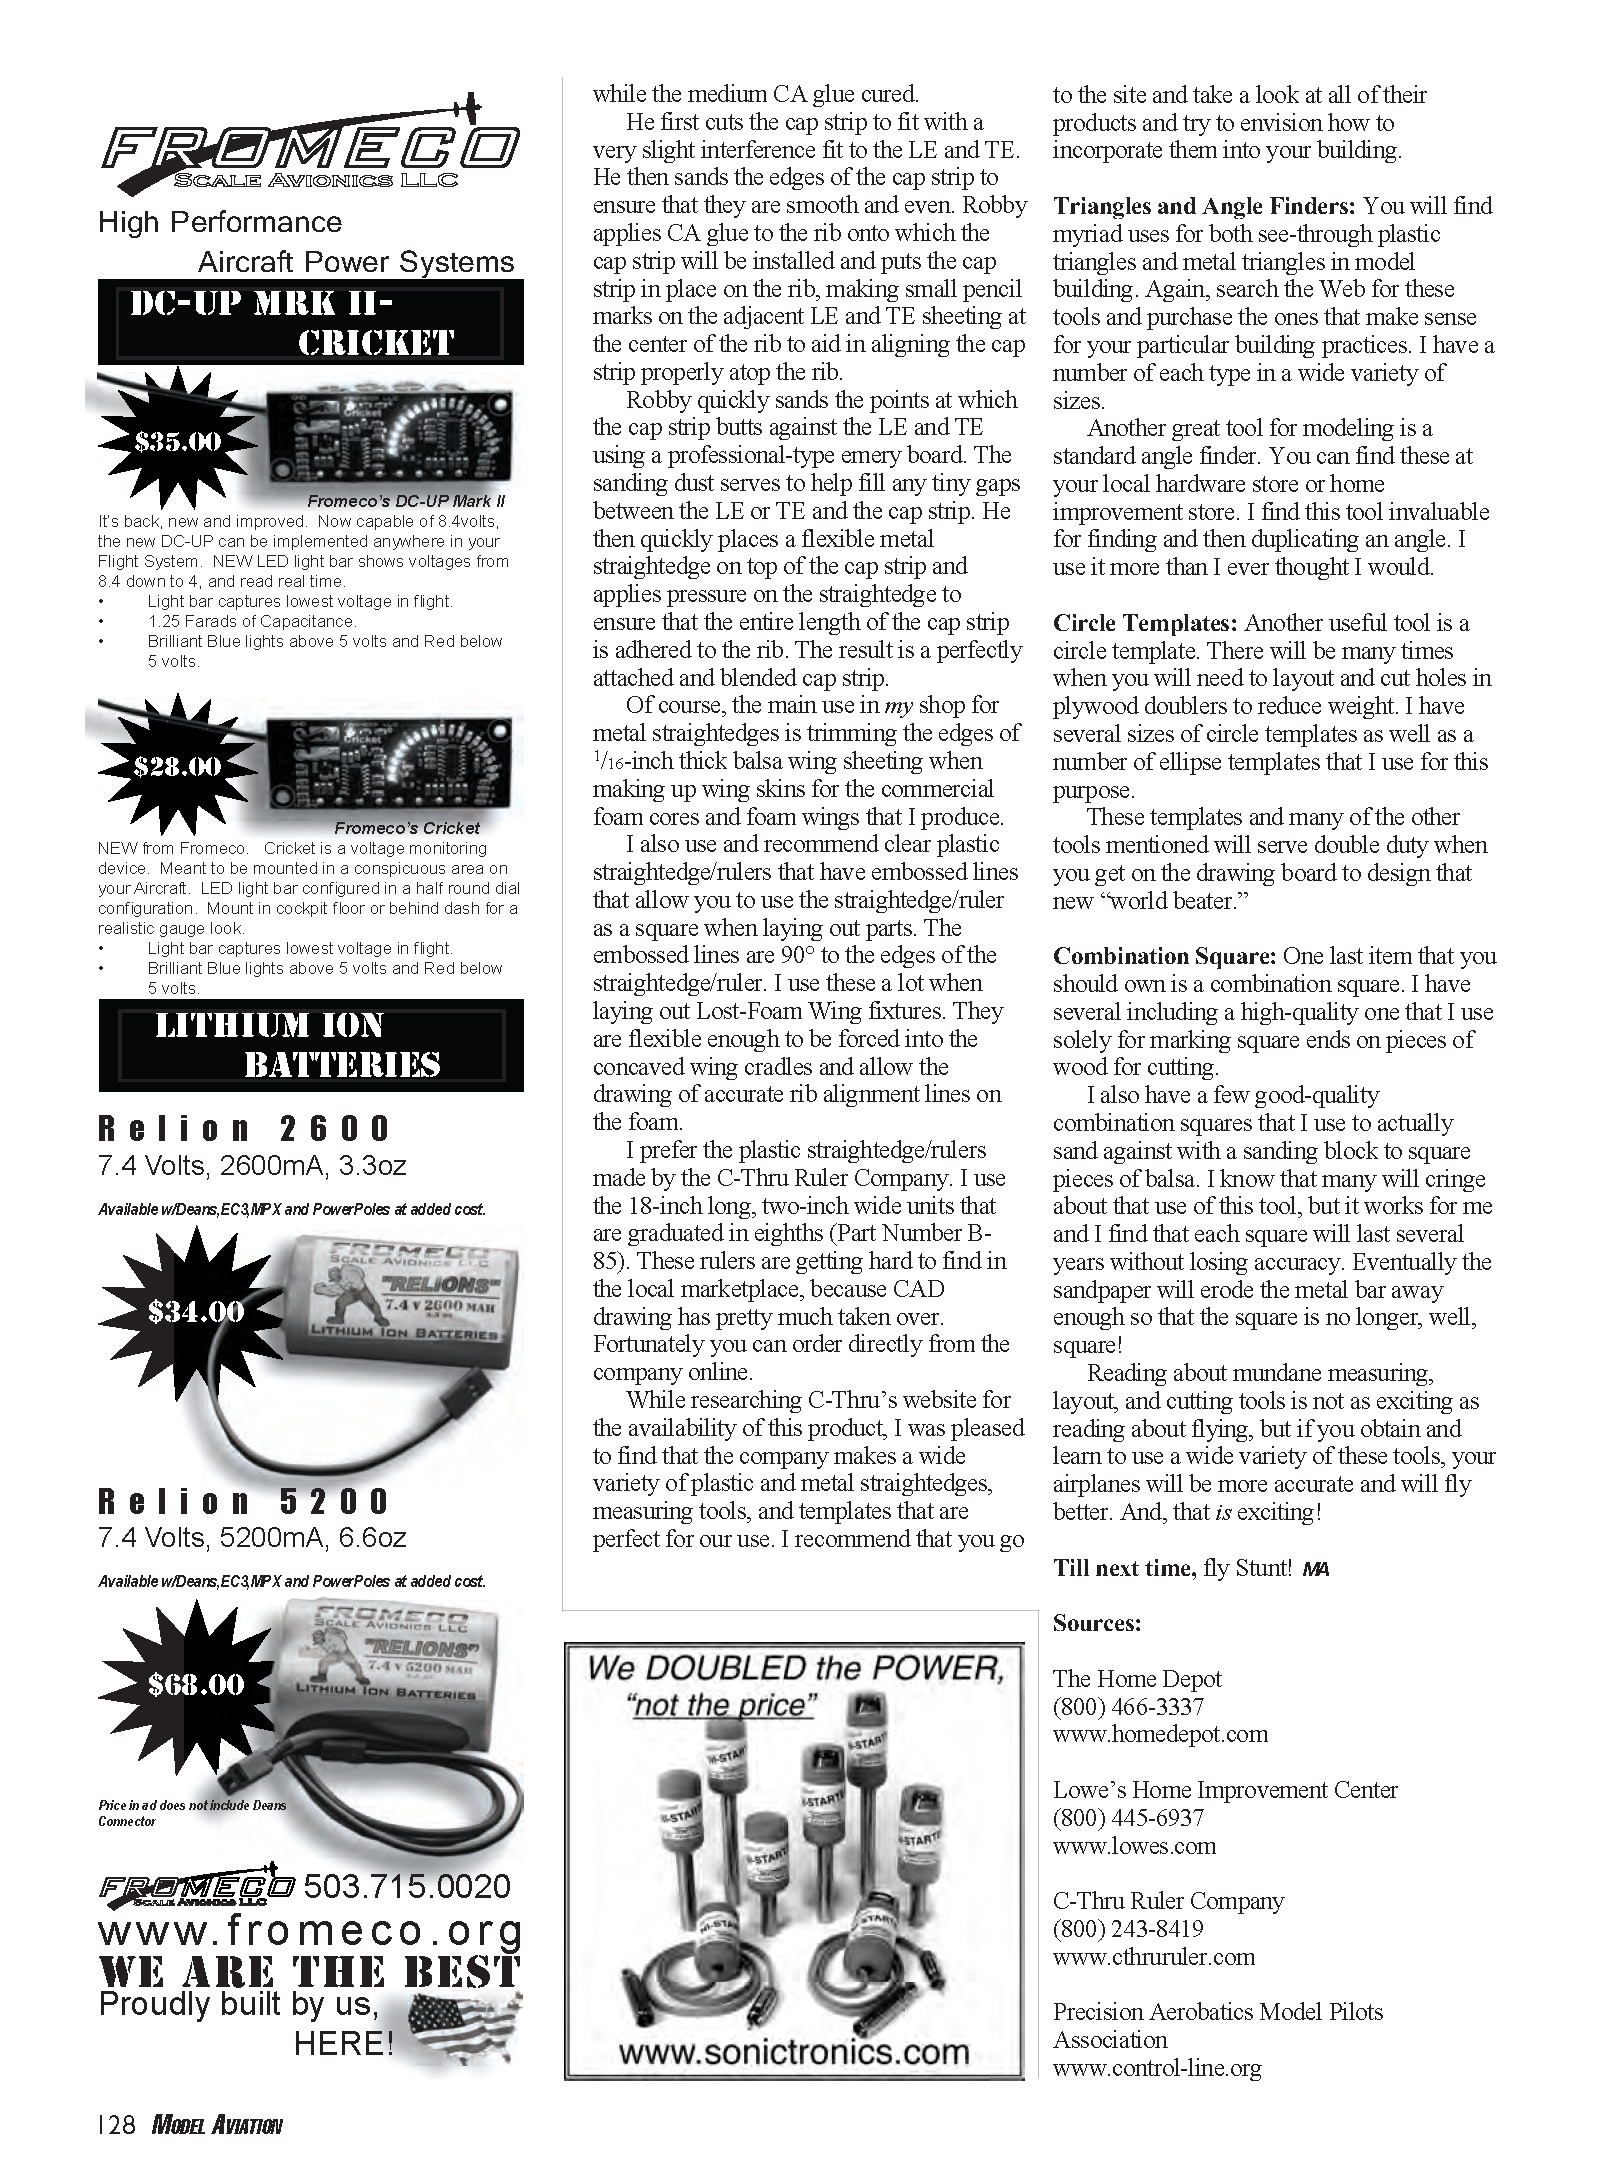
My son, Robby, found an excellent use for a flexible metal straightedge. When cap-stripping the ribs on a built-up wing, he wanted to ensure that even pressure was applied all along the length of the cap strip so that it was securely glued. He used the straightedge to apply pressure over the cap strip as the glue cured, and it worked perfectly.
He first cuts the cap strip to fit with a very slight interference fit to the LE and TE. He then sands the edges of the cap strip to ensure that they are smooth and even. Robby applies CA glue to the rib onto which the cap strip will be installed and puts the cap strip in place on the rib, making small pencil marks on the adjacent LE and TE sheeting at the center of the rib to aid in aligning the cap strip properly atop the rib.
Robby quickly sands the points at which the cap strip butts against the LE and TE using a professional-type emery board. The sanding dust serves to help fill any tiny gaps between the LE or TE and the cap strip. He then quickly places a flexible metal straightedge on top of the cap strip and applies pressure on the straightedge to ensure that the entire length of the cap strip is adhered to the rib. The result is a perfectly attached and blended cap strip.
Of course, the main use in my shop for metal straightedges is trimming the edges of 1/16-inch thick balsa wing sheeting when making up wing skins for the commercial foam cores and foam wings that I produce.
I also use and recommend clear plastic straightedge/rulers that have embossed lines that allow you to use the straightedge/ruler as a square when laying out parts. The embossed lines are 90° to the edges of the straightedge/ruler. I use these a lot when laying out Lost-Foam Wing fixtures. They are flexible enough to be forced into the concaved wing cradles and allow the drawing of accurate rib alignment lines on the foam.
I prefer the plastic straightedge/rulers made by the C-Thru Ruler Company. I use the 18-inch long, two-inch wide units that are graduated in eighths (Part Number B-85). These rulers are getting hard to find in the local marketplace, because CAD drawing has pretty much taken over. Fortunately you can order directly from the company online.
While researching C-Thru's website for the availability of this product, I was pleased to find that the company makes a wide variety of plastic and metal straightedges, measuring tools, and templates that are perfect for our use. I recommend that you go to the site and take a look at all of their products and try to envision how to incorporate them into your building.
Triangles and Angle Finders
You will find myriad uses for both see-through plastic triangles and metal triangles in model building. Again, search the Web for these tools and purchase the ones that make sense for your particular building practices. I have a number of each type in a wide variety of sizes.
Another great tool for modeling is a standard angle finder. You can find these at your local hardware store or home improvement store. I find this tool invaluable for finding and then duplicating an angle. I use it more than I ever thought I would.
Circle Templates
Another useful tool is a circle template. There will be many times when you will need to lay out and cut holes in plywood doublers to reduce weight. I have several sizes of circle templates as well as a number of ellipse templates that I use for this purpose.
These templates and many of the other tools mentioned will serve double duty when you get on the drawing board to design that new "world beater."
Combination Square
One last item that you should own is a combination square. I have several including a high-quality one that I use solely for marking square ends on pieces of wood for cutting.
I also have a few good-quality combination squares that I use to actually sand against with a sanding block to square pieces of balsa. I know that many will cringe about that use of this tool, but it works for me and I find that each square will last several years without losing accuracy. Eventually the sandpaper will erode the metal bar away enough so that the square is no longer, well, square!
Reading about mundane measuring, layout, and cutting tools is not as exciting as reading about flying, but if you obtain and learn to use a wide variety of these tools, your airplanes will be more accurate and will fly better. And, that is exciting!
Till next time, fly Stunt! MA
Sources:
- The Home Depot
(800) 466-3337 www.homedepot.com
- Lowe’s Home Improvement Center
(800) 445-6937 www.lowes.com
- C-Thru Ruler Company
(800) 243-8419 www.cthruruler.com
- Precision Aerobatics Model Pilots Association
Transcribed from original scans by AI. Minor OCR errors may remain.

