
CONTROL LINE COMBAT
Rich von Lopez
8334 Colegio Dr., Los Angeles, CA 90045
Introduction
Do you ever wonder why some Combat pilots consistently place high in the contests they attend? Some of it has to do with flying skill, but a lot has to do with the preparation of engines and models. Often, it is not the fastest model that makes it to the winner’s circle; it is the reliable and consistent model.
Part of the preparation involves trimming the aircraft so that its flight pattern is true and precise. During the past several years, most competitive Combat pilots have been buying boxes of eight to 12 RTF (ready-to-fly) models, but Ready to Fly is not always fully ready. Each model needs to be looked at carefully to identify warps.
Trimming and warps
Although the quality of the models you can get is terrific, there is a human being in a workroom somewhere cutting and assembling pieces. His or her level of focus will vary as the day progresses, just as it does with any other human being. I have made plenty of mistakes when I have built batches of models for myself. The fit of parts might not be as exact as I would like, or the model’s covering gets heated a little too much in one direction, causing a warp.
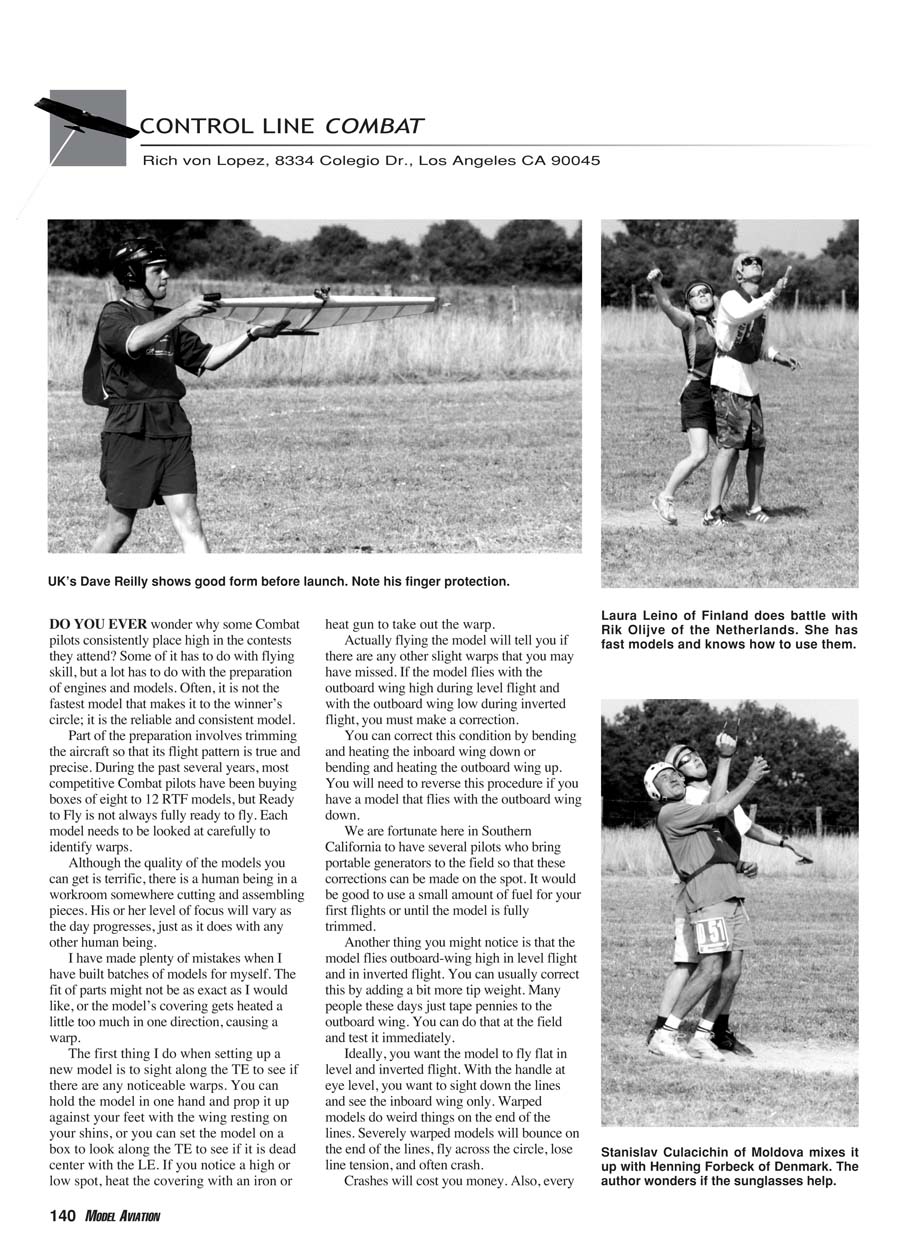
The first thing I do when setting up a new model is to sight along the trailing edge (TE) to see if there are any noticeable warps. You can hold the model in one hand and prop it up against your feet with the wing resting on your shins, or you can set the model on a box to look along the TE to see if it is dead center with the leading edge (LE). If you notice a high or low spot, heat the covering with an iron or heat gun to take out the warp.
Actually flying the model will tell you if there are any other slight warps that you may have missed. If the model flies with the outboard wing high during level flight and with the outboard wing low during inverted flight, you must make a correction. You can correct this condition by bending and heating the inboard wing down or bending and heating the outboard wing up. Reverse the procedure if the outboard wing is down in level flight.
If the model flies outboard-wing high in both level and inverted flight, you can usually correct this by adding a bit more tip weight. Many people these days just tape pennies to the outboard wing. You can do that at the field and test it immediately.
Ideally, you want the model to fly flat in level and inverted flight. With the handle at eye level, sight down the lines and see the inboard wing only. Warped models do weird things on the end of the lines. Severely warped models will bounce on the end of the lines, fly across the circle, lose line tension, and often crash. Crashes will cost you money. Every time I crash a model and get dirt in the engine, I take the engine apart and clean it thoroughly, and it takes a great deal of time.
We are fortunate here in Southern California to have several pilots who bring portable generators to the field so that these corrections can be made on the spot. It is good practice to use a small amount of fuel for your first flights or until the model is fully trimmed.
Balancing
As long as I am writing about trimming, I should discuss balance. Where should you balance your model? The advent of metal engine mounts with adjustment slots gave us the ability to fine-tune our models’ balance points. Back in the good, old days of wooden engine mounts, balancing was done by adding weights to the front or rear of the aircraft. True modelers are always in search of lighter models because they know that a lighter airplane will perform better than a heavy one. The engine will have to work less to pull the model along, and you might even be able to run more pitch on your propeller with a light model.
In the late 1960s or early 1970s, I came into ownership of a SuperTigre G21-35 rear-intake engine. It made lots of power but was heavier than the regular front-intake G21, and because it was a rear intake it had to be mounted quite a bit farther forward on the model. I had the SuperTigre mounted on a Sneeker, and during the first flight I almost crashed the airplane because it was so nose-heavy and did not want to turn. I ended up bolting 2 or 3 ounces of lead fishing sinkers to the TE before it flew somewhat normal. The problem with all that extra weight was that the advantage of the extra power was lost.
At contests and the practice field, sometimes we will see models with lead bolted to their noses. This must have meant that they were tail-heavy because of design flaws or heavy building.
You should know the weight of each of your engines. I own at least 10 different types of F2D engines, and each weighs a different amount. I am using only two different types of models and am constantly swapping engines on the same aircraft. The same model will fly differently depending on what engine is bolted to the nose. This is where those slotted engine mounts come in handy; the power plants can be slid fore and aft depending on where you want the airplane to balance.
Now that I am well into middle age, I like my models a little more steady than I did when I was a teenager. I still like them to respond quickly, but only when they are told to do so. I like to be able to fly an airplane without having to look at it. I also want to be able to fly it low in an inverted position without having to worry about it bouncing into the ground on its own.
I balance the model so that it will fly consistently at the same height without altering altitude. I have had some models that liked to "hunt," meaning that they traveled around the circle, changing altitude without my giving any control. A hunting condition means that you have a tail-heavy model. It will also want to overturn when given feeding in control. A model that overturns will also want to go into a second turn or loop even though you do not want it to. This kind of airplane is almost impossible to fly in a match against someone.
Figure out a balance point where you are comfortable flying, and then try to get all of your models to balance at a similar point. You will have much more fun and be more successful during competitions.
Line spacing and handles
The one thing I have not discussed that will have a big impact on how a model flies is the line spacing on a control handle. Wide spacing on a handle will require less wrist and arm movement to get the model to maneuver. It will help with a nose-heavy model. Close spacing on your handle will require more wrist and arm movement to achieve the same results as with a handle with wide spacing.
The spacing I use varies, depending on what size airplane I am flying:
- 1-3/4 inch spacing for my 1/2A models
- 3-1/2 inch spacing for my FAI models
- 4-1/2 inch spacing for my Fast and 80 mph models
Having handles you can adjust allows you to experiment and find what you like best. I learned that using close spacing that required a great deal of arm and wrist action fatigued my arm when flying Fast Combat models—especially if I was putting them through their paces.
Field preparation and time management
Time is becoming a precious commodity, especially for flying models. Work and family commitments require that jobs be done on the weekends, which were once totally mine. That means any projects that can be done at home should be done at home — not at the flying field. Cutting lines and working on engines are best done in a clean environment. Making bladders and fixing broken models should also be done at home.
I want to maximize flying time when I make trips out to the flying field. I currently have to drive 35 miles to get to the Whittier Narrows National Recreation Area in South El Monte, California. If you are serious about your hobby, try to maximize your field time. If you just want to kick back and socialize, do as you wish.
MACA membership
The Academy of Model Aeronautics recognizes SIGs for a variety of modeling disciplines. The Miniature Aircraft Combat Association (MACA) is the officially recognized SIG for control-line Combat. This organization has been in existence for 30 years. It needs to have all Combat-interested individuals as members.
Bill Maywald is the newsletter editor and would love to see the membership increase. MACA News keeps people current on what is happening across the United States and around the world.
Send your dues to:
- $15 for one year or $30 for two years
- Treasurer: Gene Berry, 4610 89th St., Lubbock, TX 79424
Transcribed from original scans by AI. Minor OCR errors may remain.

