
CONTROL LINE RACING
Dave McDonald, Box 384, Daleville IN 47334; E-mail: [email protected]
Cabin Fever — Tucson, Arizona
Tucson, Arizona, and the Cabin Fever contest provided welcome relief for some from the cold winter. The overall number of participants was down this year, but it was still a good time with good competition. Although it was warm, the weather turned windy on Saturday morning. Gusts of roughly 50 mph made flying impossible. The contestants retired to Chris Peters’ home for some hangar-flying session and general kibbutzing. Fortunately the wind became almost nonexistent at approximately 3 p.m., and F2C flying ensued.
The team of Tom Fluker and Dick Lambert used this opportunity to gauge their preparedness for the upcoming season. They didn’t bring their best equipment to the contest, but they were still able to obtain race settings in the 17.95–18.00 range with some backup Mazniaks.
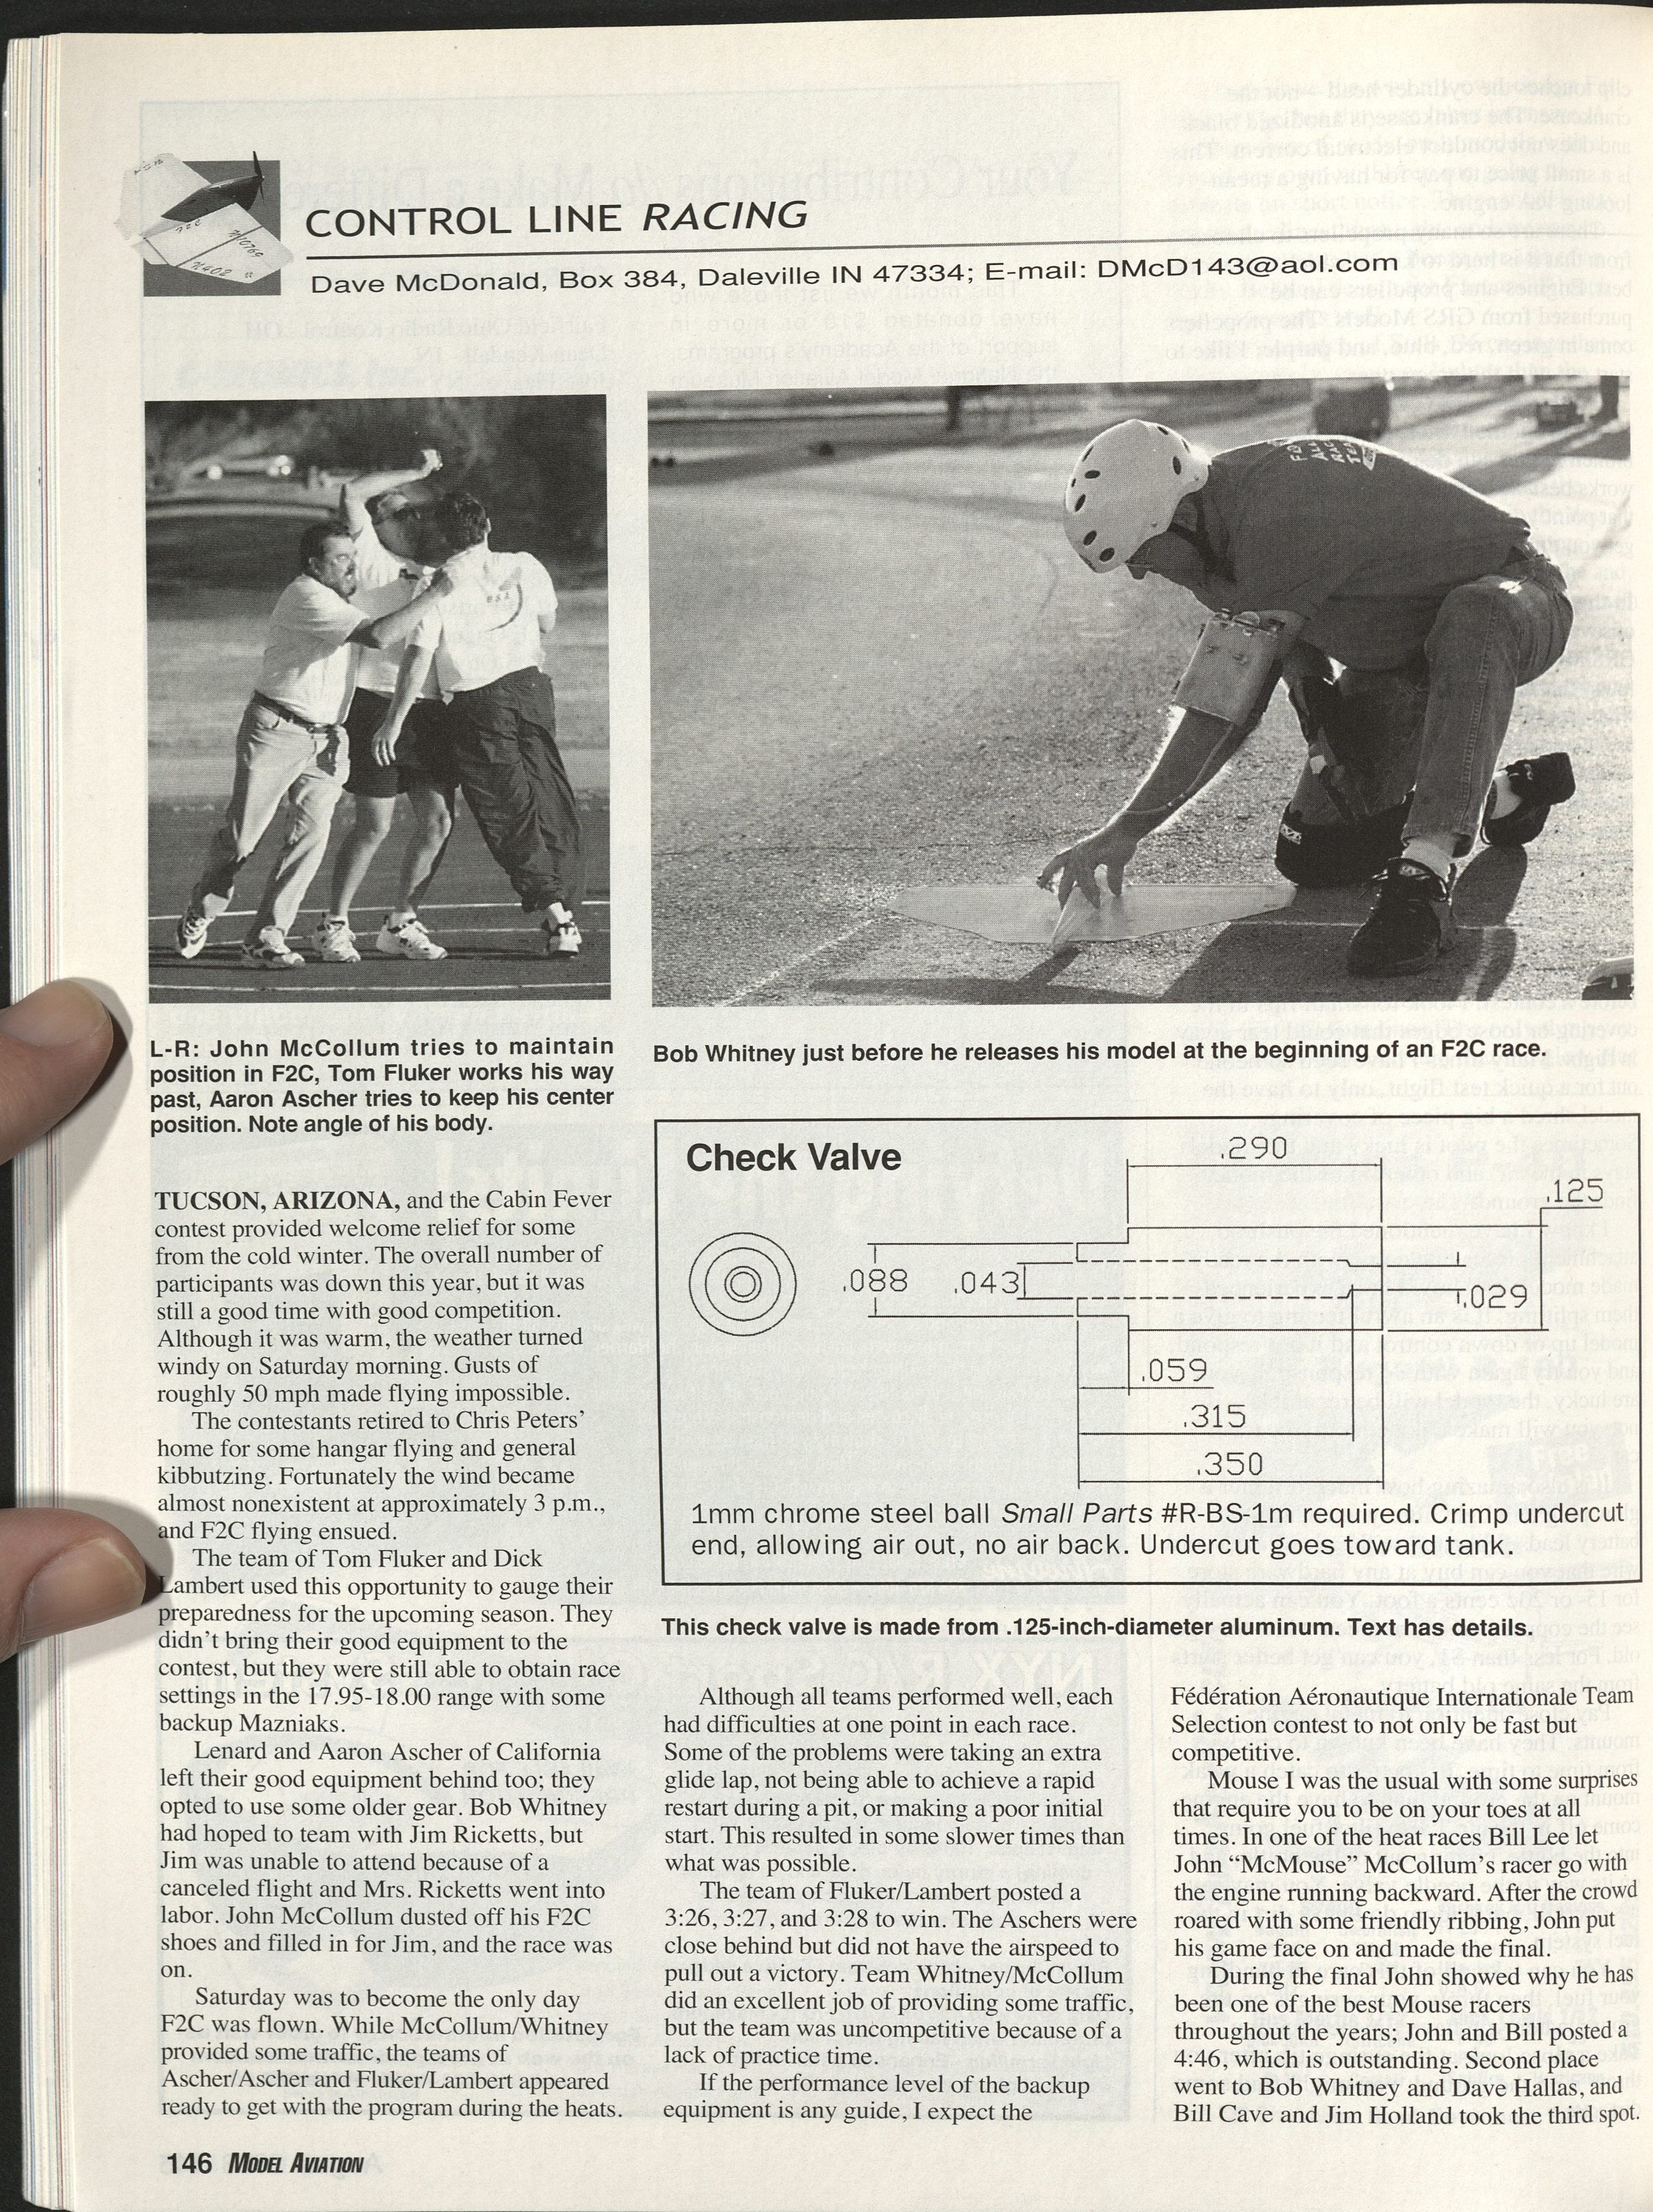
Lenard and Aaron Ascher of California left their good equipment behind too; they opted to use some older gear. Bob Whitney had hoped to team with Jim Ricketts, but Jim was unable to attend because of a canceled flight and Mrs. Ricketts went into labor. John McCollum dusted off his F2C shoes and filled in for Jim, and the race was on.
Saturday was the only day F2C was flown. While McCollum/Whitney provided some traffic, the teams of Ascher/Ascher and Fluker/Lambert appeared ready during the heats. Although all teams performed well, each had difficulties at one point in each race — extra glide laps, difficulty achieving a rapid restart during a pit, or a poor initial start — resulting in slower times than possible. The team of Fluker/Lambert posted 3:26, 3:27, and 3:28 to win. The Aschers were close behind but did not have the airspeed to pull out a victory. Team Whitney/McCollum did an excellent job of providing traffic, but the team was uncompetitive because of a lack of practice time. If the performance level of the backup equipment is any guide, I expect the Fédération Aéronautique Internationale Team Selection contest to be not only fast but competitive.
Mouse Racing and Other Events
Mouse I was the usual event with some surprises that require you to be on your toes at all times. In one of the heat races Bill Lee let John "McMouse" McCollum’s racer go with the engine running backward. After the crowd roared with some friendly ribbing, John put his game face on and made the final. During the final John showed why he has been one of the best Mouse racers through the years; John and Bill posted a 4:46, which is outstanding. Second place went to Bob Whitney and Dave Hallas, and Bill Cave and Jim Holland took third.
Quickie Rat did not show the speed and preparedness level of years past. The winning time was in the seven-minute neighborhood, which will not make the grade at most contests. However, that was enough for Cave/Holland to claim first place. Team Hallas/Whitney won flying Clown by breaking the 300-lap mark with a new Nelson .19 engine. Dave Rolley and his son won Mouse II, with Hallas/Whitney finishing in second place.
A big thanks to John Bruman and all the gang from the Tucson area who put on the event, and thanks to all of the contestants who came from great distances to make the event what it was.
New F2C Wing Technology?
Dick Lambert brought his latest creation to Tucson, and although it was only a sample, it shows what people can do if they set their minds to it. Dick brought a test piece of his new F2C wing. A set of wing molds that Wayne Trivin cut provided Dick with the tooling needed to make this new wing a reality.
After several attempts and some research-and-development work, Dick produced a portion of an F2C wing that has the paint on it and is almost ready to use when it comes out of the mold. The process uses a combination of wood and carbon to produce a wing that, when perfected, should provide a molded wing weighing less than 100 grams. If you have seen Dick's work throughout the years, you know that he is a craftsman and that it is only a matter of time before Dick is using some reproducible wings.
The idea of the molded wing is not so much for ease, but to ensure that each wing is the same. This removes one more variable in the building equation and should make each airplane that much closer to each other. I don't have any photos at this time to share, but keep watching this column for more information and photos as the process continues to evolve.
Check Valves for Scale Racing
Most Scale Racing fliers use check valves. There were several sources for them in years past, but that does not seem to be the case anymore. I recently made a couple hundred valves, and I thought this would be an opportune time to share with you just how easy they are to make in case you would rather build them yourself. If you do have the equipment and would like to get some hard-to-find, yet necessary, Scale Racing equipment, drop me a line.
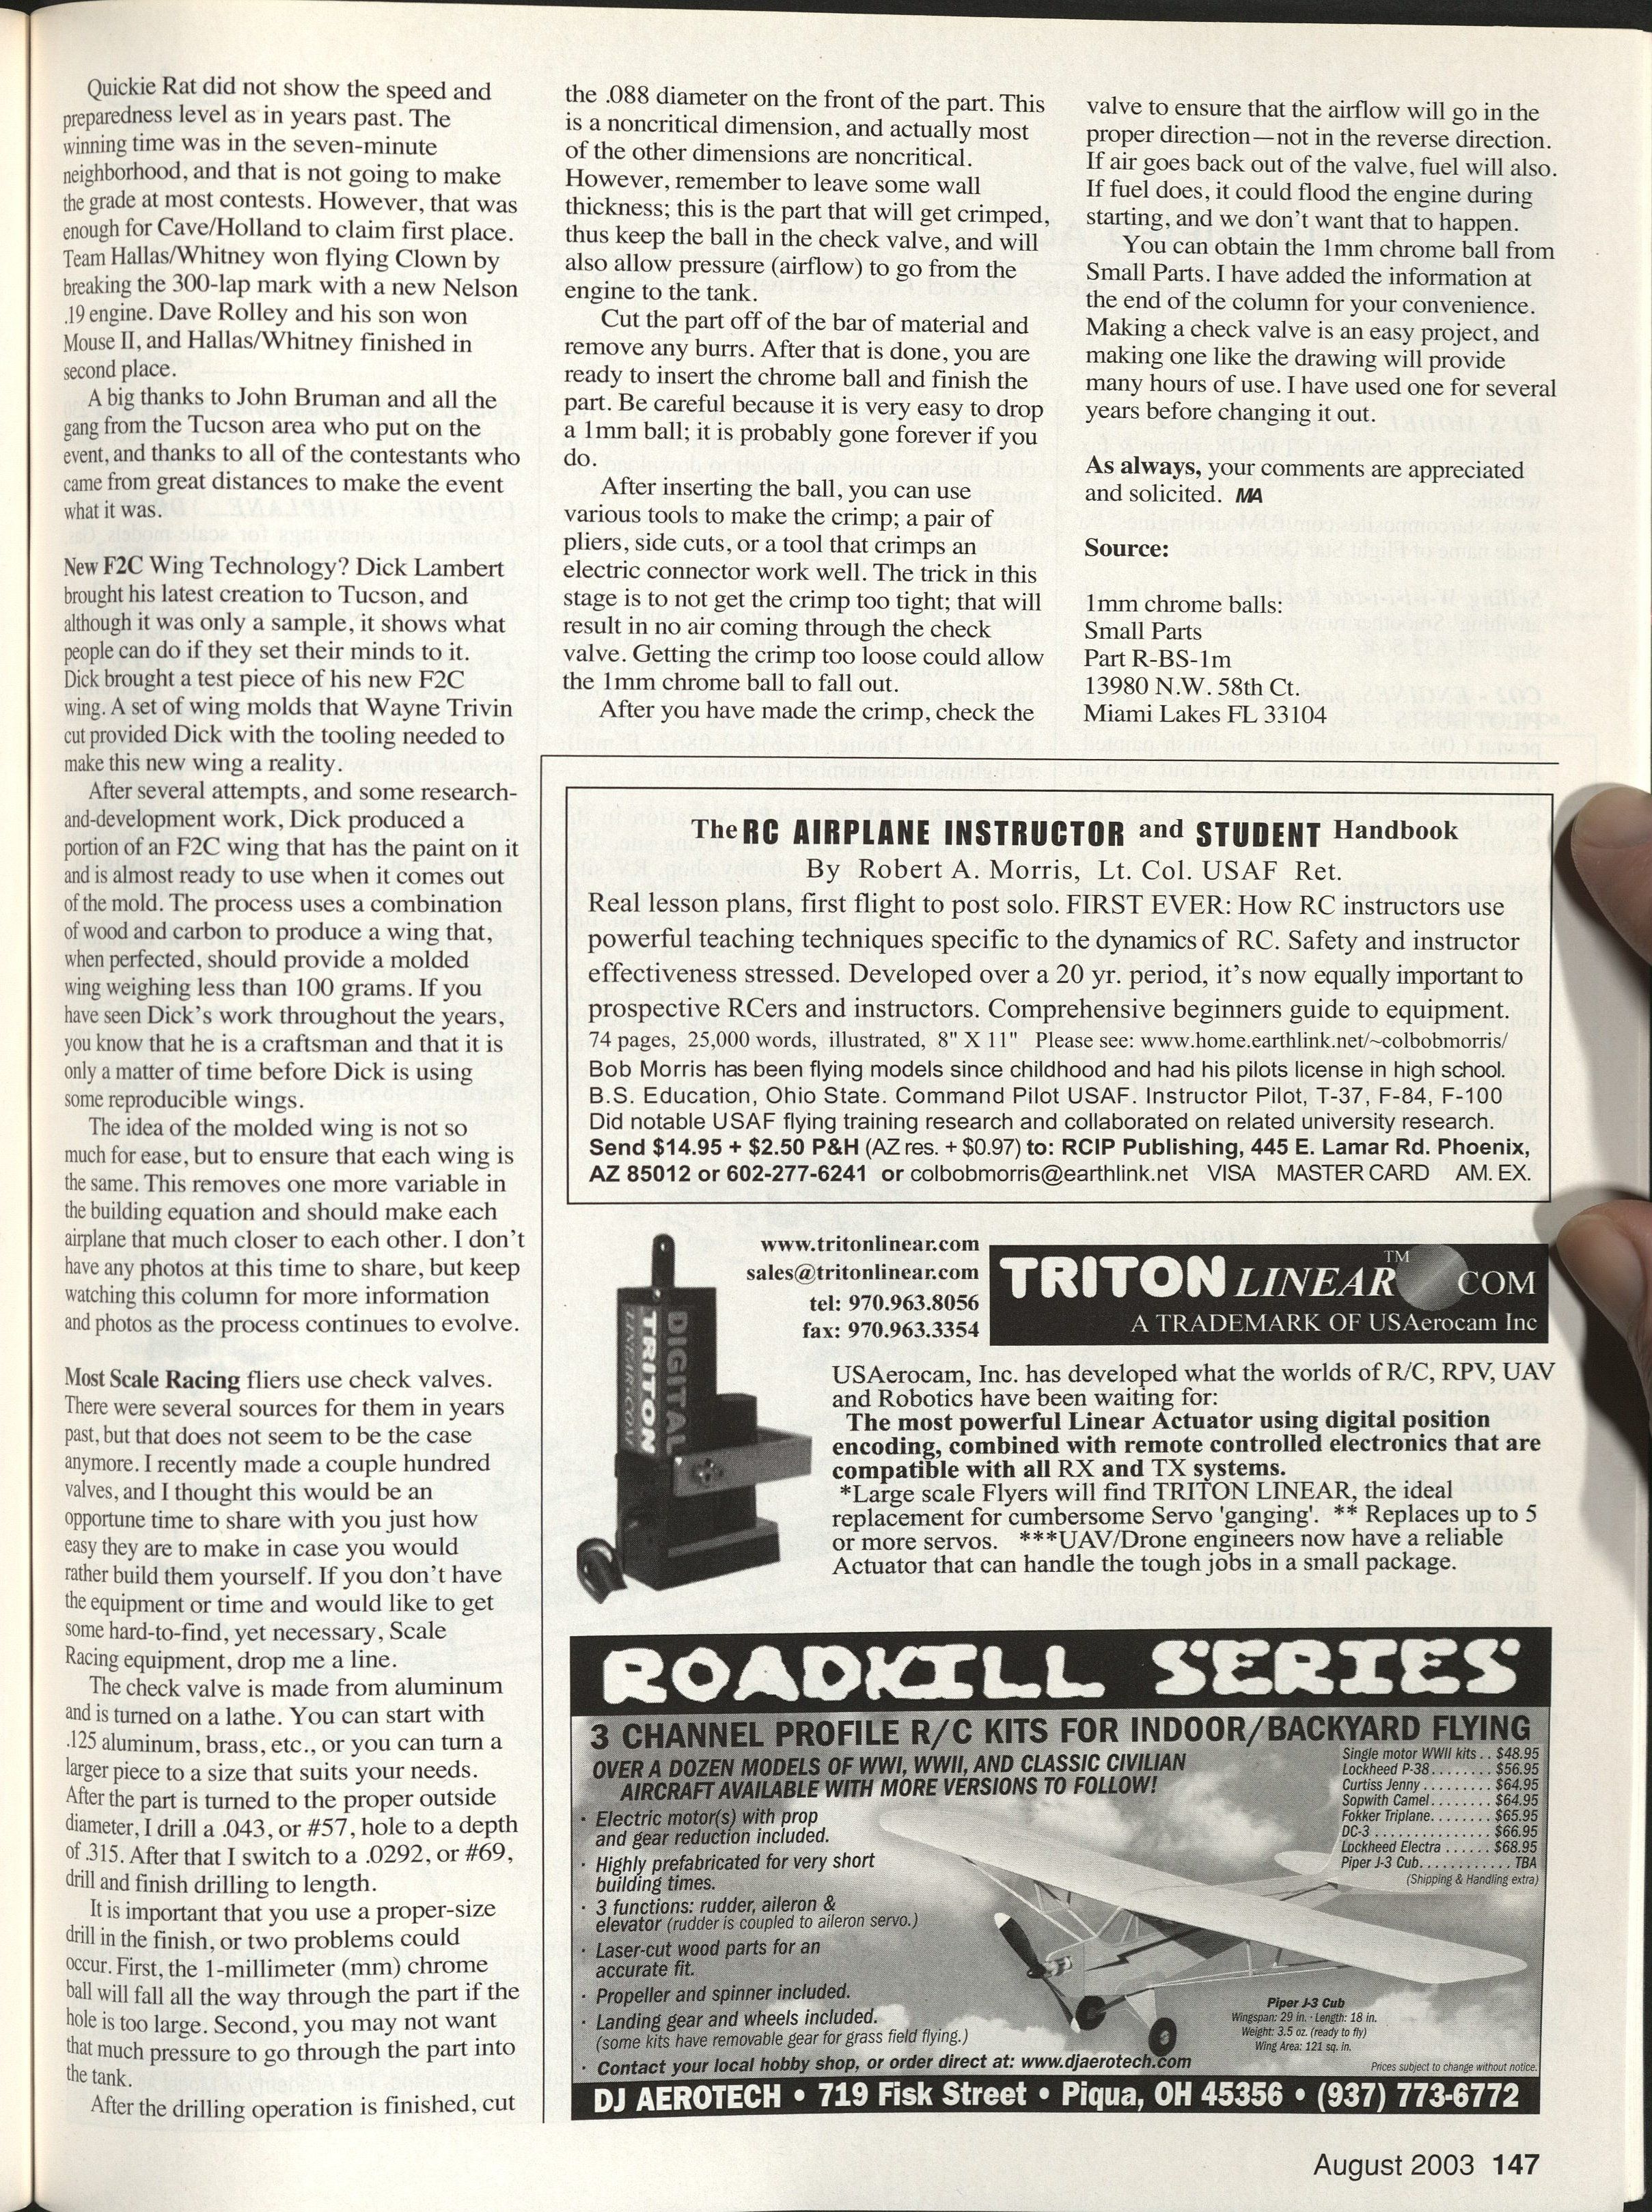
The check valve is made from aluminum and is turned on a lathe. You can start with .125 aluminum, brass, etc., or you can turn a larger piece to a size that suits your needs. After the part is turned to the proper outside diameter, drill a .043 (No. 57) hole to a depth of .315. After that, switch to a .0292 (No. 69) drill and finish drilling to length.
It is important that you use a proper-size drill in the finish, or two problems could occur. First, the 1-millimeter (mm) chrome ball will fall all the way through the part if the hole is too large. Second, you may not want that much pressure to go through the part into the tank.
After the drilling operation is finished, cut the .088 diameter on the front of the part. This is a noncritical dimension; actually most of the other dimensions are noncritical. However, remember to leave some wall thickness — this is the part that will get crimped, will keep the ball in the check valve, and will also allow pressure (airflow) to go from the engine to the tank.
Cut the part off of the bar of material and remove any burrs. After that is done, you are ready to insert the chrome ball and finish the part. Be careful because it is very easy to drop a 1mm ball; it is probably gone forever if you do.
After inserting the ball, you can use various tools to make the crimp: a pair of pliers, side cutters, or a tool that crimps an electric connector work well. The trick in this stage is to not get the crimp too tight; that will result in no air coming through the check valve. Getting the crimp too loose could allow the 1mm chrome ball to fall out.
After you have made the crimp, check the valve to ensure that the airflow will go in the proper direction — not in the reverse direction. If air goes back out of the valve, fuel will also. If fuel does, it could flood the engine during starting, and we don't want that to happen.
You can obtain the 1mm chrome ball from Small Parts. Making a check valve is an easy project, and making one like the drawing will provide many hours of use. I have used one for several years before changing it out.
As always, your comments are appreciated and solicited. MA
Source
- 1mm chrome balls: Small Parts, Part R-BS-1m
- 13980 N.W. 58th Ct.
- Miami Lakes, FL 33104
Transcribed from original scans by AI. Minor OCR errors may remain.

