
CONTROL LINE RACING - 2004/04
Dave McDonald Box 384, Daleville IN 47334 E-mail: [email protected]
Introduction
I thought I would take a break from traditional racing information this month and share some basic facts about chrome. This column is intended as a general overview of chrome and not a how-to-do-it. I may write some more-detailed information in the future.
Last May I took a position as a production manager with a chroming and grinding company. We do "hard," or industrial, chrome and grind work on everything from tiny pins to parts that are 14 inches in diameter and in excess of 100 inches long. Shaft work is our main area of production, but we do approximately 40% of our business chroming and grinding cylinders.
Again, this column is not intended for you to be able to go out and chrome after you read it. If you decide you would like to do it on your own, follow the proper safety precautions. This column will not address the plating of aluminum; that requires different procedures beforehand.
What chrome does (and doesn't) do
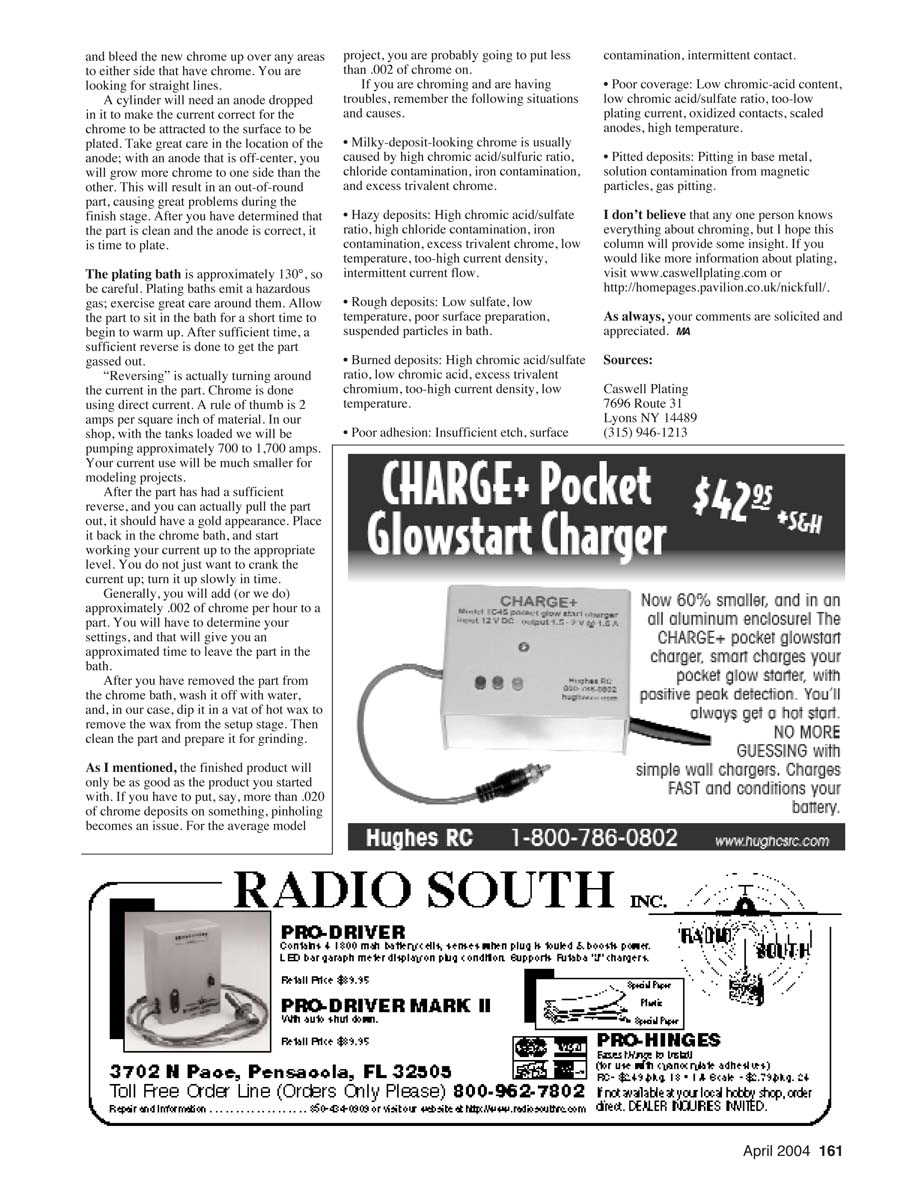
Some people think chrome is a trick that, in itself, makes engines run faster. It probably helps in some applications; however, some of the fastest engines in Quickie Rat are not chromed. Chrome has allowed different materials to be utilized for pistons and liners, but in most applications it provides longevity.
Chrome is much harder than case-hardened steel, which provides better wear and lower friction properties. When chrome is used as a bearing surface, it must be micro-finished; that will provide a lower coefficient of friction than any other metal when used against steel, iron, brass, bronze, or aluminum alloys. Chrome should not be used against chrome because it is poor at wetting out.
Although people will say you can put X or Y amount of chrome on a surface, you can put on as much as time and your technique will allow. Chrome will build up a resistance in time and actually stop plating. In that case you need to grind or hone the part to a point where the chrome is smooth, as if it were finished, and continue with the plating.
We regularly apply between .0002 and .0600 of chrome to surfaces. In our applications we apply additional chrome for grinding. Depending on the part, anywhere from .005 to .010 of additional chrome is added to allow for setup during the grinding operations. The typical model liner would have what we would call "flash chrome," meaning .001 of deposit or less.
The chrome you add to a part will only be as good as the piece was before plating. If the part is dirty, has large indentations, etc., then the chrome will reflect that in the finished product. A dirty part can cause the chrome to not adhere and not plate at all, or it can cause peeling during the grinding operation. That is not the only reason for peeling, but it is a major one.
Surface preparation and masking
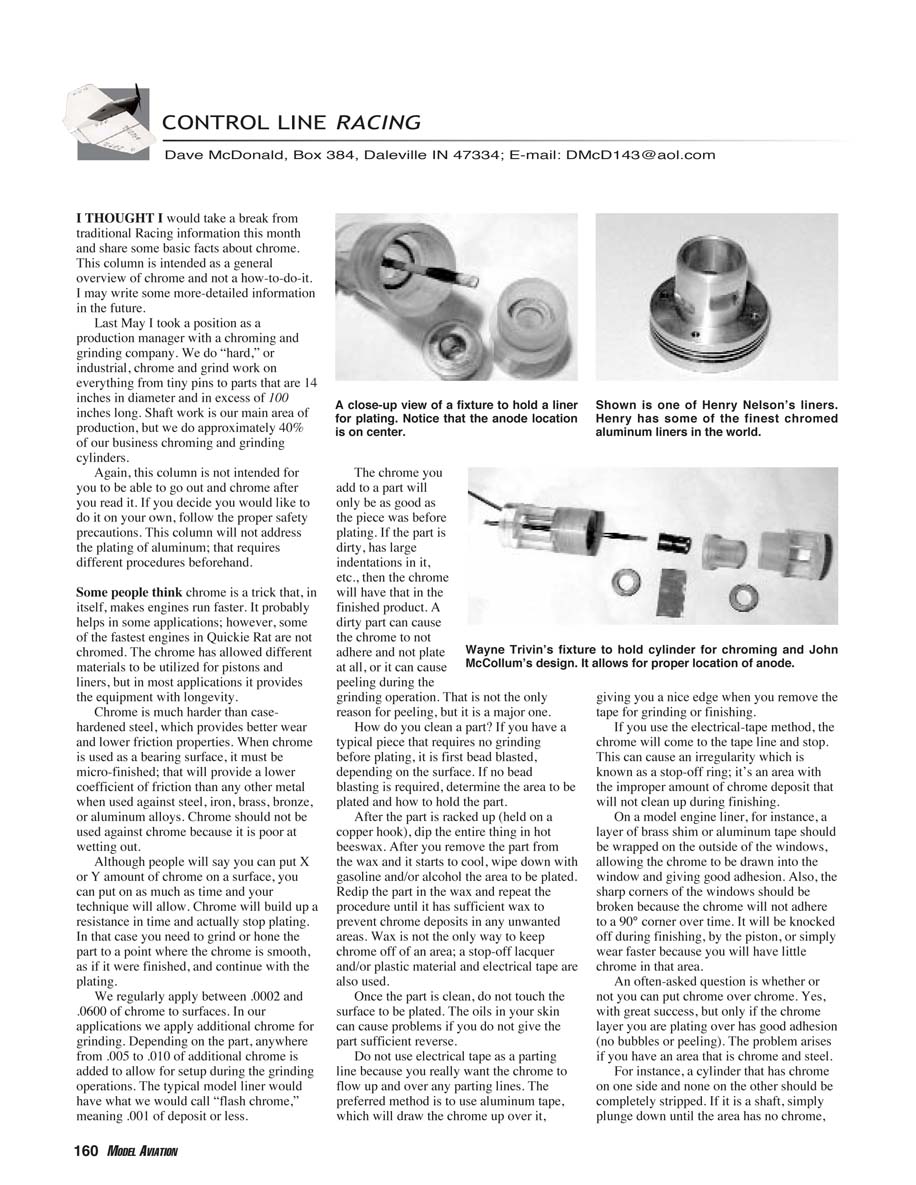
How do you clean a part? If you have a typical piece that requires no grinding before plating, it is first bead blasted, depending on the surface. If no bead blasting is required, determine the area to be plated and how to hold the part. After the part is racked up (held on a copper hook), dip the entire thing in hot beeswax. After you remove the part from the wax and it starts to cool, wipe down with gasoline and/or alcohol the area to be plated. Redip the part in the wax and repeat the procedure until it has sufficient wax to prevent chrome deposits in any unwanted areas.
Wax is not the only way to keep chrome off of an area; a stop-off lacquer and/or plastic material and electrical tape are also used. Once the part is clean, do not touch the surface to be plated. The oils in your skin can cause problems if you do not give the part sufficient reverse. Do not use electrical tape as a parting line because you really want the chrome to flow up and over any parting lines. The preferred method is to use aluminum tape, which will draw the chrome up over it, giving you a nice edge when you remove the tape for grinding or finishing. If you use electrical tape, the chrome will come to the tape line and stop. This can cause an irregularity in the deposit, which is known as a stop-off ring; it's an area with the improper amount of chrome deposit that will not clean up during finishing.
On a model engine liner, for instance, a layer of brass shim or aluminum tape should be wrapped on the outside of the windows, allowing the chrome to be drawn into the window and giving good adhesion. Also, the sharp corners on the windows should be broken because the chrome will not adhere to a 90° corner over time. It will be knocked off during finishing, by the piston, or simply wear faster because you will have little chrome in that area.
An often-asked question is whether or not you can put chrome over chrome. Yes, with great success, but only if the chrome layer you are plating over has good adhesion (no bubbles or peeling). The problem arises if you have an area that is chrome and steel. For instance, a cylinder that has chrome on one side and none on the other should be completely stripped. If it is a shaft, simply plunge down until the area has no chrome and replate, and bleed the new chrome up over any areas to either side that have chrome. You are looking for straight lines.
A cylinder will need an anode dropped into it to make the current correct for the chrome to be attracted to the surface to be plated. Take great care in the location of the anode; with an anode that is off-center, you will grow more chrome to one side than the other. This will result in an out-of-round part, causing great problems during the finish stage.
The plating process
After you have determined that the part is clean and the anode is correct, it is time to plate. The plating bath is approximately 130°F, so be careful. Plating baths emit hazardous gases; exercise great care around them. Allow the part to sit in the bath for a short time to begin to warm up. After sufficient time, perform a reverse (reverse the current) to get the part gassed out.
"Reversing" means reversing the polarity of the current applied to the part. Chrome plating is done using direct current. A rule of thumb is 2 amps per square inch of material. In our shop, with the tanks loaded, we will be pumping approximately 700 to 1,700 amps. Your current use will be much smaller for modeling projects.
After the part has had a sufficient reverse, and you can actually pull the part out, it should have a gold appearance. Place it back in the chrome bath, and start working your current up to the appropriate level. Do not crank the current up quickly; turn it up slowly over time.
Generally, we add approximately .002 of chrome per hour to a part. You will have to determine your settings, and that will give you an approximate time to leave the part in the bath.
After you have removed the part from the chrome bath, wash it off with water, and, in our case, dip it in a vat of hot wax to remove the wax from the setup stage. Then clean the part and prepare it for grinding.
As mentioned, the finished product will only be as good as the product you started with. If you have to put more than .020 of chrome deposits on something, pinholing becomes an issue. For the average model project, you are probably going to put less than .002 of chrome on.
Troubleshooting: common deposit problems and causes
- Milky-deposit-looking chrome: usually caused by high chromic acid/sulfuric ratio, chloride contamination, iron contamination, and excess trivalent chrome.
- Hazy deposits: high chromic acid/sulfate ratio, high chloride contamination, iron contamination, excessive trivalent chrome, low temperature, too-high current density, intermittent current flow.
- Rough deposits: low sulfate, low temperature, poor surface preparation, suspended particles in bath.
- Burned deposits: high chromic acid/sulfate ratio, low chromic acid, excess trivalent chromium, too-high current density, low temperature.
- Poor adhesion: insufficient etch, surface contamination, intermittent contact.
- Poor coverage: low chromic-acid content, low chromic acid/sulfate ratio, too-low plating current, oxidized contacts, scaled anodes, high temperature.
- Pitted deposits: pitting in base metal, solution contamination from magnetic particles, gas pitting.
I don't believe that any one person knows everything about chroming, but I hope this column will provide some insight. If you would like more information about plating, visit www.caswellplating.com or http://homepages.pavilion.co.uk/nickfull/.
As always, your comments are solicited and appreciated. MA
Sources
Caswell Plating 7696 Route 31 Lyons NY 14489 (315) 946-1213
Transcribed from original scans by AI. Minor OCR errors may remain.

