
Control Line Scale Bill Boss [[email protected]]
The 25th anniversary of Bill Boss's CL Scale column
"AN IMMEDIATE NEED!" Those were the words I used to start my first CL Scale column in the September 1982 MA. Now, 25 years later, I am calling for the same thing: help.
As a new writer I asked for the help of sending me newsletters, photos, contest reports, or anything relating to CL Scale. Through the years many of you have made numerous contributions, and I greatly appreciate the time and effort you spent making my writing of the column so much easier. Many of you, like me, might now be considered "oldtimers" in the sport of CL Scale, and we are sort of worn out.
During the past 25 years we have seen many changes: increased use of electronic controls, the proliferation of ARFs, the extensive use of foam and other materials in model construction, the introduction and great advancements in the use of electric power, and many changes in the Scale rules providing Sport and Profile Scale events.
Perhaps a new group of CL Scale modelers who are using these technologies and participating in events would be willing to take the time to share their experiences with others. I have featured a couple electric-powered CL Scale models here in the past couple years, but I can't help but feel that I haven't heard from many modelers out there who are experimenting with these aircraft. Therefore, I make my appeal once more, to young and old CL Scale modelers, to let me know what you are doing so I might tell others about your projects, building tips, and so on, and especially include photos showing your great work. The column is only as good and informative as the information I receive.
On the subject of things from the past I'm going to revisit some information and projects I have covered. This month I'm featuring the sliding-canopy project I included in that first column 25 years ago. The task involved converting the kit-supplied canopy into a functional version.
Also included in this column:
- Sliding-canopy project
- The passing of Lynn Green
- Ralph Robinson's Albatros
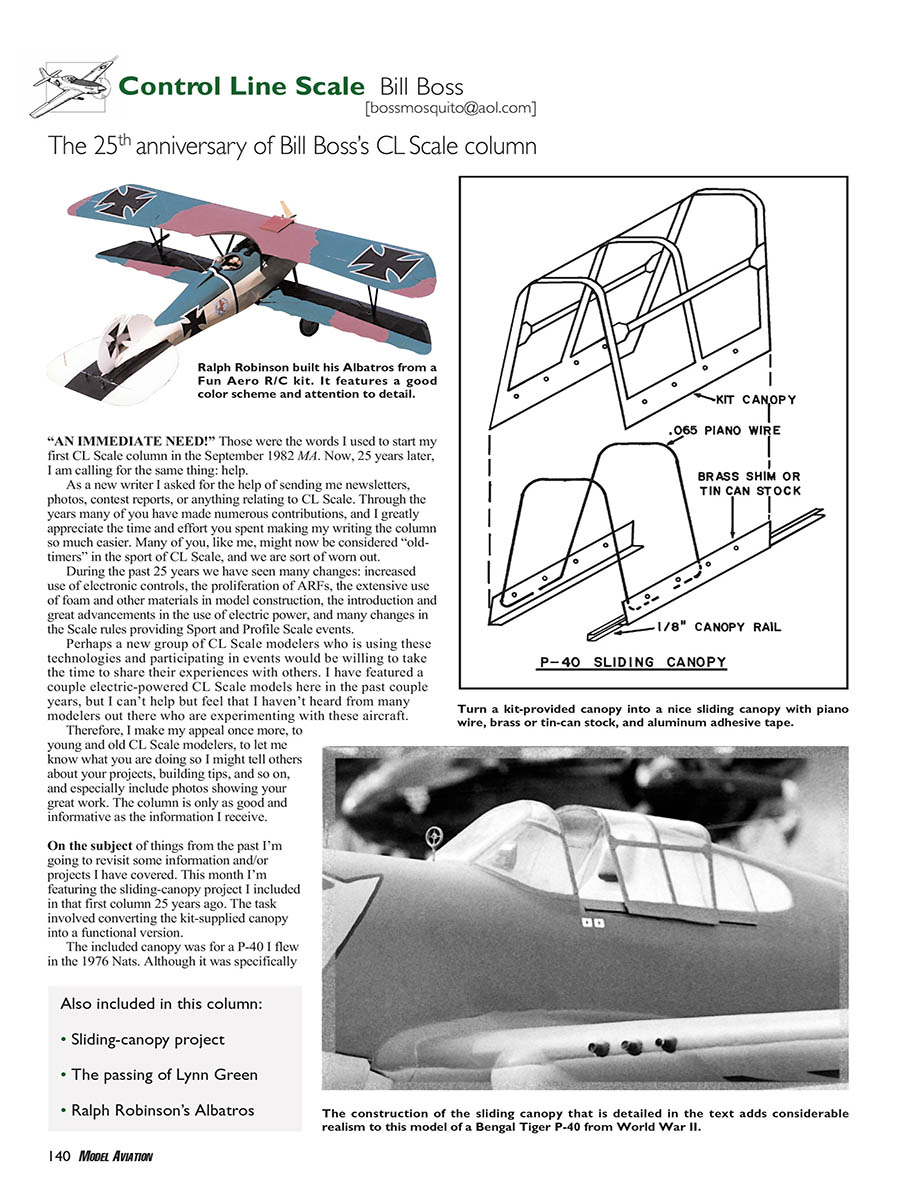
Sliding-Canopy Project
The included canopy was for a P-40 I flew in the 1976 Nats. Although it was specifically molded for that model, it lacked a realistic framework and did not open. The conversion I used then (and recommend now) involved forming a wire framework to represent the canopy structure and riveting the plastic to that frame.
Form the wire framework to match the canopy shape. Trim the plastic canopy in the appropriate area and carefully drill small holes, as shown in the sketch, to accept 1/32-inch aluminum rivets. Complete the job by carefully riveting the plastic canopy to the wire framework.
Now you have to do something so the framework does not show through the plastic. Painting is an option, but I applied an aluminum tape to the canopy in the places that would normally be the metal structure.
I used an adhesive tape that comes in rolls of various widths and lengths. You can find it in most hardware stores. The tape is easy to cut to shape with scissors or an X-Acto knife. The peel-off backing makes for easy handling until it is ready to be applied.
Cut strips of the tape to appropriate widths and apply them to the canopy. When you are making strips for canopy edges, allow a little extra so the tape can be rolled around the edges and onto the inside surface of the canopy. If you want to paint the aluminum tape, rub it lightly with 400-grit sandpaper before cutting it.
Install the windshield section of the canopy in its appropriate place on the fuselage. When you have done that, cut two lengths of the U-shaped channel that is now installed in the fuselage.
Make sure the length of the channel will permit the canopy to be fully opened and that the channel is installed to permit alignment of the sliding portion of the canopy and the windshield when the canopy is closed. After the windshield and rails are installed, put in the sliding portion of the canopy by spreading it slightly and letting it snap into the rails.
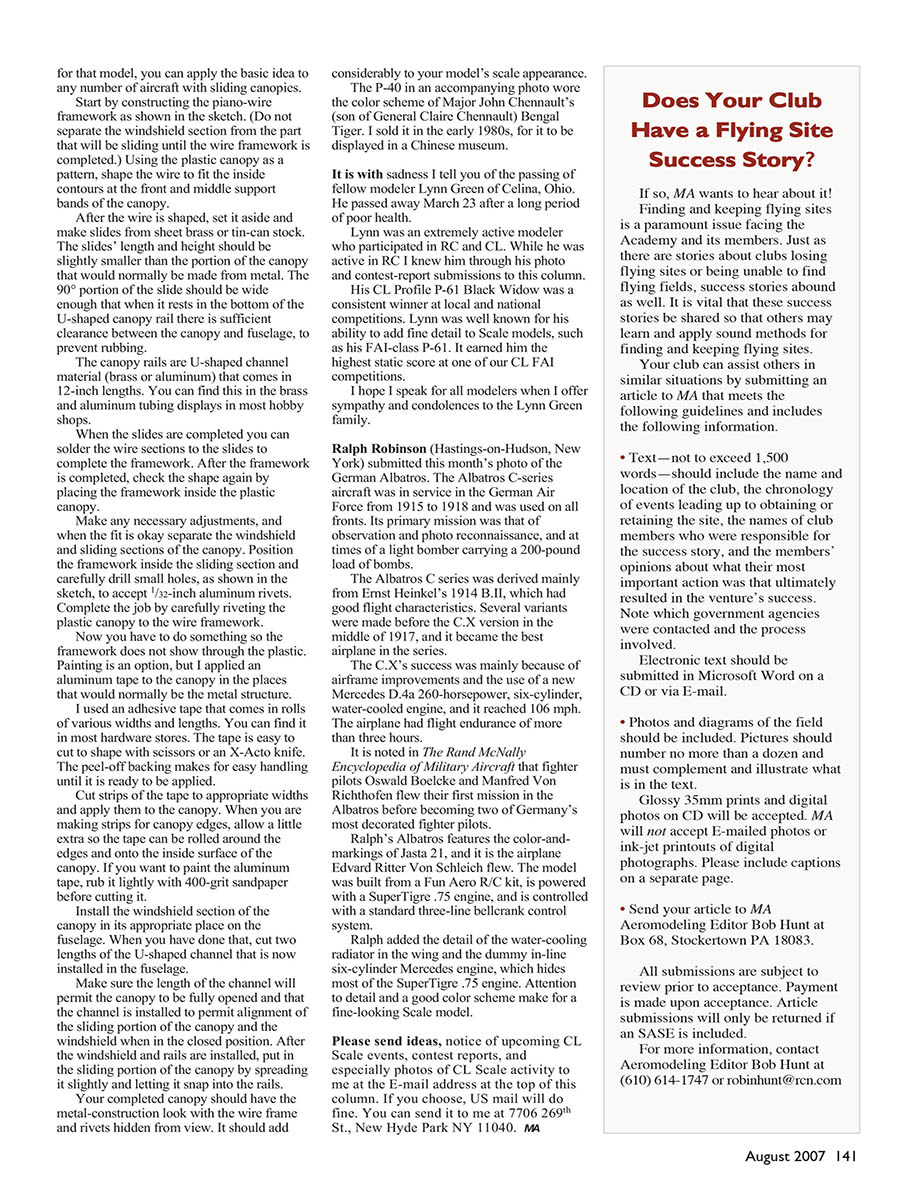
Your completed canopy should have the metal-construction look with the wire frame and rivets hidden from view. It should add considerably to your model's scale appearance.
The P-40 in an accompanying photo wore the color scheme of Major John Chennault's (son of General Claire Chennault) Bengal Tiger. I sold it in the early 1980s for it to be displayed in a Chinese museum.
The passing of Lynn Green
It is with sadness I tell you of the passing of fellow modeler Lynn Green of Celina, Ohio. He passed away March 23 after a long period of poor health.
Lynn was an extremely active modeler who participated in RC and CL. While he was active in RC I knew him through his photo and contest-report submissions to this column.
His CL Profile P-61 Black Widow was a consistent winner at local and national competitions. Lynn was well known for his ability to add fine detail to Scale models, such as his FAI-class P-61. It earned him the highest static score at one of our CL FAI competitions.
I hope I speak for all modelers when I offer sympathy and condolences to the Lynn Green family.
Ralph Robinson's Albatros
Ralph Robinson (Hastings-on-Hudson, New York) submitted this month's photo of the German Albatros. The Albatros C-series aircraft was in service in the German Air Force from 1915 to 1918 and was used on all fronts. Its primary mission was that of observation and photo reconnaissance, and at times it served as a light bomber carrying a 200-pound load of bombs.
The Albatros C series was derived mainly from Ernst Heinkel's 1914 B.II, which had good flight characteristics. Several variants were made before the C.XIV version in the middle of 1917, and it became the best airplane in the series.
The C.X's success was mainly because of airframe improvements and the use of a new Mercedes D.4a 260-horsepower, six-cylinder, water-cooled engine, and it reached 106 mph. The airplane had flight endurance of more than three hours.
It is noted in The Rand McNally Encyclopedia of Military Aircraft that fighter pilots Oswald Boelcke and Manfred von Richthofen flew their first missions in the Albatros before becoming two of Germany's most decorated fighter pilots.
Ralph's Albatros features the color-and-markings of Jasta 21, and it is the airplane Eduard Ritter von Schleich flew. The model was built from a Fun Aero R/C kit, is powered with a SuperTiger .75 engine, and is controlled with a standard three-line bellcrank control system.
Ralph added the detail of the water-cooling radiator in the wing and the dummy in-line six-cylinder Mercedes engine, which hides most of the SuperTiger .75. Attention to detail and a good color scheme make for a fine-looking Scale model.
Send submissions
Please send ideas, notice of upcoming CL Scale events, contest reports, and especially photos of CL Scale activity to the e-mail address at the top of this column. If you choose, US mail will do fine. You can send it to me at:
7706 269th St. New Hyde Park, NY 11040
MA
Transcribed from original scans by AI. Minor OCR errors may remain.

