
Control Line Speed - 2006/04
How to lap in a case for proper liner fit
Dave Mark ([email protected])
In the last column I wrote about lapping to free the needle valve for smooth operation. The non-embedding compound I mentioned there is useful for other items in engine rework.
I started flying Speed by competing in the Formula 40 event. When I began I used a K&B 6.5 (.40) engine. These are still competitive in Formula 40 and can often be purchased new for roughly $70 on eBay. The engine would fly my airplane in the 130–135 mph range right out of the box.
When I took the engine apart to examine it I had to use a piece of wood to pry the liner out of the case. After the liner moved approximately 3/8 inch it came out easily. The liner was measured from just below the top lip to the end and found to be straight within a few ten-thousandths of an inch.
I held the case up and looked inside and noticed the liner diameter had a good finish down to the area where the exhaust opening in the case intersected the cylinder bore. From that point down the finish was rough, and this was the area the liner was sticking in. The interrupted cut caused by the ports had led the boring tool to create a rough finish. It was still usable, but I felt that this bind was probably getting worse when the engine was running.
To correct this I made a lap and used TimeSaver Lapping Compound to clean the rough area. I like to apply toolmaker's layout fluid to the area above the rough zone so I have a way to see when I have gone far enough with the lapping.
How I made the lap
- Use a piece of cold-rolled 1018 steel turned a few thousandths smaller than the liner.
- Thread the end approximately 1/2 inch deep with a 3/8-inch tap.
- Using a band saw or hacksaw, cut from the end roughly an inch deep (to allow expansion).
- Screw a short set screw into the end until it just snugs up.
- Put the lap back in the lathe and take a skim cut to bring the expanded area back to final size.
Lapping procedure
- Mix the lapping compound with some light oil.
- Put the lap into the case and drip the lapping compound onto the lap through the exhaust port.
- Turn the lap by hand; you should feel some drag. Move the lap up and down so you are lapping the full zone in the case that was tight.
- Stop, clean the case, and inspect. If you have not hit the blued area yet, tighten the set screw a bit and repeat.
- As you lap the bore you will probably find six small, tight areas at the top of the case aligned with the head screw holes. Lap until these clean up.
- Stop, clean the bore, use acetone to remove the bluing, and try the liner in the case. The liner should go to the lip in one smooth movement. If it gets tighter at all during installation, lap the case some more—the liner must go in freely.
Results and notes
- This change alone caused a jump in speed to the mid-140s.
- Many people feel that winning in Speed events requires a full machine shop to make exotic parts. This is seldom the case; attention to small details will pay off many times.
Lapping the cylinder liner After reading Glenn Lee’s May 1996 MA Speed column about lapping a cylinder, I inspected the K&B liner. Held up to a bright light I noticed a shiny, highly polished area around the transfer and exhaust ports on the inside of the liner. The cause was the piston rubbing tightly against this area as the engine ran. This was not desirable in a Speed engine.
I made a lap as described in Glenn's column and lapped the area with diamond dust obtained from a local supplier. Diamond dust is inexpensive, but use care—do not get carried away. Lap until the high shine disappears, clean the parts, and fly the engine to see if speeds improve. Fly a few times, then take the engine apart and check again for shiny areas in the liner. If they show up, lap a bit more.
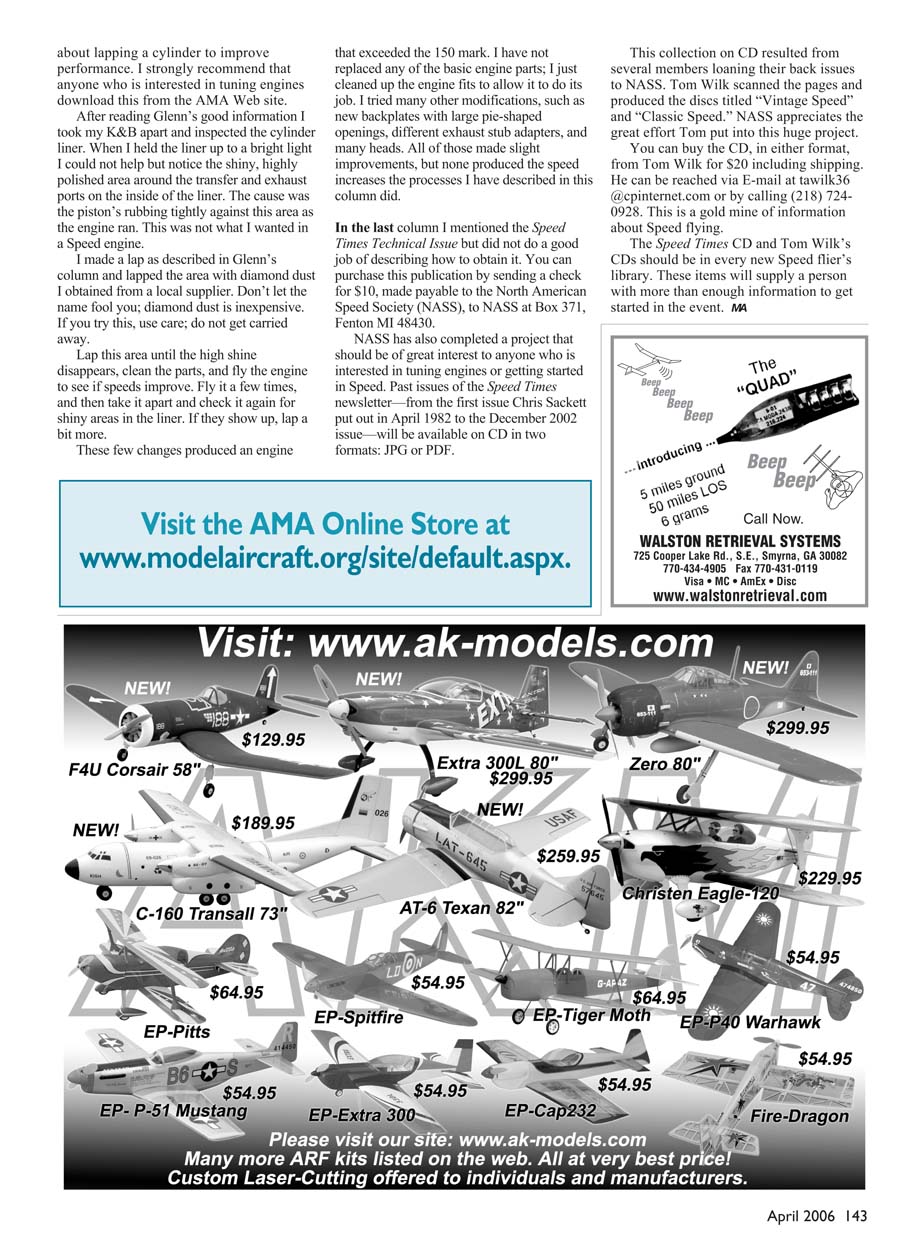
These few changes produced an engine that exceeded 150 mph. I did not replace any basic engine parts; I simply cleaned up the engine fits to allow it to do its job. I tried many other modifications—new backplates with large pie-shaped openings, different exhaust stub adapters, and many heads. Those produced slight improvements, but none matched the speed increases achieved by the fitting and lapping processes described above.
Additional resources and publications
- Also included in this column: Speed Times newsletter archive CDs are available from Chris Sackett.
- The Speed Times Technical Issue can be purchased by sending a $10 check payable to the North American Speed Society (NASS) to: NASS, Box 371, Fenton, MI 48430.
- NASS has completed a project making past issues of the Speed Times newsletter (from April 1982 through December 2002) available on CD in two formats: JPG and PDF. Tom Wilk scanned the pages and produced discs titled "Vintage Speed" and "Classic Speed."
Ordering the newsletter CDs
- You can buy the CD (either format) from Tom Wilk for $20 including shipping.
- Contact: [email protected] or call (218) 724-0928.
The Speed Times CD collection and Tom Wilk's CDs are a gold mine of information about Speed flying and should be in every new Speed flier's library.
Transcribed from original scans by AI. Minor OCR errors may remain.

