
Covering Techniques
Tips and tricks for using iron-on covering
by Jerry Smith
After you have built your airplane, it's time to cover it. Some builders prefer to stick to cloth and paint it — that is a lot of work and requires different skills. The modern iron-on covering material discussed here takes only one skill: to properly apply it. Color and finish are included!
To some, covering an airplane is a daunting task; others enjoy it. The completed job, depending on your level of perfection, differs between builders. The covering available today is a marvelous technology, requiring less work to achieve a beautiful model.
Covering materials
- MonoKote — Mylar-based material, glossy in finish; it shrinks during heating.
- UltraCote — Polyester-based, less glossy and more like a painted finish; shrinks with heat and is more flexible.
- Solite and other lighter films — Thinner, weigh less, require less heat and different handling techniques; good for smaller models.
- Many other films are available; each has different application characteristics.
Read the instructions
If you are new to covering, read the instructions that come with the material. They include helpful information such as the temperatures to set your iron for sealing and shrinking. If you use an iron sock on your covering iron (recommended), you will need to elevate the temperature to improve heat transfer. An iron sock also helps prevent scratching and marring the finish.
Preparation
- Spend time shaping, filling cracks, and sanding before covering. A good finish preparation pays off when the covering is applied.
- Sanding sequence I use:
- 150-grit for shaping
- 220-grit for general sanding
- 400-grit for final sanding
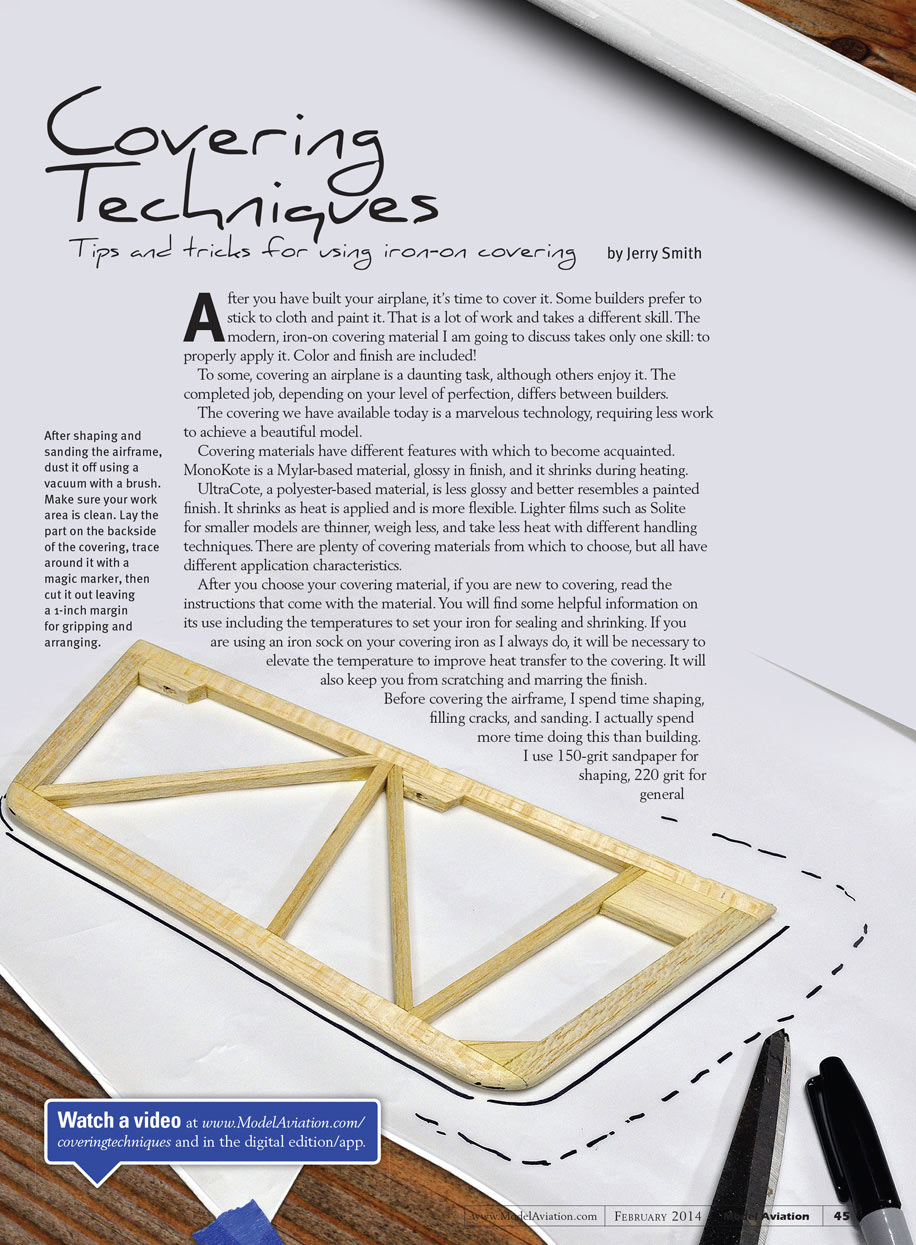
- Vacuum the work surface and dust the part with a brush to remove dirt and loose particles before covering.
- Plan your use of covering material to avoid waste. Lay the part on the back side of the covering, draw around it with a marker, and trim allowing a 1-inch margin for gripping and arranging during application.
- Be mindful of which side of the part will contact the material — you don't want the glue on the wrong side.
Start with an easy part
Before covering the whole model, choose a flat, easy-to-cover part such as a rudder or fin to get comfortable with the process.
Application steps
- Set your iron to the sealing temperature recommended for the film (increase slightly if using an iron sock).
- Lay the material on the airframe and tack it in place:
- Tack one corner, pull the material flat and tack the diagonal corner.
- Repeat for the other two corners.
- Tack in the middle on both sides.
- Starting from the center, seal the film to the edges.
- Trim off excess material (remember the 1-inch margin you left earlier) and seal the trimmed edges by rolling the iron down and around them. Ensure the edges are well sealed before shrinking.
- Cover both sides of the part before shrinking.
- Lay the part on a flat surface and weight it down to prevent warping during shrinking.
- Using a heat gun, direct heated air over the surface of the film (do not blow directly into it). Tip the gun down for more heat and up for less to control the process.
- When the covering is tight and smooth, increase the covering iron to the shrinking temperature. With the part still weighted down, go over the covering to firmly adhere it to the airframe.
Final notes and tips
- Good sanding and preparation will show in the final result.
- Work methodically and give yourself time to practice on simpler parts.
- Make sure edges are well sealed before shrinking to avoid lifting.
Transcribed from original scans by AI. Minor OCR errors may remain.

