
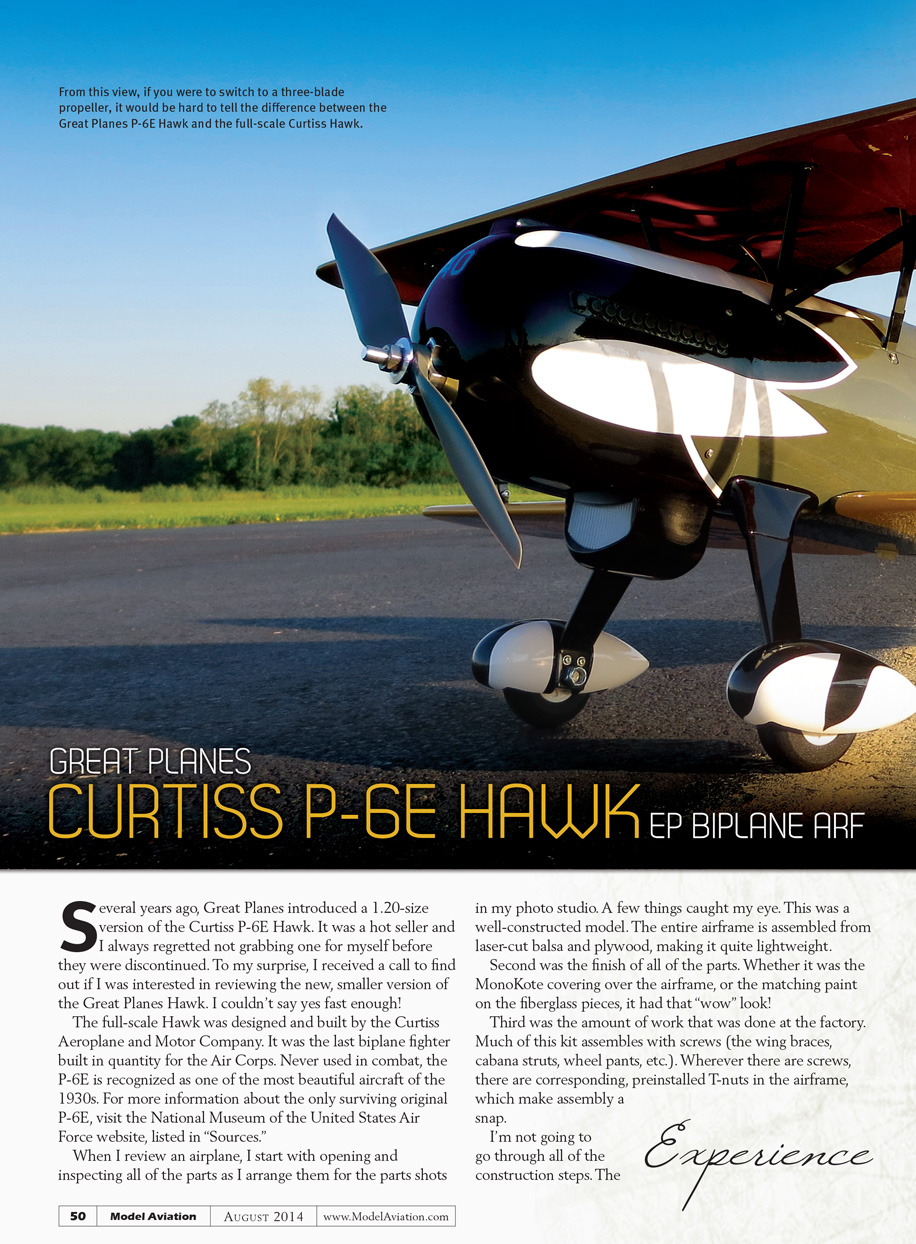
Curtiss P-6E Hawk
Several years ago, Great Planes introduced a 1.20-size version of the Curtiss P-6E Hawk. It was a hot seller and I always regretted not grabbing one for myself before they were discontinued. To my surprise, I received a call to find out if I was interested in reviewing the new, smaller version of the Great Planes Hawk. I couldn't say yes fast enough!
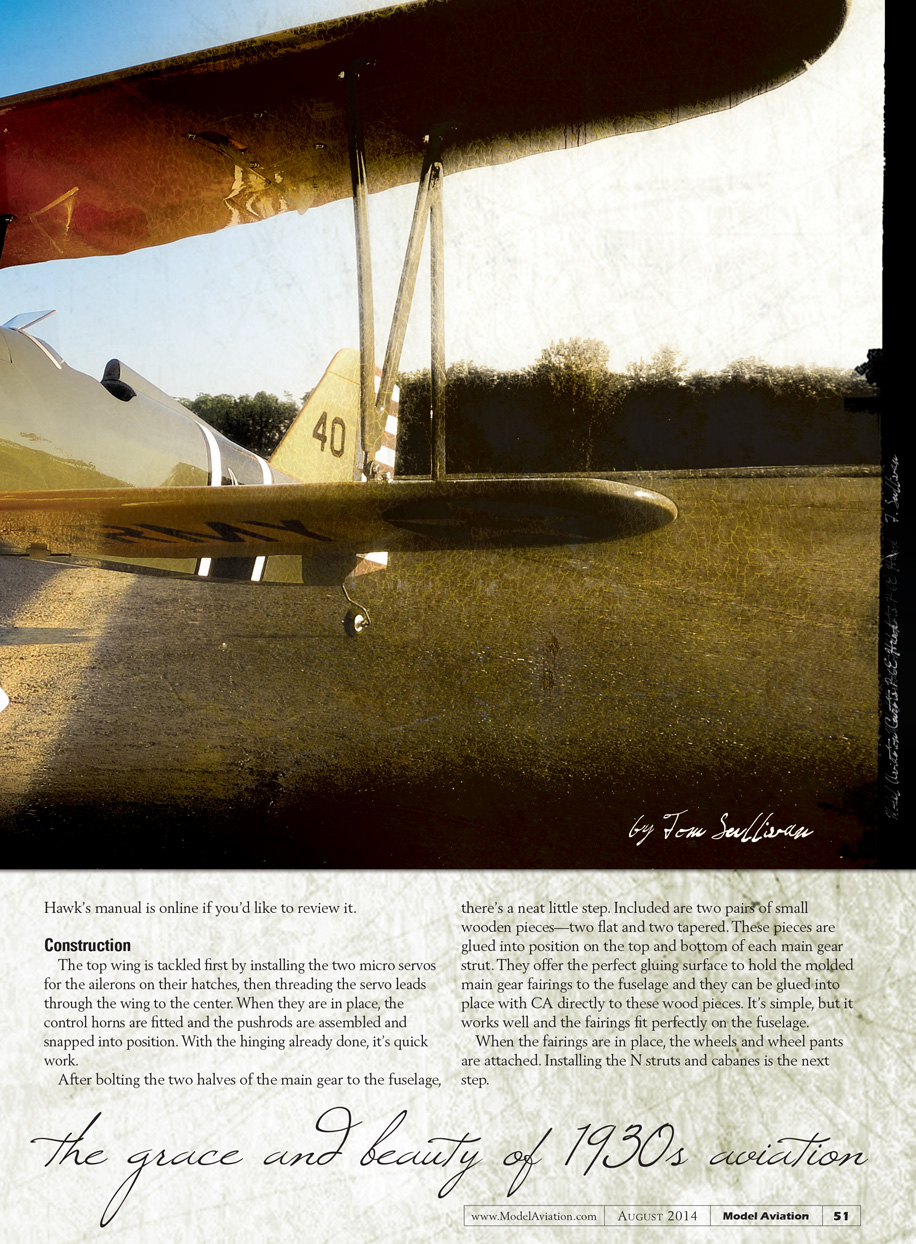
The full-scale Hawk was designed and built by the Curtiss Aeroplane and Motor Company. It was the last biplane fighter built in quantity for the Air Corps. Never used in combat, the P-6E is recognized as one of the most beautiful aircraft of the 1930s. For more information about the only surviving original P-6E, visit the National Museum of the United States Air Force website listed in "Sources."
When I review an airplane, I start by opening and inspecting all of the parts as I arrange them for the parts shots in my photo studio. A few things caught my eye. This was a well-constructed model: the entire airframe is assembled from laser-cut balsa and plywood, making it quite lightweight.
Second was the finish of all of the parts. Whether it was the MonoKote covering over the airframe or the matching paint on the fiberglass pieces, it had that "wow" look. Third was the amount of work that was done at the factory. Much of this kit assembles with screws (the wing braces, cabane struts, wheel pants, etc.). Wherever there are screws, there are corresponding preinstalled T-nuts in the airframe, which make assembly a snap.
I'm not going to go through all of the construction steps. The Hawk's manual is online if you'd like to review the steps.
Construction
The top wing is tackled first by installing the two micro servos for the ailerons on their hatches, then threading the servo leads through the wing to the center. After they are in place, the control horns are fitted and the pushrods are assembled and snapped into position. With the hinging already done, it's quick work.
After bolting the two halves of the main gear to the fuselage, there's a neat little step. Included are two pairs of small wooden pieces—two flat and two tapered. These pieces are glued into position on the top and bottom of each main gear strut. They provide the perfect gluing surface to hold the molded main gear fairings to the fuselage and can be glued into place with CA right to these wood pieces. It's simple, but it works well and the fairings fit the fuselage.
When the fairings are in place, the wheels and wheel pants are attached. Installing the N struts and cabanes is the next step. These bolt into place using screws and lock washers to hold everything tight.
Take care performing these steps. All of the pieces have tops and bottoms, including the small metal brackets. I loosely assembled everything until I was satisfied that each piece was in the right place.
Drill four holes where the bottom of the cabane struts attach to the fuselage, and use wood screws to complete fitting the wings. Don't forget to tighten everything!
Now work shifts to the rear of the airplane. A small wooden spacer block needs to be removed from the slot where the stabilizer slides into the fuselage. After it is removed, the stabilizer is glued in place (right side up). Epoxy the tailwheel bracket and vertical fin in place.
Installing the elevator and rudder servos and pushrods comes next. This requires removing the wings. I found that by removing the four wood screws holding the cabanes to the fuselage, removing the bottom wing bolts, and then removing the two lower bolts of one of the N struts, I could slide the entire wing assembly away from the fuselage.
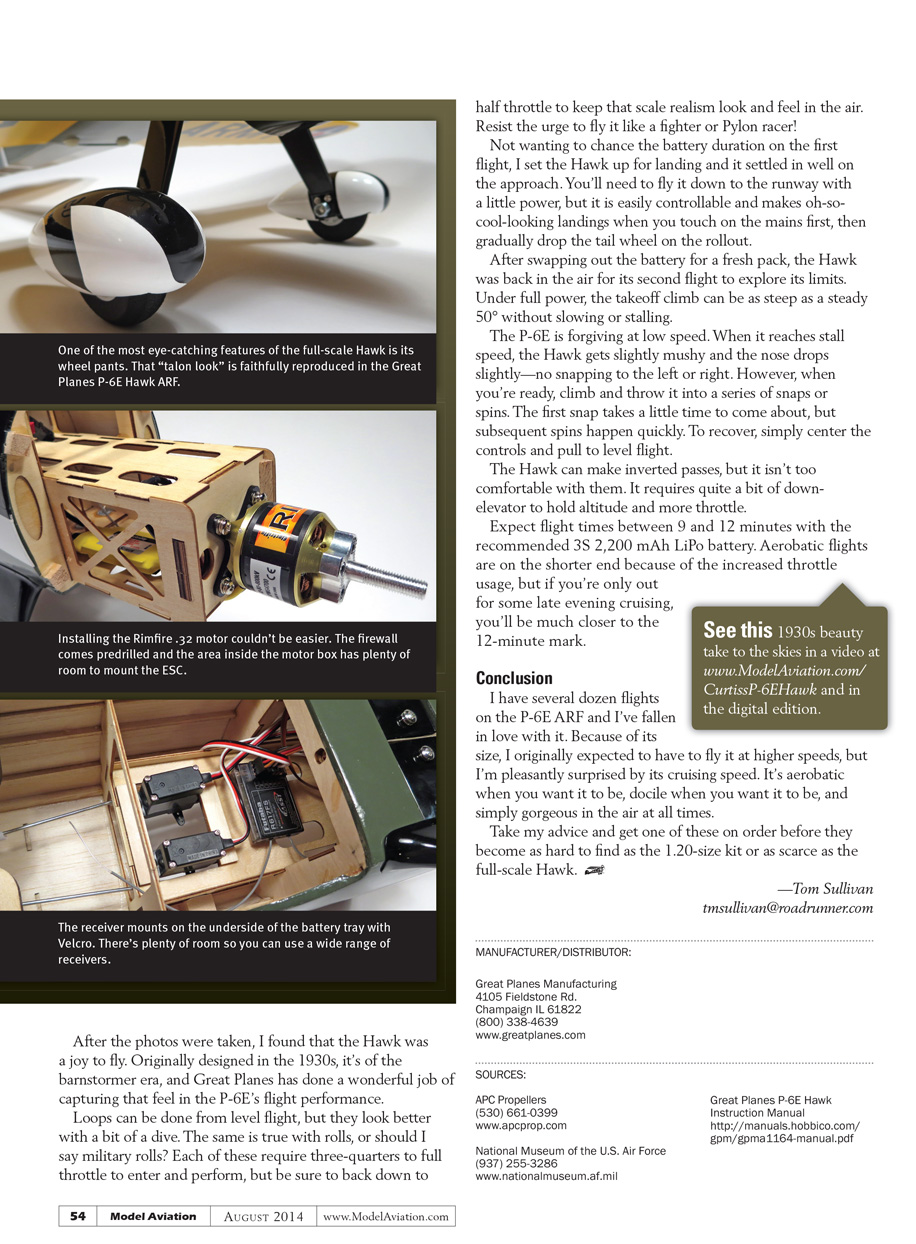
Shifting work to the front, the RimFire motor is installed using the predrilled holes in the firewall—super easy. Threading the wires throughout the motor box, the ESC is installed with Velcro.
Next, the cowl is installed. Using the technique described in the manual works as it should, but take some time to make sure that the cowl lines up with the MonoKote pattern and is properly spaced for propeller and motor clearance. When you're happy with the alignment, four holes are drilled and the cowl is held in place with four wood screws.
Before bolting the wings back in place, I installed the receiver and powered up the system for the first time. I checked that the motor rotation was correct and that all of the control surfaces were working in the proper direction, then I reattached the wings.
The windshield and turtledeck are glued into position to finish the Hawk. There is also a die-cut sheet with pressure-sensitive decals that need to be applied.
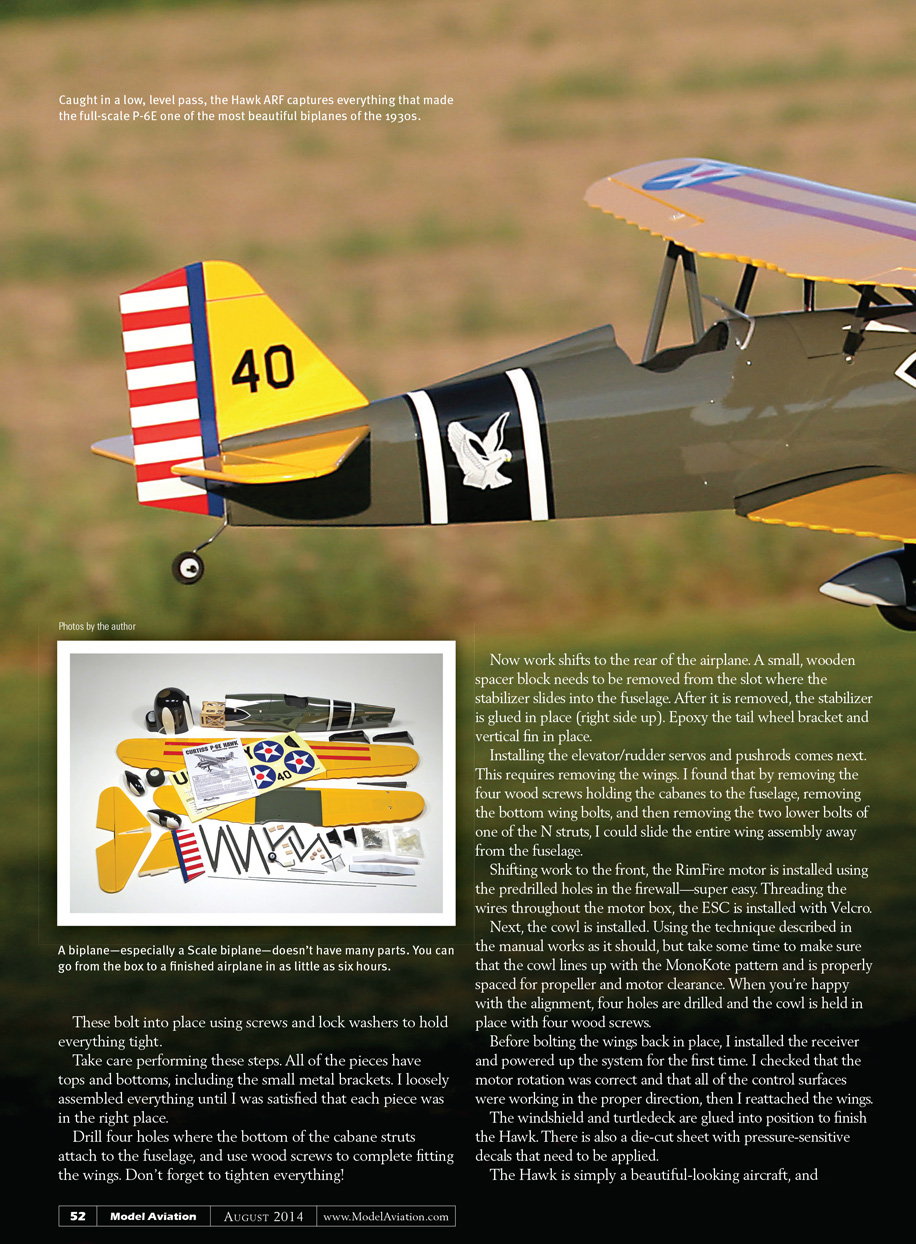
The Hawk is simply a beautiful-looking aircraft, and although I'm sure there are a few liberties taken here and there, it closely resembles its full-scale counterpart.
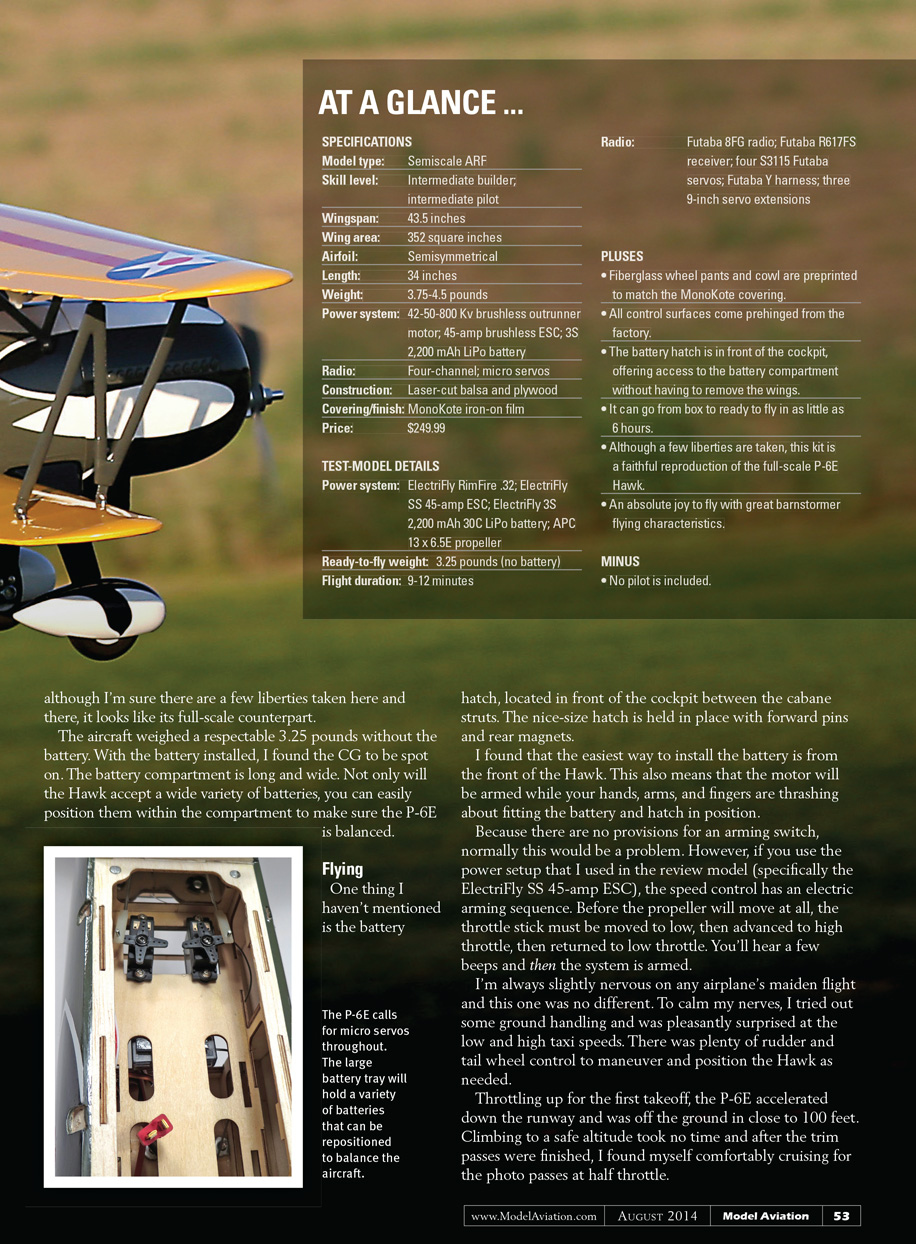
The aircraft weighed a respectable 3.25 pounds without the battery. With the battery installed, I found the CG to be spot on. The battery compartment is long and wide. Not only will the Hawk accept a wide variety of batteries, you can easily position them within the compartment to make sure the P-6E is balanced.
Flying
One thing I haven't mentioned is the battery hatch, located in front of the cockpit between the cabane struts. The nice-size hatch is held in place with forward pins and rear magnets.
I found that the easiest way to install the battery is from the front of the Hawk. This also means that the motor will be armed while your hands, arms, and fingers are thrashing about fitting the battery and hatch in position.
Because there are no provisions for an arming switch, normally this would be a problem. However, if you use the power setup that I used in the review model (specifically the ElectriFly SS 45-amp ESC), the speed control has an electric arming sequence. Before the propeller will move at all, the throttle stick must be moved to low, then advanced to high throttle, then returned to low throttle. You'll hear a few beeps and then the system is armed.
I'm always slightly nervous on any airplane's maiden flight and this one was no different. To calm my nerves, I tried out some ground handling and was pleasantly surprised at the low and high taxi speeds. There was plenty of rudder and tailwheel control to maneuver and position the Hawk as needed.
Throttling up for the first takeoff, the P-6E accelerated down the runway and was off the ground in close to 100 feet. Climbing to a safe altitude took no time and after the trim passes were finished, I found myself comfortably cruising for the photo passes at half throttle.
It will perform lazy eights, loops and rolls with no problem. While it won't snap like a pattern ship, it will do point rolls and slow flick rolls if you get the timing and elevator in there.
Stall characteristics are benign and forgiving. Landings are straightforward; with a light wing loading it's best to carry a little power on final for better control, but the Hawk settles in nicely when you flare for touchdown.
After the photos were taken, I found that the Hawk was a joy to fly. Originally designed in the 1930s, it's of the barnstormer era, and Great Planes has done a wonderful job of capturing that feel in the P-6E's flight performance.
Loops can be done from level flight, but they look better with a bit of a dive. The same is true with rolls (or military rolls). Each of these requires three-quarters to full throttle to enter and form, but be sure to back down to half throttle to keep that scale-realistic look and feel in the air. Resist the urge to fly it like a fighter or pylon racer!
Not wanting to chance the battery duration on the first flight, I set the Hawk up for landing and it settled in well on the approach. You'll need to fly it down to the runway with a little power, but it is easily controllable and makes oh-so-cool-looking landings when you touch on the mains first, then gradually drop the tailwheel on the rollout.
After swapping out the battery for a fresh pack, the Hawk was back in the air for its second flight to explore its limits. Under full power, the takeoff climb can be as steep as a steady 50° without slowing or stalling.
The P-6E is forgiving at low speed. When it reaches stall speed, the Hawk gets slightly mushy and the nose drops a bit—no snapping to the left or right. However, when you're ready, climb and throw it into a series of snaps or spins. The first snap takes a little time to come about, but subsequent spins happen quickly. To recover, simply center the controls and pull to level flight.
The Hawk can make inverted passes, but it isn't too comfortable with them. It requires quite a bit of down elevator to hold altitude and more throttle.
Expect flight times between 9 and 12 minutes with the recommended 3S 2,200 mAh LiPo battery. Aerobatic flights are on the shorter end because of the increased throttle usage, but if you're only out for some late-evening cruising, you'll be much closer to the 12-minute mark.
Conclusion
I have several dozen flights on the P-6E ARF and I've fallen in love with it. Because of its size, I originally expected to have to fly it at higher speeds, but I'm pleasantly surprised by its cruising speed. It's aerobatic when you want it to be, docile when you want it to be, and simply gorgeous in the air at all times.
Take my advice and get one of these on order before they become as hard to find as the 1.20-size kit or as scarce as the full-scale Hawk.
—Tom Sullivan [email protected]
MANUFACTURER/DISTRIBUTOR
- Great Planes Manufacturing
- 4105 Fieldstone Rd.
- Champaign, IL 61822
- (800) 338-4639
- www.greatplanes.com
SOURCES
- APC Propellers — (530) 661-0399 — www.apcprop.com
- National Museum of the U.S. Air Force — (937) 255-3286 — www.nationalmuseum.af.mil
- Great Planes P-6E Hawk Instruction Manual — http://manuals.hobbico.com/gpm/gpma1164-manual.pdf
Transcribed from original scans by AI. Minor OCR errors may remain.

