

Custom Scale Helicopter Landing Lights - 2009/12
By Bob Engle
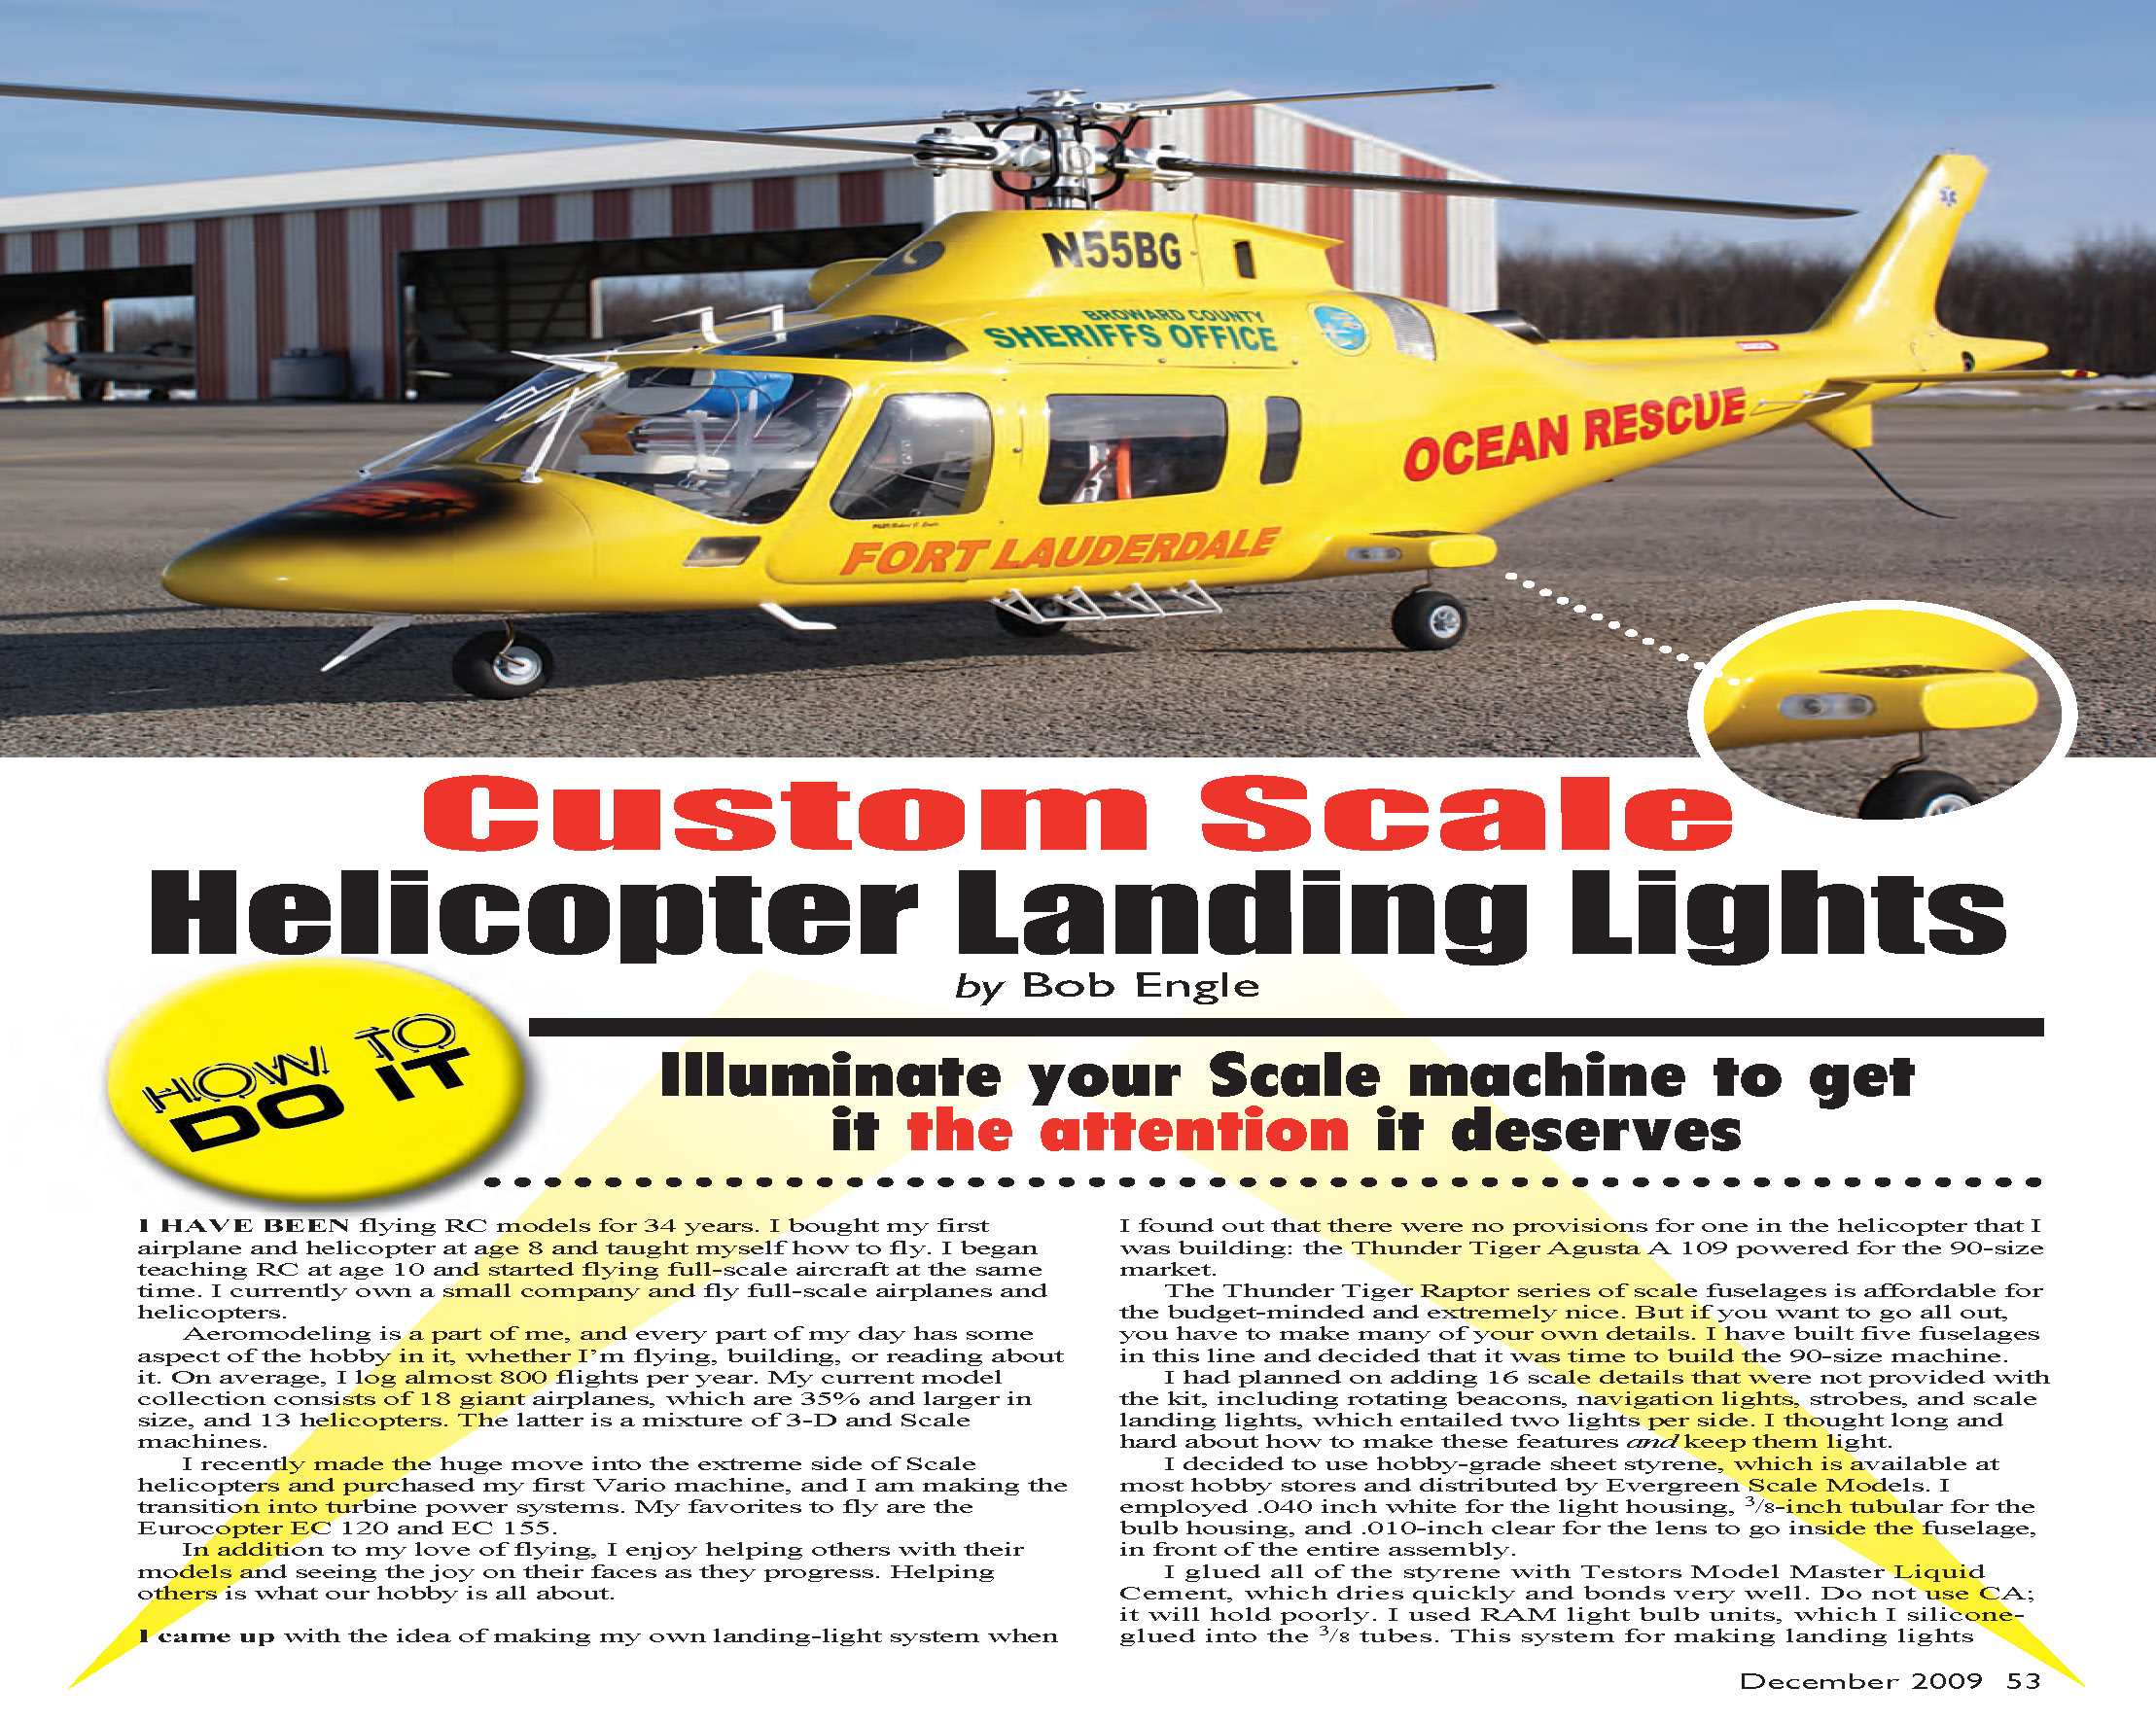
Illuminate your scale machine to get it the attention it deserves.
I have been flying RC models for 34 years. I bought my first airplane and helicopter at age eight and taught myself how to fly. I began teaching RC at age ten and started flying full-scale aircraft at the same time. I currently own a small company and fly full-scale airplanes and helicopters.
Aeromodeling is a part of me, and every part of my day has some aspect of the hobby in it, whether I’m flying, building, or reading about it. On average, I log almost 800 flights per year. My current model collection consists of 18 giant airplanes (35% and larger) and 13 helicopters. The helicopters are a mixture of 3-D and scale machines.
I recently made the move into the extreme side of scale helicopters and purchased my first Vario machine, and I am transitioning into turbine power systems. My favorites to fly are the Eurocopter EC 120 and EC 155.
In addition to my love of flying, I enjoy helping others with their models and seeing the joy on their faces as they progress. Helping others is what our hobby is all about.
I came up with the idea of making my own landing-light system when I found out that there were no provisions for one in the Thunder Tiger Agusta A109 fuselage I was building (powered for the 90-size market).
The Thunder Tiger Raptor series of scale fuselages is affordable for the budget-minded and extremely nice. But if you want to go all out, you have to add many of your own details. I have built five fuselages in this line and decided it was time to build the 90-size machine.
I planned to add 16 scale details that were not provided with the kit, including rotating beacons, navigation lights, strobes, and scale landing lights (two lights per side). I thought long and hard about how to make these features and keep them light.
Materials
- Evergreen .040-inch white sheet styrene (for light housing)
- Evergreen .010-inch clear styrene (for the lens)
- Evergreen 3/8-inch tubular styrene (for the bulb housing)
- RAM light bulb units (silicone-glued into the 3/8 tubes)
- Testors Model Master Liquid Cement (do not use CA; it holds poorly)
- Fine-tip marker
- 6-inch metal ruler
- Dremel tool with 1/4-inch coarse drum and fine drum
- Small shop vacuum
- 120-grit sandpaper
- Silicone adhesive (for wiring)
- Fiberglass fuselage (Thunder Tiger Agusta A109)
This system for making landing lights works great and looks fantastic when complete.
Construction (step-by-step)
- Prepare the fuselage
- Make sure all model wires and fittings are clear of the retractable landing gear. Secure wires with silicone to the fiberglass fuselage to keep everything neat. The last thing you want in a helicopter is wires flapping around moving parts.
- Scribe the light opening
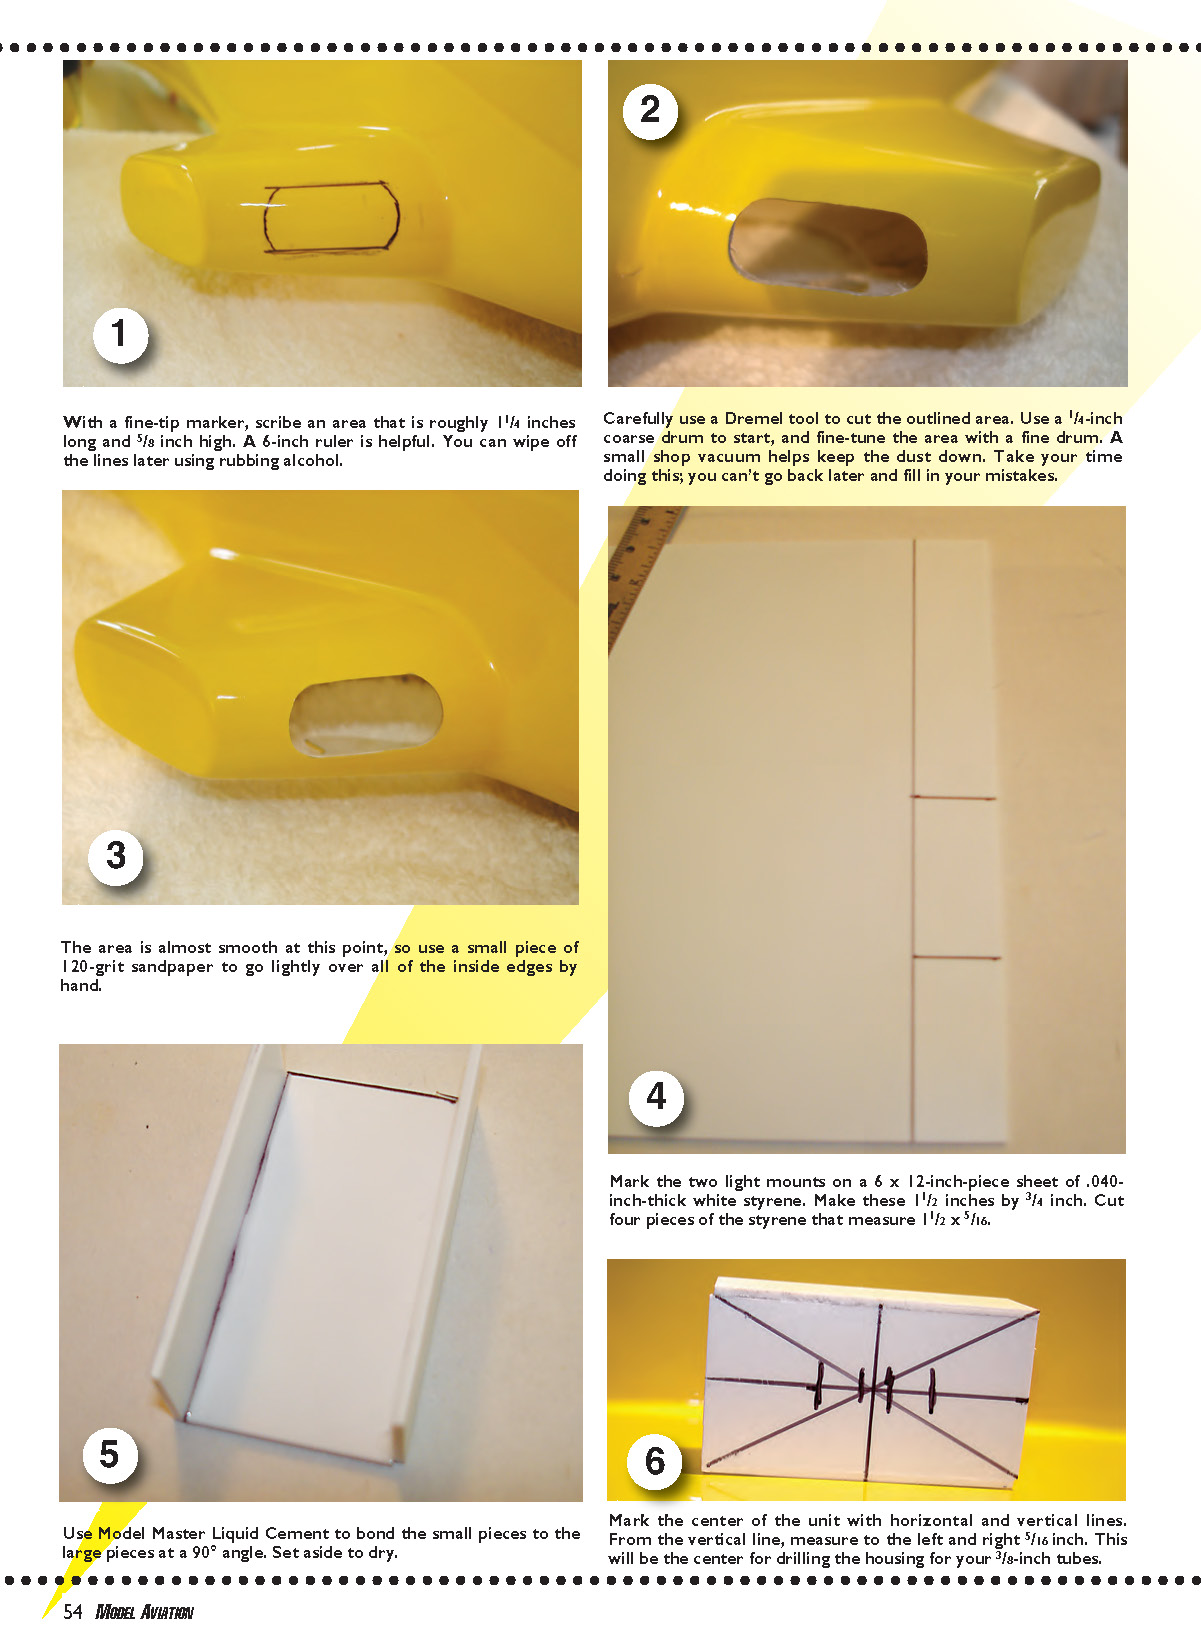
- With a fine-tip marker, scribe an area roughly 1-1/4 inches long and 5/8 inch high where the light will mount. Use a 6-inch ruler for accuracy. You can wipe off the marker lines later with rubbing alcohol.
- Cut the opening
- Carefully use a Dremel tool to cut the outlined area. Start with a 1/4-inch coarse drum and then fine-tune with a fine drum. Use a small shop vacuum to control dust. Take your time—mistakes are difficult to fix.
- Smooth the edges
- The area will be almost smooth after cutting. Use a small piece of 120-grit sandpaper to lightly sand all inside edges by hand.
- Fabricate the light mounts
- Mark the two light mounts on a 6 x 12-inch piece of .040-inch-thick white styrene. Make the mounts 1-1/2 inches by 3/4 inch.
- Cut four pieces of styrene that measure 1-1/2 x 5/16 inch (these form the bulb housings or supports).
- Use Model Master Liquid Cement to bond the small pieces to the large pieces at a 90° angle. Set aside to dry.
- Drill the bulb housings
- Mark the center of the unit with horizontal and vertical lines. From the vertical centerline, measure 5/16 inch to the left and right. These marks are the centers for drilling the housings for your 3/8-inch tubes.
- Insert the 3/8-inch tubular styrene pieces and silicone-glue the RAM light bulb units into the tubes.
- Install the lens and final assembly
- Use the .010-inch clear styrene for the lens to sit inside the fuselage in front of the entire assembly.
- Test fit everything, secure with liquid cement where appropriate, and make final adjustments for alignment and finish.
You can complete this project in a short amount of time. The photos and captions (not included here) illustrate the how-to details. You will spend more time waiting for glue to dry than on construction. If you take your time, you will be rewarded with fully functional lights that look terrific.
MJ
Bob Engle [email protected]
Sources:
- Thunder Tiger Agusta A109 fuselage:
- Ace Hobby Distributors
- (800) 322-7121
- www.acehobby.com
- Evergreen Scale Models
- (425) 402-4918
- www.evergreenscalemodels.com
- Testors
- (800) 962-6654
- www.testors.com
- RAM
- (847) 740-8726
- www.ramrcandramtrack.com
- Agusta A109 graphics:
- Gupp Signs
- (585) 244-5070
- www.guppsigns.com
Transcribed from original scans by AI. Minor OCR errors may remain.

