
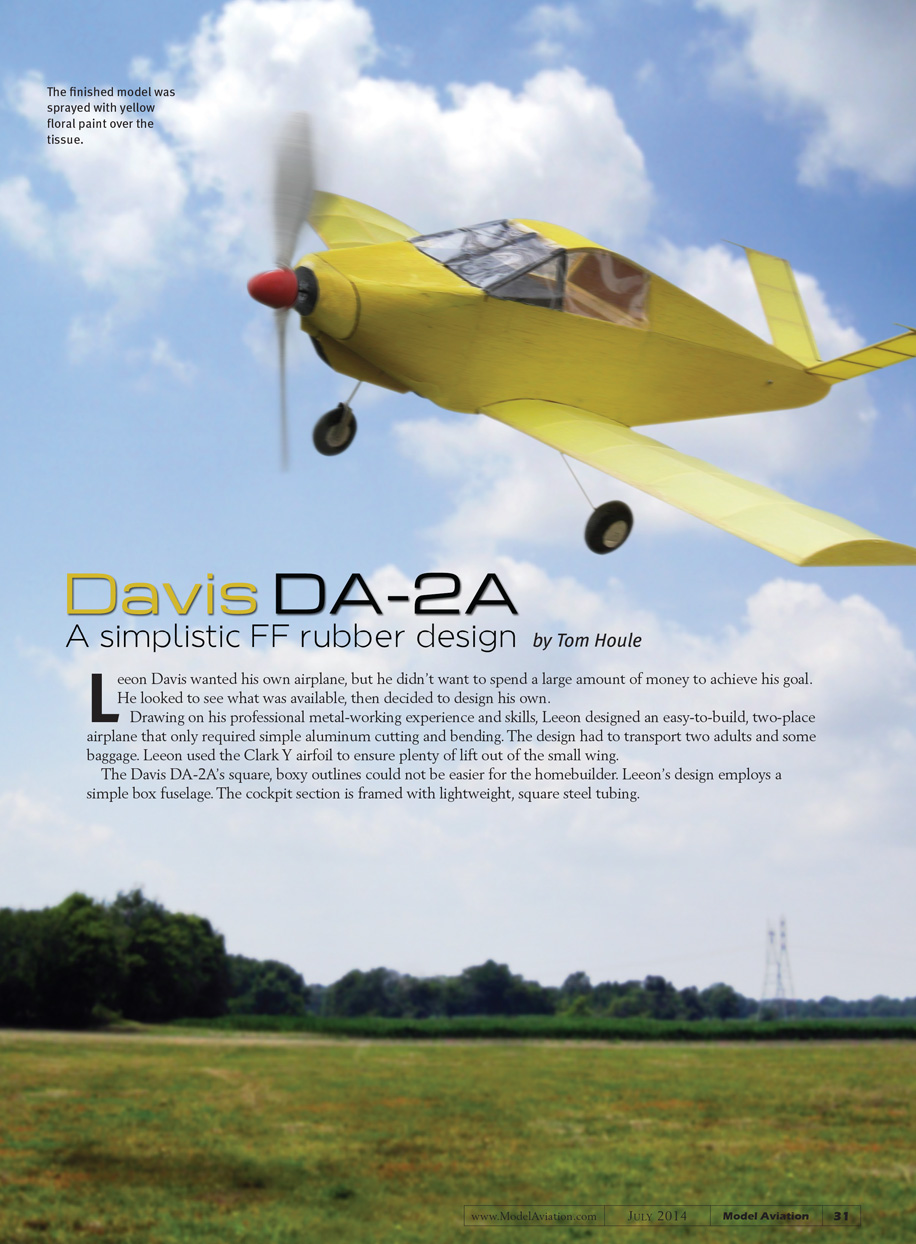

Davis DA-2A
A simplistic FF rubber design by Tom Houle
Leen Davis wanted his own airplane, but he didn't want to spend a large amount of money to achieve his goal. He looked to see what was available, then decided to design his own. Drawing on his professional metal-working experience and skills, Leen designed an easy-to-build, two-place airplane that only required simple aluminum cutting and bending. The design had to transport two adults and some baggage. Leen used the Clark Y airfoil to ensure plenty of lift from the relatively small wing.
The Davis DA-2A's square, boxy outlines could not be easier for the homebuilder. Leen's design employs a simple box fuselage. The cockpit section is framed with lightweight square steel tubing. The airplane has constant-chord wings and a V-tail, and the side engine cowl cheeks are simple curves.
I've always admired the simplicity of Leen's design and vowed that someday I'd build a FF scale model. I searched online and turned up a pair of Davis DA-2A plans by Lloyd V. Hunt and William McCombs, respectively. These plans were helpful in visualizing the airframe for a larger model. A Google search generated a number of Davis DA-2A photos, and I tracked down a three-view from a 1971 issue of Air Trails magazine.
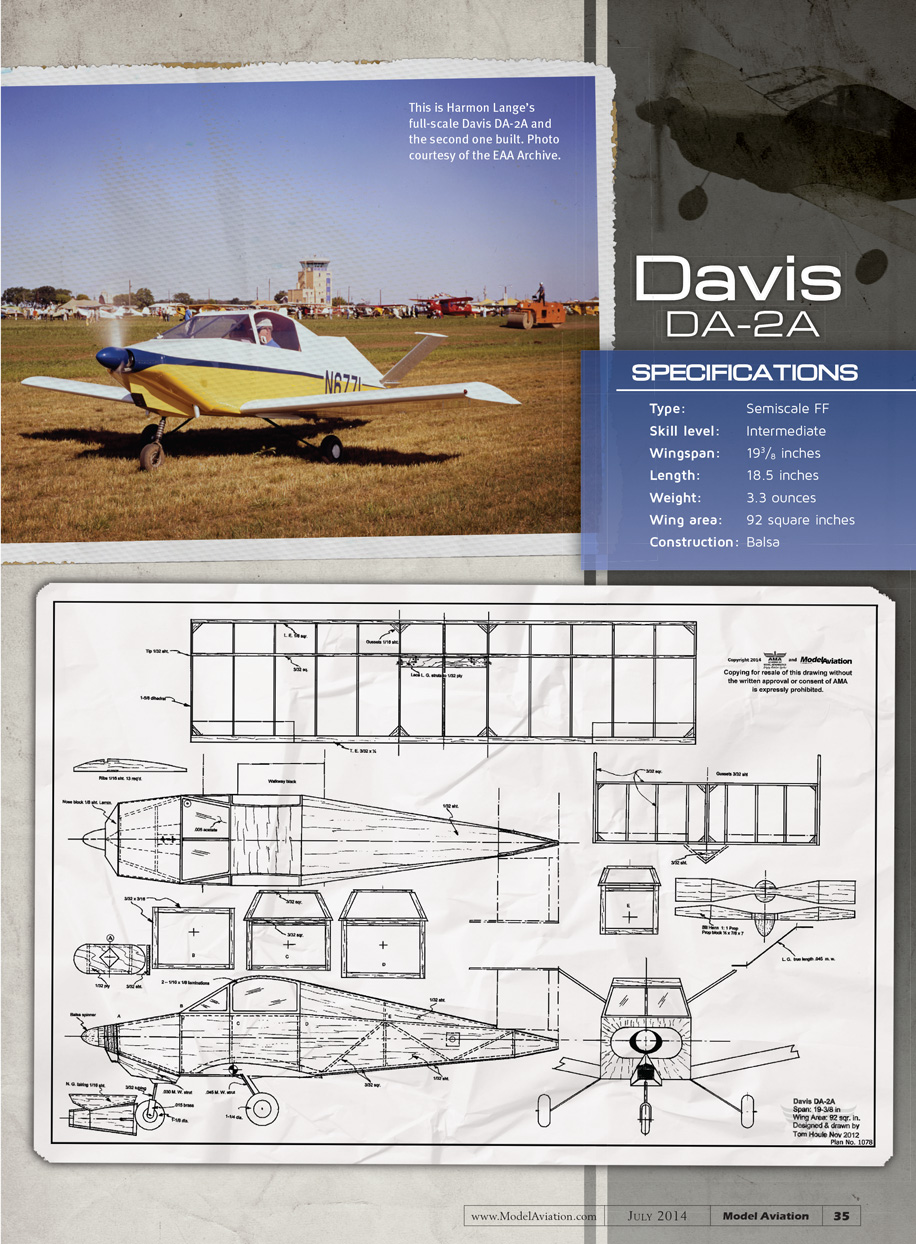
H. G. Frautschy, executive director of the Experimental Aircraft Association's (EAA) Vintage Aircraft Association, provided me with EAA Archive photos. The full-scale DA-2A photo in this article is courtesy of the EAA Archive.
For this build I opted to use old-fashioned rubber for power; however, there are lightweight RC and electric power systems that would also fly this airplane. Had I chosen RC electric, I would have left the V-tail feathers fixed and used aileron controls.
The accompanying pictures should give you the general idea of this build. The entire article can be seen online at www.ModelAviation.com/DA-2A or in the digital edition.
—Tom Houle [email protected]
Construction Notes
- The basic fuselage is a simple box design with cockpit framing of square steel tubing and soft balsa sheeting.
- Wing construction is straightforward: strong and lightweight, suitable for first flights. Tip ribs are covered with 1/32-inch soft balsa sheet.
- The V-tail is built from 3/32-inch square balsa construction; pin it down when shrinking the tissue.
- If building two fuselage sides, build one on top of the other to ensure they are identical.
- The turtledeck stringers run to the V-tail assembly leading edge (LE).
Nose Strut and Radiator Housing
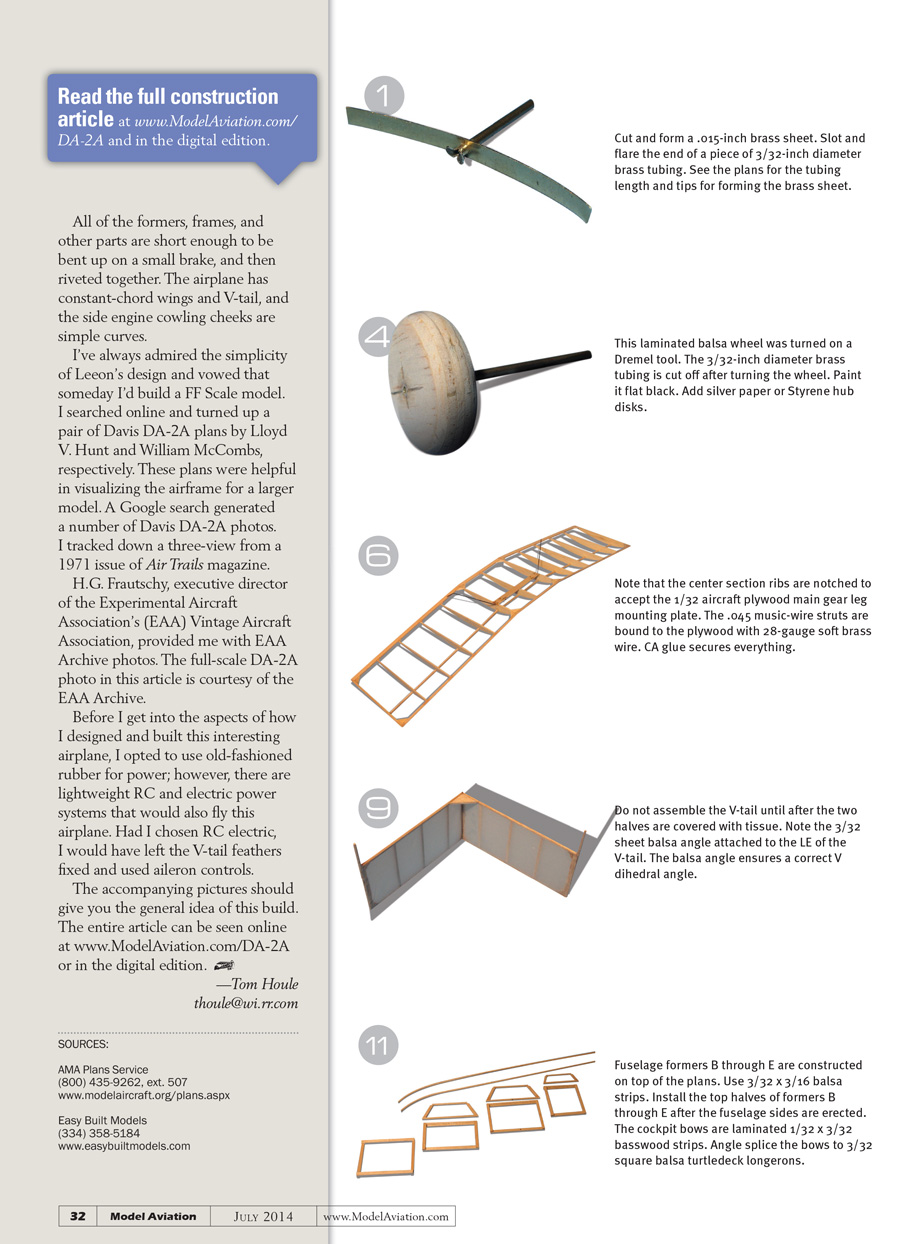
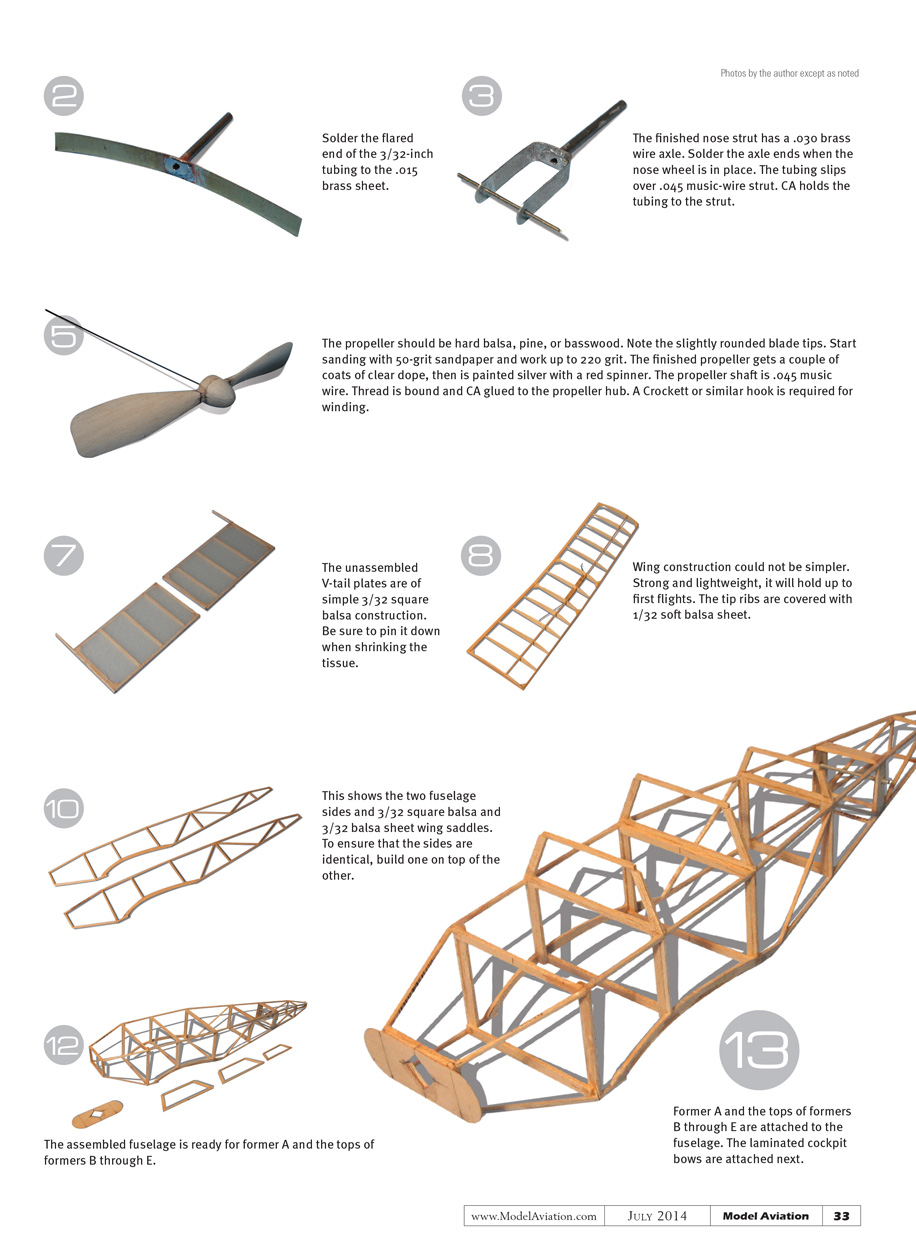
- Solder the flared end of the 3/32-inch brass tubing to the .015-inch brass sheet.
- The finished nose strut uses a .030-inch brass wire axle; solder the axle ends once the nose wheel is in place.
- The brass tubing slips over a .045-inch music-wire strut; CA (cyanoacrylate) glue holds the tubing to the strut.
- Retain the brass nose strut tubing with gap-filling CA glue.
- The nose strut radiator housing is built up from soft 1/16-inch balsa sheet. Leave an opening at the bottom rear of the fuselage for attaching the rubber motor to the rear peg.
Propeller
- The propeller should be hard balsa, pine, or basswood. Note the slightly rounded blade tips.
- Start sanding with 50-grit sandpaper and work up to 220 grit.
- The finished propeller receives a couple of coats of clear dope, then is painted silver with a red spinner.
- The propeller shaft is .045-inch music wire. The thread is bound and CA-glued to the propeller hub.
- A Crockett or similar hook is required for winding.
Fuselage Assembly Steps
- Assemble the two fuselage sides and add 3/32-inch square balsa and 3/32-inch balsa-sheet wing saddles.
- The assembled fuselage is prepared for former A and the tops of formers B through E.
- Attach former A and the tops of formers B through E to the fuselage. Attach the laminated cockpit bows next.
- The brass tubing nose strut assembly is ready to slip over the .045-inch music-wire extension. Add a 3/32-inch balsa-sheet backing at former A to facilitate gluing the 1/32-inch balsa sheet to the cowl cheeks.
- Install the cockpit bows and turtledeck stringers. Note that the turtledeck stringers run to the V-tail assembly LE.
- Sheet the fuselage sides and bottom with soft 1/32-inch balsa sheet. The 1/32-inch cockpit top sheeting runs cross-grain.
- Complete the fuselage sheeting. Install three windshield supports of 3/32-inch strip balsa. The instrument-panel glare shield can be made from black construction paper.
- Bevel-trim the inside faces of the fuselage top longerons so that the V-tail assembly rests on the top edges of the top longerons.
- The top edge of the 3/32-inch angle gusset at the V-tail assembly LE should sit exactly 1/32 inch below the top of the turtledeck sheeting, positioning the LE at zero degrees incidence. Fill the space between the V-tails with a triangular piece of 1/32-inch balsa sheet. Leave the trailing edge (TE) of the V-tail assembly loose to allow shimming in negative incidence.
Finishing
- After assembly and sheeting, cover as desired and make final incidence and balance adjustments before flight testing.
- If using RC electric instead of rubber, consider fixing the V-tail and using ailerons for roll control.
Specifications
- Type: Semiscale FF
- Skill level: Intermediate
- Wingspan: 19 3/8 inches
- Length: 18.5 inches
- Weight: 3.3 ounces
- Wing area: 92 square inches
- Construction: Balsa
Sources
- AMA Plans Service — (800) 435-9262, ext. 507 — www.modelaircraft.org/plans.aspx
- Easy Built Models — (334) 358-5184 — www.easybuiltmodels.com
Transcribed from original scans by AI. Minor OCR errors may remain.

