
District IX
Contact
Mark Smith, District IX Vice President; [email protected]
States
- Colorado
- Kansas
- Nebraska
- North Dakota
- South Dakota
- Wyoming
Slow Stick on Steroids (by Mark Dennis)
If you go back and take a look at the District IX March column, you’ll notice I snuck in a few words and a picture of my Slow Stick camera set-up with corn walker John Wells. Little did I know this would set off a flurry of innovative improvements using an FMA Co-Pilot by club member Mark Dennis, who writes the following about what I coined “Slow Stick on Steroids.”
This is a standard GWS Slow Stick that I use for aerial photography. Ready to fly it weighs roughly 17 ounces without the camera and 24 ounces with it. Because of the extra weight, I made a few modifications. I powered it with an E-Flite Park 480 1020Kv brushless outrunner motor turning an APC 11 x 5.5E propeller.
I use a Castle Creations Phoenix 25 speed controller (ESC) and typically a 2-cell 1,500 mAh LiPo battery. On windy days and when I have the camera mounted I will put in a 3-cell pack just to have the extra thrust. (Yes, it’ll go straight up at half throttle without the camera mounted with a 3-cell pack.)
The motor can handle a larger propeller, but it would draw more amperage than the battery is rated for. This motor is way too much for this airplane and I am on the lookout for a slightly smaller one—maybe an E-Flite Park 400 outrunner—but since I had it sitting on the shelf doing nothing, the price was right.
Other modifications necessary to handle the extra load include a landing gear strengthened by adding an additional strut between the legs near the top and larger pins to hold the larger rubber bands that secure the wings. I made these pegs out of 1-inch pieces of 1/4-inch dowel with a hole drilled in them to go over the existing pins and a small screw from the top holding the other end.
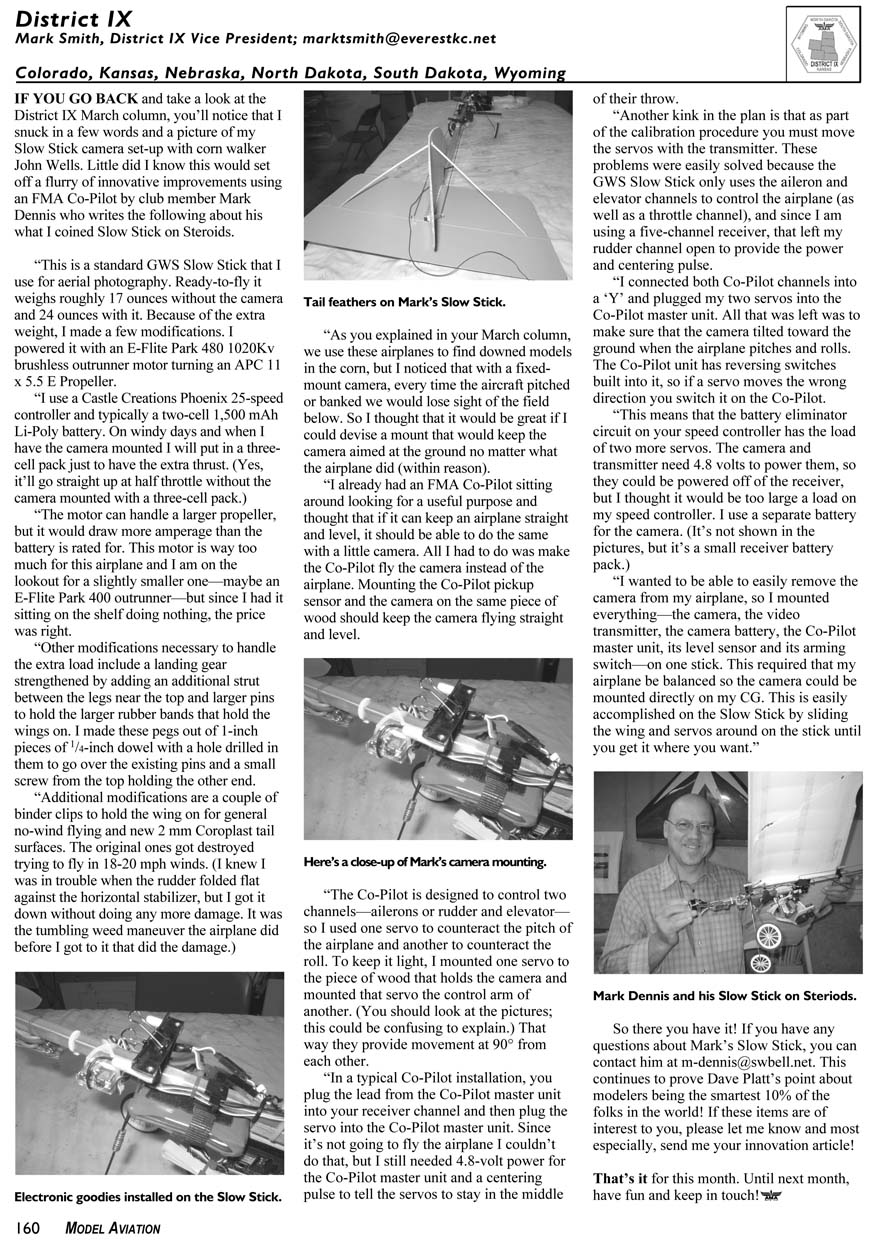
Additional modifications are a couple of binder clips to hold the wing on for general no-wind flying and new 2 mm Coroplast tail surfaces. The original ones got destroyed trying to fly in 18–20 mph winds. I knew I was in trouble when the rudder folded flat against the horizontal stabilizer, but I got it down without doing any more damage. It was the tumbling-weed maneuver the airplane did before I got to it that did the damage.
As you explained in your March column, we use these airplanes to find downed models in the corn, but I noticed that with a fixed-mount camera, every time the aircraft pitched or banked we would lose sight of the field below. So I thought it would be great if I could devise a mount that would keep the camera aimed at the ground no matter what the airplane did (within reason).
I already had an FMA Co-Pilot sitting around looking for a useful purpose and thought that if it can keep an airplane straight and level, it should be able to do the same with a little camera. All I had to do was make the Co-Pilot fly the camera instead of the airplane. Mounting the Co-Pilot pickup sensor and the camera on the same piece of wood should keep the camera flying straight and level.
The Co-Pilot is designed to control two channels—ailerons (or rudder) and elevator—so I used one servo to counteract the pitch of the airplane and another to counteract the roll. To keep it light, I mounted one servo to the piece of wood that holds the camera and mounted that servo to the control arm of the other. (You should look at the pictures; this could be confusing to explain.) That way they provide movement at 90° from each other.
In a typical Co-Pilot installation, you plug the lead from the Co-Pilot master unit into your receiver channel and then plug the servo into the Co-Pilot master unit. Since it’s not going to fly the airplane I couldn’t do that, but I still needed 4.8-volt power for the Co-Pilot master unit and a centering pulse to tell the servos to stay in the middle of their throw.
Another kink in the plan is that as part of the calibration procedure you must move the servos with the transmitter. These problems were easily solved because the GWS Slow Stick only uses the aileron and elevator channels to control the airplane (as well as a throttle channel), and since I am using a five-channel receiver, that left my rudder channel open to provide the power and centering pulse.
I connected both Co-Pilot channels into a “Y” and plugged my two servos into the Co-Pilot master unit. All that was left was to make sure that the camera tilted toward the ground when the airplane pitched and rolled. The Co-Pilot unit has reversing switches built into it, so if a servo moves the wrong direction you switch it on the Co-Pilot.
This means that the battery eliminator circuit (BEC) on your speed controller has the load of two more servos. The camera and transmitter need 4.8 volts to power them, so they could be powered off the receiver, but I thought it would be too large a load on my speed controller. I use a separate battery for the camera. (It’s not shown in the pictures, but it’s a small receiver battery pack.)
I wanted to be able to easily remove the camera from my airplane, so I mounted everything—the camera, the video transmitter, the camera battery, the Co-Pilot master unit, its level sensor and its arming switch—on one stick. This required that my airplane be balanced so the camera could be mounted directly on my CG. This is easily accomplished on the Slow Stick by sliding the wing and servos around on the stick until you get it where you want.
So there you have it! If you have any questions about Mark’s Slow Stick, you can contact him at [email protected]. This continues to prove Dave Platt’s point about modelers being the smartest 10% of the folks in the world! If this item is of interest to you, please let me know and, most especially, send me your innovation article!
That’s it for this month. Until next month, have fun and keep in touch!
Transcribed from original scans by AI. Minor OCR errors may remain.

