
DJI Phantom
Terry Dunn [email protected]
It is difficult to look at a multirotor model and not be impressed by the precision and ingenuity that makes it such a novel and utilitarian machine. Inversely, many of us find it impossible to view the yards of exposed wiring and myriad antennae sprouting from unidentifiable black boxes without raising an eyebrow in silent, dumbfounded confusion.
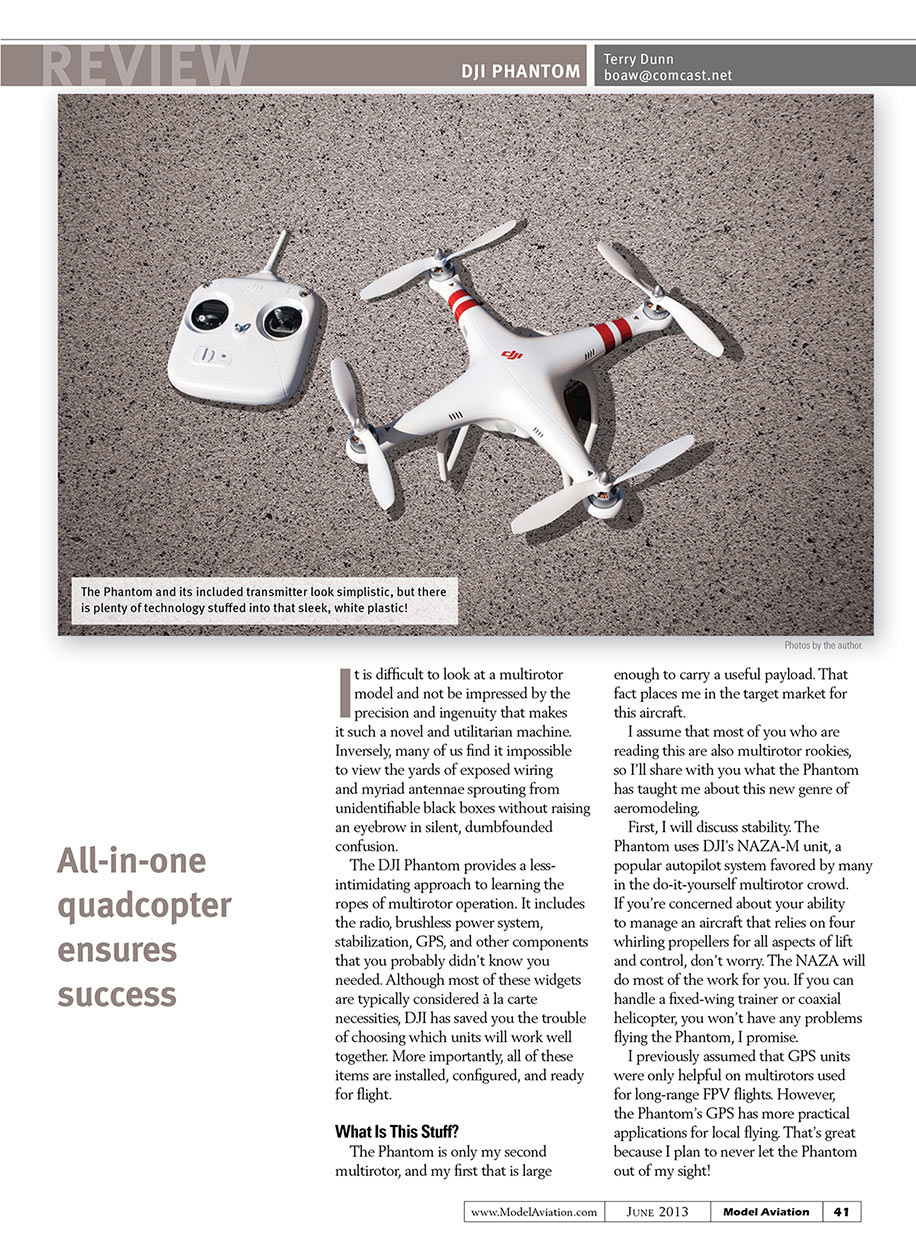
The DJI Phantom provides a less-intimidating approach to learning the ropes of multirotor operation. It includes the radio, brushless power system, stabilization, GPS, and other components that you probably didn't know you needed. Although most of these widgets are typically considered à la carte necessities, DJI has saved you the trouble of choosing which units will work well together. More importantly, all of these items are installed, configured, and ready for flight.
What Is This Stuff?
The Phantom is only my second multirotor, and my first that is large enough to carry a useful payload. That fact places me in the target market for this aircraft.
I assume that most of you who are reading this are also multirotor rookies, so I'll share with you what the Phantom has taught me about this new genre of aeromodeling.
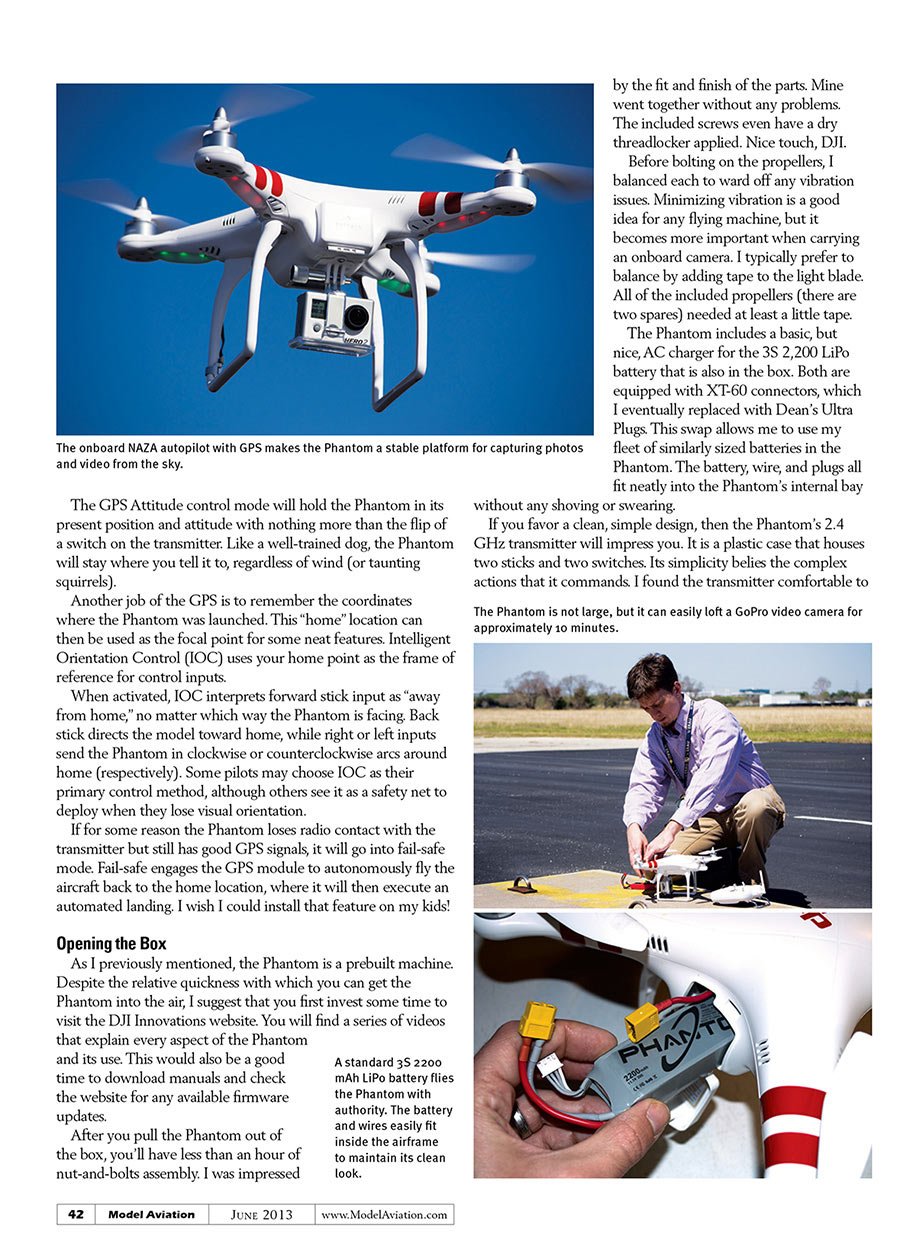
First, I will discuss stability. The Phantom uses DJI's NAZA-M unit, a popular autopilot system favored by many in the do-it-yourself multirotor crowd. If you're concerned about your ability to manage an aircraft that relies on four whirling propellers for all aspects of lift and control, don't worry. The NAZA will do most of the work for you. If you can handle a fixed-wing trainer or coaxial helicopter, you won't have any problems flying the Phantom, I promise.
I previously assumed that GPS units were only helpful on multirotors used for long-range FPV flights. However, the Phantom's GPS has more practical applications for local flying. That's great because I plan to never let the Phantom out of my sight!
The GPS Attitude control mode will hold the Phantom in its present position and attitude with nothing more than the flip of a switch on the transmitter. Like a well-trained dog, the Phantom will stay where you tell it to, regardless of wind (or taunting squirrels).
Another job of the GPS is to remember the coordinates where the Phantom was launched. This "home" location can then be used as the focal point for some neat features. Intelligent Orientation Control (IOC) uses your home point as the frame of reference for control inputs.
When activated, IOC interprets forward stick input as "away from home," no matter which way the Phantom is facing. Back stick directs the model toward home, while right or left inputs send the Phantom in clockwise or counterclockwise arcs around home (respectively). Some pilots may choose IOC as their primary control method, although others see it as a safety net to deploy when they lose visual orientation.
If for some reason the Phantom loses radio contact with the transmitter but still has good GPS signals, it will go into fail-safe mode. Fail-safe engages the GPS module to autonomously fly the aircraft back to the home location, where it will then execute an automated landing. I wish I could install that feature on my kids!
Opening the Box
As I previously mentioned, the Phantom is a prebuilt machine. Despite the relative quickness with which you can get the Phantom into the air, I suggest that you first invest some time to visit the DJI Innovations website. You will find a series of videos that explain every aspect of the Phantom and its use. This would also be a good time to download manuals and check the website for any available firmware updates.
After you pull the Phantom out of the box, you'll have less than an hour of nut-and-bolts assembly. I was impressed by the fit and finish of the parts. Mine went together without any problems. The included screws even have a dry threadlocker applied. Nice touch, DJI.
Before bolting on the propellers, I balanced each to ward off any vibration issues. Minimizing vibration is a good idea for any flying machine, but it becomes more important when carrying an onboard camera. I typically prefer to balance by adding tape to the light blade. All of the included propellers (there are two spares) needed at least a little tape.
The Phantom includes a basic, but nice, AC charger for the 3S 2,200 LiPo battery that is also in the box. Both are equipped with XT-60 connectors, which I eventually replaced with Dean’s Ultra Plugs. This swap allows me to use my fleet of similarly sized batteries in the Phantom. The battery, wire, and plugs all fit neatly into the Phantom’s internal bay without any shoving or swearing.
If you favor a clean, simple design, then the Phantom’s 2.4 GHz transmitter will impress you. It is a plastic case that houses two sticks and two switches. Its simplicity belies the complex actions that it commands. I found the transmitter comfortable to hold and reliable.
The back of the airframe has an LED that is intended to relay the status of certain systems to the pilot with a combination of red, yellow, or green flashes. I'm now comfortable with most of the usual indicators that tell you things such as which control mode you are in, or that the flight battery is getting low. However, I admit that I still can't decipher all of the light patterns. The flashes happen so rapidly that I often have a hard time counting them.
Taking Wing ... Err, Rotor
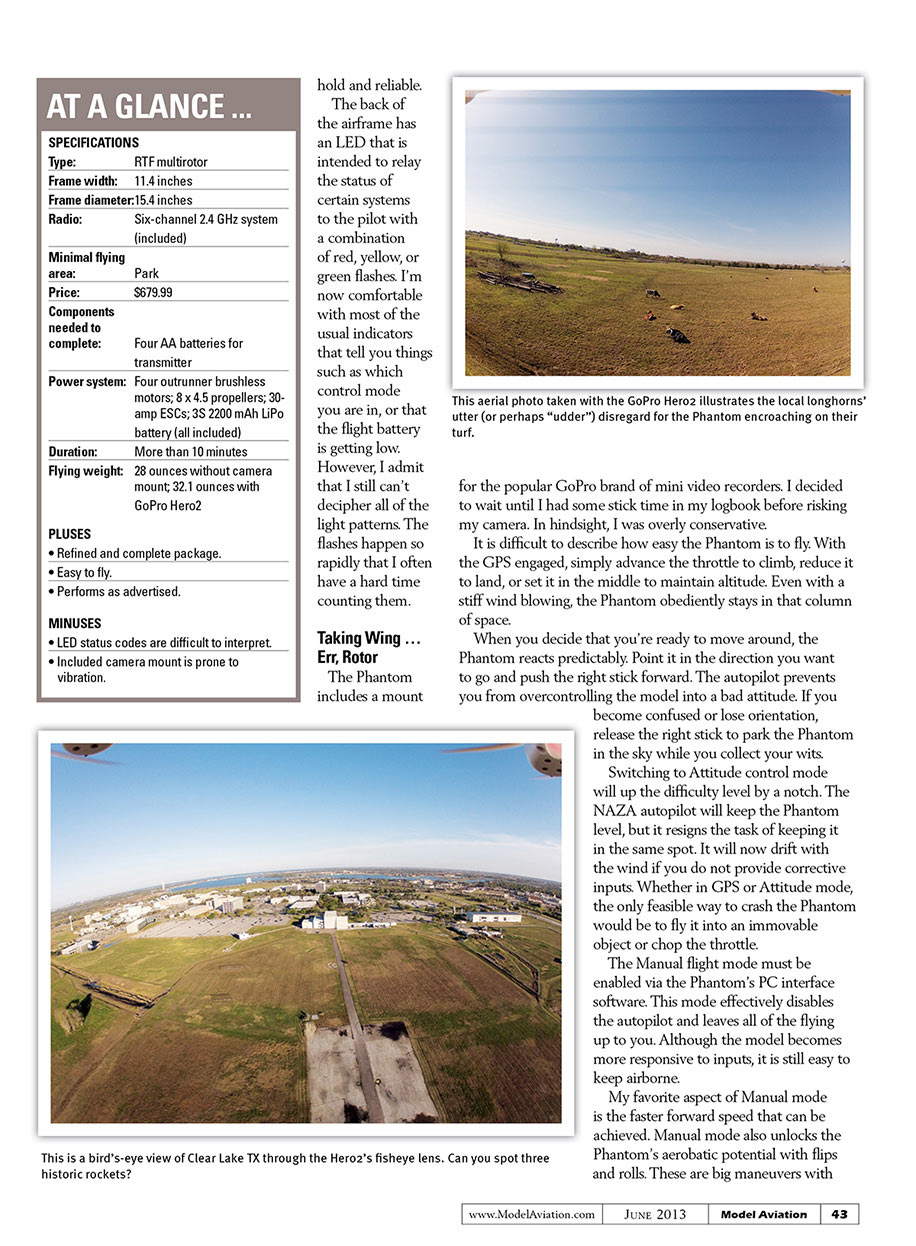
The Phantom includes a mount for the popular GoPro brand of mini video recorders. I decided to wait until I had some stick time in my logbook before risking my camera. In hindsight, I was overly conservative.
It is difficult to describe how easy the Phantom is to fly. With the GPS engaged, simply advance the throttle to climb, reduce it to land, or set it in the middle to maintain altitude. Even with a stiff wind blowing, the Phantom obediently stays in that column of space.
When you decide that you're ready to move around, the Phantom reacts predictably. Point it in the direction you want to go and push the right stick forward. The autopilot prevents you from overcontrolling the model into a bad attitude. If you become confused or lose orientation, release the right stick to park the Phantom in the sky while you collect your wits.
Switching to Attitude control mode will up the difficulty level by a notch. The NAZA autopilot will keep the Phantom level, but it resigns the task of keeping it in the same spot. It will now drift with the wind if you do not provide corrective inputs. Whether in GPS or Attitude mode, the only feasible way to crash the Phantom would be to fly it into an immovable object or chop the throttle.
The Manual flight mode must be enabled via the Phantom's PC interface software. This mode effectively disables the autopilot and leaves all of the flying up to you. Although the model becomes more responsive to inputs, it is still easy to keep airborne.
My favorite aspect of Manual mode is the faster forward speed that can be achieved. Manual mode also unlocks the Phantom's aerobatic potential with flips and rolls. These are big maneuvers with the stock control rates, so start them up high until you get the hang of it. If you get in a bind, switch to Attitude mode and the Phantom will right itself.
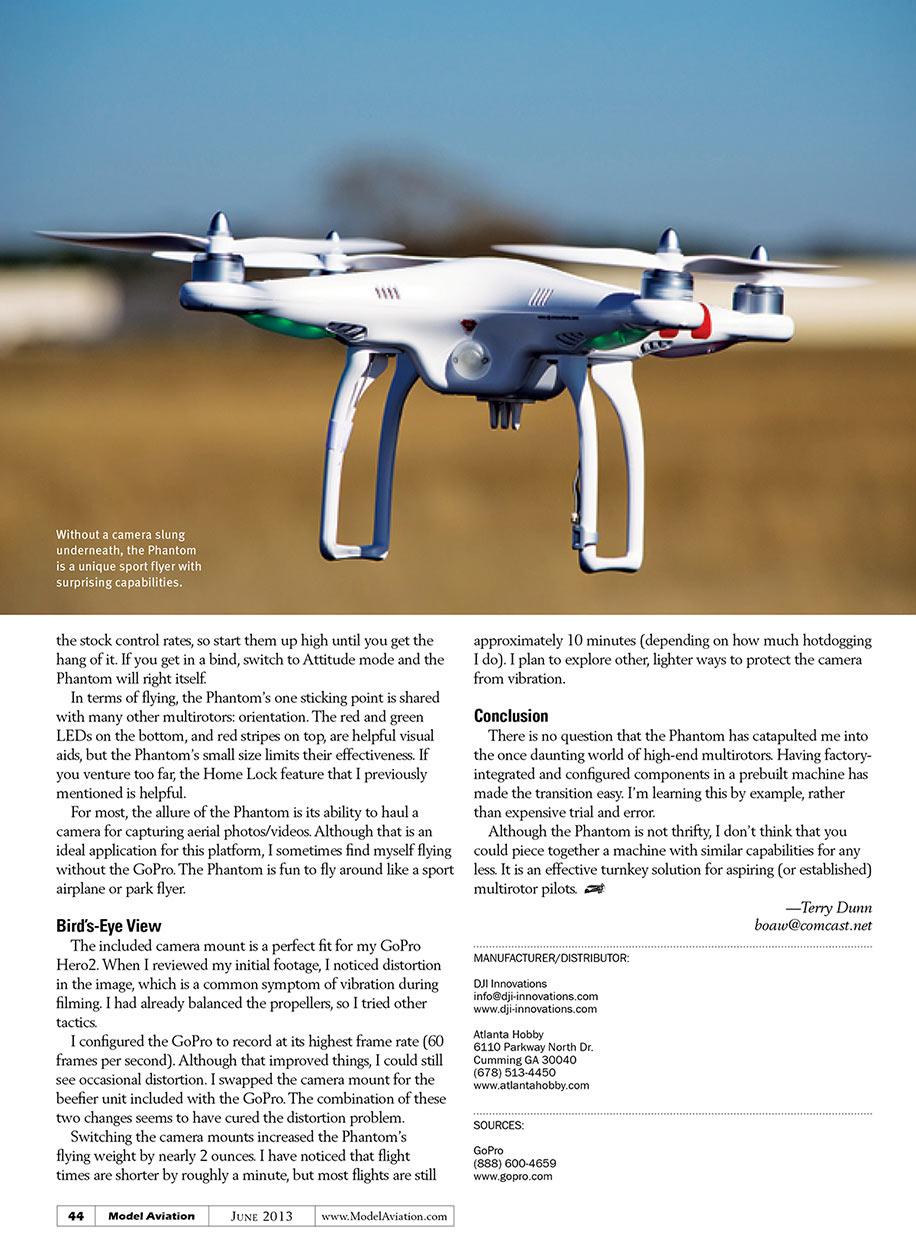
In terms of flying, the Phantom's one sticking point is shared with many other multirotors: orientation. The red and green LEDs on the bottom, and red stripes on top, are helpful visual aids, but the Phantom's small size limits their effectiveness. If you venture too far, the Home Lock feature that I previously mentioned is helpful.
For most, the allure of the Phantom is its ability to haul a camera for capturing aerial photos/videos. Although that is an ideal application for this platform, I sometimes find myself flying without the GoPro. The Phantom is fun to fly around like a sport airplane or park flyer.
Bird's-Eye View
The included camera mount is a perfect fit for my GoPro Hero2. When I reviewed my initial footage, I noticed distortion in the image, which is a common symptom of vibration during filming. I had already balanced the propellers, so I tried other tactics.
I configured the GoPro to record at its highest frame rate (60 frames per second). Although that improved things, I could still see occasional distortion. I swapped the camera mount for the beefier unit included with the GoPro. The combination of these two changes seems to have cured the distortion problem.
Switching the camera mounts increased the Phantom's flying weight by nearly 2 ounces. I have noticed that flight times are shorter by roughly a minute, but most flights are still approximately 10 minutes (depending on how much hotdogging I do). I plan to explore other, lighter ways to protect the camera from vibration.
Conclusion
There is no question that the Phantom has catapulted me into the once daunting world of high-end multirotors. Having factory-integrated and configured components in a prebuilt machine has made the transition easy. I'm learning this by example, rather than expensive trial and error.
Although the Phantom is not thrifty, I don't think that you could piece together a machine with similar capabilities for any less. It is an effective turnkey solution for aspiring (or established) multirotor pilots.
—Terry Dunn [email protected]
Transcribed from original scans by AI. Minor OCR errors may remain.

