
Durafly Balsa Series Ryan STA(M)
Jon Barnes [email protected]
Introduction
Within the last two years, Durafly has released an impressive variety of exciting warbird models. With electric retracts, lighting systems, scale multibladed propellers, and flaps all standard features, these foam-composition models pack plenty of value in the box. Roll back the calendar a decade or so, and most airplane kits were manufactured using balsa and light plywood. Durafly has added a new product line that solely features wood-composition kits called the Balsa Series.
The first model in Durafly's Balsa Series is a 965 mm wingspan Ryan STA(M). It includes a preinstalled brushless power system and four factory-installed Hextronik HXT900 9-gram servos.
The Durafly Balsa Series Ryan is based on the 1930s-era Ryan monoplane, an aircraft that featured two open cockpits in tandem and a metal semimonocoque fuselage. "STA" stood for "Sport Trainer–Aerobatic," with the "M" designating the military version. The STA-M variant featured wider cockpits to accommodate parachute-clad pilots and had a provision for mounting a machine gun.
According to Durafly, the company's rendition of the Ryan is specifically identifiable as the YPT-16. The YPT-16 variants were notable because they were the first monoplanes ever ordered by the U.S. Army Air Corps (USAAC). Eventually, more than 1,000 of these airplanes went into service with the USAAC, the U.S. Air Force, and the U.S. Navy.
First Impressions
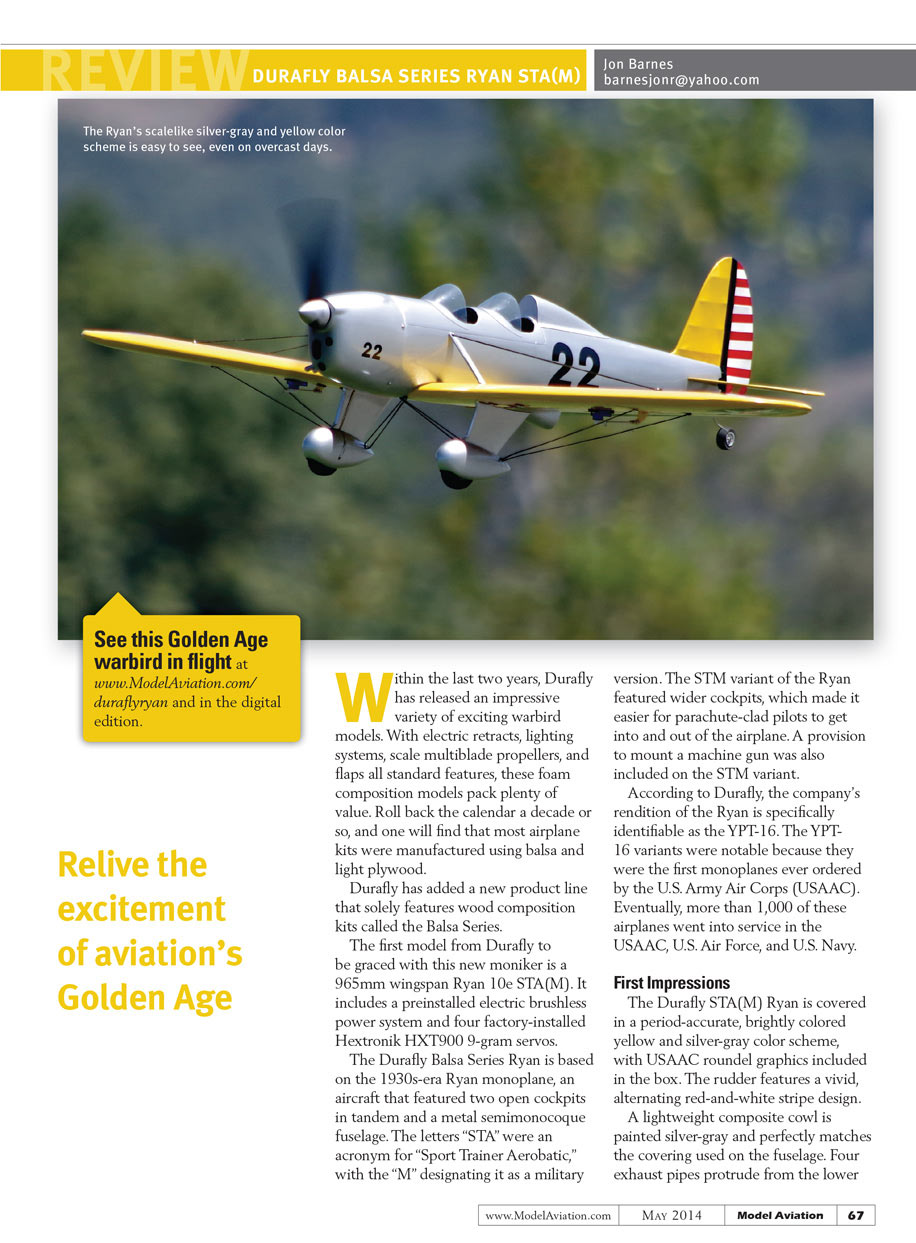
The Durafly STA(M) Ryan is covered in a period-accurate, brightly colored yellow and silver-gray scheme, with USAAC roundel graphics included in the box. The rudder features vivid alternating red-and-white stripes.
A lightweight composite cowl is painted silver-gray and perfectly matches the covering used on the fuselage. Four exhaust pipes protrude from the lower right side of the cowl, a nod to the full-scale airplane’s Menasco air-cooled, four-cylinder inline engine. This model is identified as a Plug and Fly kit, which means the builder must supply a minimum four-channel radio system and a 3S 2,200 mAh LiPo battery. I recommend a different battery and will discuss it later. All servos and the brushless power system are included and preinstalled. The Hextronik HXT900 9-gram servos (four) in this model are dependable and affordable.
Construction
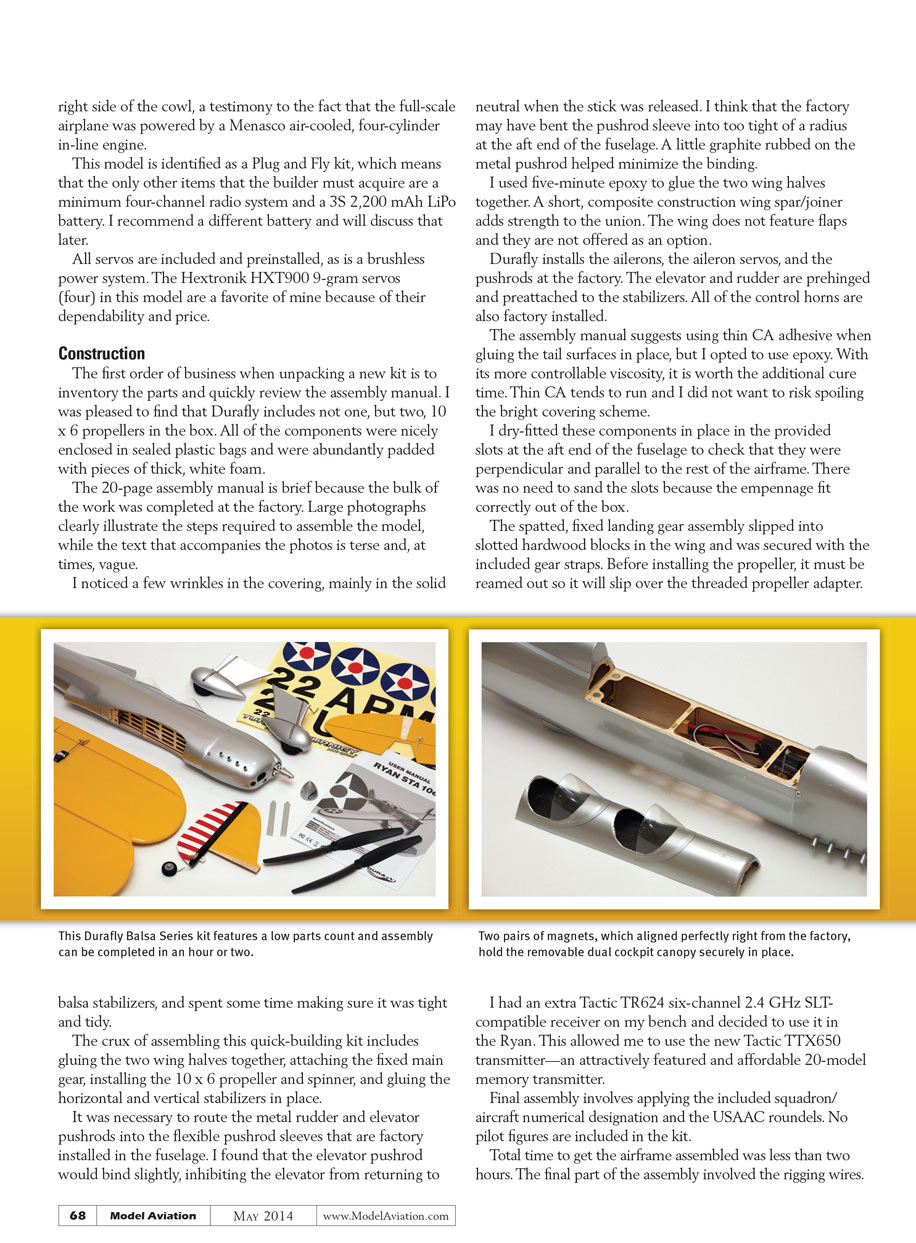
The first order of business when unpacking a new kit is to inventory the parts and give the assembly manual a quick review. Durafly includes two 10 x 6 propellers in the box. All components were enclosed in sealed plastic bags and abundantly padded with thick white foam. The 20-page assembly manual is brief because the bulk of the work was completed at the factory. Large photographs clearly illustrate the steps required to assemble the model, while the accompanying text is terse and, at times, vague. I noticed a few wrinkles in the covering, mainly on the solid balsa stabilizers, and made sure they were tight and tidy.
Key assembly steps include gluing the two wing halves together, attaching the fixed main gear, installing the 10 x 6 propeller and spinner, and gluing the horizontal and vertical stabilizers in place. It is also necessary to route the metal rudder and elevator pushrods into the flexible pushrod sleeves factory-installed in the fuselage. I found the elevator pushrod slightly bound, inhibiting the elevator from returning to neutral when the stick was released—likely because the factory bent the pushrod sleeve into too tight a radius at the aft end of the fuselage. A little graphite rubbed on the metal pushrod helped minimize the binding.
I used five-minute epoxy to glue the two wing halves together. A short composite construction wing spar/joiner adds strength to the union. The wing does not feature flaps and they are not offered as an option.
Durafly installs the ailerons, aileron servos, and pushrods at the factory. The elevator and rudder are prehinged and preattached to the stabilizers. All control horns are factory-installed.
The assembly manual suggests thin CA for gluing the tail surfaces, but I opted to use epoxy for its more controllable viscosity. Thin CA tends to run and risks marring the bright covering scheme.
I dry-fitted the components into the provided slots at the aft end of the fuselage to check alignment. There was no need to sand the slots; the empennage fit correctly out of the box.
The spatted fixed landing gear assembly slips into slotted hardwood blocks in the wing and is secured with the included gear straps. Before installing the propeller, it must be reamed out so it will slip over the threaded propeller adapter.
I had an extra Tactic TR624 six-channel 2.4 GHz SLT-compatible receiver on my bench and used it in the Ryan. This allowed me to use the Tactic TTX650 transmitter—an attractively featured, affordable transmitter with 20-model memory.
Final assembly involves applying the included squadron/aircraft numerical designations and the USAAC roundels. No pilot figures are included in the kit.
Total time to assemble the airframe was less than two hours. The final part of the assembly involved the rigging wires. Durafly includes precut lengths of thin black elastic cordlike material, but the number of pieces did not match the number required to recreate the model shown on the box artwork. I found the included cording cumbersome, so I used slightly thicker, non-elastic cording from a local craft shop.
My technique for installing the rigging: insert the screw into the model and drive it until almost fully seated; loop the cording around the screw; then carefully tighten the screw the rest of the way. A drop or two of medium CA secured the cording to the screw.
Installing the rigging wires doubled the assembly time, but omitting them would be like flying a biplane with only one wing. The rigging is integral to the era and enhances the model’s appearance.
Flying
Durafly provides recommended control throws in the manual. The recommended CG is 55 mm behind the wing’s leading edge. Although the recommended battery is a 3S 2,200 mAh pack, I prefer to keep electric aircraft light and decided to try a 3S 1,800 mAh LiPo.
I hit the recommended CG with no problem, positioning the battery all the way forward in the provided space and securing it with hook-and-loop material.
My Ryan's all-up weight came in at 29 ounces ready to fly—several ounces lighter than Durafly's specification, as expected with the smaller battery. Lighter is generally better for electric flight.
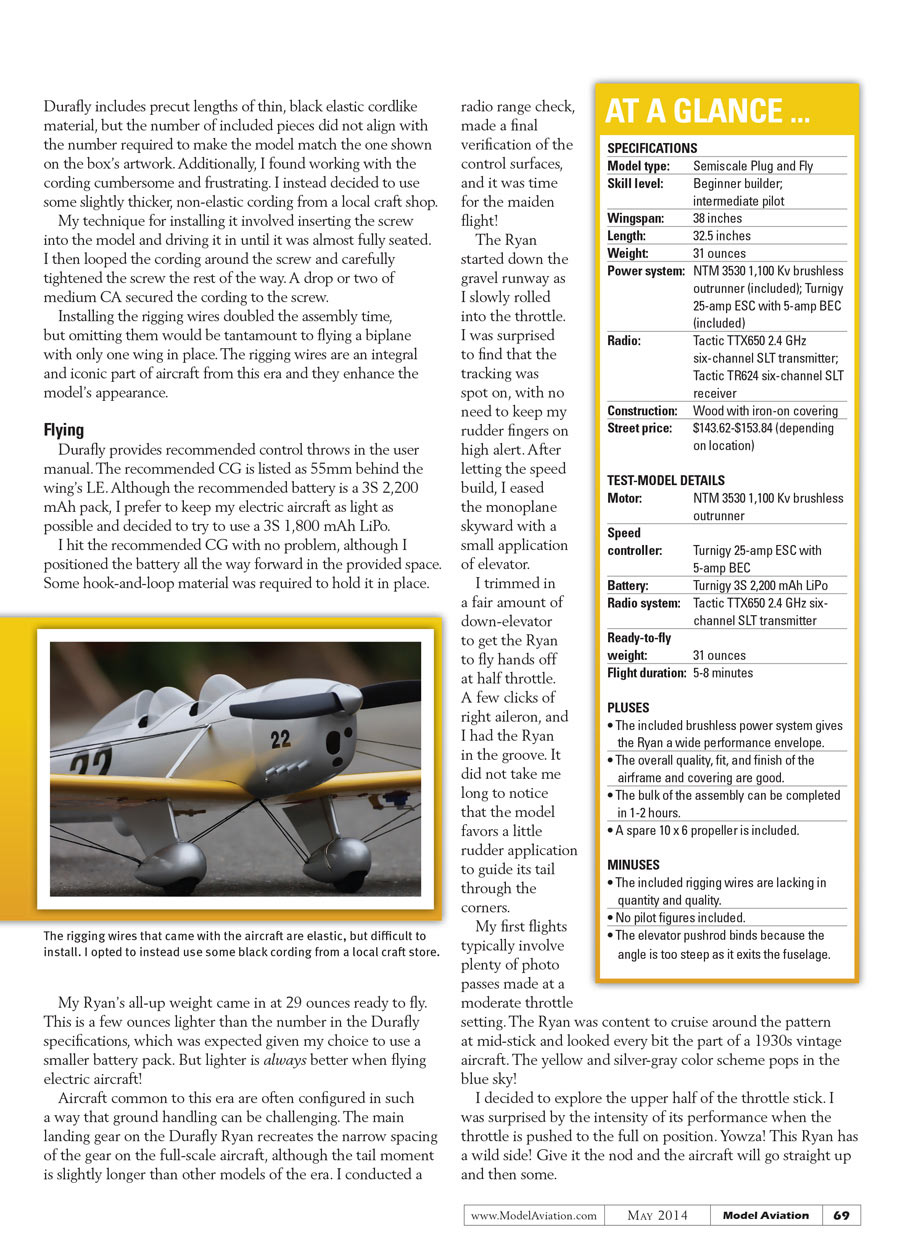
Aircraft of this era often have challenging ground handling. The main landing gear on the Durafly Ryan recreates the full-scale aircraft’s narrow spacing, although the tail moment is slightly longer than on other models of the era. After a radio range check and final control verification, it was time for the maiden flight.
The Ryan started down the gravel runway with smooth tracking and required only a small application of elevator to lift off. I trimmed in a fair amount of down elevator to fly hands-off at half throttle. A few clicks of right aileron got the Ryan well balanced. The model favors a bit of rudder through the corners.
During low-to-mid throttle photo passes, the Ryan cruised the pattern nicely and looked the part of a 1930s vintage aircraft. The yellow and silver-gray color scheme pops against the blue sky.
At full throttle the performance is intense—the NTM 3530 1,100 Kv motor gives the Ryan a wild side. It will climb aggressively and shows strong vertical performance.
Inverted flight was easy, requiring only a touch of elevator to maintain attitude. Knife-edge flight was solid; the motor power compensated well for the modest rudder authority. Durafly appears to have given this STA version enough power to live up to its aerobatic label.
On approach, I initially had too much airspeed and executed a go-around. On the second approach, with slightly less speed, the airplane crossed the numbers at an appropriate speed. Keeping the throttle a few clicks above idle allowed a slow sink to the runway; feathering in up-elevator helped the aircraft settle onto its main gear. Landings are manageable but require the active throttle management typical of taildraggers.
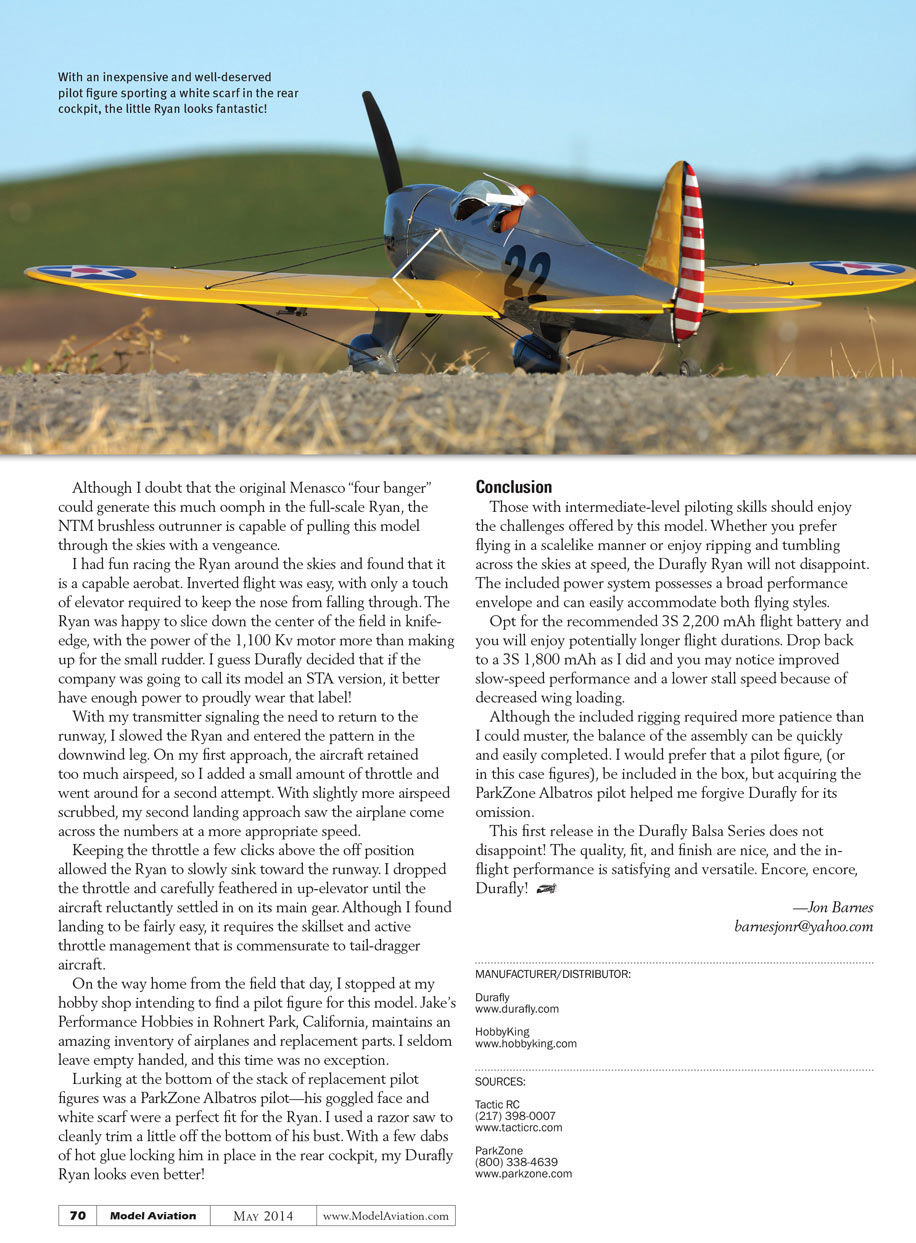
After the flight I found a ParkZone Albatros pilot figure at my hobby shop that fit the Ryan perfectly after a small trim. A few dabs of hot glue secured the figure in the rear cockpit and improved the model’s appearance.
AT A GLANCE ...
SPECIFICATIONS
- Model type: Semiscale Plug and Fly
- Skill level: Beginner builder; intermediate pilot
- Wingspan: 38 inches (965 mm)
- Length: 32.5 inches
- Weight: 31 ounces (manufacturer spec)
- Power system: NTM 3530 1,100 Kv brushless outrunner (included); Turnigy 25-amp ESC with 5-amp BEC (included)
- Radio: Tactic TTX650 2.4 GHz six-channel SLT transmitter; Tactic TR624 six-channel SLT receiver
- Construction: Wood with iron-on covering
- Street price: $143.62–$153.84 (depending on location)
TEST-MODEL DETAILS
- Motor: NTM 3530 1,100 Kv brushless outrunner
- Speed controller: Turnigy 25-amp ESC with 5-amp BEC
- Battery: Turnigy 3S 2,200 mAh LiPo (recommended)
- Radio system: Tactic TTX650 2.4 GHz six-channel SLT transmitter
- Ready-to-fly weight: 31 ounces (manufacturer spec)
- Flight duration: 5–8 minutes
PLUSES
- The included brushless power system gives the Ryan a wide performance envelope.
- Overall quality, fit, and finish of the airframe and covering are good.
- The bulk of the assembly can be completed in 1–2 hours.
- A spare 10 x 6 propeller is included.
MINUSES
- The included rigging wires are lacking in quantity and quality.
- No pilot figures included.
- Elevator pushrod may bind because the exit angle is too steep as it leaves the fuselage.
Although I doubt the original Menasco "four banger" could generate this much oomph on the full-scale Ryan, the NTM brushless outrunner pulls this model through the sky with vigor. The Ryan is a capable aerobat and versatile performer.
—Jon Barnes [email protected]
Conclusion
Pilots with intermediate-level skills should enjoy the Durafly Ryan. Whether you prefer scalelike flying or ripping across the sky at speed, this model will not disappoint. The included power system accommodates both styles.
Opt for the recommended 3S 2,200 mAh battery for potentially longer flight durations. Using a 3S 1,800 mAh pack, as I did, may improve slow-speed performance and lower stall speed due to reduced wing loading.
While the included rigging requires patience, the rest of the assembly is quick and straightforward. I would prefer that pilot figures be included, but adding a ParkZone Albatros figure remedied that omission.
This first release in the Durafly Balsa Series is a success: good quality, fit, and finish, and satisfying, versatile in-flight performance. Encore, Durafly!
MANUFACTURER/DISTRIBUTOR:
- Durafly — www.durafly.com
- HobbyKing — www.hobbyking.com
SOURCES:
- Tactic RC: (217) 398-0007 — www.tacticrc.com
- ParkZone: (800) 338-4639 — www.parkzone.com
Transcribed from original scans by AI. Minor OCR errors may remain.

