
E-flite Edge 540QQ 280 BNF Basic
Chris Mulcahy
I enjoy flying my Giant Scale airplanes. I get a kick out of flying precision-style maneuvers and I have fun flying 3-D. My local flying club is nearly an hour away, and I have to make a day of it to make the trip worthwhile. I hook up my trailer and spend an entire day out at the field.
This is one of the reasons I was excited about the 280-size E-flite Edge 540QQ. Its diminutive size meant that it was ideal for running out to the local park (which is only 5 minutes away) to get in those invaluable flying fixes through the week.
As small as it is, it shouldn't be mistaken as a beginner's airplane or as something closer to a toy than a "real" model. The Edge is capable of extreme flight, and has one of the most ridiculously fun and fast roll rates I've ever seen on a model of this size.
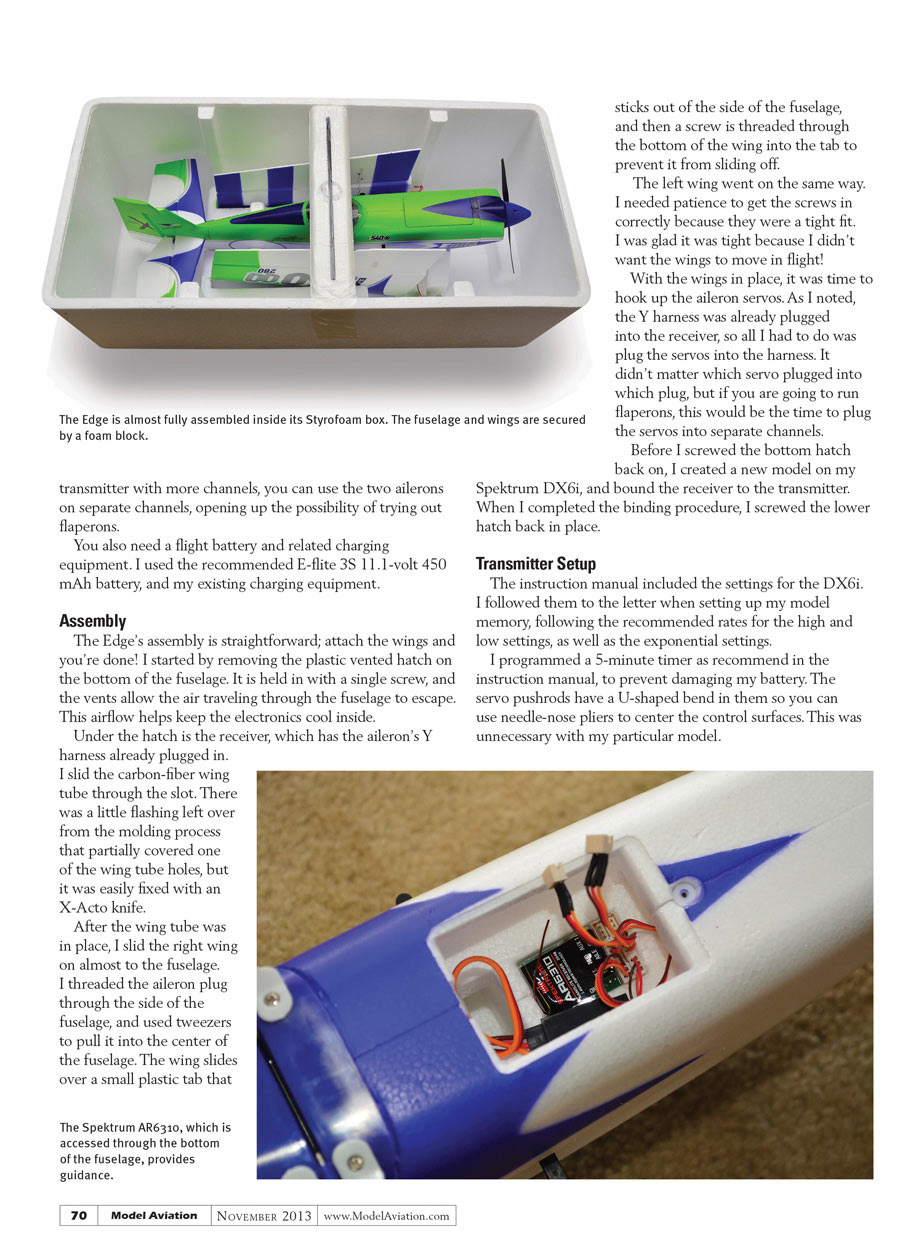
In the Box The Edge comes in a large Styrofoam box, which doubles as its carrying case. The two-piece wings are held in place down the sides of the fuselage, with the carbon wing spar slotted into a foam block across the top. Everything is preassembled, except for the wings, which must be attached.
The Edge comes with four E-flite 3.5-gram digital servos installed—one for each aileron, one for the elevator, and one for the rudder. The motor is an E-flite BL280 1,800 Kv brushless outrunner, with an E-flite 10-amp ESC.
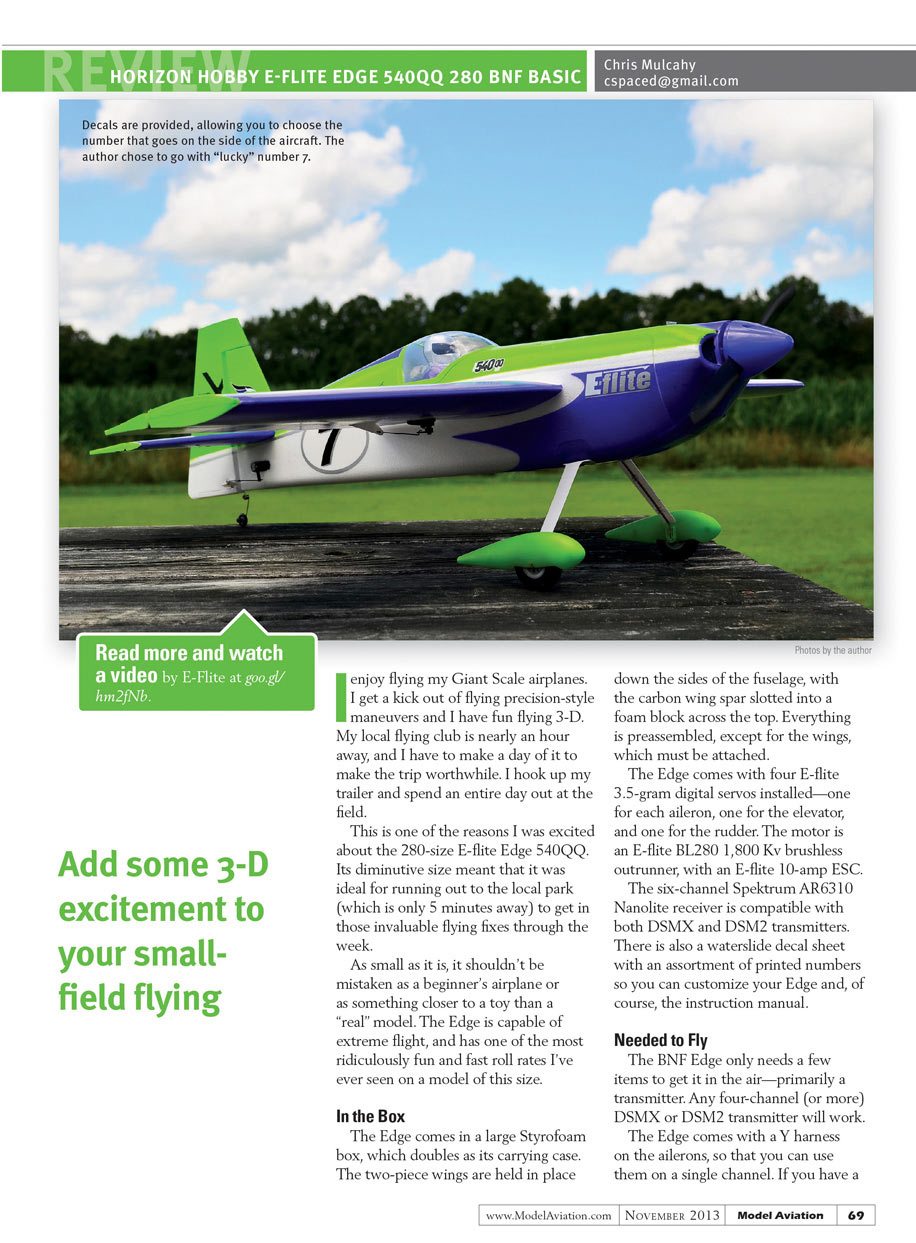
The six-channel Spektrum AR6310 Nanolite receiver is compatible with both DSMX and DSM2 transmitters. There is also a waterslide decal sheet with an assortment of printed numbers so you can customize your Edge and, of course, the instruction manual.
Needed to Fly The BNF Edge only needs a few items to get it in the air—primarily a transmitter. Any four-channel (or more) DSMX or DSM2 transmitter will work.
The Edge comes with a Y harness on the ailerons, so that you can use them on a single channel. If you have a transmitter with more channels, you can use the two ailerons on separate channels, opening up the possibility of trying out flaperons.
You also need a flight battery and related charging equipment. I used the recommended E-flite 3S 11.1-volt 450 mAh battery, and my existing charging equipment.
Assembly
The Edge’s assembly is straightforward; attach the wings and you’re done! I started by removing the plastic vented hatch on the bottom of the fuselage. It is held in with a single screw, and the vents allow the air traveling through the fuselage to escape. This airflow helps keep the electronics cool inside.
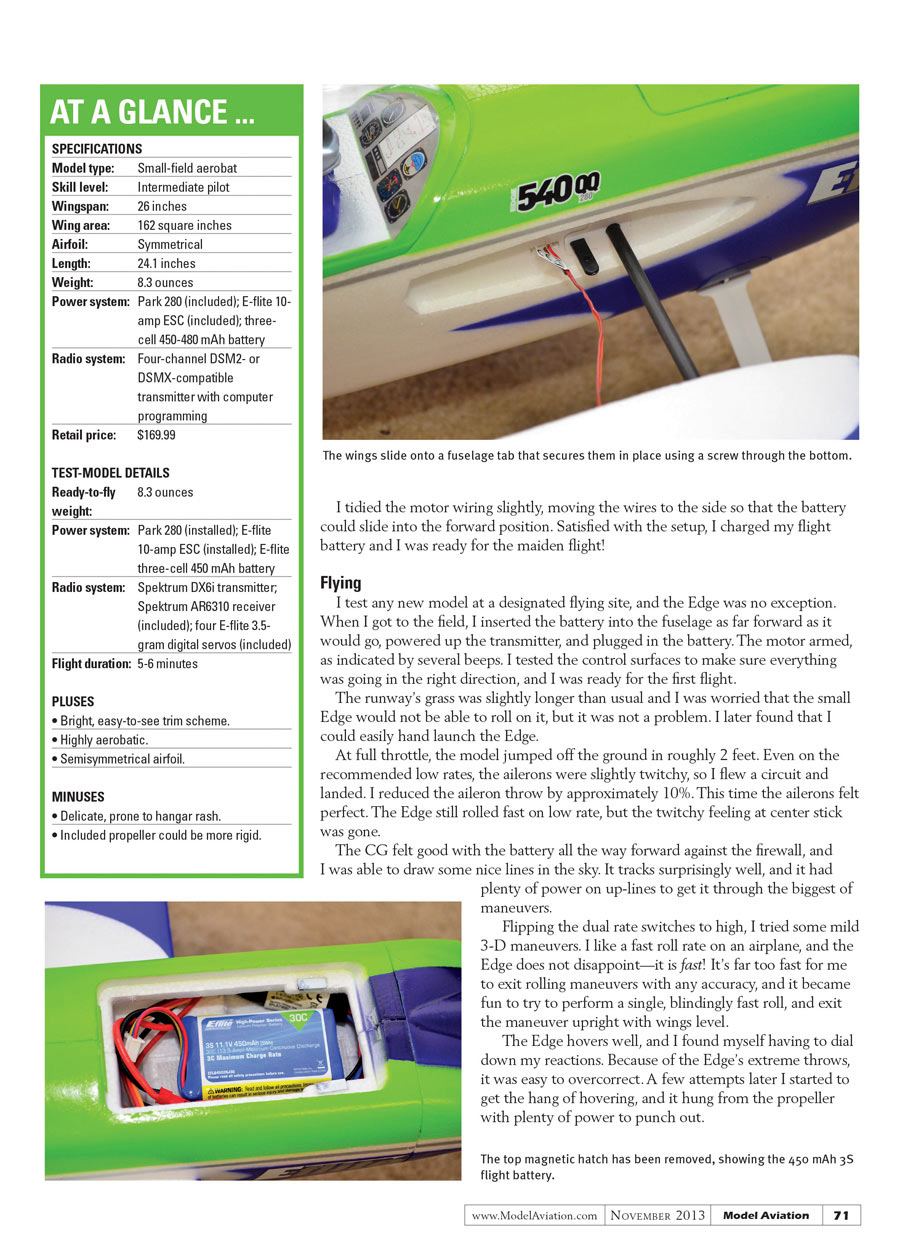
Under the hatch is the receiver, which has the aileron’s Y harness already plugged in.
I slid the carbon-fiber wing tube through the slot. There was a little flashing left over from the molding process that partially covered one of the wing tube holes, but it was easily fixed with an X-Acto knife.
After the wing tube was in place, I slid the right wing on almost to the fuselage. I threaded the aileron plug through the side of the fuselage, and used tweezers to pull it into the center of the fuselage. The wing slides over a small plastic tab that sticks out of the side of the fuselage, and then a screw is threaded through the bottom of the wing into the tab to prevent it from sliding off.
The left wing went on the same way. I needed patience to get the screws in correctly because they were a tight fit. I was glad it was tight because I didn’t want the wings to move in flight!
With the wings in place, it was time to hook up the aileron servos. As I noted, the Y harness was already plugged into the receiver, so all I had to do was plug the servos into the harness. It didn’t matter which servo plugged into which plug, but if you are going to run flaperons, this would be the time to plug the servos into separate channels.
Before I screwed the bottom hatch back on, I created a new model on my Spektrum DX6i, and bound the receiver to the transmitter. When I completed the binding procedure, I screwed the lower hatch back in place.
Transmitter Setup
The instruction manual included the settings for the DX6i. I followed them to the letter when setting up my model memory, following the recommended rates for the high and low settings, as well as the exponential settings.
I programmed a 5-minute timer as recommended in the instruction manual, to prevent damaging my battery. The servo pushrods have a U-shaped bend in them so you can use needle-nose pliers to center the control surfaces. This was unnecessary with my particular model.
I tidied the motor wiring slightly, moving the wires to the side so that the battery could slide into the forward position. Satisfied with the setup, I charged my flight battery and I was ready for the maiden flight!
Flying
I test any new model at a designated flying site, and the Edge was no exception. When I got to the field, I inserted the battery into the fuselage as far forward as it would go, powered up the transmitter, and plugged in the battery. The motor armed, as indicated by several beeps. I tested the control surfaces to make sure everything was going in the right direction, and I was ready for the first flight.
The runway's grass was slightly longer than usual and I was worried that the small Edge would not be able to roll on it, but it was not a problem. I later found that I could easily hand launch the Edge.
At full throttle, the model jumped off the ground in roughly 2 feet. Even on the recommended low rates, the ailerons were slightly twitchy, so I flew a circuit and landed. I reduced the aileron throw by approximately 10%. This time the ailerons felt perfect. The Edge still rolled fast on low rate, but the twitchy feeling at center stick was gone.
The CG felt good with the battery all the way forward against the firewall, and I was able to draw some nice lines in the sky. It tracks surprisingly well, and it had plenty of power on up-lines to get it through the biggest of maneuvers.
Flipping the dual rate switches to high, I tried some mild 3-D maneuvers. I like a fast roll rate on an airplane, and the Edge does not disappoint—it is fast! It's far too fast for me to exit rolling maneuvers with any accuracy, and it became fun to try to perform a single, blindingly fast roll, and exit the maneuver upright with wings level.
The Edge hovers well, and I found myself having to dial down my reactions. Because of the Edge's extreme throws, it was easy to overcorrect. A few attempts later I started to get the hang of hovering, and it hung from the propeller with plenty of power to punch out.
Landings were uneventful. I had to land with a little bit of power on the motor, similar to a larger gas airplane. When the Edge was a few inches off the ground, I chopped the throttle and it settled right in.
That same long grass that it took off from was not as forgiving on landing. It grabbed the gear each time resulting in a nose-over. The Edge needs a smoother runway.
I did find that my fingernails could easily scratch the paint from the foam if I wasn't careful when I removed the battery hatch, but so far that is my only issue.
The Edge is not for beginners, but it can be tame enough for moderate-to-advanced pilots to handle with ease.
—Chris Mulcahy <REDACTED>
Conclusion
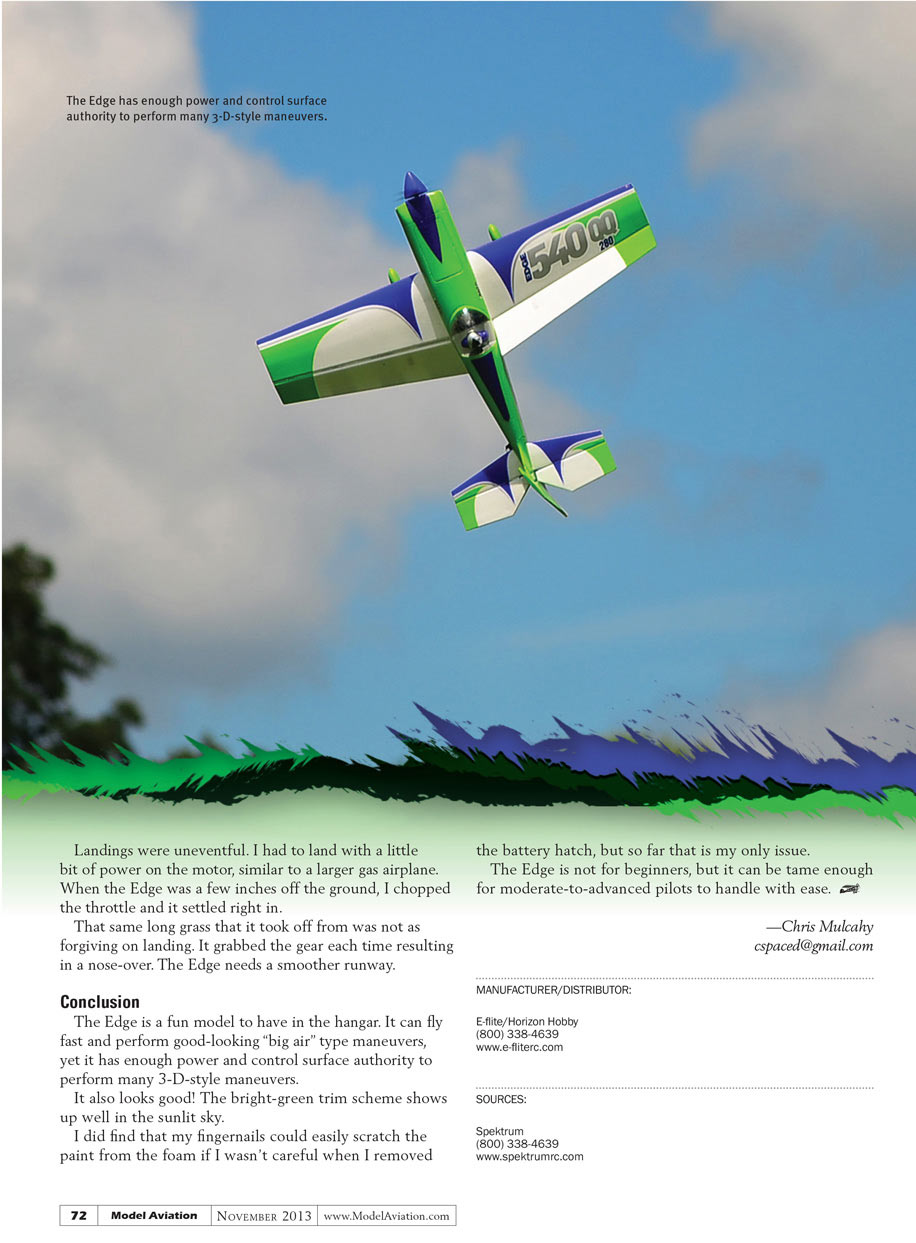
The Edge is a fun model to have in the hangar. It can fly fast and perform good-looking "big air" type maneuvers, yet it has enough power and control surface authority to perform many 3-D-style maneuvers.
It also looks good! The bright-green trim scheme shows up well in the sunlit sky.
MANUFACTURER/DISTRIBUTOR: E-flite/Horizon Hobby (800) 338-4639 www.e-fliterc.com
SOURCES: Spektrum (800) 338-4639 www.spektrumrc.com
Transcribed from original scans by AI. Minor OCR errors may remain.

