
Easy-to-Form Canopies
by Dave Harding
Raise your hand if you wish you could build scale models like Dave Platt. That's probably most of you.
Now raise your hand if you would like to put realistic canopies on your scale or scalelike models. That's probably the same bunch.
Finally, raise your hand if you don't have a vacuum-forming machine. I have just found the audience for this session.
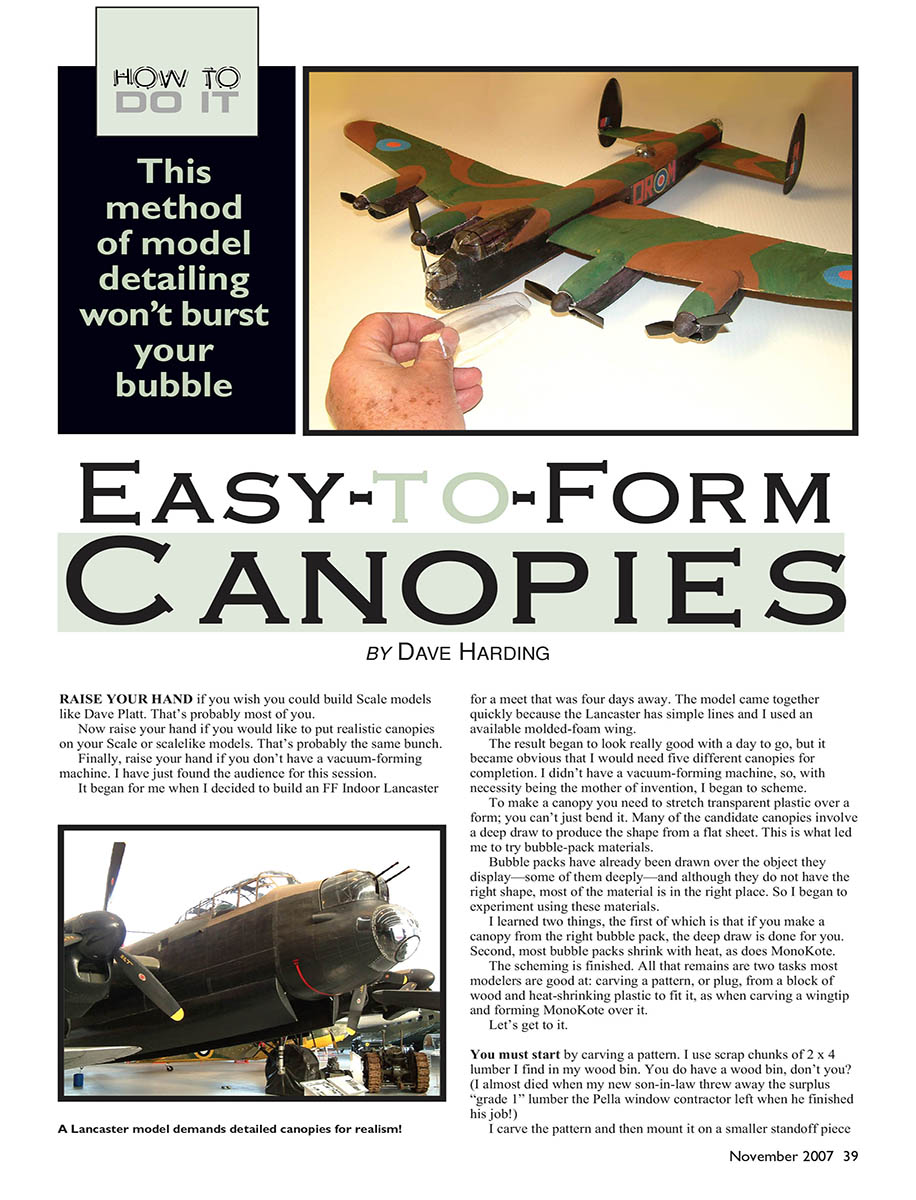
It began for me when I decided to build an FF indoor Lancaster for a meet that was four days away. The model came together quickly because the Lancaster has simple lines and I used an available molded-foam wing. The result began to look really good with a day to go, but it became obvious that I would need five different canopies for completion. I didn't have a vacuum-forming machine, so, with necessity being the mother of invention, I began to scheme.
Concept
To make a canopy you need to stretch transparent plastic over a form; you can't just bend it. Many of the candidate canopies involve a deep draw to produce the shape from a flat sheet. This led me to try bubble-pack materials.
Bubble packs have already been drawn over the object they display—some of them deeply—and although they do not have the right shape, most of the material is in the right place. I began to experiment using these materials and learned two important things:
- If you make a canopy from the right bubble pack, the deep draw is done for you.
- Most bubble packs shrink with heat, as does MonoKote.
The scheming was finished. All that remained were two tasks most modelers are good at:
- Carving a pattern, or plug, from a block of wood.
- Heat-shrinking plastic to fit it, as when carving a wingtip and forming MonoKote over it.
Carving the Pattern
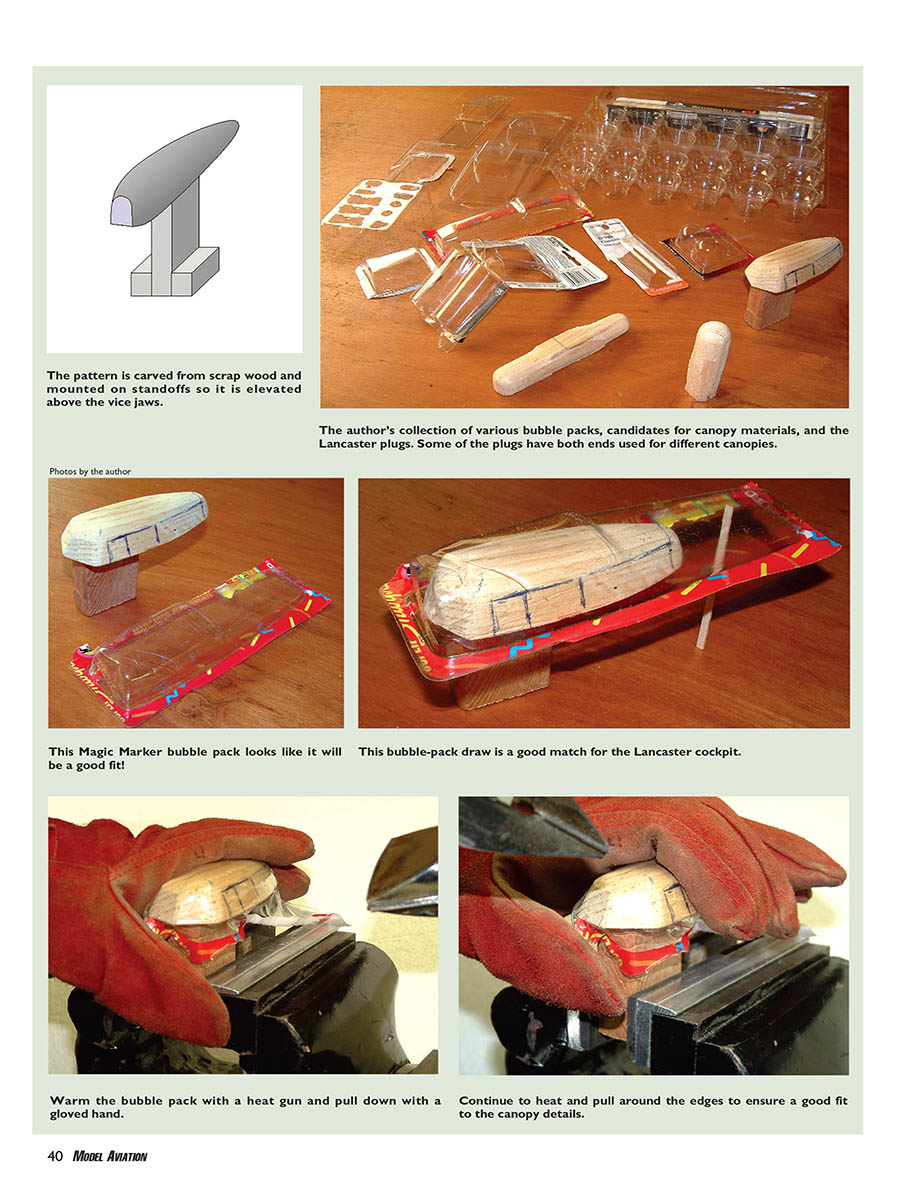
You must start by carving a pattern. I use scrap chunks of 2x4 lumber I find in my wood bin. (You do have a wood bin, don't you?) I carve the pattern and then mount it on a smaller standoff piece so the whole thing can be clamped in a vise. The canopy part stands above the vise jaws. You need access all around the pattern while performing the canopy-forming task.
Selecting the Bubble Pack
The second part is to pick exactly the right bubble pack. It must have approximately the right draw at the deepest part. I have been collecting bubble packs from my purchases for some time now. My assortment is such that I am prepared to make almost any canopy at a moment's notice, without leaving the workshop.
One of the most versatile packs is one from a Magic Marker. Don't worry about creases; they will come out in the forming process.
Forming the Canopy
The process—to pull the pack down on the form while shrinking the surplus material around the edges—includes a heat gun. You will pull the material onto the form with your hand(s) while wearing heavy gloves for protection. It will take some practice, but at some point you will find that it is difficult to get the material to stretch any more but relatively easy to make it shrink. You use your hands in a way that sort of replicates the vacuum force in conventional forming: pull down around the edges and apply the heat to the area that needs to be shaped. Working all around in successive areas, the form will take shape.
Sometimes, with a particularly difficult shape, you may find it helpful to push it with your fingers and hold it while the part cools. Eventually you will have the part—or something close to it. It might take several tries to get a good form as you build your skills.
Results and Tips
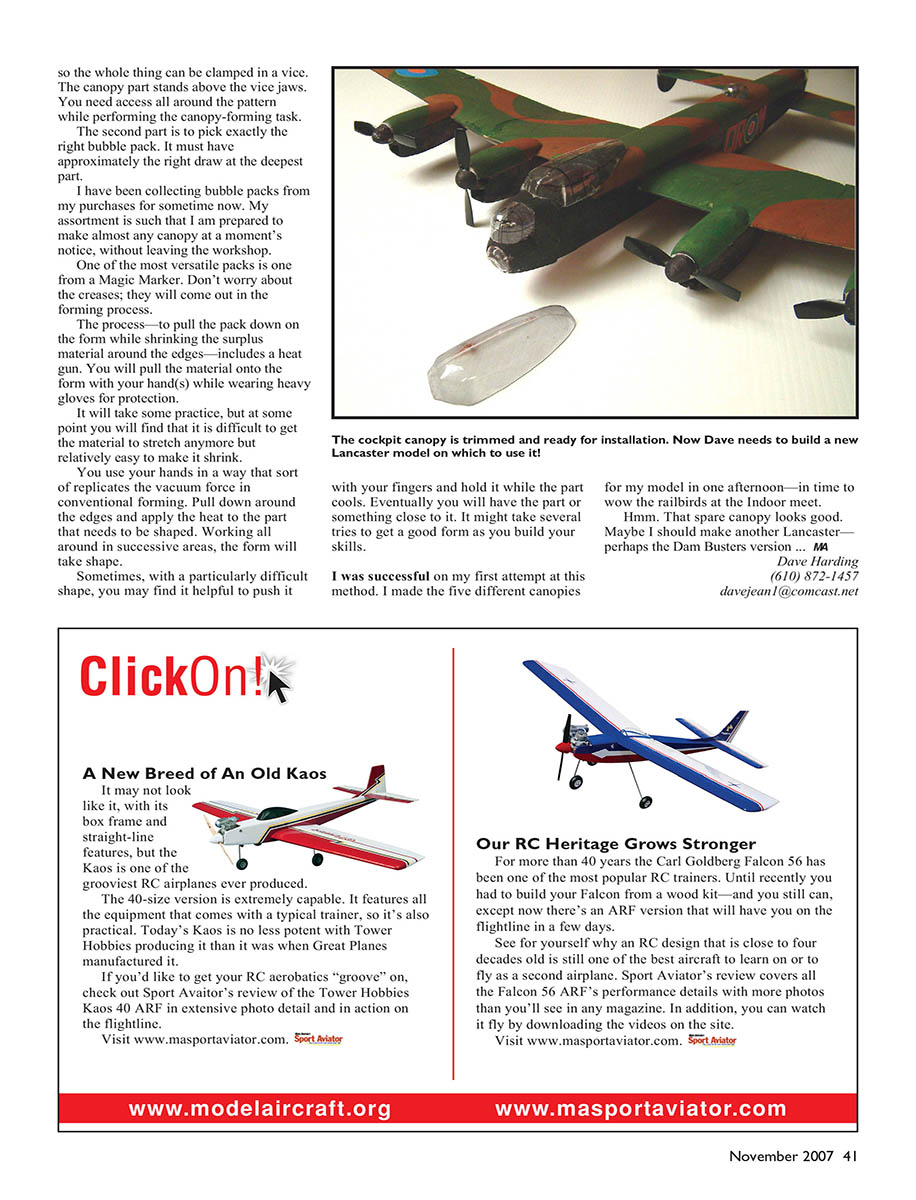
I was successful on my first attempt at this method. I made the five different canopies for my model in one afternoon—in time to wow the railbirds at the indoor meet.
A spare canopy looked good enough to make me consider building another Lancaster—perhaps the Dam Busters version.
Contact
Dave Harding (610) 872-1457 [email protected]
Transcribed from original scans by AI. Minor OCR errors may remain.

