
Eindecker
Dick Sarpolus
Profile Control Line (CL) models have been popular for many years. The construction technique of using one piece of sheet balsa for a fuselage is certainly a quick-and-easy way to build an airplane—as long as you don't mind the appearance of this "slab" fuselage, as compared to the more-conventional built-up style with a cross-section.
Profile models can fly extremely well, and modelers can forgive the less-than-realistic appearance in favor of building ease and speed.
Throughout the years, CL enthusiasts have built models resembling almost every type of full-scale aircraft for sport and aerobatic flying. True scale authenticity is sacrificed to get the model proportions needed for good CL performance.
Probably the most-popular full-scale aircraft to be replicated have been World War II and newer single-seat-fighter types, such as Mustangs, Bearcats, Sabres, etc.
The aircraft least-likely to be CL subjects have been the World War I types. They don't look particularly attractive, aggressive, or capable of active flying performance by today's standards. And it might bother an aviation enthusiast to see a WW I fighter model going through maneuvers that the original aircraft's designer and pilots couldn't even have thought of—much less tried to perform.
In spite of these good reasons not to build a WW I CL model, I decided to try it for fun—and in the all-sheet-balsa Profile 1/2A class, to keep the effort easy and quick.
Also, I had recently done several large Scale World War I designs, so I had three-views and information handy.
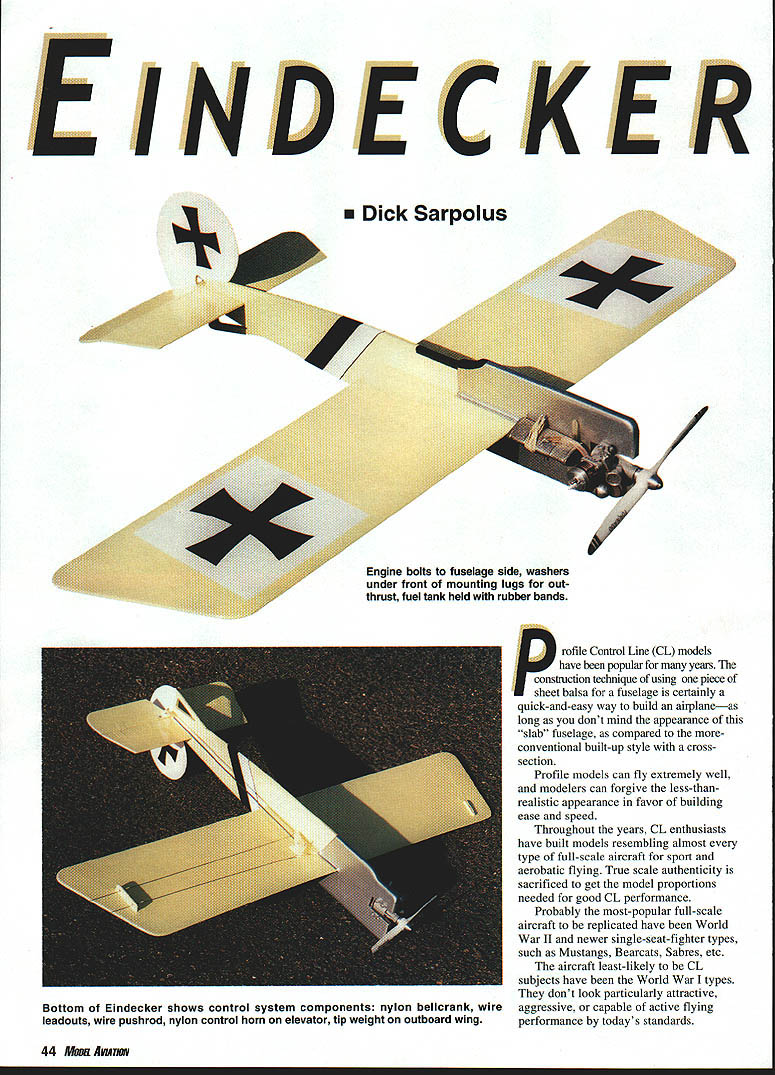
Biplanes would have been too much of a stretch. I looked for WW I monoplane fighters to keep things easy, and the well-known Eindecker was an obvious choice.
1/2A-powered sheet-balsa Profiles are the bargain way to enjoy CL flying; they are easy to build, low-cost, and offer a good bit of aerobatic capability.
Often underestimated, 1/2As with a good engine on the proper aircraft, and flown on 35-foot or longer wire lines, can be flown through most (if not all) of the aerobatic pattern well enough for plenty of flying fun and/or actually learning the pattern maneuvers.
1/2As are light and strong enough to bounce back from most crashes when flown over grass fields, so they are suitable for beginners. Good fliers can use their flying ability for relaxed flying fun.
The Norvel BigMig .061 CL engine is such a pleasure to operate, I looked forward to a new-airplane excuse to get out and fly with it some more.
After spending time at the drafting table, armed with an Eindecker three-view drawing and a good idea of the moments and proportions I wanted, I had the plans for a new project. A wingspan of 29 inches, a wing area of roughly 170 square inches, and an overall length of approximately 22 inches should provide the aerobatic capability I wanted.
Any larger, and the 1/2A engines—except the Norvel—probably wouldn't provide adequate performance; any smaller with less area, and the airframe couldn't handle the maneuvering.
I took many liberties with the basic Eindecker design, but this project wasn't intended for Scale competition. I think the result—trimmed well—will be recognizable as the classic WW I aircraft.
I've made approximately two dozen 1/2A Profiles throughout the years, and one or two had a landing gear. Most flying is over grass fields, and a landing gear on an aircraft this small isn't practical on grass. Hand launches and belly landings are the way to go.
If you must have a landing gear—you fly from a paved or dirt field (crashes will hurt)—the plans show the location of a scale-type gear that could be made from 1/16 wire and light wheels.
WW I aircraft look strange without landing gear, but it doesn't bother me too much.
Eindecker
Full-Size Plans Available—see page 182
Fly this model on 35' .000 wire lines
1/2A control line stunt model Designed and drawn by Dick Sarpolus
The plans show a machine gun and windshield; if you really want to add some scale detailing for fun, do so.
CONSTRUCTION
Construction techniques are standard and well-proven.
A jig saw or band saw makes cutting the parts easy.
Cut the plans to use as templates, or trace the part outlines if you want to save the plans.
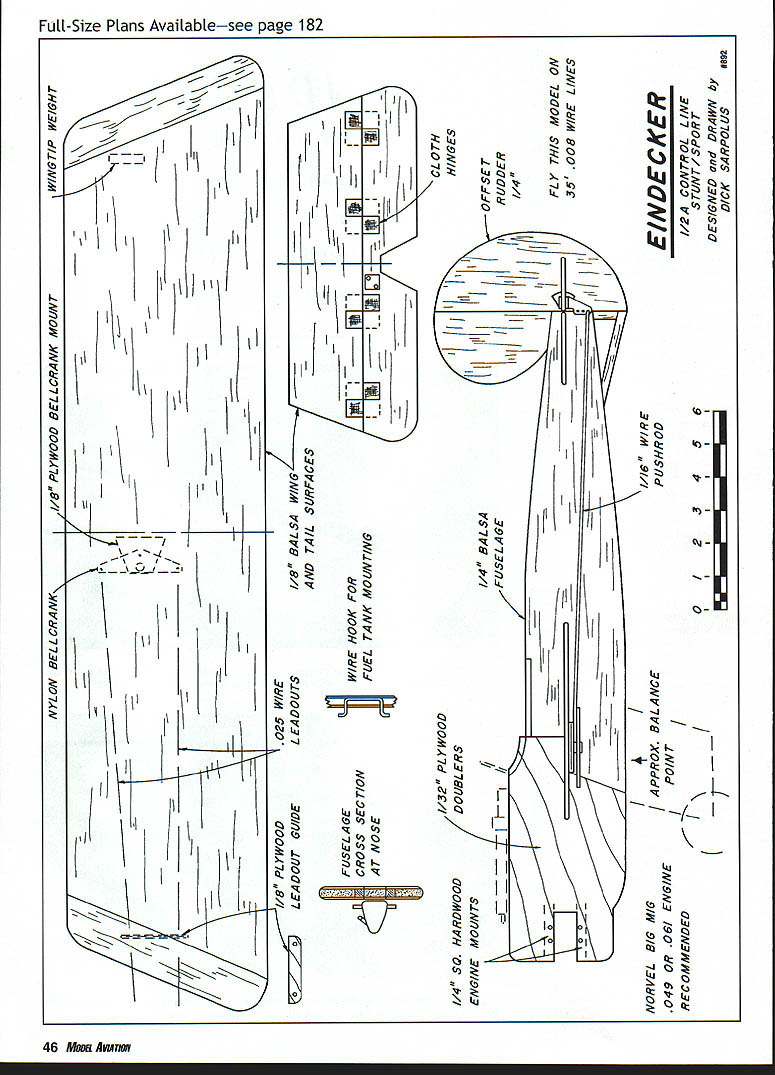
The fuselage is 1/4" balsa, with 1/32" plywood bulkheads over the nose section and 1/4" square hardwood engine mounts inserted into the fuselage.
Wing and tail surfaces are 1/8" balsa. Edge-glue the balsa from whatever widths are available to get the sizes needed; 1/8" may be overkill for the tail surfaces, but it's convenient to use the same-size material.
I don't worry much about wood selection; I'm just trying for medium weight and firmness. Really hard balsa is rugged, but too heavy, and soft balsa breaks too easily.
The models bounce from most crashes into a grass field. When they do break, 5-minute epoxy or CA (cyanoacrylate) instant glue can get them back into the air. Thin glass cloth can reinforce bad breaks, if necessary.
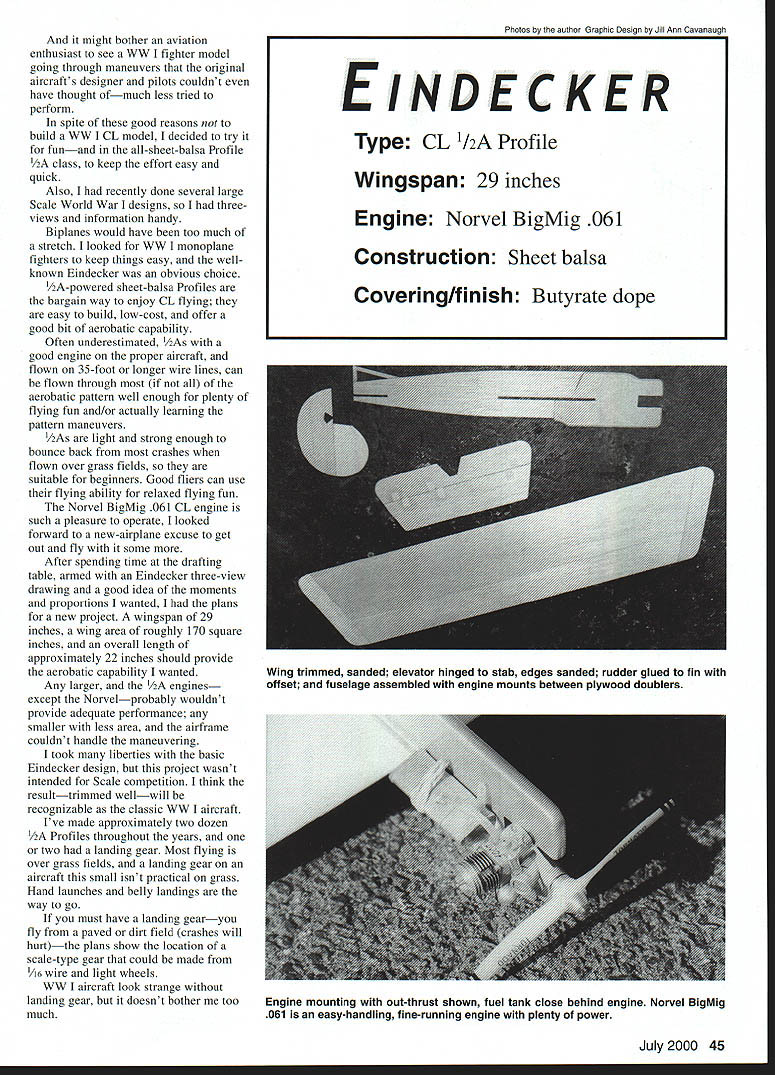
Hardware is the usual stuff:
- molded nylon 10-32 nylon horn
- 1/16" wire pushrod
- .025" wire leadouts
- small metal fuel tank (I still use the Perfect brand of tanks; they've been around for a long time)
The traditional cloth hinges are easy to glue on, they provide free movement, and they last. I use multiple coats of old-fashioned model-airplane glue to attach the hinges, and I assemble the rest of the airframe with 5-minute epoxy.
I form small fillets with my finger for appearance and strength at the fuselage/surface joints.
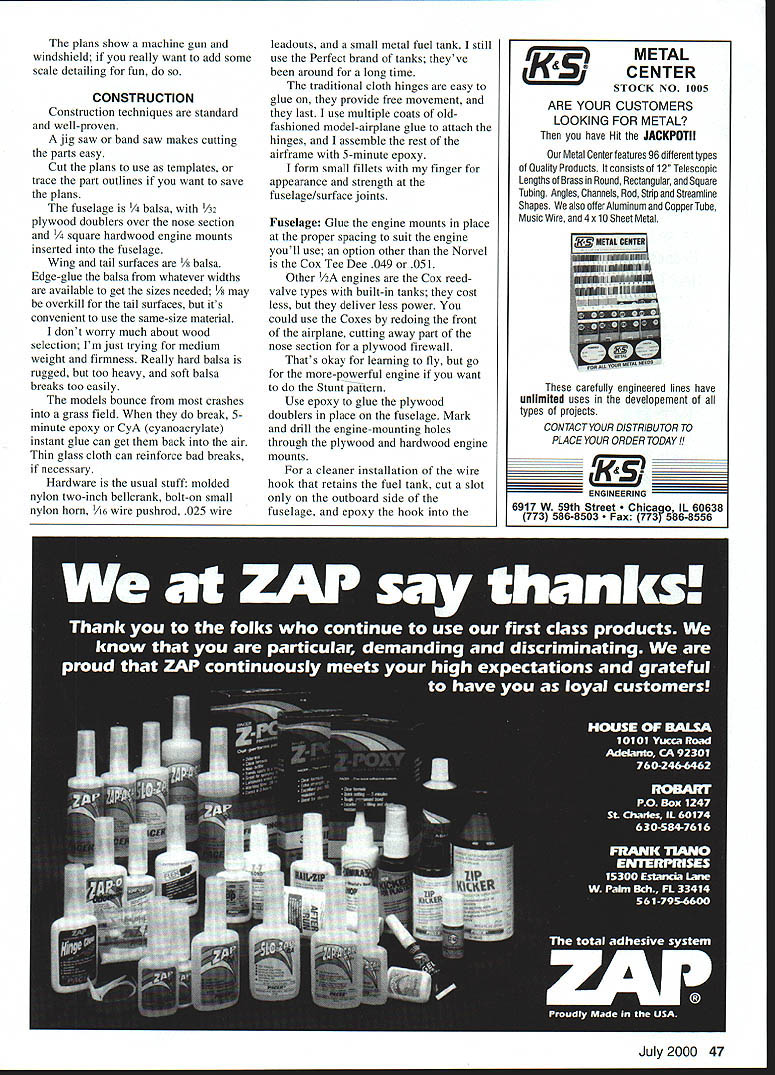
Fuselage Glue the engine mounts in place at the proper spacing to suit the engine you'll use; an option other than the Norvel is the Cox Tee Dee .049 or .051.
Other 1/2A engines are the Cox reed-valve types with built-in tanks; they cost less, but they deliver less power. You could use the Coxes by redoing the front of the airplane, cutting away part of the nose section for a plywood firewall.
That's okay for learning to fly, but go for the more-powerful engine if you want to do the Stunt pattern.
Use epoxy to glue the plywood doublers in place on the fuselage. Mark and drill the engine-mounting holes through the plywood and hardwood engine mounts.
For a cleaner installation of the wire hook that retains the fuel tank, cut a slot only on the outboard side of the fuselage, and epoxy the hook into the fuselage with a small plywood filler piece in the slot.
Wing
The separate tip sections glued on will help the wing resist warps.
Sometimes these thin-sheet-balsa wings do twist and warp after the model is completed. I don't think there is a way to get rid of the twist in a finished model, but the warps don't bother the airplane's flying qualities because the wings are so flexible.
Round the edges of the wing and tail surfaces, and glue the rudder to the fin so it is offset roughly 1/4" toward the outside of the flying circle.
A small piece of lead or wire solder glued to the bottom of the outboard wingtip is the tip weight.
Final Assembly
Slide the wing through the fuselage slot and align it at right angles to the fuselage. I use a few pins to hold the wing in place, tack it with CyA glue, then use epoxy for a strong joint.
Glue the tail surfaces to the fuselage, aligning them with the wing. Be sure to check from the side that the engine thrustline, wing, and stabilizer are parallel.
Add the plywood bellcrank mount, leadout guide, and outboard tip weight. Mount the nylon bellcrank with a small screw.
Bolt a nylon control horn to the elevator and link it to the bellcrank with a 1/16" wire pushrod; it should be made the right length for the elevator and bellcrank to be lined up in their neutral positions, so you get equal elevator movement in both directions.
With everything checked out, the engine, bellcrank, and control horn are removed, to be reinstalled with the leadouts and fuel tank after the model is painted.
Finish
I still use traditional butyrate dope to finish all-balsa projects such as this; it's been working for me for 40 years.
Do not try for a perfect finish, with all signs of the wood grain hidden; it would take too much paint and would add too much weight. I use just enough paint to get a reasonable finish and to protect the wood from spilled fuel and exhaust oil.
After thoroughly final-sanding the bare balsa, apply one coat of sanding sealer, sand it well, then add four or five coats of clear dope, sanding between coats. This goes on quickly and seals the wood enough to accept two or three sprayed-on coats of color.
I brushed white dope on the Eindecker's fin/rudder and insignia locations on the wings, then I masked those areas off and sprayed the rest of the aircraft with cream dope. I did the nose section with aluminum dope, and masked off the fuselage's black and white stripes for painting with a brush. With the paint job finished, I gave the whole airplane a few coats of clear dope for protection and gloss.
I used vinyl computer-cut German WW I insignia crosses, done for me by Vinylwrite Custom Lettering (16043 Tulsa St., Granada Hills CA 91344)—a friendly, helpful outfit.
Preflight: Add the engine, tank, and control hardware, then check for proper balance.
If nose or tail weight is needed, drill a 1/8" hole into the fuselage and glue in a length of heavy solder or a large steel nail. These things usually balance close enough without adding weight.
Use a washer under the front of each engine-mounting lug for several degrees of out-thrust, to assist in keeping the lines tight while flying.
I use .008" or .012" stranded cable flying lines, and I have heard that solid wire lines offer even less drag for better performance. I still use the cable lines to better-resist kinking and eventual breakage.
Flying First flights of the Eindecker showed that it was tail-heavy—too sensitive to the controls.
Adding nose weight improved things greatly, and I plan to add a bit more; handling is a personal thing, and an airplane should be trimmed to suit its pilot.
The first flight ended with an inverted landing, and the second flight ended with a straight-down landing when the engine ran out of fuel at an inopportune time—no damage to the airplane though, flying over grass.
I'm going to try 40- and 45-foot lines; the Norvel engine is so powerful—or my flying ability is slowing down so much that I'd like to get longer lap times. I will also try a larger-diameter and/or lower-pitch prop.
When flying from the necessary hand launch, have the launcher keep the lines tight and point the airplane slightly toward the outside of the flying circle, as he or she takes a few steps forward and releases the airplane in a level position with a forward arm motion.
Adjust the engine before launch, with the airplane held pointing up at a steep angle.
These small, simple aircraft can surprise you with their abilities; try every maneuver you can think of, relax, and enjoy this "direct connection" form of model aviation.
MA
Dick Sarpolus 32 Alameda Ct. Shrewsbury NJ 07702
Transcribed from original scans by AI. Minor OCR errors may remain.

