
Weatronic 2.4 dual FHSS system
Greg Gimlick | [email protected]
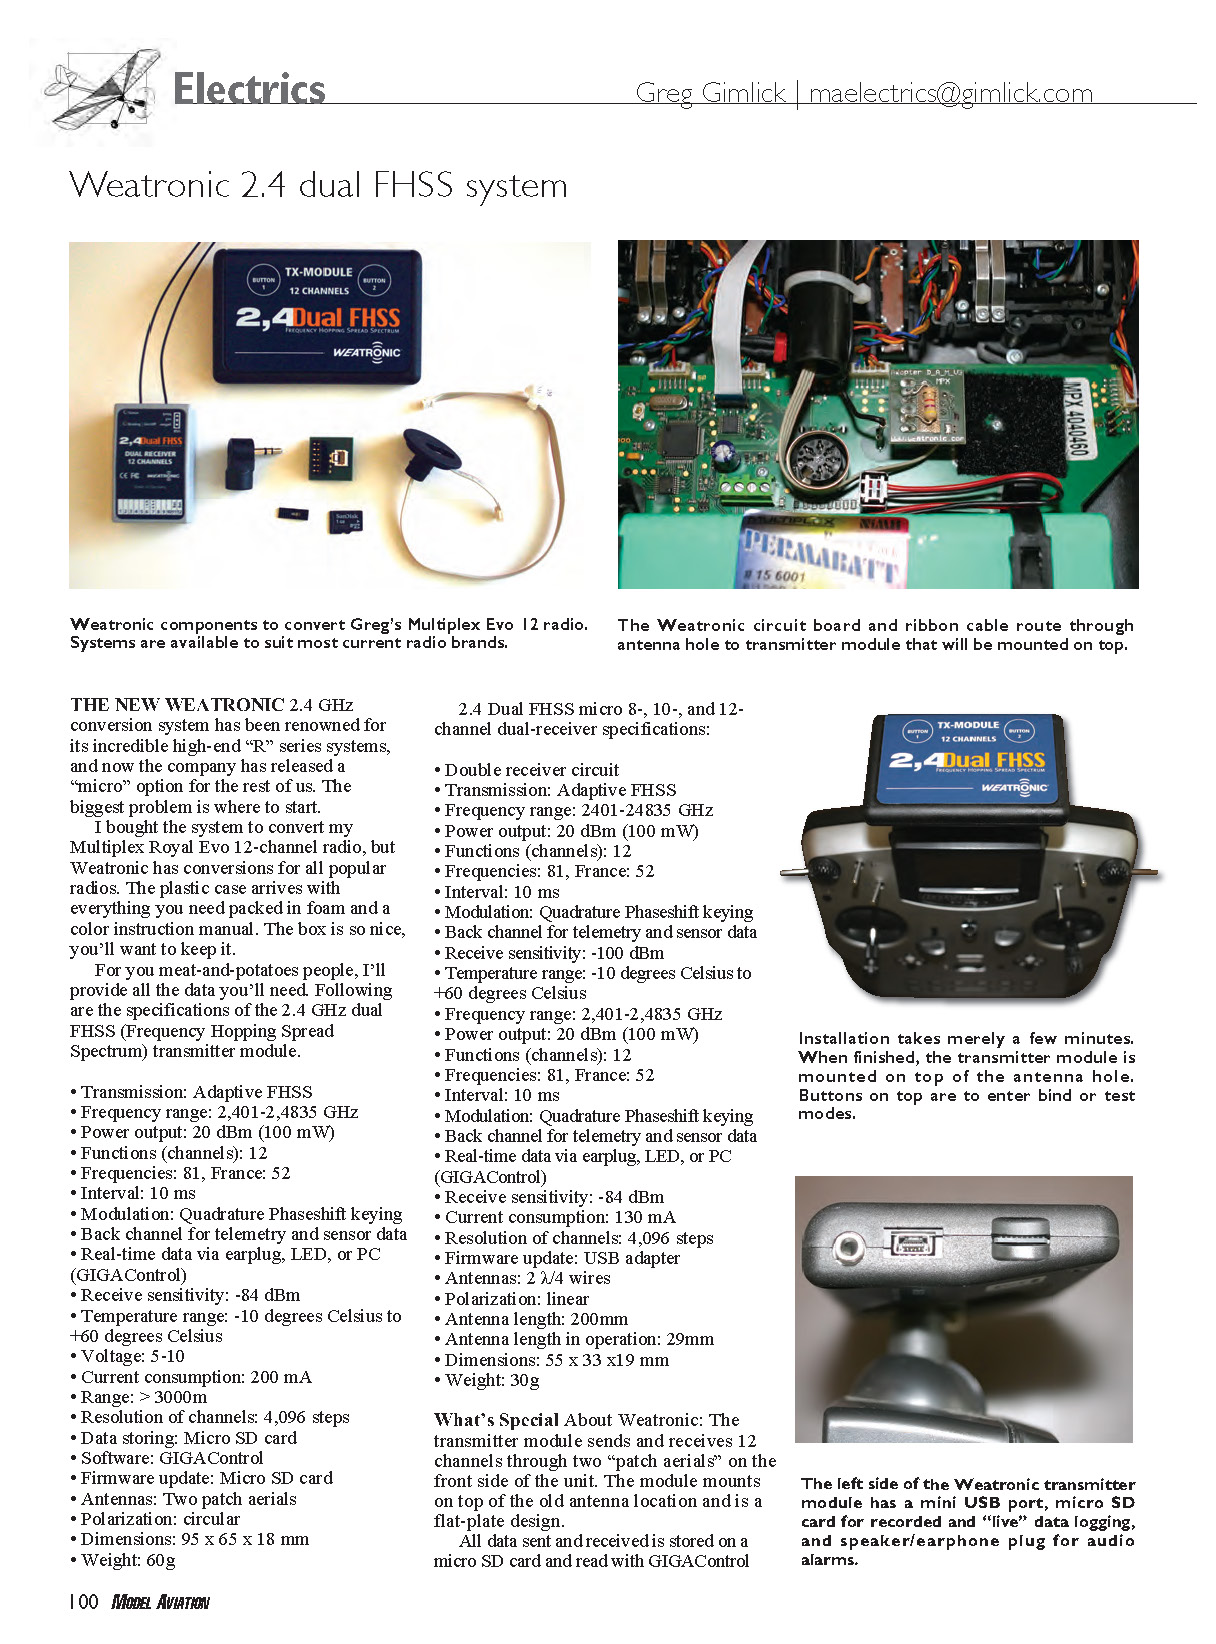
THE NEW WEATRONIC 2.4 GHz conversion system has been renowned for its incredible high-end “R” series systems, and now the company has released a “micro” option for the rest of us. The biggest problem is where to start.
I bought the system to convert my Multiplex Royal Evo 12-channel radio, but Weatronic has conversions for all popular radios. The plastic case arrives with everything you need packed in foam and a color instruction manual. The box is so nice, you’ll want to keep it.
For you meat-and-potatoes people, I’ll provide all the data you’ll need. Following are the specifications of the 2.4 GHz dual FHSS (Frequency Hopping Spread Spectrum) transmitter module.
Transmitter module specifications
- Transmission: Adaptive FHSS
- Frequency range: 2,401–2,483.5 MHz
- Power output: 20 dBm (100 mW)
- Functions (channels): 12
- Number of hopping frequencies: 81 (52 in France)
- Interval (frame rate): 10 ms
- Modulation: Quadrature Phase-Shift Keying (QPSK)
- Back channel for telemetry and sensor data
- Real-time data via earplug (audio), LED, or PC (GIGAControl)
- Receive sensitivity: -84 dBm
- Temperature range: -10 °C to +60 °C
- Voltage: 5–10 V
- Current consumption: 200 mA
- Range: > 3,000 m
- Resolution of channels: 4,096 steps
- Data storing: micro SD card
- Software: GIGAControl
- Firmware update: micro SD card
- Antennas: two patch aerials
- Polarization: circular
- Dimensions: 95 x 65 x 18 mm
- Weight: 60 g
2.4 Dual FHSS micro (8-, 10-, and 12-channel) dual-receiver specifications
- Double receiver circuit
- Transmission: Adaptive FHSS
- Frequency range: 2,401–2,483.5 MHz
- Power output: 20 dBm (100 mW)
- Functions (channels): 12
- Number of hopping frequencies: 81 (52 in France)
- Interval (frame rate): 10 ms
- Modulation: Quadrature Phase-Shift Keying (QPSK)
- Back channel for telemetry and sensor data
- Receive sensitivity: -100 dBm
- Temperature range: -10 °C to +60 °C
- Current consumption: 130 mA
- Resolution of channels: 4,096 steps
- Firmware update: USB adapter
- Antennas: 2 × λ/4 wires
- Polarization: linear
- Antenna length: 200 mm (29 mm in operation)
- Dimensions: 55 x 33 x 19 mm
- Weight: 30 g
What's special about Weatronic
The transmitter module sends and receives up to 12 channels through two patch aerials on the front of the unit. The module mounts on top of the old antenna location and is a flat-plate design. All data sent and received is stored on a micro SD card and can be read with GIGAControl.
GIGAControl provides live display and logging of telemetry, and the unit provides acoustic and visual warnings (earplug/speaker and a red LED) if predefined values for battery voltage, range, or temperature exceed user-defined limits. The system uses adaptive FHSS with up to 81 hopping frequencies. The 10 ms frame rate and 4,096-step resolution are particularly attractive for helicopter pilots and precision setups.
The receiver uses two antenna wires (roughly 200 mm, 29 mm when installed) that can be routed inside or outside the aircraft.
Installation
The transmitter module takes approximately five minutes to hook up. The kit includes a circuit board to plug into the radio’s motherboard and a ribbon cable that goes up through the antenna channel to the module mounted on a disk to fit in the antenna channel. The ribbon is flat against the module, reducing the chance of snagging.
The receiver installs in the model like any other receiver; route the antenna wires appropriately and use the status LEDs on the receiver to verify operation.
Binding procedure
As with any spread-spectrum system, you must bind the receiver to the transmitter. Binding is done with the standard jumper on the receiver:
- Turn on the transmitter and hold down the #2 button until the yellow test LED indicates bind mode.
- Power up the receiver with the bind plug installed and watch the LEDs until they indicate a green condition (binding complete).
- Power everything down, remove the jumper, and you’re ready to fly.
If you have several receivers bound to the transmitter (for different models), you can "quick bind" when changing models:
- Power up the aircraft as usual (without the bind plug installed).
- Briefly press the #2 button on the transmitter module.
- Within a couple of seconds the transmitter finds the stored code for that receiver and the LEDs indicate green — ready to fly. No need to enter the full bind procedure.
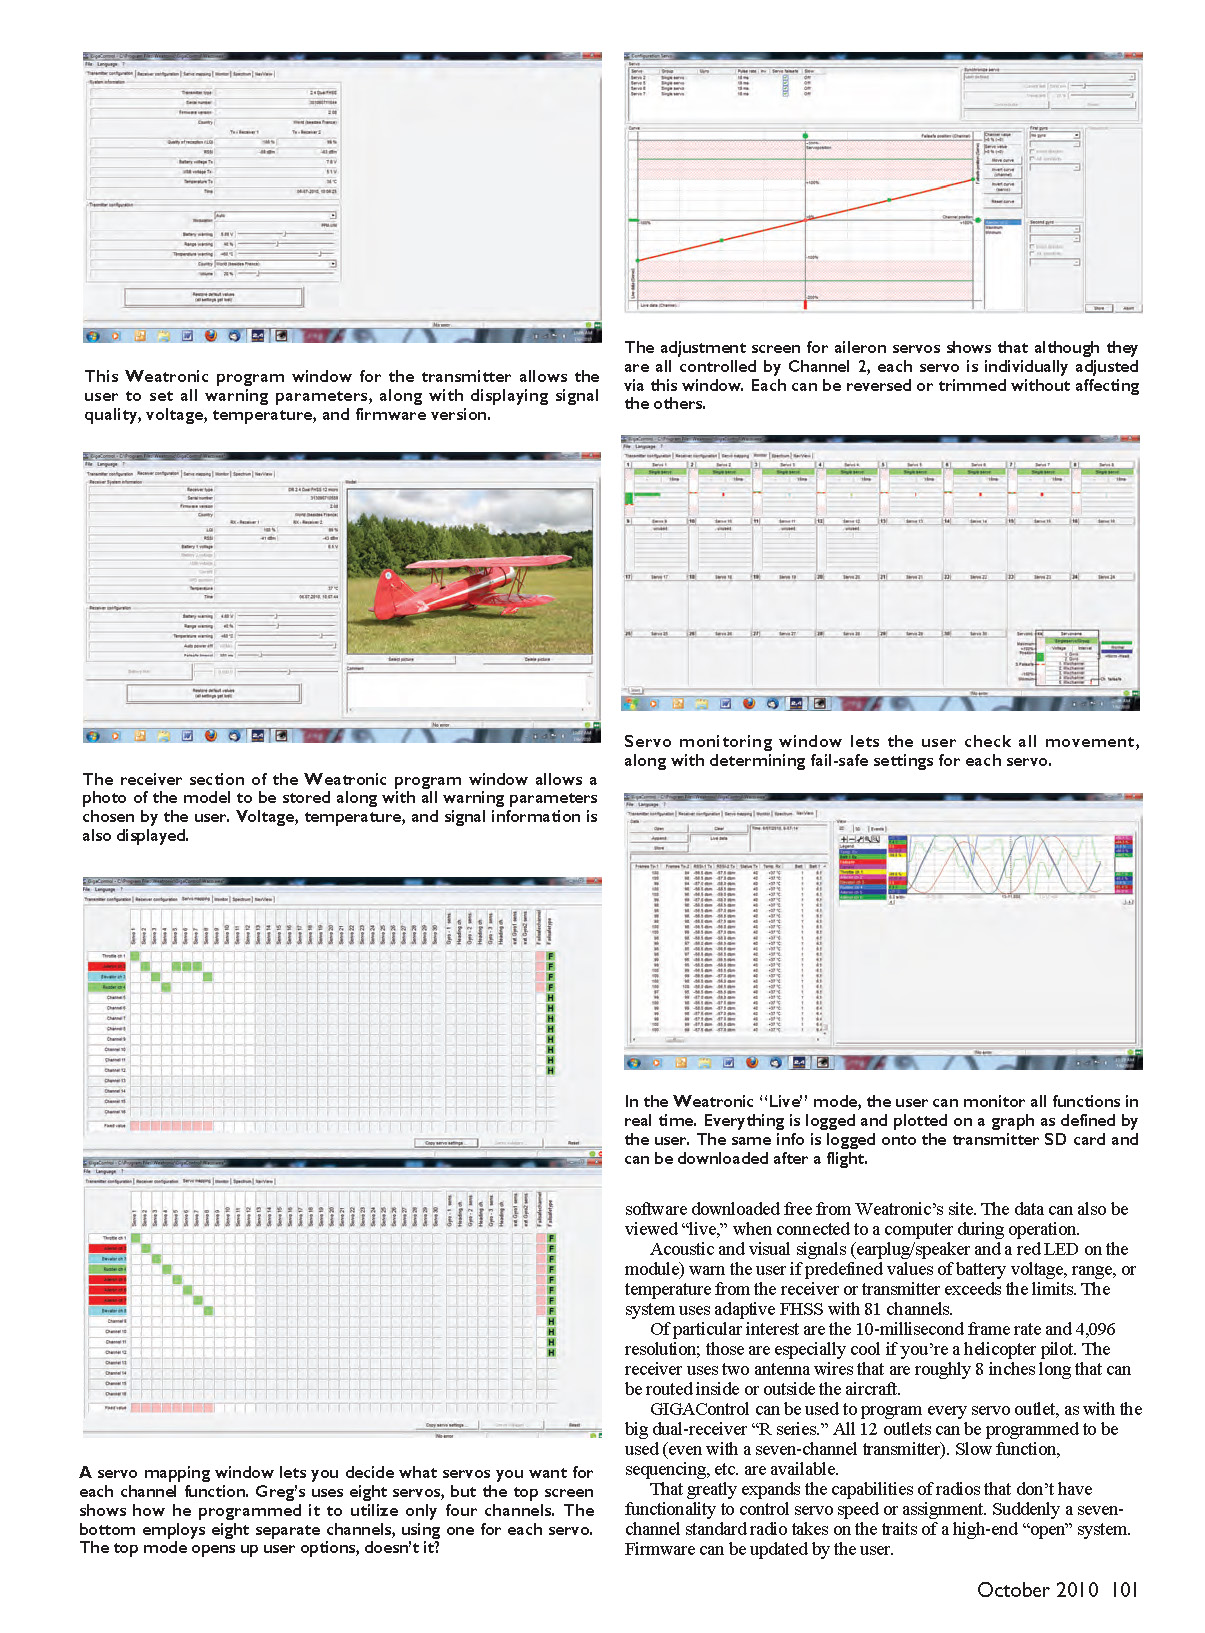
GIGAControl and programming features
GIGAControl is free software from Weatronic and can be used live (connected to a computer) or to read logs from the SD card after a flight. It allows programming of every servo outlet, similar to the high-end dual-receiver "R series." All 12 outputs can be assigned and used even with a seven-channel transmitter.
Features include:
- Assigning multiple servos to one channel and tuning each servo individually in software (no Y-leads required).
- Programming curves, fail-safe positions, servo speed, sequencing (e.g., retracts and gear doors).
- Logging all servo positions (percent travel) and telemetry on the SD card or in real time.
- Viewing receiver temperature, receiver battery voltage, and signal/frame logs to diagnose dropouts or low-voltage events.
- Recording a complete log of frames sent and received on both signals for the entire flight.
- Scanner and monitor modes to view frequencies being used or skipped during operation.
I was unable to swamp the signal even with several other systems, modems, and cordless phones next to the Weatronic radio. The system is robust and offers capabilities previously found only on very expensive radios.
Program magic (practical example)
My test model was a Giant Scale WACO UPF-7 with a servo on each of four ailerons, servos for each elevator half, rudder servo, and throttle/ESC. Normally that would require eight channels, but with Weatronic I used four channels by assigning multiple servos to one channel and adjusting each servo individually in GIGAControl. You can tune travel, set individual fail-safes, slow servos, and sequence functions. All positions and telemetry are logged, so you can review exactly what happened during a flight.
You can also program loss-of-signal fail-safe timing and view a complete frame log to analyze signal performance.
Conclusion
I’ve only scratched the surface of this system and am eager to test it further. It’s worth a look if you’re shopping for a new system, and the price is in line with other conversion options on the market. So far, I’m sold.
Sources:
- Weatronic USA
- (503) 543-3037
- www.weatronic-usa.com
Transcribed from original scans by AI. Minor OCR errors may remain.

