
ESC wiring
Greg Gimlick | [email protected]
TAKING OFF: I hope you have a warm shop and are spending time in it getting your creations ready to fly when the weather breaks. Don’t forget to share photos and information so I can pass it on to others.
Do you have a cool way of doing something that might be of interest? I’m always looking for tips and tricks to share, so don’t be shy. Email me with the details and photos.
Let’s continue down the path of figuring out problems and look at some more things that can give you nightmares if you’re not careful.
ESC Wiring: I’m going to start with my usual disclaimer: I am not an electrical engineer! This information is meant for the everyday flier who is trying to keep from ruining his or her equipment. It is gleaned from information I received from engineers who design speed controls for various manufacturers. I’ve tried to keep it accurate and put it in layman’s terms. Many thanks to Doug Ingraham for helping me work through this debate. Doug has been designing some of the top speed controls and chargers on the market since I entered electrics 20 years ago. He tolerates my silly questions and puts things in plain language for me.
The main question I want to address is: Is it better to lengthen the wires from the battery to the ESC or to lengthen the wires from the ESC to the motor? The online forums are full of ideas, opinions, conjecture, and debate about this question. Forums have done more to confuse the issue than to answer the question.
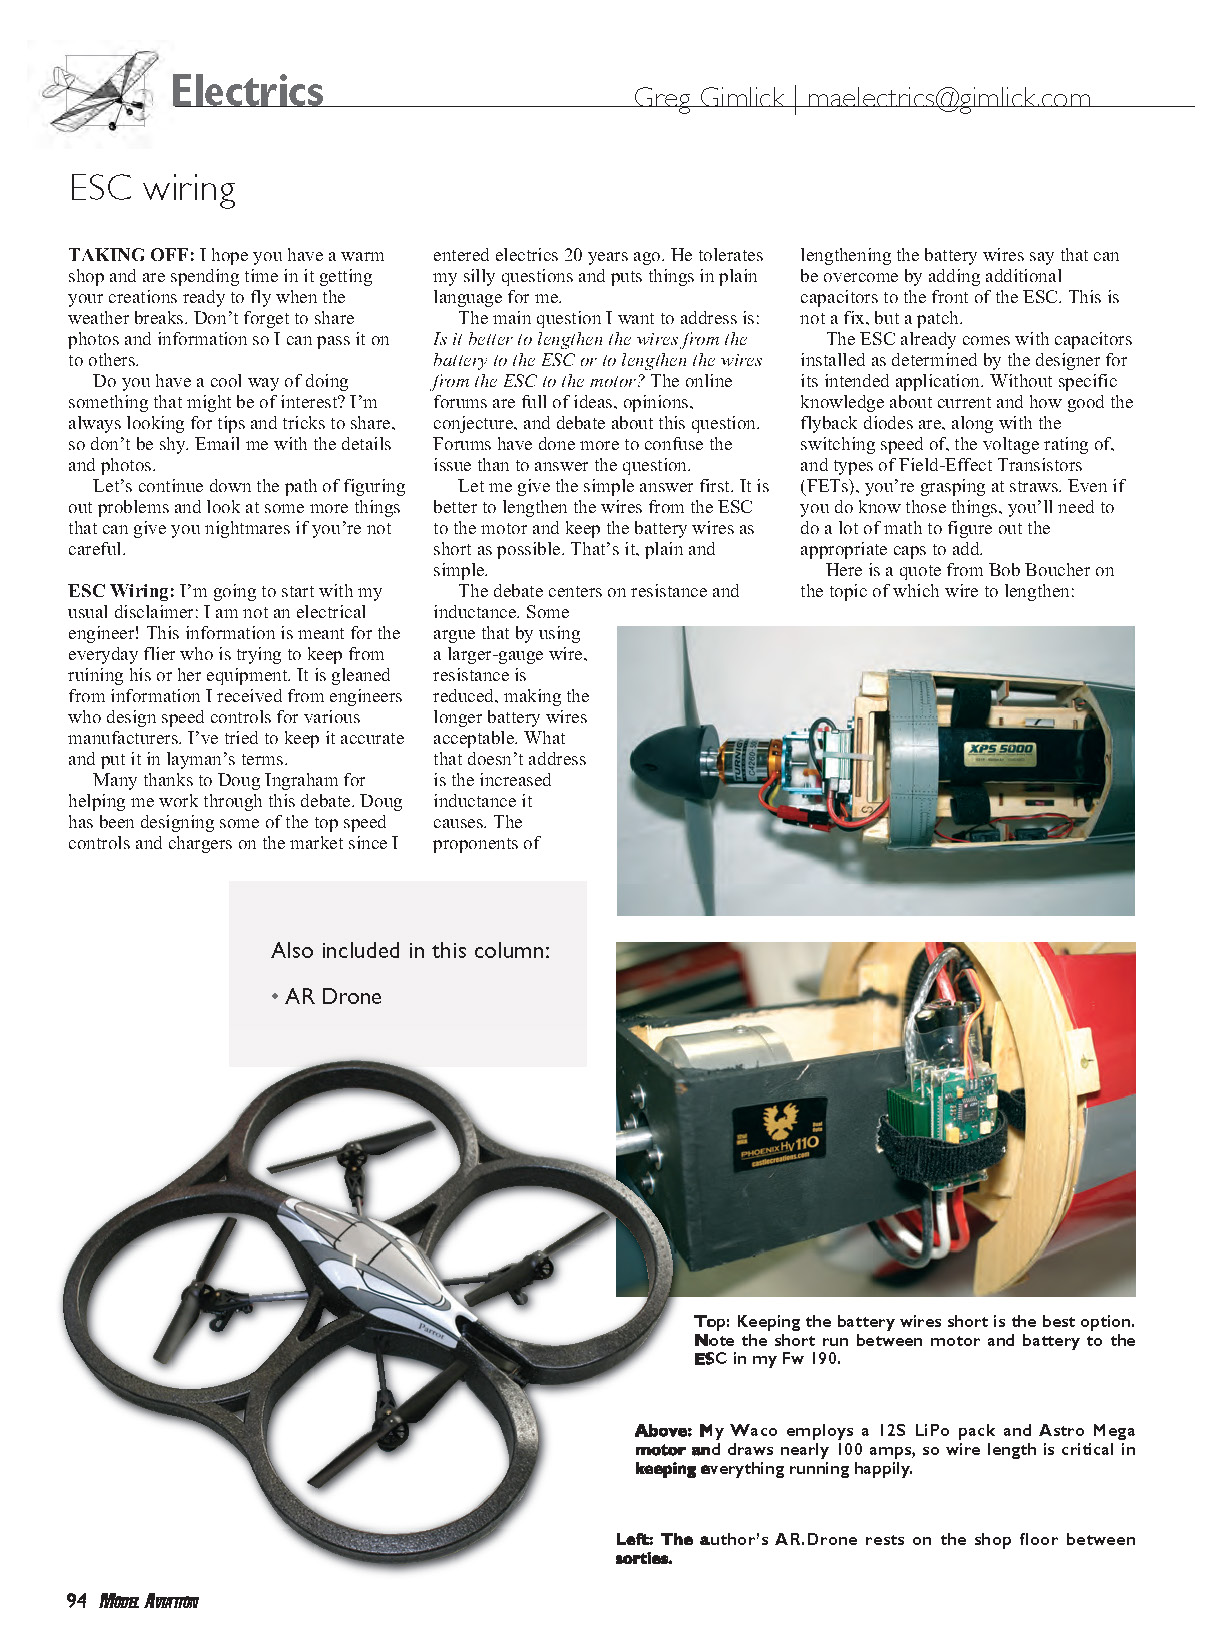
Let me give the simple answer first. It is better to lengthen the wires from the ESC to the motor and keep the battery wires as short as possible. That’s it, plain and simple.
The debate centers on resistance and inductance. Some argue that by using a larger-gauge wire, resistance is reduced, making longer battery wires acceptable. What that doesn’t address is the increased inductance this causes. The proponents of lengthening the battery wires say that can be overcome by adding additional capacitors to the front of the ESC. This is not a fix, but a patch.
The ESC already comes with capacitors installed as determined by the designer for its intended application. Without specific knowledge about current, how good the flyback diodes are, the switching speed, the voltage rating, and the types of Field-Effect Transistors (FETs), you’re grasping at straws. Even if you do know those things, you’ll need to do a lot of math to figure out the appropriate capacitors to add.
Here is a quote from Bob Boucher on the topic of which wire to lengthen:
Bob Boucher:
- Wire resistance may rob you of a bit of power but will not destroy your speed control or motor.
- Wire inductance will not damage your motor, nor will you be able to detect any effect even with 100 feet of wire.
- Wire inductance will kill the MOSFETs (metal-oxide semiconductor field-effect transistors) in your control and may even blow the caps.
"I will repeat the answer previously given. I hope you heed some sound advice based on theory and practice. I've been a design engineer and manufacturer of motors and controls for over 30 years. You must keep battery wires as short as practical. Short means 1 foot or less, brushed or brushless, [it] makes no difference."
Bob is comparing inductance in the motor-to-ESC wire to inductance in the ESC-to-battery wire. Bob is better known as "AstroBob," former owner of AstroFlight and holder of a patent on electric flight. He knows his stuff, so I listen.
Books could be written about the science behind this, but I think you get the idea. If it's possible, always lengthen the wires from the motor to the ESC. The best possible solution, of course, is to keep all wires as short as possible, but we know that's not always easy when you're doing that special scale project.
Thanks to the people at AstroFlight, Castle Creations, Schulze Elektronik, and Doug Ingraham for the help.
AR.Drone
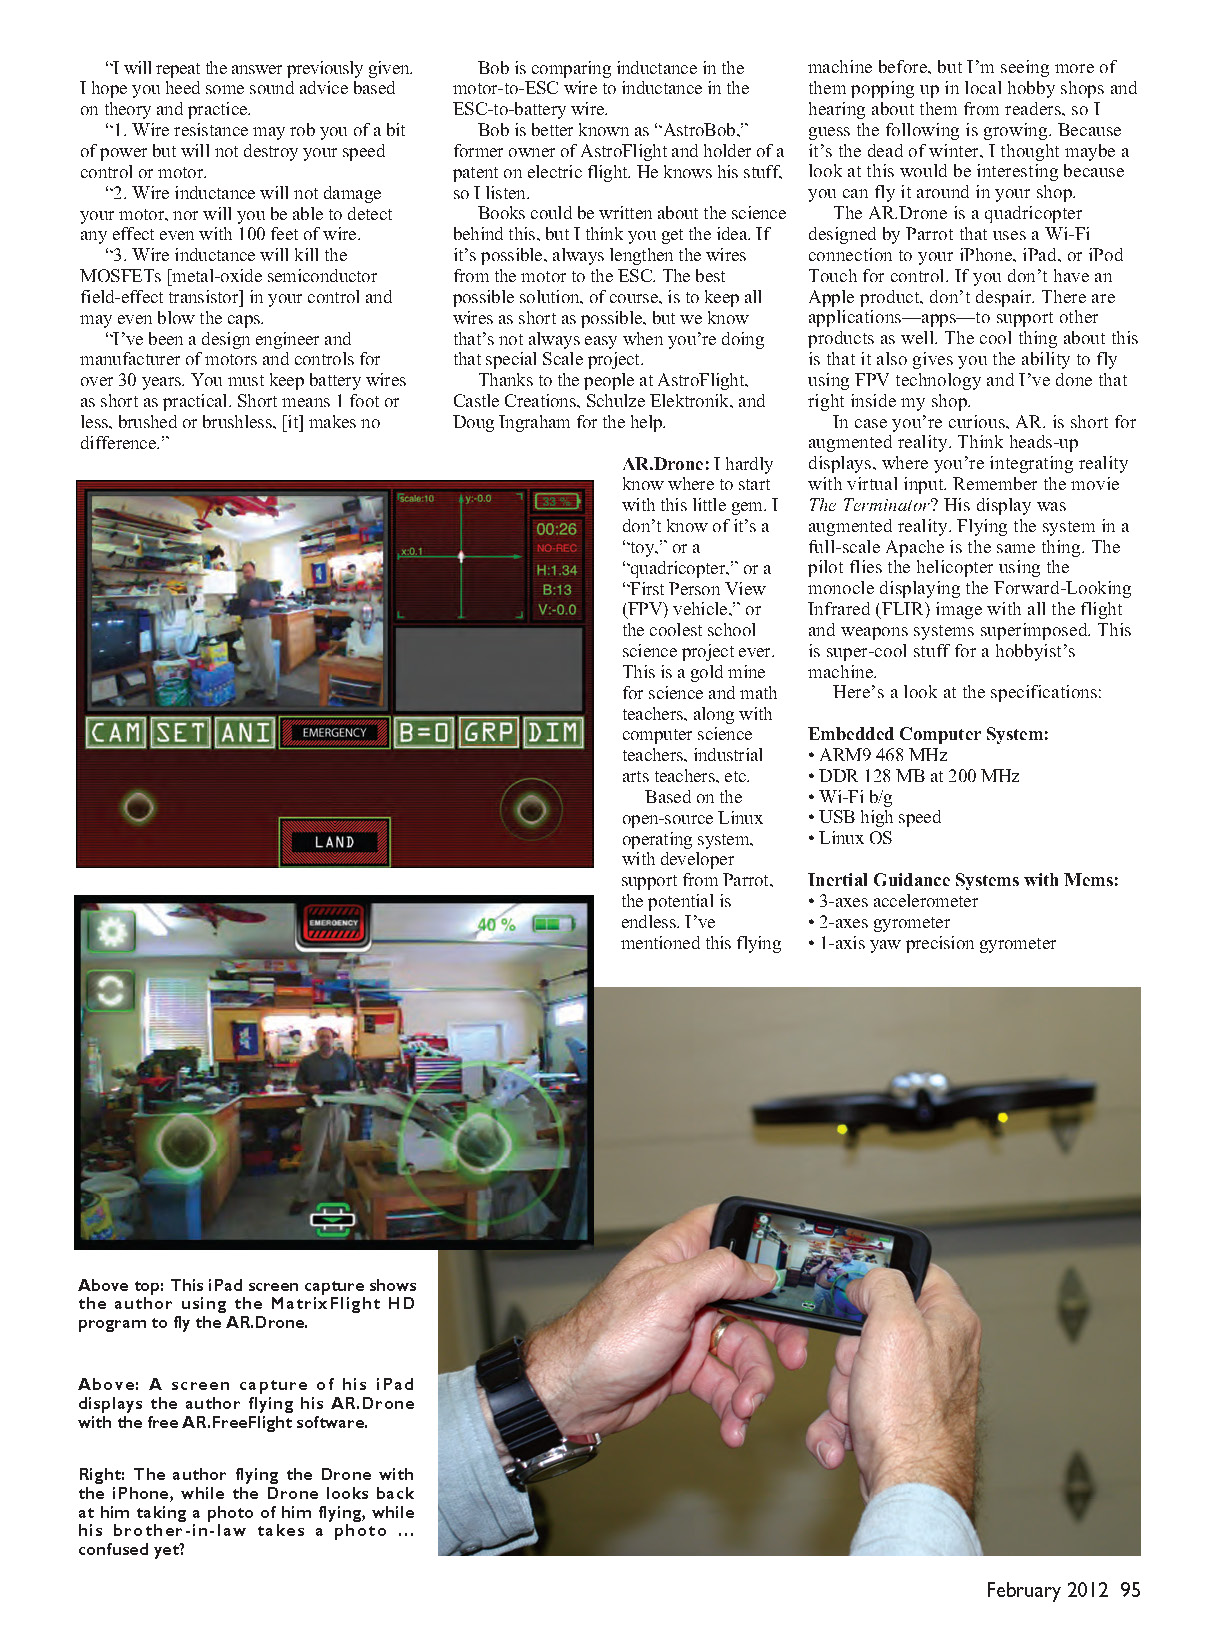
I hardly know where to start with this little gem. I don't know if it's a "toy," a "quadcopter," a "First Person View (FPV) vehicle," or the coolest school science project ever. This is a gold mine for science and math teachers, along with computer science teachers, industrial arts teachers, etc.
Based on the open-source Linux operating system, with developer support from Parrot, the potential is endless. I've mentioned this flying machine before, but I'm seeing more of them popping up in local hobby shops and hearing about them from readers, so I guess the following is growing. Because it's the dead of winter, I thought maybe a look at this would be interesting because you can fly it around in your shop.
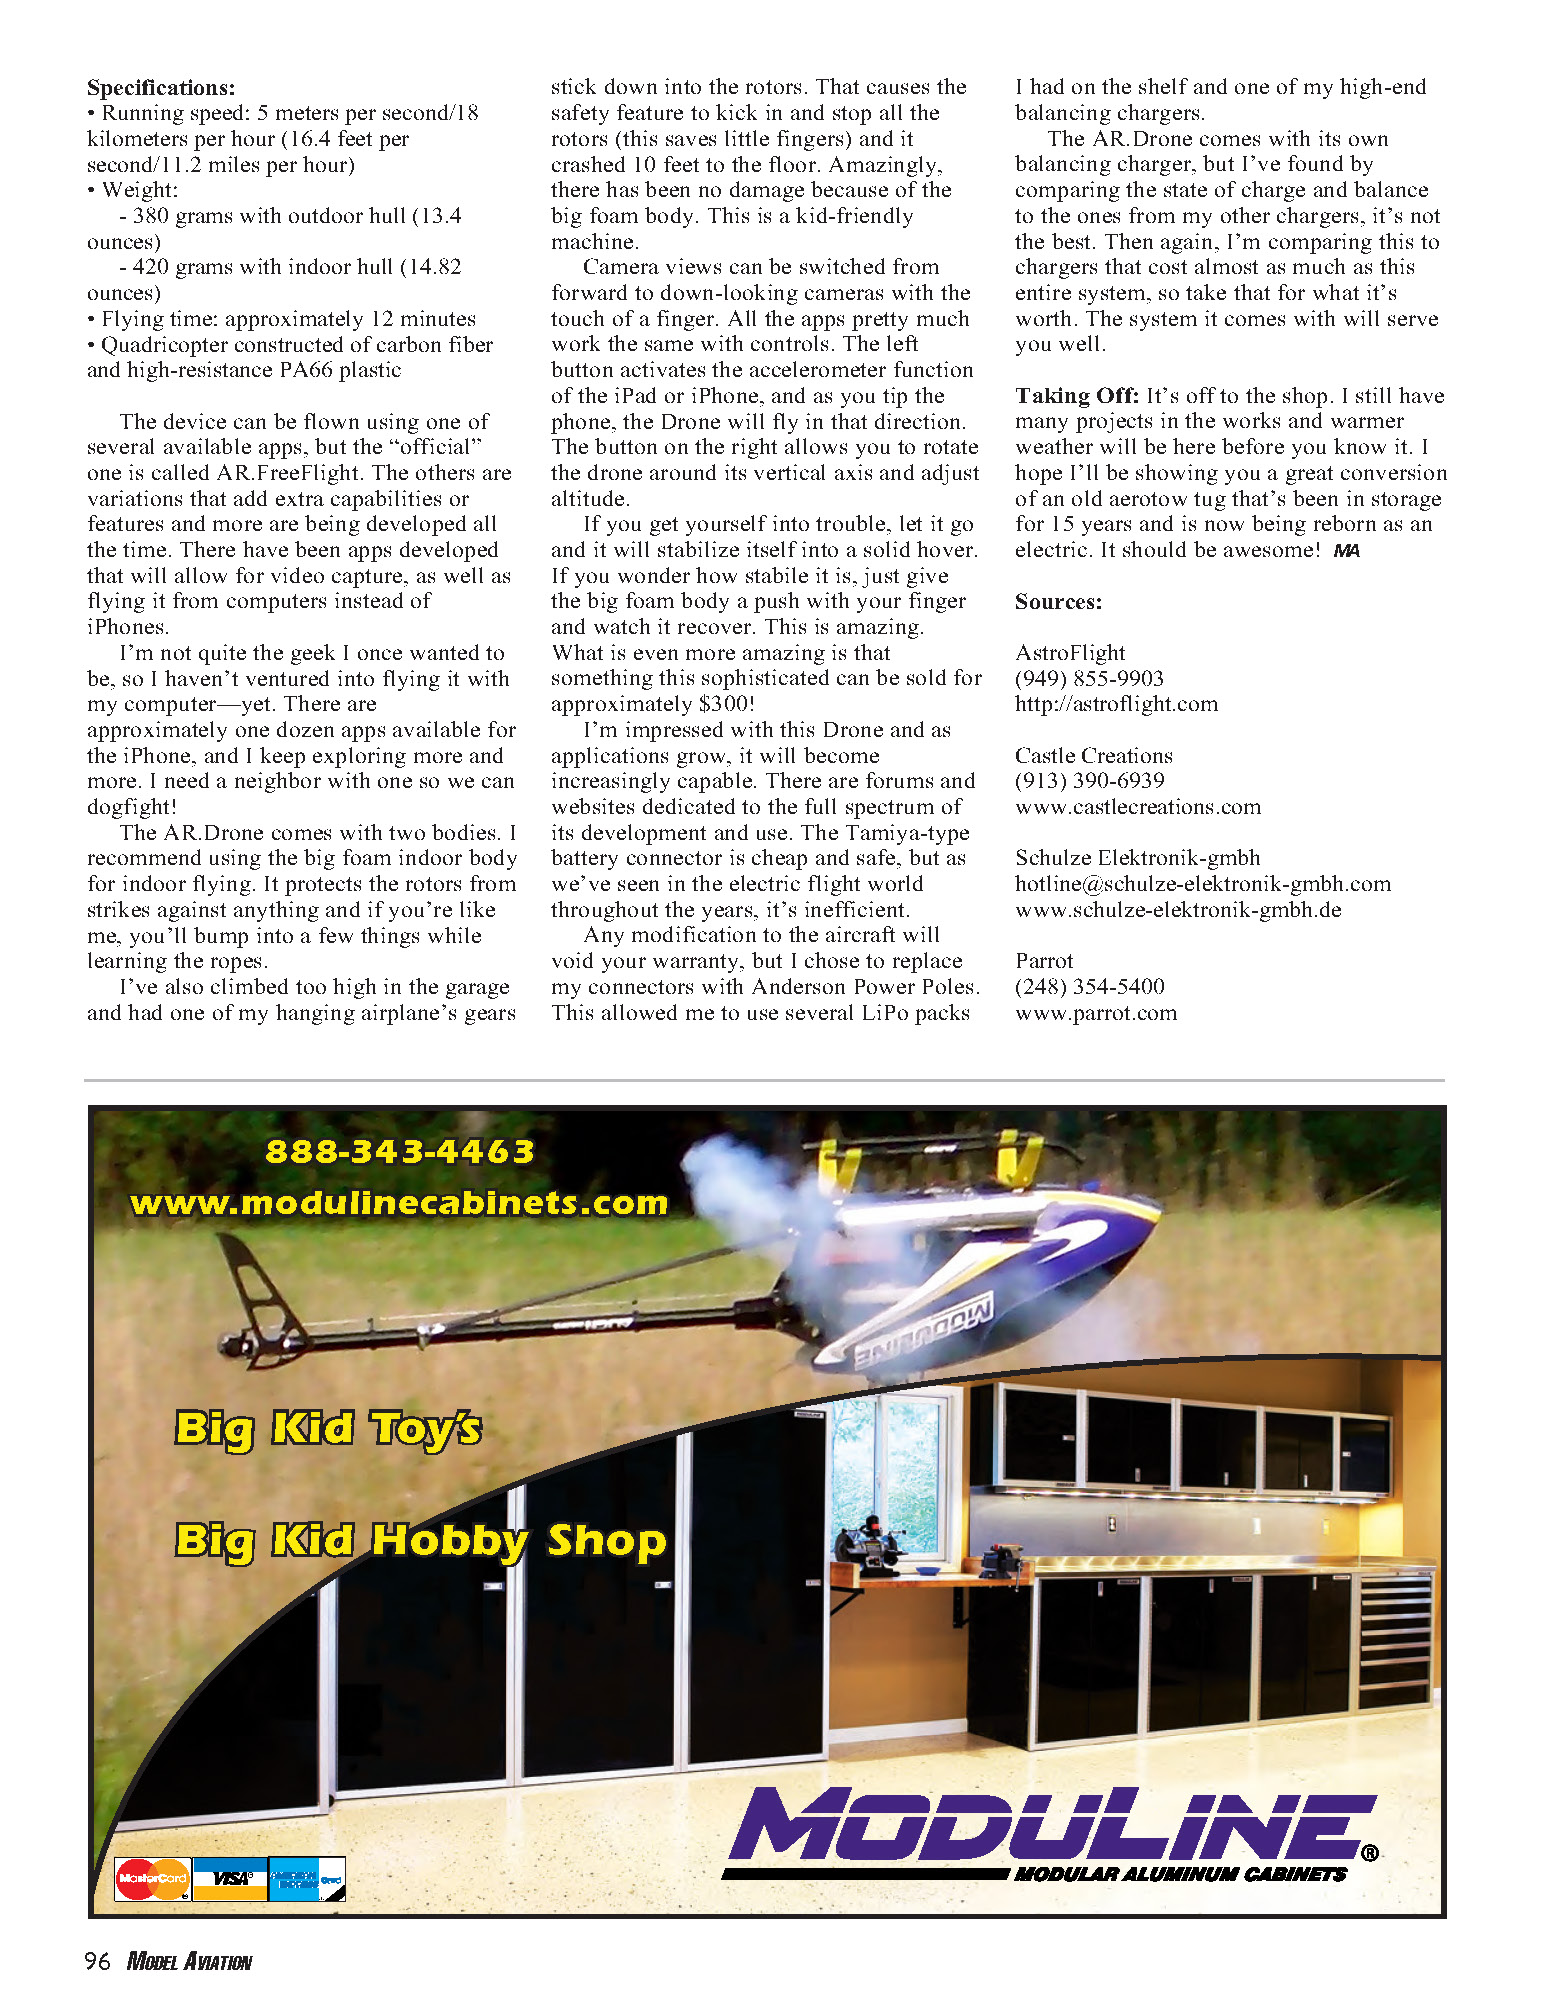
The AR.Drone is a quadcopter designed by Parrot that uses a Wi‑Fi connection to your iPhone, iPad, or iPod Touch for control. If you don't have an Apple product, don't despair. There are applications (apps) to support other products as well. The cool thing about this is that it also gives you the ability to fly using FPV technology — I’ve done that, right inside my shop.
AR is short for augmented reality. Think heads‑up displays, where you're integrating reality with virtual input. Remember the movie The Terminator? His display was augmented reality. Flying the system in a full-scale Apache is the same idea: the pilot flies using a monocle displaying the FLIR image with flight and systems superimposed. This is super-cool stuff for a hobbyist’s machine.
Embedded computer and sensors
- Embedded computer system:
- ARM9 468 MHz
- DDR 128 MB at 200 MHz
- Wi‑Fi b/g
- USB high speed
- Linux OS
- Inertial guidance systems with MEMS:
- 3‑axis accelerometer
- 2‑axis gyrometer
- 1‑axis yaw precision gyrometer
Specifications
- Running speed: 5 meters per second / 18 kilometers per hour (16.4 feet per second / 11.2 miles per hour)
- Weight:
- 380 grams with outdoor hull (13.4 ounces)
- 420 grams with indoor hull (14.82 ounces)
- Flying time: approximately 12 minutes
- Quadrotor constructed of carbon fiber and high-resistance PA66 plastic
The device can be flown using one of several available apps, but the "official" one is called AR.FreeFlight. The others are variations that add extra capabilities or features, and more are being developed all the time. There have been apps developed that will allow for video capture, as well as flying it from computers instead of iPhones.
I'm not quite the geek I once wanted to be, so I haven't ventured into flying it with my computer—yet. There are approximately a dozen apps available for the iPhone, and I keep exploring more and more. I need a neighbor with one so we can dogfight!
The AR.Drone comes with two bodies. I recommend using the big foam indoor body for indoor flying. It protects the rotors from strikes against anything and if you're like me, you'll bump into a few things while learning the ropes.
I've also climbed too high in the garage and had one of my hanging airplane's gears stick down into the rotors. That causes the safety feature to kick in and stop all the rotors (this saves little fingers) and it crashed 10 feet to the floor. Amazingly, there has been no damage because of the big foam body. This is a kid-friendly machine.
Camera views can be switched from forward to down-looking cameras with the touch of a finger. All the apps pretty much work the same with controls. The left button activates the accelerometer function of the iPad or iPhone, and as you tip the phone, the Drone will fly in that direction. The button on the right allows you to rotate the drone around its vertical axis and adjust altitude.
If you get yourself into trouble, let it go and it will stabilize itself into a solid hover. If you wonder how stable it is, just give the big foam body a push with your finger and watch it recover. This is amazing. What is even more amazing is that something this sophisticated can be sold for approximately $300!
I'm impressed with this Drone and as applications grow, it will become increasingly capable. There are forums and websites dedicated to the full spectrum of its development and use. The Tamiya‑type battery connector is cheap and safe, but as we've seen in the electric flight world throughout the years, it's inefficient.
Any modification to the aircraft will void your warranty, but I chose to replace my connectors with Anderson Powerpoles. This allowed me to use several LiPo packs I had on the shelf and one of my high-end balancing chargers.
The AR.Drone comes with its own balancing charger, but I've found by comparing the state of charge and balance to the ones from my other chargers, it's not the best. Then again, I'm comparing this to chargers that cost almost as much as this entire system, so take that for what it's worth. The system it comes with will serve you well.
Taking Off
It's off to the shop. I still have many projects in the works and warmer weather will be here before you know it. I hope I'll be showing you a great conversion of an old aerotow tug that's been in storage for 15 years and is now being reborn as an electric. It should be awesome! MA
Sources
- AstroFlight
(949) 855-9903 http://astroflight.com
- Castle Creations
(913) 390-6939 www.castlecreations.com
- Schulze Elektronik‑gmbh
[email protected] www.schulze-elektronik-gmbh.de
- Parrot
(248) 354-5400 www.parrot.com
Transcribed from original scans by AI. Minor OCR errors may remain.

