

Diagnostics: Common issues and solutions
Greg Gimlick — [email protected]
My last column, in the August 2014 issue, covered some basic thought processes necessary to diagnose a problem with our electric systems. I will continue that thread with a focus on some common problems.
Excessive Current
Excessive current is something we all eventually run into. Whether it's truly excessive or simply what we should expect can be the stumper.
Assuming you've used the exact components recommended by a manufacturer, you should closely match their performance and duration. If you've done that and are not seeing the expected results, then you need to look for the reason. Be sure that it is excessive and not an unrealistic expectation. Check my August "Electrics" column for more on that.
Here are some common causes for which you should check:
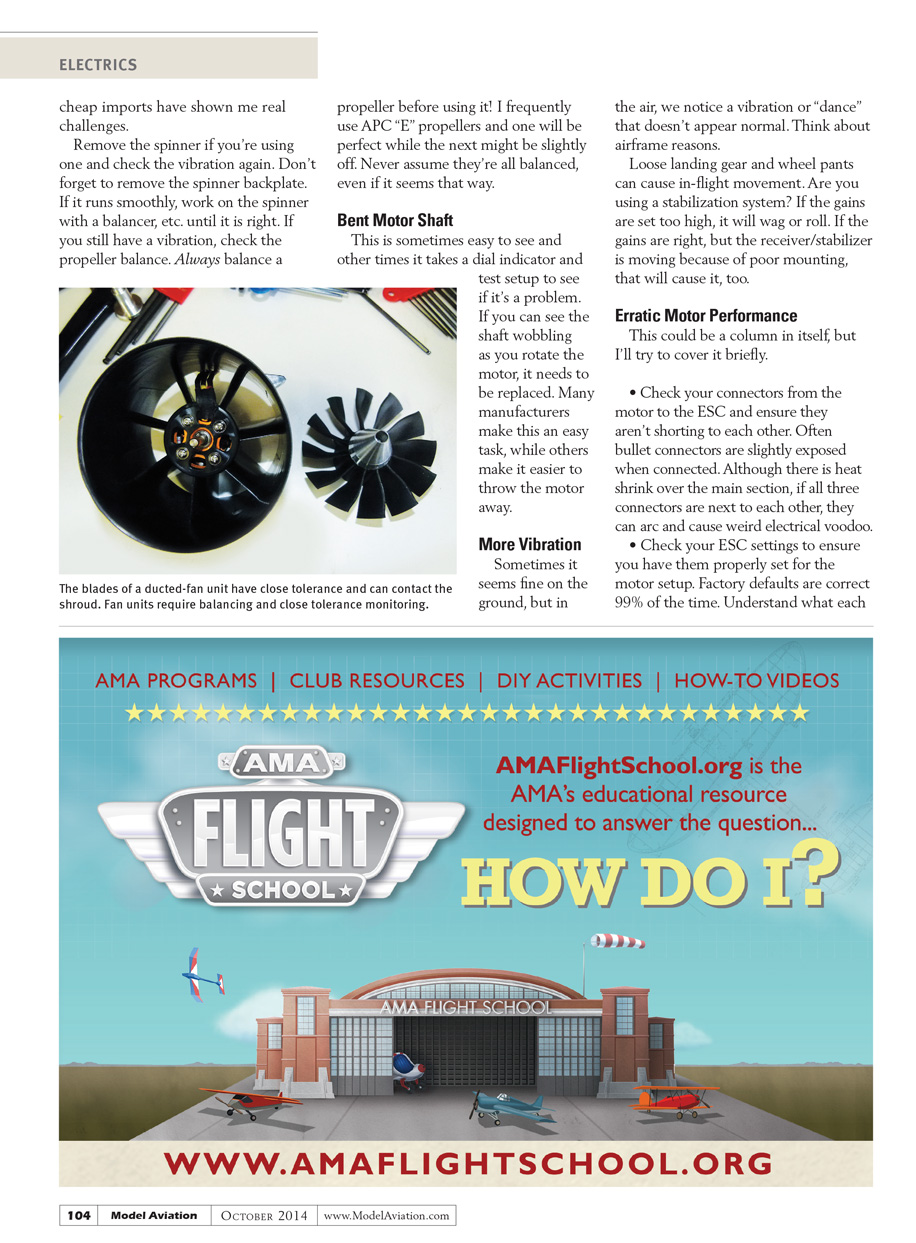
- Ducted fan: check to be sure the blades in your fan unit are not contacting the shroud. This can cause friction and force the motor to work harder, which means more current.
- Geared or helicopter applications: setting the gear lash or belt tension too tight will cause the motor to pull excess current. Check to see that they are properly set.
- Worn bearings: this causes friction and will pull more current. Boca Bearings is a good source for replacements.
The shaft collar can barely clear the opening in the mount but still rub when installed. Even if it looks smooth and doesn't touch the edge on the bench, the wires often exit along the side of the motor and must be secured to prevent contact with the rotating motor body.
Poor Solder Joints
Whether you or the factory made them, look over the solder joints and see if they are secure and done well. If they are dull and rough looking, they are "cold joints" and will affect the circuit. The only recourse is to correctly re-solder them.
Motor Mounting
Check to see that the motor is spinning freely when it is mounted in the airplane. That last part is important, so read it again!
I recently ran into a situation where the motor spun freely on the bench, but when installed in the airplane the shaft's retaining collar rubbed the hole it fit through on the firewall/mount. This caused friction on the shaft when installed and drew extra current. Had I not checked while it was installed, I would have missed this problem.
Vibration
We've come to expect a smooth-running aircraft because of electric power, so when it doesn't run smoothly there has to be a problem. The biggest culprit is often the spinner. Just because you bought an aluminum spinner doesn't mean it will run true. Quality is all over the place, and some cheap imports have shown me some real challenges.
Remove the spinner if you're using one and check the vibration again. Don't forget to remove the spinner backplate, too. If it runs smoothly, work on the spinner with a balancer, etc., until it is right. If you still have a vibration, check the propeller balance. Always balance a propeller before using it! I frequently use APC "E" propellers and one will be perfect while the next might be slightly off. Never assume they're all balanced, even if it seems that way.
Bent Motor Shaft
This is sometimes easy to see and other times it takes a dial indicator and test setup to see if it's a problem. If you can see the shaft wobbling as you rotate the motor, it needs to be replaced. Many manufacturers make this an easy task, while others make it easier to throw the motor away.
More Vibration
Sometimes it seems fine on the ground, but in the air we notice a vibration or "dance" that doesn't appear normal. Think about airframe reasons. Loose landing gear and wheel pants can cause in-flight movement. Are you using a stabilization system? If the gains are set too high, it will wag or roll. If the gains are right, but the receiver/stabilizer is moving because of poor mounting, that will cause it, too.
Erratic Motor Performance
This could be a column in itself, but I'll try to cover it briefly:
- Check your connectors from the motor to the ESC and ensure they aren't shorting to each other. Often bullet connectors are slightly exposed when connected. Although there is heat shrink over the main section, if all three connectors are next to each other they can arc and cause weird electrical voodoo.
- Check your ESC settings to ensure you have them properly set for the motor setup. Factory defaults are correct 99% of the time. Understand what each setting means and read the help files for your ESC.
- Did you wind your own motor? Many hobbyists enjoy doing that and there are great motor kits available. The wires in the motor have extremely thin insulation and are easily nicked. This can cause a short that is often erratic rather than a dead short, preventing it from running. Check the continuity of your circuits if you wind your own motors.
- Check your battery packs. Connect a meter to the pack and see if flexing it, shaking it, etc., has any effect on the voltage reading. If so, that is a major problem and must be fixed or replaced. I don't advocate cutting open LiPo packs, so talk to your vendor about a replacement if it's a new pack. If you attached the connectors, check to be sure they were properly done.
- Check your motor wires to ensure that they aren't rubbing against the rotating case of an outrunner motor. This is especially easy to have happen in the narrow nose of an electric-powered sailplane. Secure all of the wires out of the way and add an extra layer of tape just to be sure.
Excessive Heat
Assuming the timing is properly set in your ESC settings, the motor shouldn't get scorching hot, nor should your ESC. Provide adequate cooling air intake to the motor/ESC and, equally important, allow a spot for the air to get out. The rule of thumb is to have twice the outlet area for the inlet air.
In other words, if your inlet air hole is 4 square inches, your outlet hole should be 8 square inches. Don't pack your ESC so tightly into the fuselage that it can't get any air. Some have heat sinks and others don't, but all of them need some airflow.
Wrapping Up
The list of possible problems grows and grows, but none of it is beyond the scope of the average modeler to find and fix. Hey — if I can do it, you can too!
Sources
- Model Aviation Digital Library
- https://library.ModelAviation.com
Transcribed from original scans by AI. Minor OCR errors may remain.

