
Royal Evo conversion warning
Greg Gimlick | [email protected]
Let's start with an update on a couple of items I wrote about in the last issue. I left you with expectations of looking at how to use some of the USB programmers and why I prefer them to some other methods. But first there's an issue with my Spektrumized Evo, aka Franken‑Evo Part II, you should know about.
Do not drill holes in your motherboard! Remember when I wrote that converting your radio and soldering connections inside would void all warranties? I decided to mount the Spektrum module to the motherboard. Since there were mounting holes and standoffs for the module when I removed it from the case, I figured I'd use them to bolt it to the motherboard. We had done this on Jim Ryan's radio and it worked great.
When I drilled the motherboard on mine, the digital adjusters quit working. Closer examination showed that the newer Multiplex Royal Evo radios are using a multilayer circuit board, whereas the older ones didn't. When you drill through them, you ruin the hidden layer. A quick trip to Hitec/RCD service in California got a new motherboard installed, but it wasn't cheap.
This is the problem with do‑it‑yourself radio conversions if you don't have the latest engineering data for your board, etc. I got great service from Hitec/RCD and the resident service guru, Tony Ohm.
For a full story with photos about how to do the conversion, check out my blog (see the "Sources" list for the Web address). You can also visit Michel Moret's site; he carries the extra‑light version of the conversion module we used to do the internal install. You might need to refer directly to my project so he'll know you want the one without the big plug on it. Great service from Michel!
Also included in this column:
- Dual ESC BEC clarification
- USB programming devices
June Column Clarification
I received a lot of mail regarding using BECs on multiengine setups when I wrote about my friend with the jet and its erratic speed‑control actions. To be clear about this, I was referring to using Castle Creations controllers, so talk to your manufacturer if you're using a different brand.
You can connect two speed controls with their BECs activated to one receiver. This is paralleling them to the bus, and that's fine. You can't connect two controllers to a Y harness with the red wire connected and then disconnect the red wire at the receiver end of the "Y" cord. Doing that, in essence, shorts the two red power wires at the other end. Software/firmware in the ESC tries to filter that out, but it's beyond its capability.
External USB Programmers
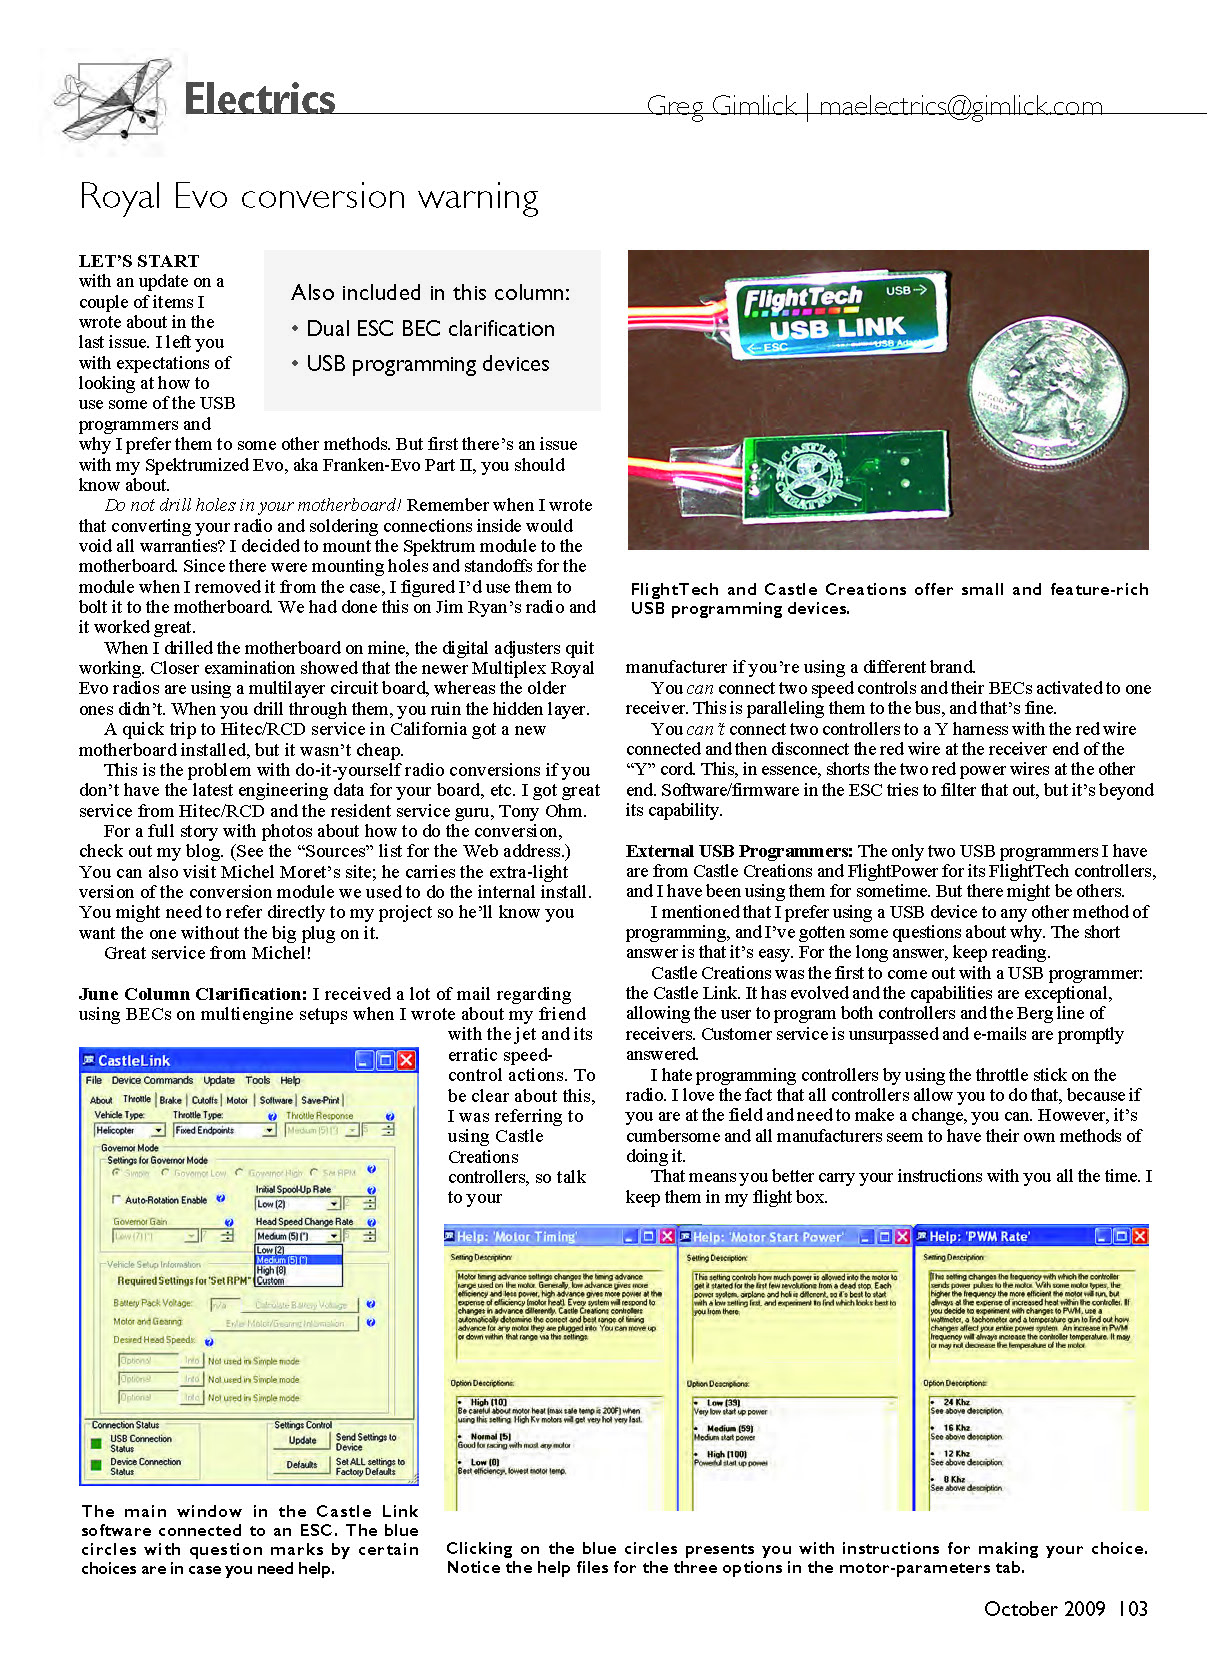
The only two USB programmers I have are from Castle Creations and FlightPower for its FlightTech controllers, and I have been using them for some time. There might be others. I mentioned that I prefer using a USB device to any other method of programming, and I've gotten some questions about why. The short answer is that it's easy. For the long answer, keep reading.
Castle Creations was the first to come out with a USB programmer: the Castle Link. It has evolved and the capabilities are exceptional, allowing the user to program both controllers and the Berg line of receivers. Customer service is unsurpassed and e‑mails are promptly answered.
I hate programming controllers by using the throttle stick on the radio. I love the fact that all controllers allow you to do that, because if you are at the field and need to make a change, you can. However, it's cumbersome and all manufacturers seem to have their own methods of doing it. That means you have to learn each manufacturer's method.
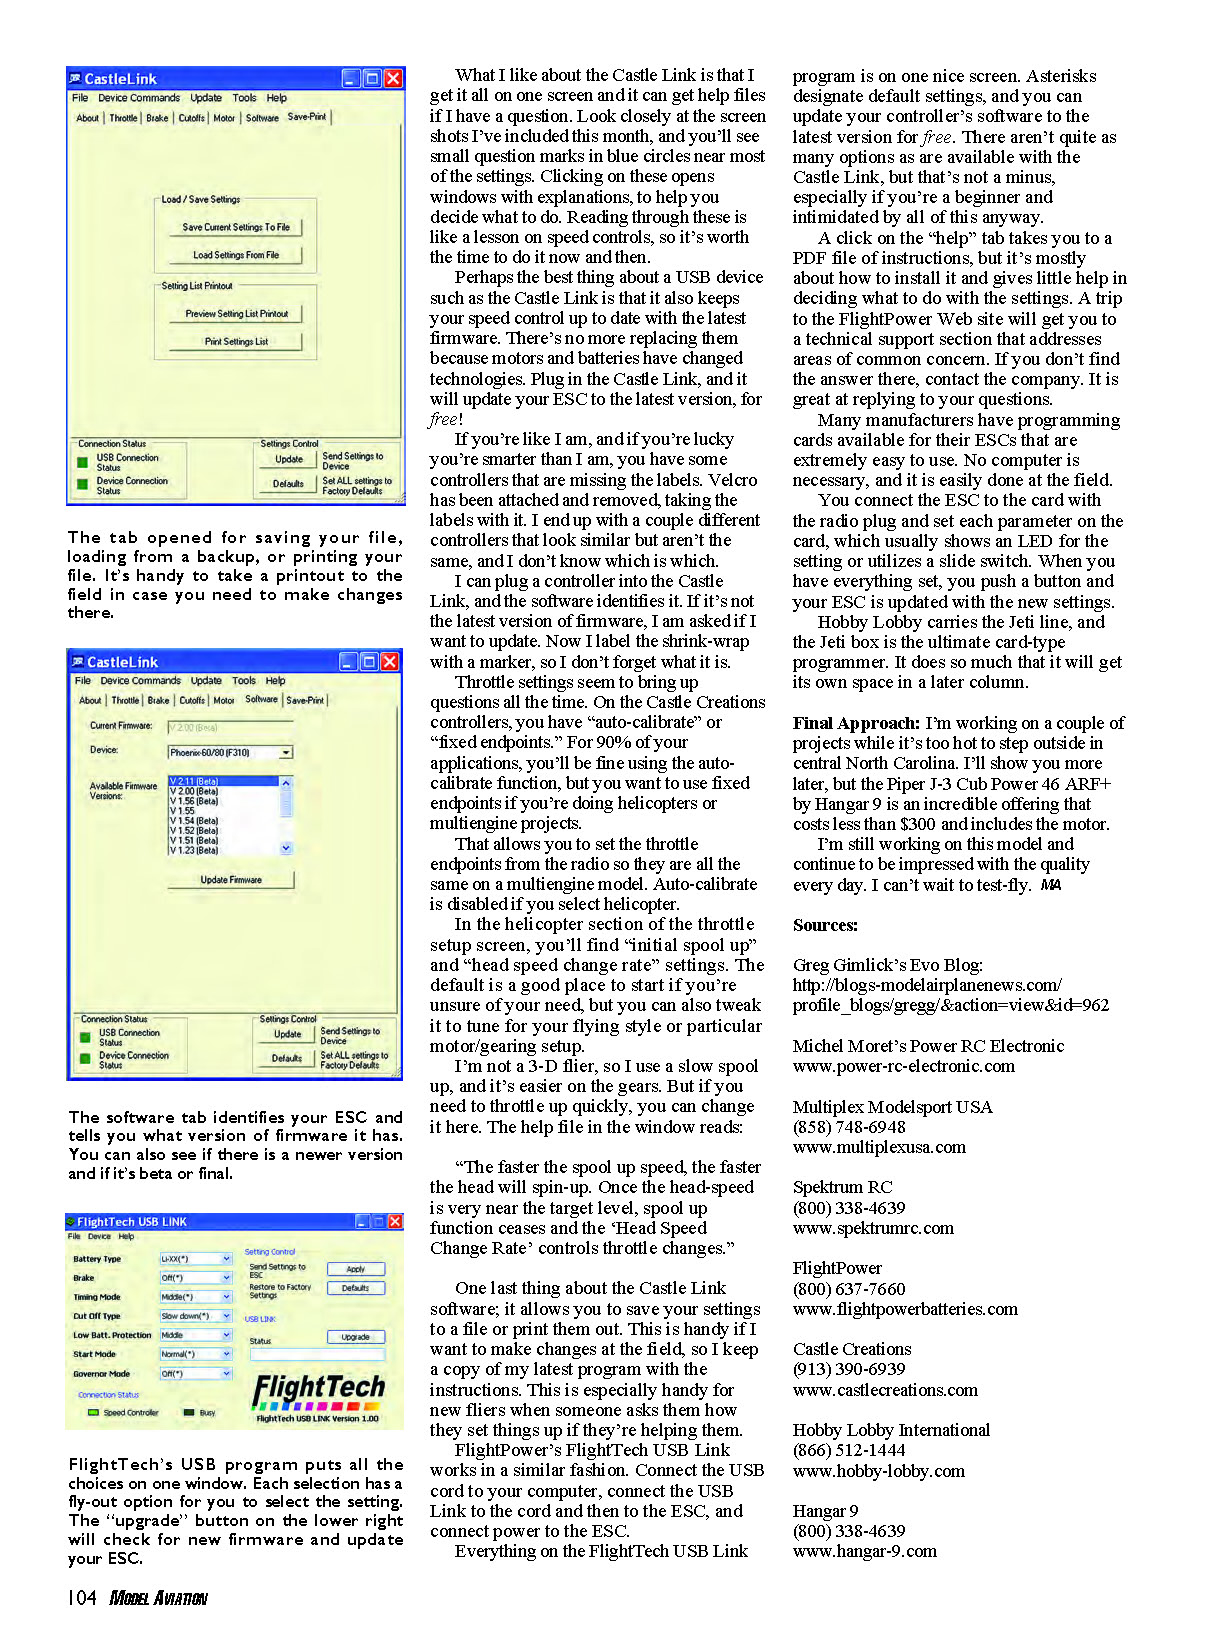
What I like about the Castle Link is that I get it all on one screen and it can get help files if I have a question. Look closely at the screen shots I've included this month, and you'll see small question marks in blue circles near most of the settings. Clicking on these opens windows with explanations to help you decide what to do. Reading through these is like a lesson on speed controls, so it's worth the time to do it now and then.
Perhaps the best thing about a USB device such as the Castle Link is that it also keeps your speed control up to date with the latest firmware. There's no more replacing them because motors and batteries have changed technologies. Plug in the Castle Link, and it will update your ESC to the latest version, for free!
If you're like I am, and if you're lucky you're smarter than I am, you have some controllers that are missing the labels. Velcro has been attached and removed, taking the labels with it. I end up with a couple different controllers that look similar but aren't the same, and I don't know which is which.
I can plug a controller into the Castle Link, and the software identifies it. If it's not the latest version of firmware, I am asked if I want to update. Now I label the shrink‑wrap with a marker so I don't forget what it is.
Throttle settings seem to bring up questions all the time. On the Castle Creations controllers, you have "auto‑calibrate" or "fixed endpoints." For 90% of your applications, you'll be fine using the auto‑calibrate function, but you want to use fixed endpoints if you're doing helicopters or multiengine projects.
Fixed endpoints allow you to set the throttle endpoints from the radio so they are all the same on a multiengine model. Auto‑calibrate is disabled if you select helicopter.
In the helicopter section of the throttle setup screen, you'll find "initial spool up" and "head speed change rate" settings. The default is a good place to start if you're unsure, but you can also tweak it to tune for your flying style or particular motor/gearing setup.
I'm not a 3‑D flier, so I use a slow spool up, and it's easier on the gears. But if you need to throttle up quickly, you can change it here. The help file in the window reads:
"The faster the spool up speed, the faster the head will spin‑up. Once the head‑speed is very near the target level, spool up function ceases and the 'Head Speed Change Rate' controls throttle changes."
One last thing about the Castle Link software: it allows you to save your settings to a file or print them out. This is handy if I want to make changes at the field, so I keep a copy of my settings with the instructions. This is especially handy for new fliers when someone asks them how they set things up if they're helping them.
FlightPower's FlightTech USB Link works in a similar fashion. Connect the USB cord to your computer, connect the USB Link to the cord and then to the ESC, and connect power to the ESC.
Everything on the FlightTech USB Link program is on one nice screen. Asterisks designate default settings, and you can update your controller's software to the latest version for free. There aren't quite as many options as are available with the Castle Link, but that's not a minus, especially if you're a beginner and intimidated by all of this anyway.
A click on the "help" tab takes you to a PDF file of instructions, but it's mostly about how to install it and gives little help in deciding what to do with the settings. A trip to the FlightPower Web site will get you to a technical support section that addresses areas of common concern. If you don't find the answer there, contact the company. It is great at replying to your questions.
Many manufacturers have programming cards available for their ESCs that are extremely easy to use. No computer is necessary, and it is easily done at the field.
You connect the ESC to the card with the radio plug and set each parameter on the card, which usually shows an LED for the setting or utilizes a slide switch. When you have everything set, you push a button and your ESC is updated with the new settings.
Hobby Lobby carries the Jeti line, and the Jeti box is the ultimate card‑type programmer. It does so much that it will get its own space in a later column.
Final Approach
I'm working on a couple of projects while it's too hot to step outside in central North Carolina. I'll show you more later, but the Piper J‑3 Cub Power 46 ARF+ by Hangar 9 is an incredible offering that costs less than $300 and includes the motor.
I'm still working on this model and continue to be impressed with the quality every day. I can't wait to test‑fly.
Sources
- Greg Gimlick's Evo Blog: http://blogs.modelairplanenews.com/profile_blogs/gregg/?action=view&id=962
- Michel Moret's Power RC Electronic: www.power-rc-electronic.com
- Multiplex ModelSport USA: (858) 748-6948, www.multiplexusa.com
- Spektrum RC: (800) 338-4639, www.spektrumrc.com
- FlightPower: (800) 637-7660, www.flightpowerbatteries.com
- Castle Creations: (913) 390-6939, www.castlecreations.com
- Hobby Lobby International: (866) 512-1444, www.hobby-lobby.com
- Hangar 9: (800) 338-4639, www.hangar-9.com
Transcribed from original scans by AI. Minor OCR errors may remain.

