
The Engine Shop - 2006/02
Joe passes a milestone in his engine-experimenting career
Joe Wagner | [email protected]
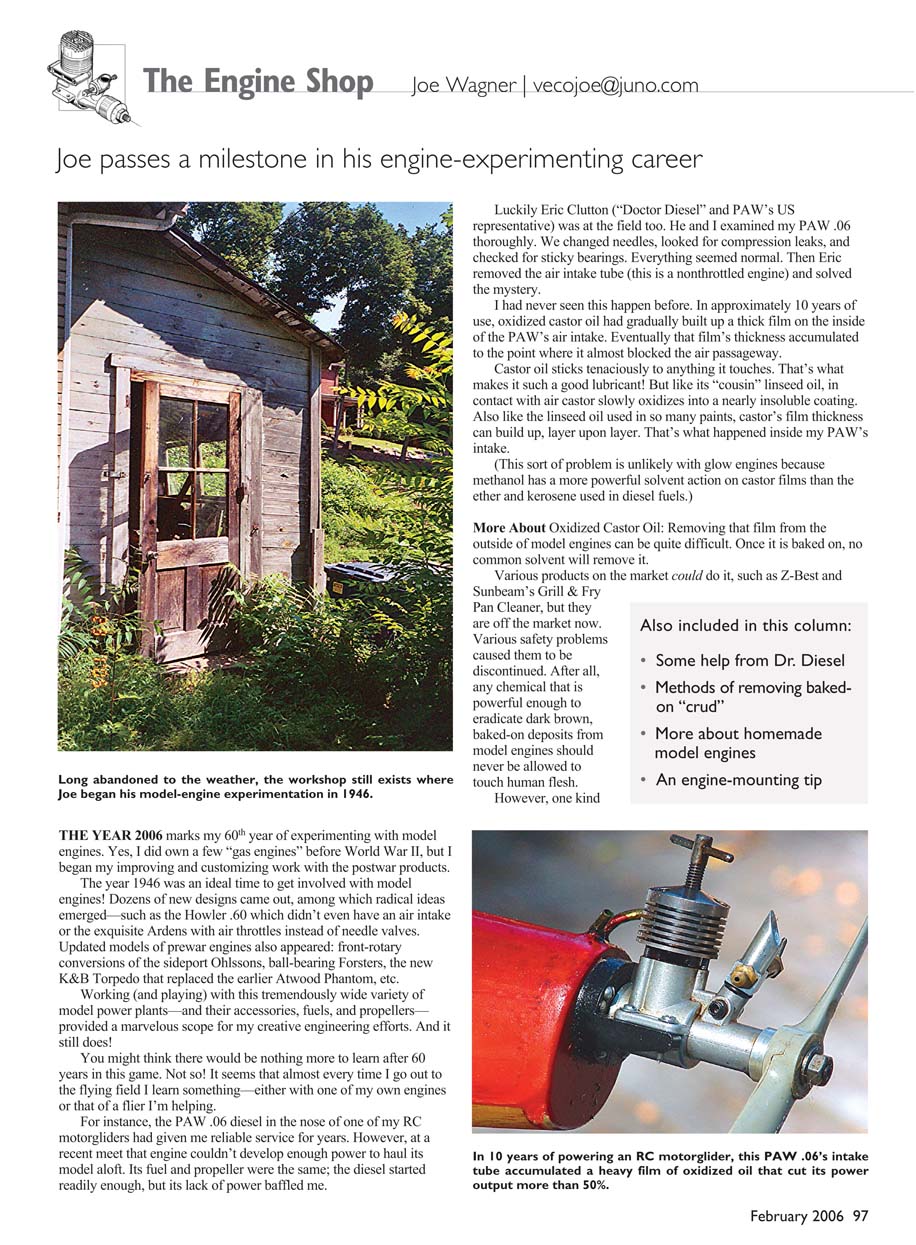
The year 2006 marks my 60th year of experimenting with model engines. Yes, I did own a few "gas engines" before World War II, but I began my improving and customizing work with the postwar products.
The year 1946 was an ideal time to get involved with model engines. Dozens of new designs came out, among which radical ideas emerged—such as the Howler .60, which didn't even have an air intake, or the exquisite Ardens with air throttles instead of needle valves. Updated models of prewar engines also appeared: front-rotary conversions of the sideport Ohlssons, ball-bearing Forsters, the new K&B Torpedo that replaced the earlier Atwood Phantom, etc.
Working (and playing) with this tremendously wide variety of model power plants—and their accessories, fuels, and propellers—provided a marvelous scope for my creative engineering efforts. And it still does!
You might think there would be nothing more to learn after 60 years in this game. Not so. It seems that almost every time I go out to the flying field I learn something—either with one of my own engines or that of a flier I'm helping.
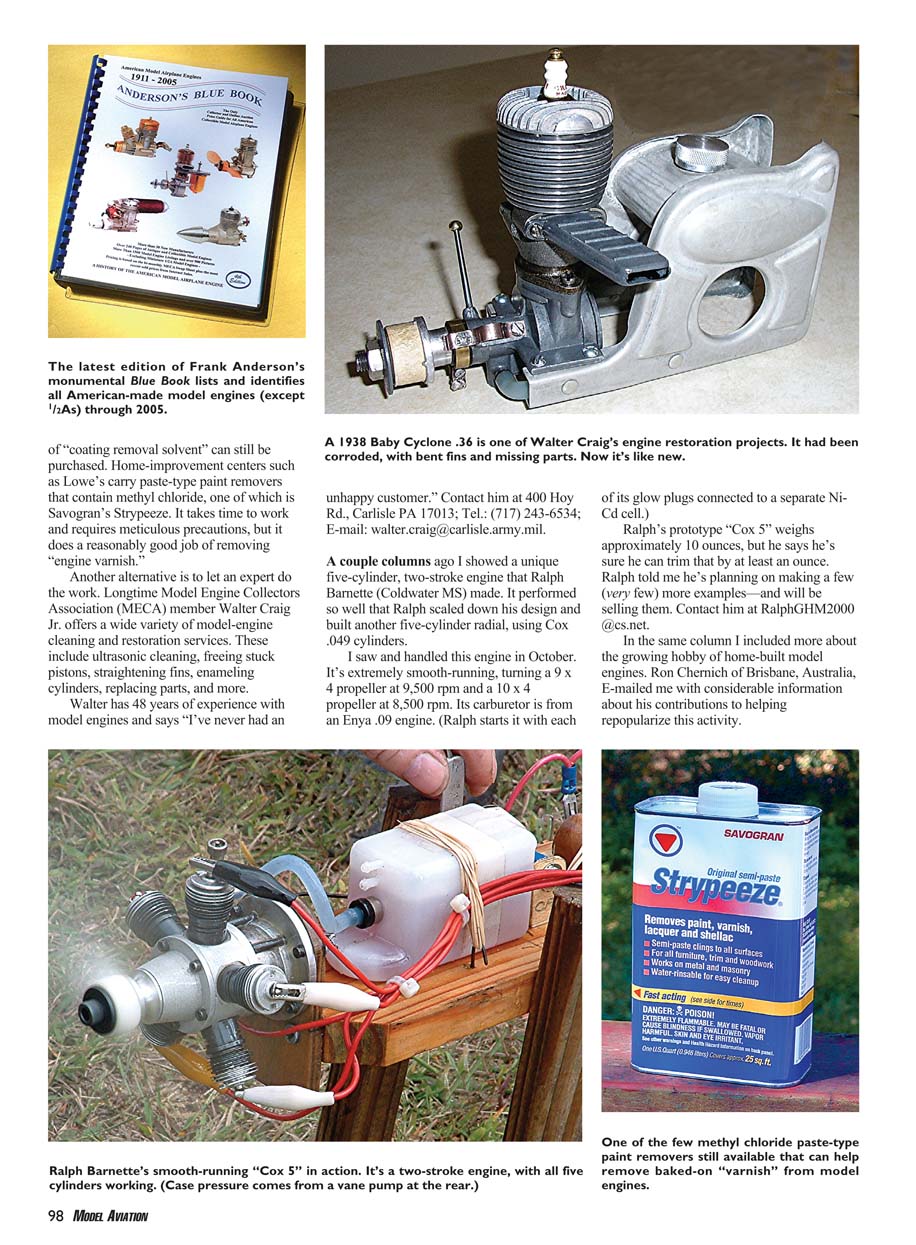
For instance, the PAW .06 diesel in the nose of one of my RC motorgliders had given me reliable service for years. However, at a recent meet that engine couldn't develop enough power to haul its model aloft. Its fuel and propeller were the same; the diesel started readily enough, but its lack of power baffled me.
Luckily Eric Clutton ("Doctor Diesel" and PAW's US representative) was at the field too. He and I examined my PAW .06 thoroughly. We changed needles, looked for compression leaks, and checked for sticky bearings. Everything seemed normal. Then Eric removed the air intake tube (this is a non-throttled engine) and solved the mystery.
I had never seen this happen before. In approximately 10 years of use, oxidized castor oil had gradually built up a thick film on the inside of the PAW's air intake. Eventually that film's thickness accumulated to the point where it almost blocked the air passageway.
Castor oil sticks tenaciously to anything it touches. That's what makes it such a good lubricant. But like its "cousin" linseed oil, in contact with air castor slowly oxidizes into a nearly insoluble coating. Also like the linseed oil used in so many paints, castor's film thickness can build up, layer upon layer. That's what happened inside my PAW's intake.
(This sort of problem is unlikely with glow engines because methanol has a more powerful solvent action on castor films than the ether and kerosene used in diesel fuels.)
More About Oxidized Castor Oil
Removing that film from the outside of model engines can be quite difficult. Once it is baked on, no common solvent will remove it.
Various products on the market could do it, such as Z-Best and Sunbeam's Grill & Fry Pan Cleaner, but they are off the market now. Various safety problems caused them to be discontinued. After all, any chemical that is powerful enough to eradicate dark brown, baked-on deposits from model engines should never be allowed to touch human flesh. However, one kind of "coating removal solvent" can still be purchased. Home-improvement centers such as Lowe's carry paste-type paint removers that contain methyl chloride, one of which is Savogran's Strypeeze. It takes time to work and requires meticulous precautions, but it does a reasonably good job of removing "engine varnish."
Another alternative is to let an expert do the work. Longtime Model Engine Collectors Association (MECA) member Walter Craig Jr. offers a wide variety of model-engine cleaning and restoration services. These include ultrasonic cleaning, freezing stuck pistons, straightening fins, enameling cylinders, replacing parts, and more.
Walter has 48 years of experience with model engines and says, "I've never had an unhappy customer." Contact him at:
- Walter Craig Jr., 400 Hoy Rd., Carlisle PA 17013
- Tel.: (717) 243-6534
- E-mail: [email protected]
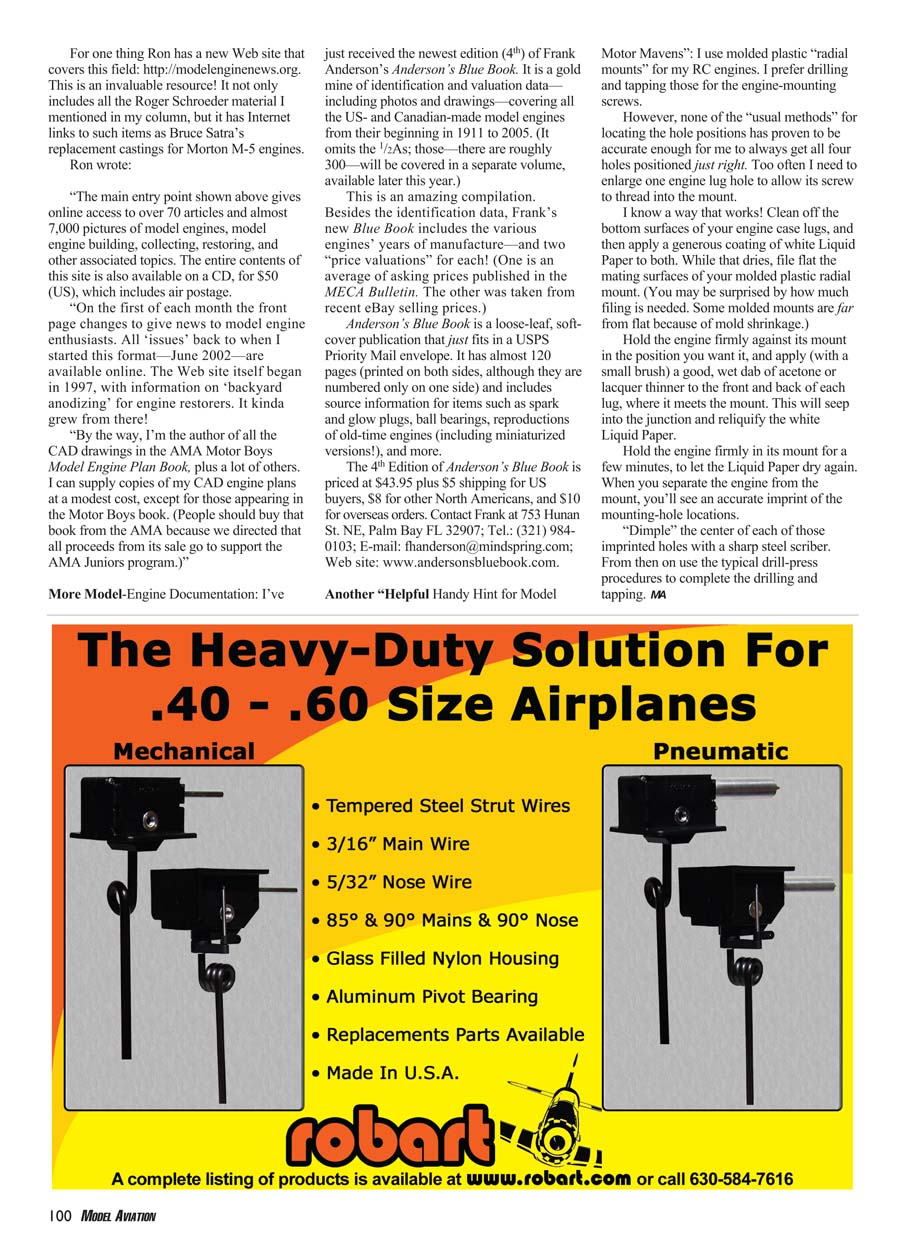
A couple columns ago I showed a unique five-cylinder, two-stroke engine that Ralph Barnette (Coldwater MS) made. It performed so well that Ralph scaled down his design and built another five-cylinder radial, using Cox .049 cylinders.
I saw and handled this engine in October. It's extremely smooth-running, turning a 9 x 4 propeller at 9,500 rpm and a 10 x 4 propeller at 8,500 rpm. Its carburetor is from an Enya .09 engine. (Ralph starts it with each of its glow plugs connected to a separate Ni-Cd cell.)
Ralph's prototype "Cox 5" weighs approximately 10 ounces, but he says he's sure he can trim that by at least an ounce. Ralph told me he's planning on making a few (very few) more examples—and will be selling them. Contact him at [email protected].
In the same column I included more about the growing hobby of home-built model engines. Ron Chernich of Brisbane, Australia, emailed me with considerable information about his contributions to helping repopularize this activity.
For one thing Ron has a new web site that covers this field: http://modelenginenews.org. This is an invaluable resource. It not only includes all the Roger Schroeder material I mentioned in my column, but it has Internet links to such items as Bruce Satra’s replacement castings for Morton M-5 engines.
Ron wrote:
"The main entry point shown above gives online access to over 70 articles and almost 7,000 pictures of model engines, model engine building, collecting, restoring, and other associated topics. The entire contents of this site is also available on a CD, for $50 (US), which includes air postage.
"On the first of each month the front page changes to give news to model engine enthusiasts. All 'issues' back to when I started this format—June 2002—are available online. The Web site itself began in 1997, with information on 'backyard anodizing' for engine restorers. It kinda grew from there!
"By the way, I'm the author of all the CAD drawings in the AMA Motor Boys Model Engine Plan Book, plus a lot of others. I can supply copies of my CAD engine plans at a modest cost, except for those appearing in the Motor Boys book. (People should buy that book from the AMA because we directed that all proceeds from its sale go to support the AMA Juniors program.)"
More Model-Engine Documentation
I've just received the newest edition (4th) of Frank Anderson’s Anderson’s Blue Book. It is a gold mine of identification and valuation data—including photos and drawings—covering all the US- and Canadian-made model engines from their beginning in 1911 to 2005. (It omits the 1/2 As; those—there are roughly 300—will be covered in a separate volume, available later this year.)
This is an amazing compilation. Besides the identification data, Frank’s new Blue Book includes the various engines’ years of manufacture—and two "price valuations" for each. One is an average of asking prices published in the MECA Bulletin. The other was taken from recent eBay selling prices.
Anderson’s Blue Book is a loose-leaf, soft-cover publication that just fits in a USPS Priority Mail envelope. It has almost 120 pages (printed on both sides, although they are numbered only on one side) and includes source information for items such as spark and glow plugs, ball bearings, reproductions of old-time engines (including miniaturized versions!), and more.
The 4th Edition of Anderson’s Blue Book is priced at $43.95 plus shipping:
- $5 for US buyers
- $8 for other North Americans
- $10 for overseas orders
Contact Frank at:
- Frank Anderson, 753 Hunan St. NE, Palm Bay FL 32907
- Tel.: (321) 984-0103
- E-mail: [email protected]
- Web site: www.andersonsbluebook.com
Another "Helpful Handy Hint for Model Motor Mavens"
I use molded plastic "radial mounts" for my RC engines. I prefer drilling and tapping those for the engine-mounting screws.
However, none of the "usual methods" for locating the hole positions has proven to be accurate enough for me to always get all four holes positioned just right. Too often I need to enlarge one engine lug hole to allow its screw to thread into the mount.
I know a way that works. Clean off the bottom surfaces of your engine case lugs, and then apply a generous coating of white Liquid Paper to both. While that dries, file flat the mating surfaces of your molded plastic radial mount. (You may be surprised by how much filing is needed. Some molded mounts are far from flat because of mold shrinkage.)
Hold the engine firmly against its mount in the position you want it, and apply (with a small brush) a good, wet dab of acetone or lacquer thinner to the front and back of each lug, where it meets the mount. This will seep into the junction and reliquify the white Liquid Paper.
Hold the engine firmly in its mount for a few minutes, to let the Liquid Paper dry again. When you separate the engine from the mount, you’ll see an accurate imprint of the mounting-hole locations.
"Dimple" the center of each of those imprinted holes with a sharp steel scriber. From then on use the typical drill-press procedures to complete the drilling and tapping.
MA
Transcribed from original scans by AI. Minor OCR errors may remain.

