

The Engine Shop
Are O.S.'s new LA Series engines really better?
Also included in this column:
- Thoughts about castor oil
- The Lee Custom .61 is available
- The reason for offset venturi location
Since this is my 57th column it seems appropriate to cover a “Heinz variety” of topics in it.
In the previous column I discussed O.S.’s new LA Series engines—the line of sport-model power plants with midnight-blue exteriors. My friend Larry Blews (New Castle, Pennsylvania), a longtime O.S. user and admirer, asked me, “Are these really an improvement on the older models or are they just prettier-looking?” Good question! As it happened, I had an easy way to answer it.
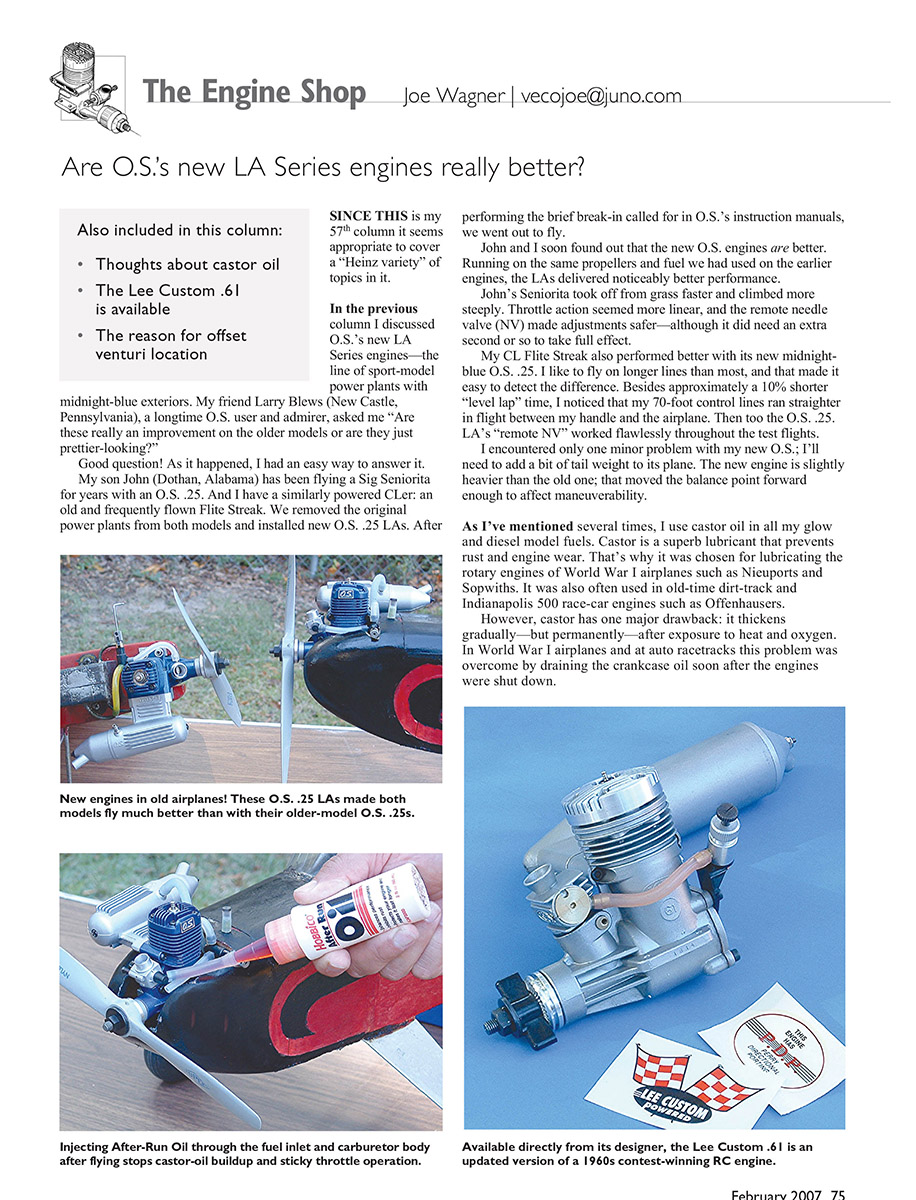
My son John (Dothan, Alabama) has been flying a Sig Seniorita for years with an O.S. .25. I have a similarly powered CLer: an old and frequently flown Flite Streak. We removed the original power plants from both models and installed new O.S. .25 LAs. After performing the brief break-in called for in O.S.’s instruction manuals, we went out to fly.
John and I soon found out that the new O.S. engines are better. Running on the same propellers and fuel we had used on the earlier engines, the LAs delivered noticeably better performance. John’s Seniorita took off from grass faster and climbed more steeply. Throttle action seemed more linear, and the remote needle valve (NV) made adjustments safer—although it did need an extra second or so to take full effect.
My CL Flite Streak also performed better with its new midnight-blue O.S. .25. I like to fly on longer lines than most, and that made it easy to detect the difference. Besides approximately a 10% shorter “level lap” time, I noticed that my 70-foot control lines ran straighter in flight between my handle and the airplane. The O.S. .25 LA’s remote NV worked flawlessly throughout the test flights.
I encountered only one minor problem with my new O.S.: I’ll need to add a bit of tail weight to the plane. The new engine is slightly heavier than the old one; that moved the balance point forward enough to affect maneuverability.
As I’ve mentioned several times, I use castor oil in all my glow and diesel model fuels. Castor is a superb lubricant that prevents rust and engine wear. That’s why it was chosen for lubricating the rotary engines of World War I airplanes such as Nieuports and Sopwiths. It was also often used in old-time dirt-track and Indianapolis 500 race-car engines such as Offenhausers.
However, castor has one major drawback: it thickens gradually—but permanently—after exposure to heat and oxygen. In World War I airplanes and at auto racetracks this problem was overcome by draining the crankcase oil soon after the engines were shut down.
In model engines, where the oil and fuel are mixed, there’s no “crankcase oil” reservoir that can be drained. However, the castor film remaining between moving parts will become more viscous with time. After a week or two it can make an engine feel “sticky” and hard to turn over. To prevent that from happening we inject After-Run Oil (ARO) into our glow engines after we’re finished flying. (Never use ARO in model diesels, though!)
In working with model RC engines that have not been run for a while, I’ve noticed another area where thickening castor oil can cause trouble: in the carburetor and NV assemblies. Oxidized oil-film buildup can seriously restrict fuel orifices and tapered needles—in effect making them larger in diameter and upsetting their adjustments.
A sticky castor oil film on a carburetor barrel makes the throttle servo work harder. If that becomes excessive, it can drain a flight battery quickly and perhaps even cause a crash or a flyaway.
To prevent these difficulties, when you inject ARO into your engine after flying, also pull the fuel line off and squirt ARO through the spraybar. Then work it well into the carburetor barrel.
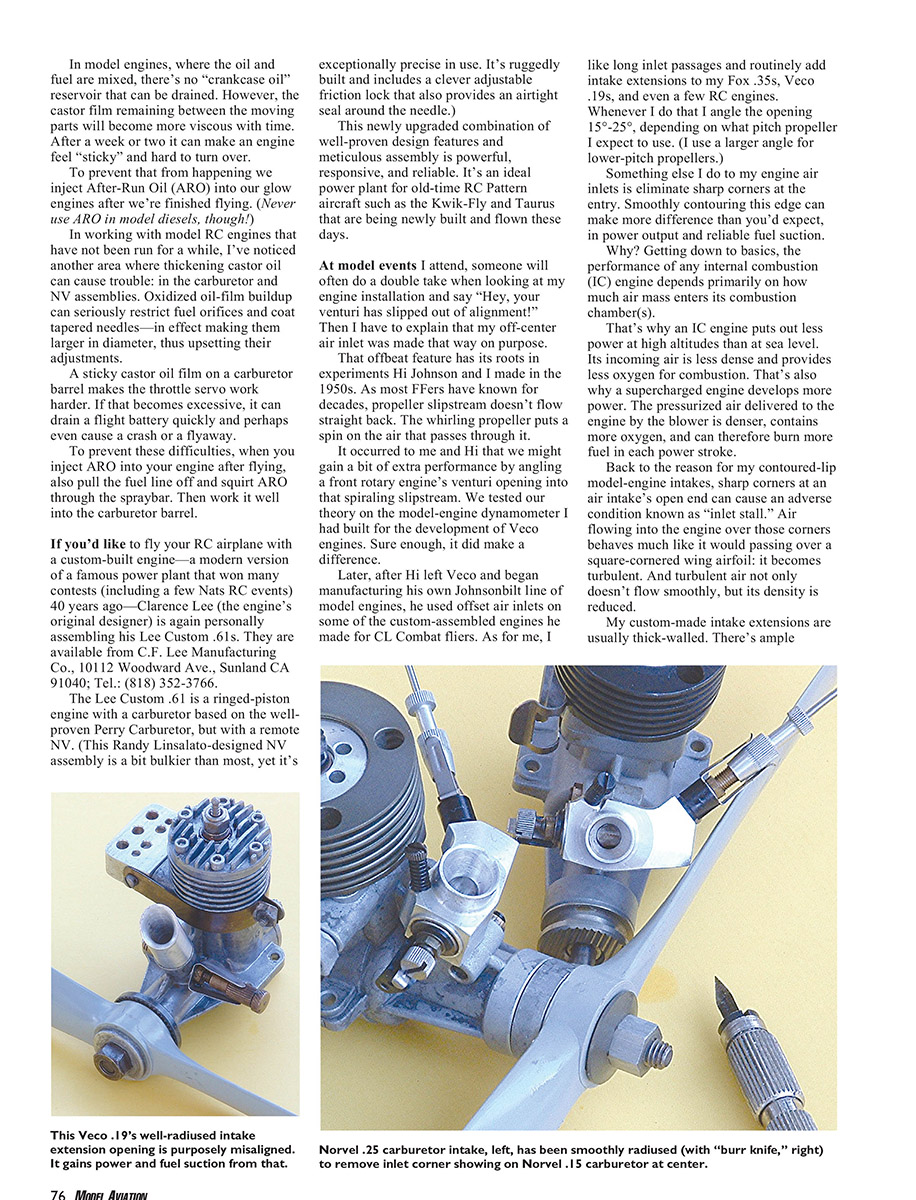
If you'd like to fly your RC airplane with a custom-built engine—a modern version of a famous power plant that won many contests (including a few Nats RC events) 40 years ago—Clarence Lee (the engine's original designer) is again personally assembling his Lee Custom .61s. They are available from C.F. Lee Manufacturing Co., 10112 Woodward Ave., Sunland, CA 91040; Tel.: (818) 352-3766.
The Lee Custom .61 is a ringed-piston engine with a carburetor based on the well-proven Perry Carburetor, but with a remote NV. This Randy Linsalato–designed NV assembly is a bit bulkier than most, yet it's exceptionally precise in use. It's ruggedly built and includes a clever adjustable friction lock that also provides an airtight seal around the needle.
This newly upgraded combination of well-proven design features and meticulous assembly is powerful, responsive, and reliable. It's an ideal power plant for old-time RC Pattern aircraft such as the Kwik-Fly and Taurus that are being newly built and flown these days.
At model events I attend, someone will often do a double take when looking at my engine installation and say, “Hey, your venturi has slipped out of alignment!” Then I have to explain that my off-center inlet was made that way on purpose.
That offbeat feature has its roots in experiments Hi Johnson and I made in the 1950s. As most FFers have known for decades, propeller slipstream doesn't flow straight back. The whirling propeller puts a spin on the air that passes through it.
It occurred to Hi and me that we might gain a bit of extra performance by angling a front rotary engine's venturi opening into that spiraling slipstream. We tested one theory on the model-engine dynamometer I had built for the development of Veco engines. Sure enough, it did make a difference.
Later, after Hi left Veco and began manufacturing his own Johnsonbilt line of engines, he used offset air inlets on some of the custom-assembled engines he made for CL Combat fliers. As for me, I like long inlet passages and routinely add intake extensions to my Fox .35s, Veco .19s, and even a few RC engines. Whenever I do that I angle the opening 15°–25°, depending on what pitch propeller I expect to use (I use a larger angle for lower-pitch propellers).
Something else I do to my engine air inlets is eliminate sharp corners at the entry. Smoothly contouring this edge can make more difference than you'd expect in power output and reliable fuel suction.
Why? Getting down to basics, the performance of any internal combustion (IC) engine depends primarily on how much air mass enters its combustion chamber(s).
That's why an IC engine puts out less power at high altitudes than at sea level—its incoming air is less dense and provides less oxygen for combustion. It's also why a supercharged engine develops more power: the pressurized air delivered by the blower is denser, contains more oxygen, and can therefore burn more fuel in each power stroke.
Back to the reason for my contoured-lip model-engine intakes: sharp corners at an air intake's open end can cause an adverse condition known as "inlet stall." Air flowing into the engine over those corners behaves much like it would passing over a square-cornered wing airfoil: it becomes turbulent. Turbulent air not only doesn't flow smoothly, but its density is reduced.
My custom-made intake extensions are usually thick-walled. There's ample material for shaping their entries into smoothly curved contours, but it's possible to round over the sharp inner corners of most of today's model-engine intakes. I do that by hand on my engines.
An X-Acto knife will work for this job, but I prefer a tool called a "burr knife." It has a rigid, three-cornered, hardened-steel cutting edge and can be bought via mail order from sources such as Harbor Freight Tools (www.harborfreight.com). This tool is inexpensive and much easier to control than a model knife. It's far less likely to slip out of the intake opening and gash your holding hand.
In any case, reshaping the inlet entry is a gradual, cut-only-a-little-at-a-time process. You can reduce the effort somewhat by starting with a hand countersink. That will bevel the inside corner but still leaves an edge. The burr knife can then be used to shave that edge away and form a smoothly curved entry for the all-important incoming airflow.
How much power gain can this inlet rework achieve? That's hard to say since there are so many variables. However, I'd estimate a minimum of 4%—that's 600 extra top-end rpm if your stock engine turns up 15,000 rpm. At the other extreme, my lengthened, offset, carefully contoured Fox .35 extensions gave me close to 15% more power than the stock venturi did.
MA
Transcribed from original scans by AI. Minor OCR errors may remain.

