


Model engines with "personality"
Joe Wagner | [email protected]
Glancing through the pages of any of today's model airplane magazines quickly shows that electric power has largely superseded piston power. It has practically wiped out glow engines smaller than .15 in size and made CO2 motors obsolete.
Yet many of us fliers, old and young, keep using our piston engines. Our motivations may vary, but as John Allen Kennedy (Shreveport, Louisiana) once told me, "Piston power possesses personality!"
That got me thinking. Yes, "personality"! I've owned and operated hundreds of model engines since my first pre-World War II Brown Junior. As I look back on those, I can distinctly remember the "character" of many.
Some piston engines were mean, inimical, and uncooperative. Others were dull plodders that needed much attention and coaxing to operate. But a few memorable ones stand out in my recollection. Their "personalities" are unforgettable.
We users of spark-ignition model engines of the 1930s and early 1940s had to contend with weak batteries and poor condensers, oily contact points, and fouled spark plugs. Those issues caused many frustrations.
Manufacturing quality varied considerably too. That's why my Forster .29 made a deeply favorable impression on me; it seemed to want to run—and keep running as long as its fuel lasted. That engine's fine-threaded needle valve and easily adjustable point gap made for simple and positive settings, and I never doubted my Forster .29's reliability.
After WWII, a plethora of model power plants came on the market. A few of those stand out in my memory, such as the Arden .099s, DeLong .30s, and Super Cyclones. They were great spark-ignition engines and I liked them a lot.
Then the glow plug appeared in 1946, and model engine makers didn't know what to do about that radical new development at first. But they soon took the obvious path and issued glow versions of their earlier sparkers without their ignition points, including Bantams, K&B Torpedos, and Atwood Champions—and sold many. A few farsighted innovators could see that, without needing to carry heavy batteries and spark coils in flight, it had become possible to make tiny model power plants. Among those visionaries was Mel Anderson, who designed the justly famous Super Cyclone. Using exactly half of the bore and stroke of the Baby Cyclone .36—the first model airplane engine he was involved in producing, more than a decade earlier—Mel came up with the Baby Spitfire .045. As a pioneering 1/2A engine, the Baby Spit had a drawback or two. Its small size made it fragile—especially the needle and radial mounting lugs. But it started readily, wasn't finicky in its settings, and had a minimal cost. I enjoyed many flights with Baby Spitfire-powered Dakotas and Sioux and remember what an agreeable engine it was.
I did considerable CL Stunt (Precision Aerobatics) flying in the 1950s. Engines of choice for that were Foxes, Vecos, and K&Bs. They did well, both in performance and in sales, but I can't recall any especially memorable qualities they had. The Johnson was something else.
Also included in this column:
- Starting small diesels
- Homemade gaskets
The Johnson was derived from the earlier Orwick line of CL power plants. The Johnson .29 went through a lengthy development period, but it brought results. I owned several Johnsons, and still have two, and they have all seemed "rarin' to go" when installed in one of my Chief or Squaw aircraft. I'm not the only one who got that impression, either. No Johnson engines have been made in the last 45 years, but existing specimens are still much in demand for flying in Old-Time Stunt events.
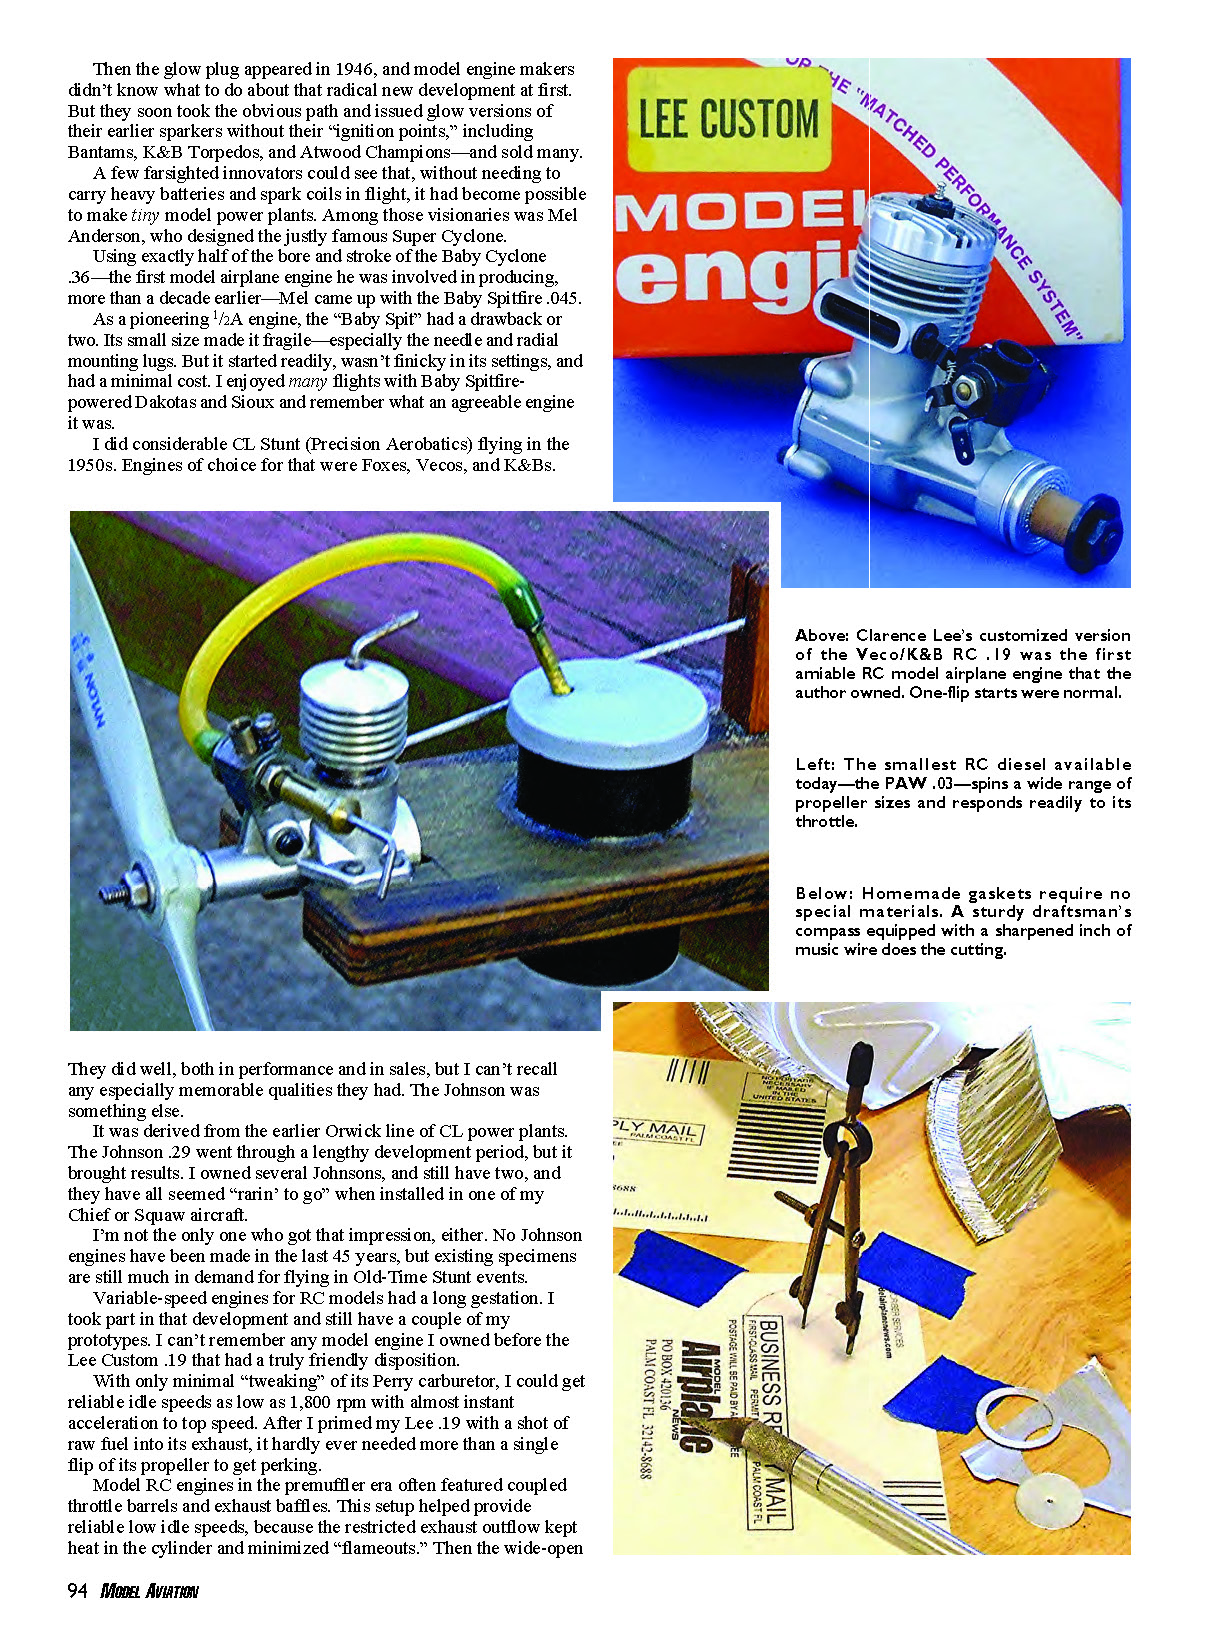
Variable-speed engines for RC models had a long gestation. I took part in that development and still have a couple of my prototypes. I can't remember any model engine I owned before the Lee Custom .19 that had a truly friendly disposition.
With only minimal tweaking of its Perry carburetor, I could get reliable idle speeds as low as 1,800 rpm with almost instant acceleration to top speed. After I primed my Lee .19 with a shot of raw fuel into its exhaust, it hardly ever needed more than a single flip of its propeller to get perking.
Model RC engines in the premuffler era often featured coupled throttle barrels and exhaust baffles. This setup helped provide reliable low idle speeds, because the restricted exhaust outflow kept heat in the cylinder and minimized "flameouts." Then the wide-open exhaust at full power let excess fuel that had accumulated in the case during idling blast out swiftly and prevented hesitation in returning to top rpm.
Starting small diesels
Another of my RC engines that I classify as exceptionally friendly is the Progress Aero Works (PAW) .03 diesel. Because of its variable compression, this little gem can happily run turning propellers from 5 x 2 to 10 x 4. However, as do most model diesels of less than .10 displacement, the PAW .03 requires a different starting method than larger sizes do.
Standard diesel starting technique calls for a high initial compression setting to ignite the fuel-oil-air mixture in a cold engine. Then, as soon as the engine begins to run and warm up, it’s necessary to back off the compression, gradually, to prevent premature ignition, overheating, and excessive stresses that result from that.
But small diesels often start best with a reduced compression setting. That’s because the headspace between the piston crown and the underside of the cylinder head at the top of the stroke is so small—less than 1/64 inch sometimes. The mere thickness of a wet fuel-oil film in the combustion chamber can act as a compression booster.
I begin starting my PAW .03s (I own several) at a low compression setting, keeping my left hand on the adjusting lever as I hand-flip the propeller. I gradually increase the compression until the engine fires. Then I quickly increase the compression further, until the firing smoothes out and the exhaust oil emerges no darker than a light brown. I seldom need to change needle settings.
Homemade gaskets
One topic I often get queries about is replacement gaskets. These can be difficult to find, even for some modern engines, and they’re almost impossible to buy for old-time power plants. Material for do-it-yourself (DIY) gasket makers seems to have gone off the market too. However, I’ve been making my own model engine replacement gaskets for years.
For everything except head gaskets, I use card stock material from the drop-out-in-your-lap subscription ad cards that most of today’s magazines contain. For head gaskets, I use thin aluminum sheet from disposable pie pans. I cut my gaskets with a modified drafting compass—one that has a cutting blade on one leg instead of a graphite point.
Ring-type gaskets work fine for most model engine applications. It’s unnecessary for gaskets to cover the entire mating surface area, including screw holes. I’ve found that eliminating the little perforated "ears" helps sealing efficiency; it lets the gasket compress evenly around its perimeter, instead of mostly around the screw-hole areas.
I made the blade in my DIY gasket cutter from .080 (2 mm) music wire. That’s hardened steel, but not quite hard enough to retain an extremely sharp edge. So I grind the cutting edge to the approximate shape while holding the wire in a pin vise. Then I re-harden the point.
To do that, I set an ice cube on my workbench. I light my small butane torch and heat the end 1/4 inch or so of the rough-ground music wire to a bright, cherry-red glow. I keep it at that temperature for approximately 30 seconds, and then plunge it quickly onto the ice cube. That provides an instant quench, which maximizes the point’s hardness. After that, I carefully grind, sharpen, and hone the cutting edge, being careful never to allow the razor-thin edge to get hot enough to lose any of its hardness.
This gasket-cutting process requires many cutter rotations. I use either a hard plywood backing under the gasket material or, better yet, a flat sheet of aircraft aluminum. A relatively unyielding undersurface prevents the gasket material from embossing under the cutter’s numerous passes. It also stops the compass’s center point from digging itself deeper as the cutting process continues.
Properly done, slowly and surely, gaskets cut this way will have smooth edges and lay flat. If yours aren’t like that, resharpen your cutting point and try again, since the material is cheap.
Before installing my replacement gaskets, I soak them in castor oil for a few minutes. That provides extra sealing ability and, yes, that also applies to the aluminum gaskets.
And remember: "Piston power possesses personality!"
MA
Transcribed from original scans by AI. Minor OCR errors may remain.

