
The Engine Shop
Joe Wagner | [email protected]
The SuperTigre ringed G-34
I like smaller model engines. The airplanes they power are quicker to construct, less costly, and easier to transport than giant-scale types. Probably for those reasons, model power plants with .25 through .46 cu. in. displacements have long been the most popular varieties for RC flying.
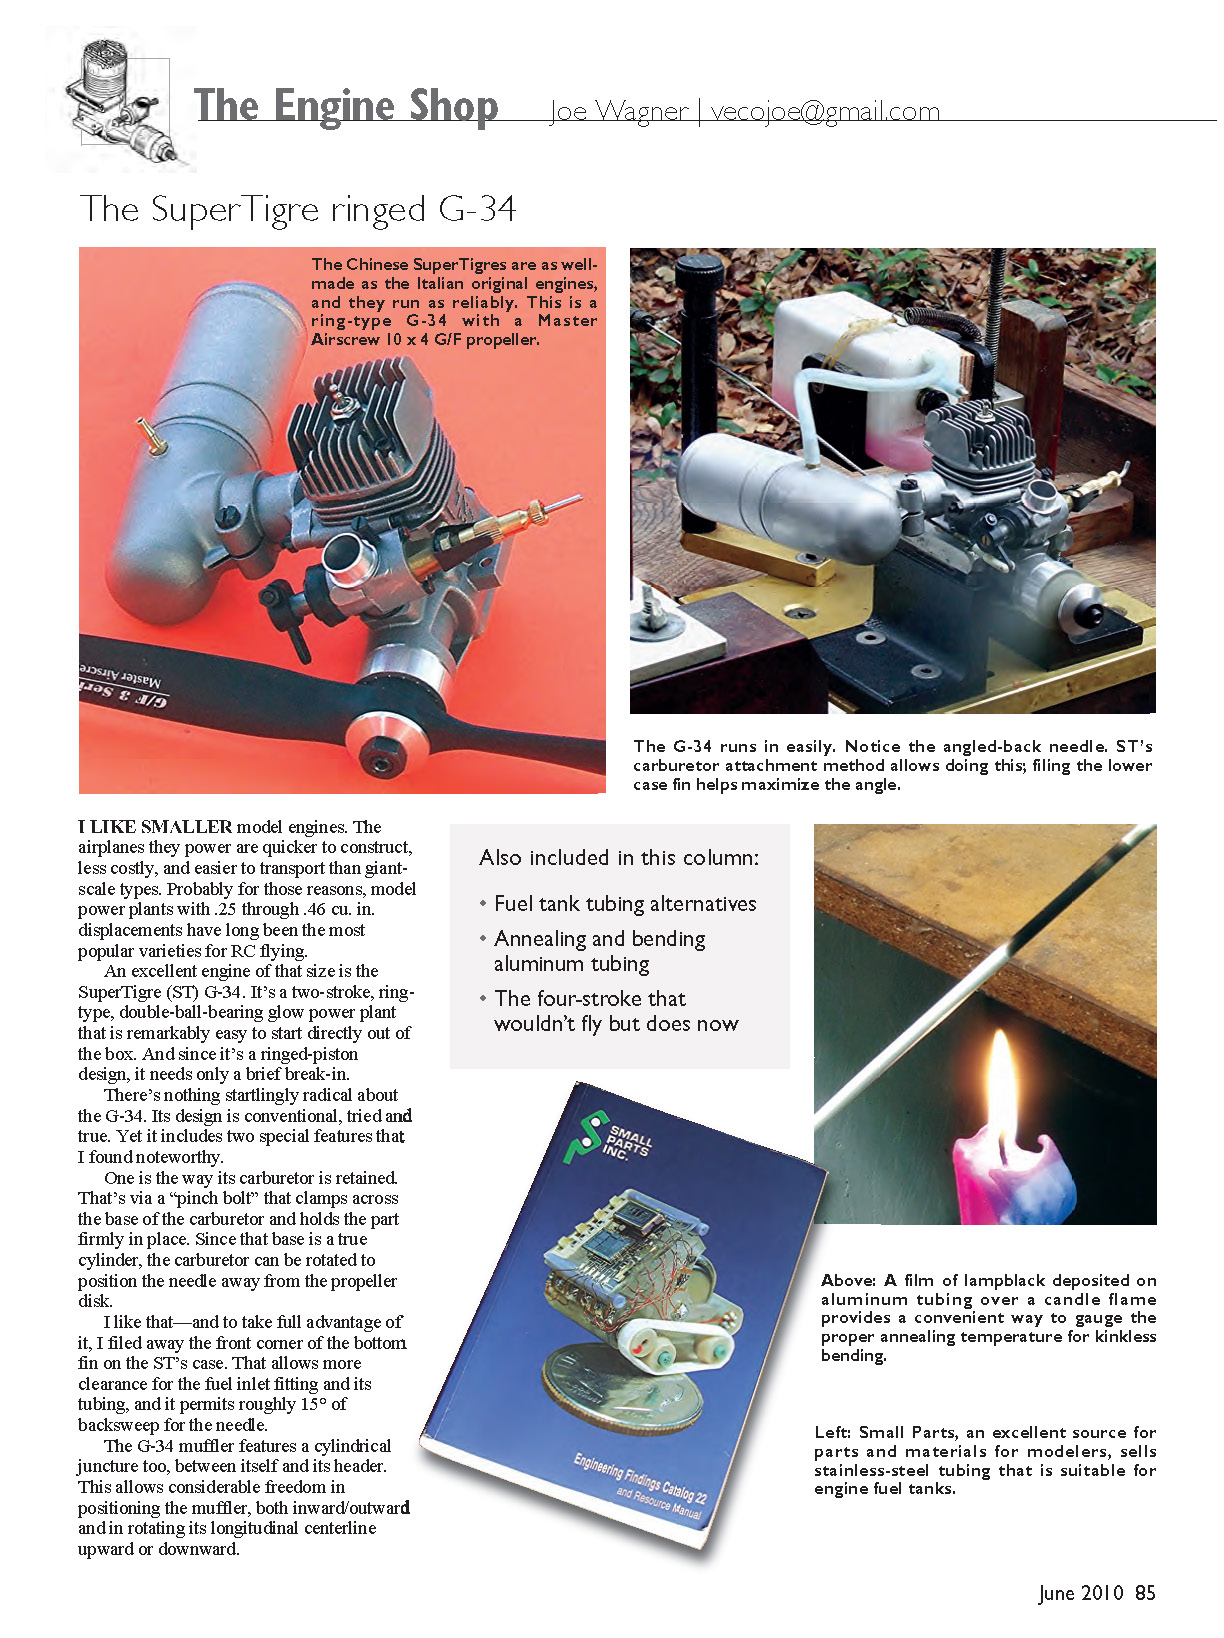
An excellent engine of that size is the SuperTigre (ST) G-34. It's a two-stroke, ring-type, double-ball-bearing glow power plant that is remarkably easy to start directly out of the box. And since it's a ringed-piston design, it needs only a brief break-in.
There's nothing startlingly radical about the G-34. Its design is conventional, tried and true. Yet it includes two special features that I found noteworthy.
One is the way its carburetor is retained. That's via a "pinch bolt" that clamps across the base of the carburetor and holds the part firmly in place. Since that base is a true cylinder, the carburetor can be rotated to position the needle away from the propeller disk.
I like that — and to take full advantage of it, I filed away the front corner of the bottom fin on the ST's case. That allows more clearance for the fuel inlet fitting and its tubing, and it permits roughly 15° of backsweep for the needle.
The G-34 muffler features a cylindrical juncture too, between itself and its header. This allows considerable freedom in positioning the muffler, both inward/outward and in rotating its longitudinal centerline upward or downward.
That also makes it easy to mount and remove the engine, because loosening a single clamp bolt on the muffler permits sliding it off of its header. That gives good access to the mounting bolts on the engine's exhaust side. The ST .34's muffler is rather bulky for an engine this size. However, it's extremely effective. I measured the sound output 10 feet from the engine at a mere 82 dBA; that was with a Graupner gray 10 x 4 propeller turning 11,800 rpm.
Two things about the ST muffler could be improved. One is its exhaust outlet location, on the muffler body centerline. With the muffler axis aligned horizontally, it allows exhaust oil to accumulate within — which could be embarrassing when putting the model back in one's vehicle after a full day of flying. The second thing is that the muffler pressure fitting is straight upright. It works fine with an upright engine installation, but it's not good with an inverted engine. See the troubleshooting paragraphs at the end of this column for more information about this potential problem. On my ST .34 I plan to relocate the muffler pressure fitting so that it points toward the cylinder at close to 45°. While I'm altering that, I'll add a similar fitting at the bottom aft end of the muffler, as a drain for exhaust oil.
My mention in a recent column about corrosion in model fuel tanks, caused by brass tubing, brought considerable input from readers. Bob Whitney (Palm Bay, Florida) suggested using stainless-steel tubing instead of brass. He wrote that suitably sized stainless tubing can be obtained from Small Parts, and although the material is rigid, it can be easily annealed. Also, it's solderable with Sta-Brite solder and flux.
Other readers suggested electroless nickel plating the brass tubing. They pointed out that this process plates both the inside and outside of the tubing.
However, locating a convenient source for electroless nickel plating for a few small model parts might be difficult in many places. I couldn't find any near here, in the southeast corner of Alabama.
Doug Dahlke (Oshkosh, Wisconsin) mentioned that copper tubing won't cause corrosion in model fuel. That's true — but 1/8-inch-OD copper tubing has a thick wall. Its ID is only .055. That's less than 1/16 inch in diameter and will considerably restrict fuel flow.
Mostly with Dave West's (Streamwood, Illinois) advice, we've come up with a nearly ideal alternative for brass fuel tank tubing. It's aluminum.
Thin-wall aluminum tubing is easy to find (e.g., K&S), inexpensive, and won't corrode in any kind of model engine fuel. Using it instead of brass requires doing things differently.
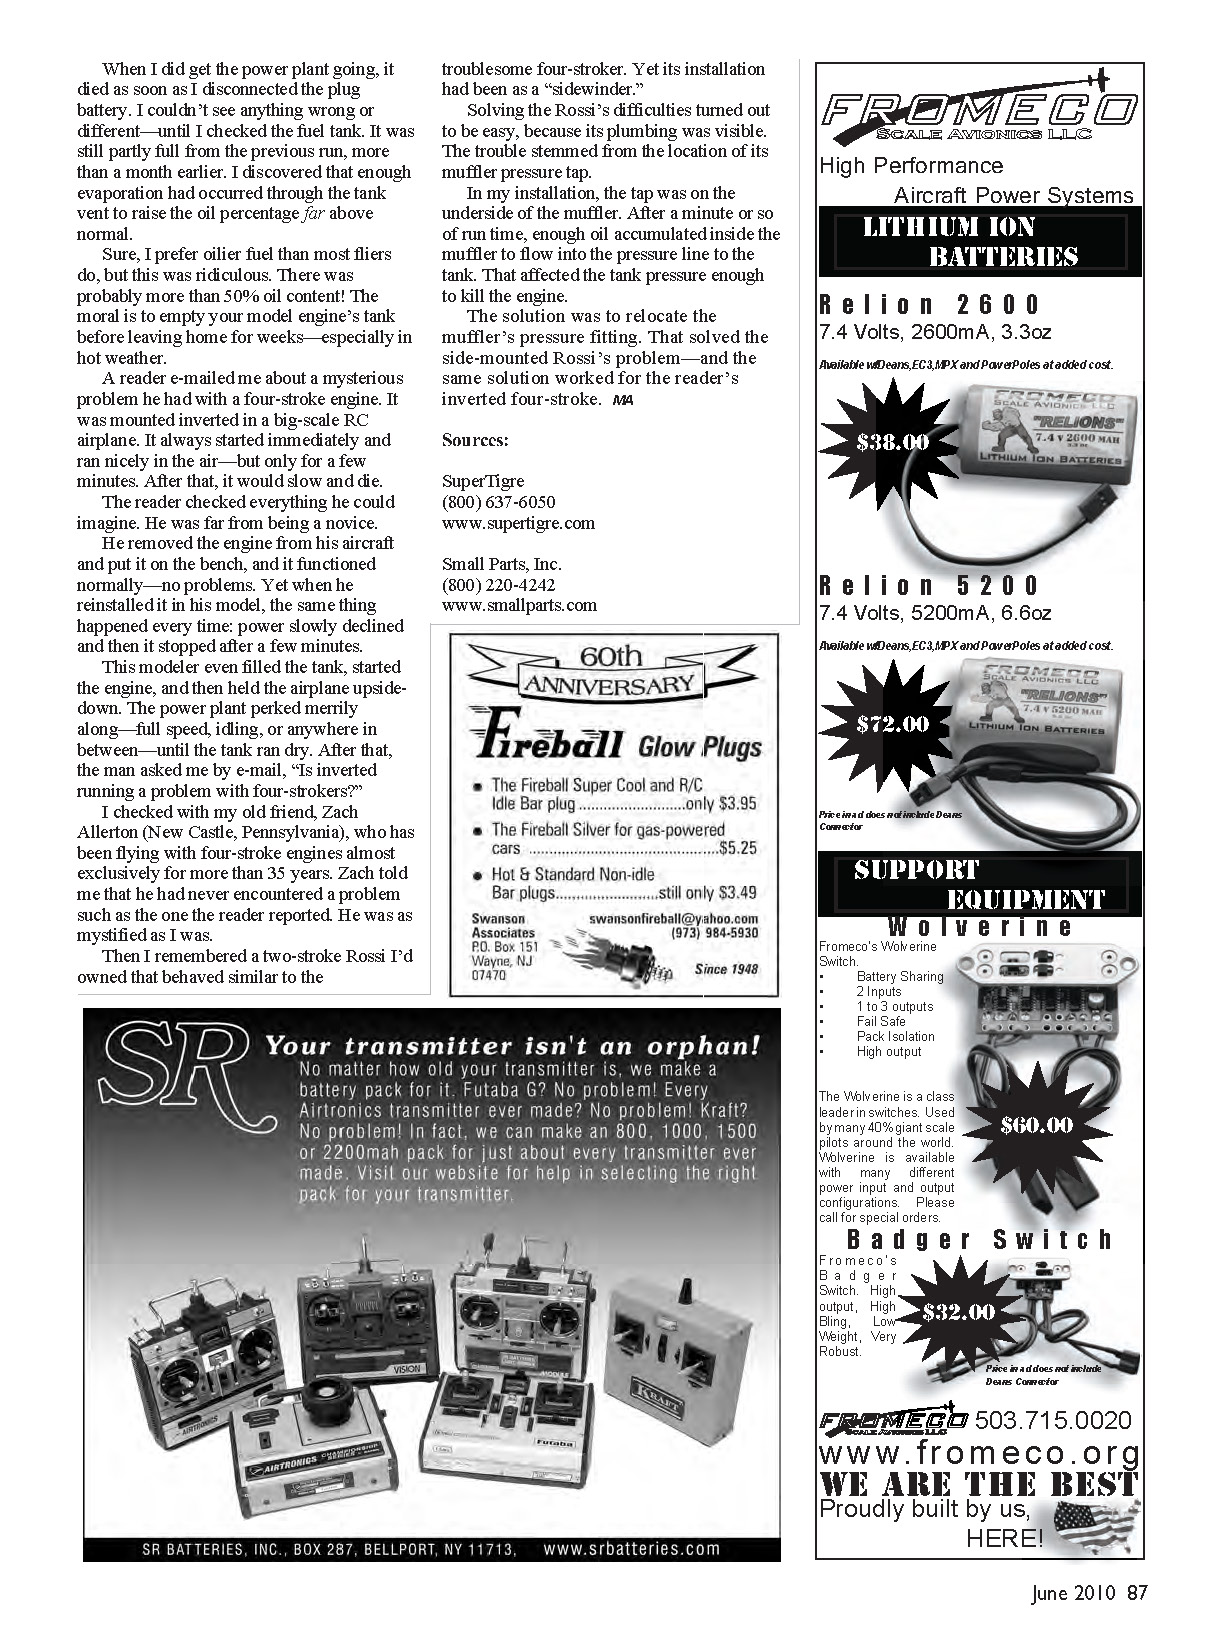
Although aluminum can be soldered, it's not easy. But we don't need solder to assemble aluminum tubing into metal fuel tanks when J.B. Weld is available.
That material is as strong and almost as adherent to metal as solder is. It's easy to achieve a reliable, airtight juncture between the tubing and the tank with J.B. Weld too.
The biggest problem I encountered in working with thin-wall aluminum tubing was bending it without kinking. That's because the process used in manufacturing it "work-hardens" the metal, making it stiff. Trying to achieve anything more than gentle bends in thin-wall aluminum tubing usually results in a kink.
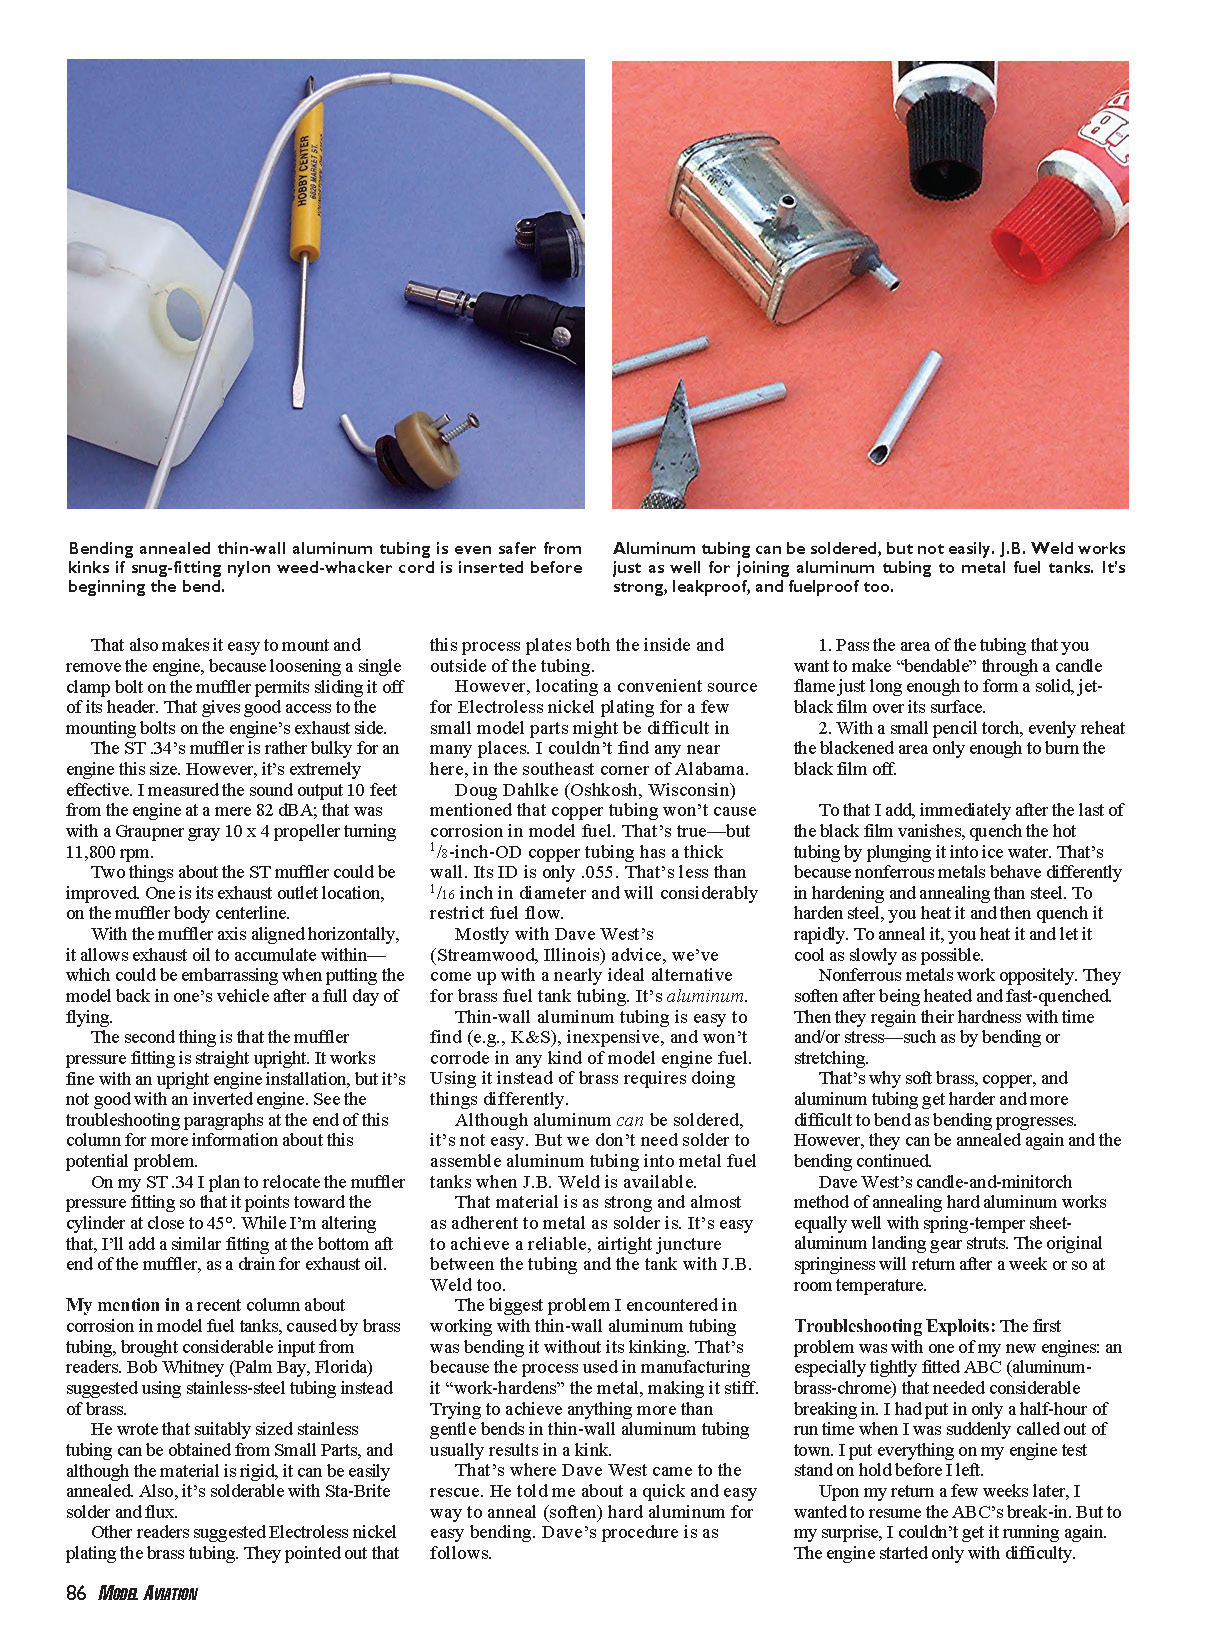
That's where Dave West came to the rescue. He told me about a quick and easy way to anneal (soften) hard aluminum tubing for easy bending. Dave's procedure is as follows.
- Pass the area of the tubing that you want to make "bendable" through a candle flame just long enough to form a solid, jet-black film over its surface.
- With a small pencil torch, evenly reheat the blackened area only enough to burn the black film off.
- Immediately after the last of the black film vanishes, quench the hot tubing by plunging it into ice water.
To explain: nonferrous metals behave differently in hardening and annealing than steel. To harden steel, you heat it and then quench it rapidly. To anneal it, you heat it and let it cool as slowly as possible. Nonferrous metals work oppositely. They soften after being heated and fast-quenched. Then they regain their hardness with time and/or stress — such as by bending or stretching.
That's why soft brass, copper, and aluminum tubing get harder and more difficult to bend as bending progresses. However, they can be annealed again and the bending continued.
Dave West's candle-and-minitorch method of annealing hard aluminum works equally well with spring-temper sheet-aluminum landing gear struts. The original springiness will return after a week or so at room temperature.
Troubleshooting Exploits
The first problem was with one of my new engines: an especially tightly fitted ABC (aluminum-brass-chrome) that needed considerable breaking in. I had put in only a half-hour of run time when I was suddenly called out of town. I put everything on my engine test stand on hold before I left.
Upon my return a few weeks later, I wanted to resume the ABC's break-in. But to my surprise, I couldn't get it running again. The engine started only with difficulty. When I did get the power plant going, it died as soon as I disconnected the plug battery. I couldn't see anything wrong or different — until I checked the fuel tank. It was still partly full from the previous run, more than a month earlier. I discovered that enough evaporation had occurred through the tank vent to raise the oil percentage far above normal.
Sure, I prefer oilier fuel than most fliers do, but this was ridiculous. There was probably more than 50% oil content! The moral is to empty your model engine's tank before leaving home for weeks — especially in hot weather.
A reader e-mailed me about a mysterious problem he had with a four-stroke engine. It was mounted inverted in a big-scale RC airplane. It always started immediately and ran nicely in the air — but only for a few minutes. After that, it would slow and die.
The reader checked everything he could imagine. He was far from being a novice.
He removed the engine from his aircraft and put it on the bench, and it functioned normally — no problems. Yet when he reinstalled it in his model, the same thing happened every time: power slowly declined and then it stopped after a few minutes.
This modeler even filled the tank, started the engine, and then held the airplane upside-down. The power plant perked merrily along — full speed, idling, or anywhere in between — until the tank ran dry. After that, the man asked me by e-mail, "Is inverted running a problem with four-strokers?"
I checked with my old friend, Zach Allerton (New Castle, Pennsylvania), who has been flying with four-stroke engines almost exclusively for more than 35 years. Zach told me that he had never encountered a problem such as the one the reader reported. He was as mystified as I was.
Then I remembered a two-stroke Rossi I'd owned that behaved similar to the troublesome four-stroker. Yet its installation had been as a "sidewinder."
Solving the Rossi's difficulties turned out to be easy, because its plumbing was visible. The trouble stemmed from the location of its muffler pressure tap.
In my installation, the tap was on the underside of the muffler. After a minute or so of run time, enough oil accumulated inside the muffler to flow into the pressure line to the tank. That affected the tank pressure enough to kill the engine.
The solution was to relocate the muffler's pressure fitting. That solved the side-mounted Rossi's problem — and the same solution worked for the reader's inverted four-stroke.
Sources
- SuperTigre — (800) 637-6050 — www.supertigre.com
- Small Parts, Inc. — (800) 220-4242 — www.smallparts.com
Transcribed from original scans by AI. Minor OCR errors may remain.

