
Servicing Your Engine
Eric Henderson <[email protected]>
Engine servicing, part one: As I write this, it is winter in the Northeast. Time to pull some engines apart! It is surprising to me how reluctant people are to do this.
If an engine is still under warranty, call the supplier, get a return authorization, and ship it back. However, if the engine is old and no longer covered, then why not have at it?
Digital cameras are a great aid. Take as many photographs as you like — it costs nothing to take one or 100. My iPhone 4 is always by my side. It is easy to use, lets me review photos quickly, and is great for blowing up small details with a touch of a finger. You don't need expensive 35mm developing or a PC/printer.
Tools and supplies
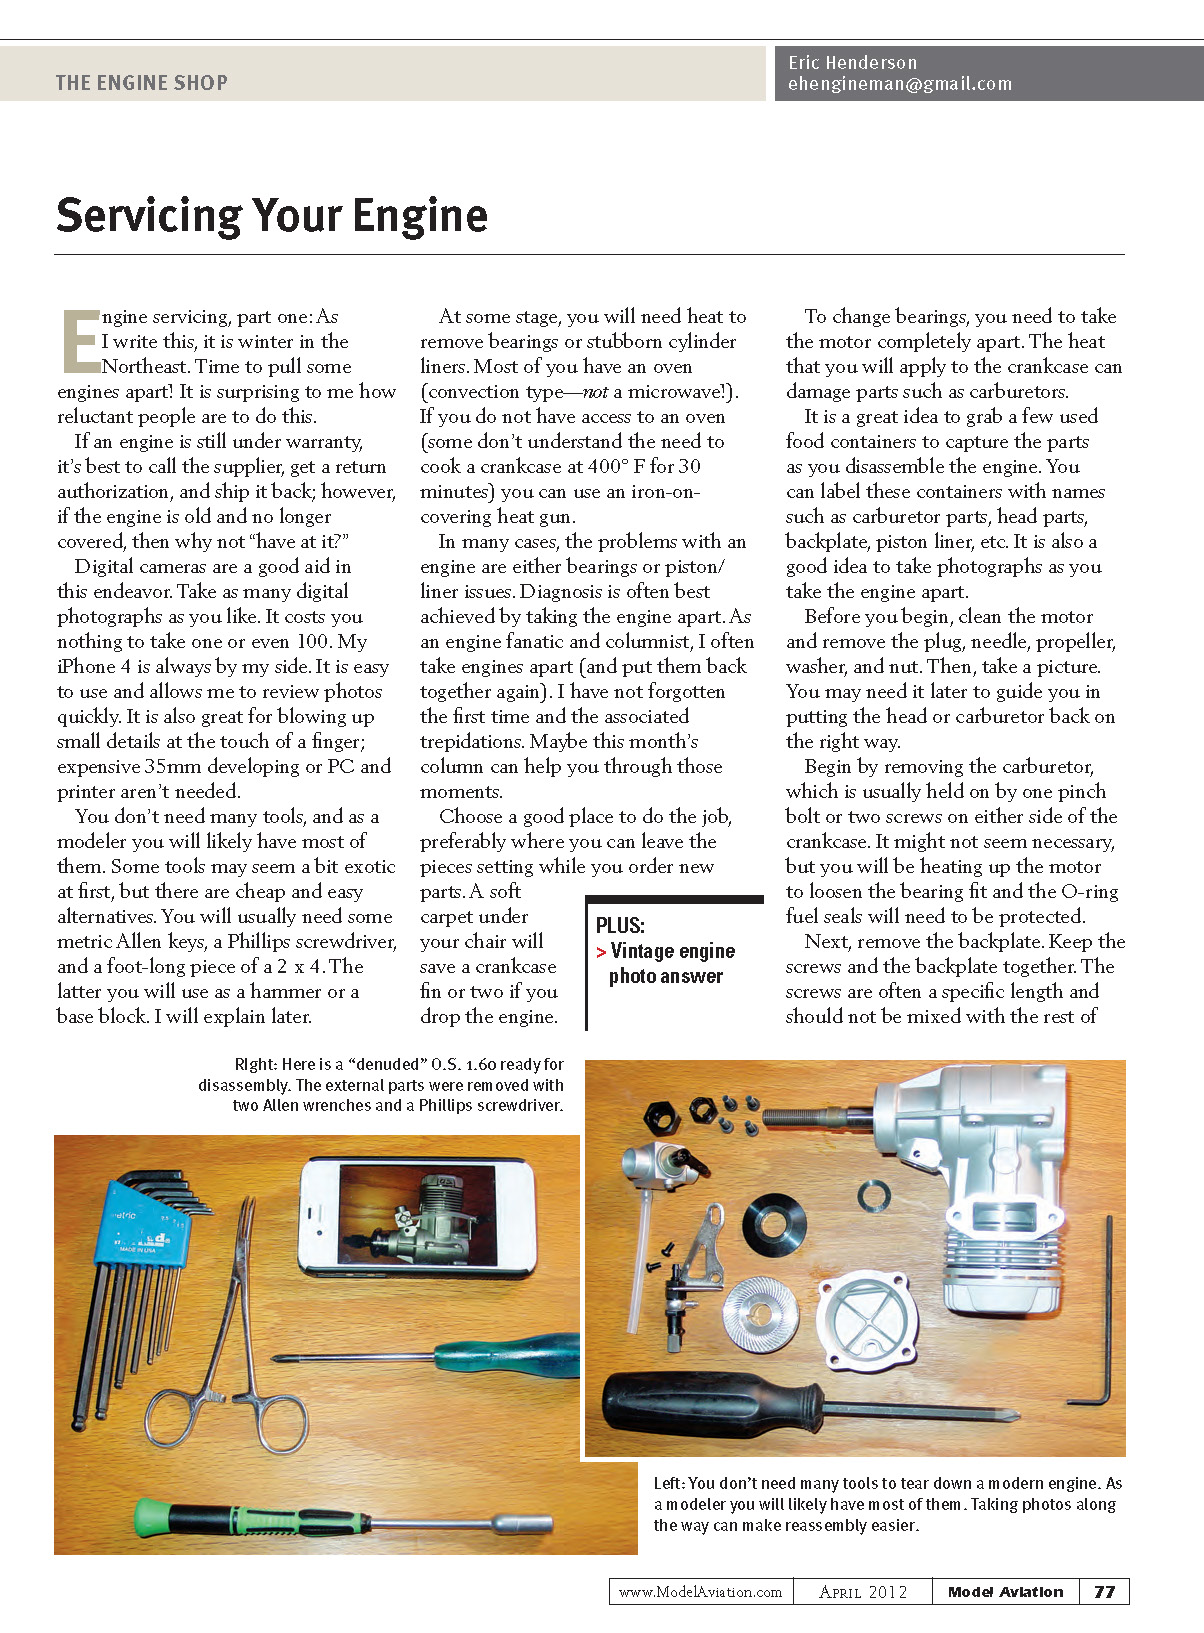
- Digital camera or smartphone
- A set of metric Allen keys
- Phillips screwdriver
- A 1-foot piece of 2 x 4 (used as a hammer or base block)
- Oven (convection type) or a covering iron / heat gun (not a paint-stripper type)
- Oven gloves (not the ones you return to the kitchen)
- Wooden dowel
- Small puller (inexpensive automotive types work)
- Dental floss
- Razor blade (for gasket removal)
- Small used food containers and labels (to store and identify parts)
- Optional: replacement bearings (I order stainless front and rear bearings from Boca Bearings)
Preparation and safety
Choose a good place to work where you can leave parts while you order replacements. A soft carpet under your chair will save crankcase fins if you drop the engine. Before you begin, clean the motor and remove the glow plug, needle, propeller, washer, and nut — then take a picture. That photo may guide you when reinstalling the head or carburetor.
Grab a few used food containers and label them (for example: carburetor parts, head parts, backplate, piston/liner). Take photographs as you disassemble the engine.
To change bearings you must take the motor completely apart. Note that the heat you apply to the crankcase can damage parts such as carburetors, so remove them first.
Disassembly steps
- Remove the carburetor. It is usually held on by one pinch bolt or two screws on either side of the crankcase. Protect the O-ring fuel seals from heat.
- Remove the backplate. Keep the screws and backplate together; screws are often specific lengths and should not be mixed. Preserve the backplate gasket if possible. If you reuse it, slide a razor blade between the mating faces to lift it off. Note the orientation of the backplate — there is usually a cutaway to clear the piston skirt.
- Inspect the crankcase interior. If you see much rust, the bearings are likely shot. If it looks shiny and new, the bearings and crankshaft are probably okay.
- Loosen the head bolts about a half-turn at a time all the way around to prevent warping of the aluminum cylinder head. With five or more head bolts, loosen in an opposite/diagonal pattern (each time you loosen a bolt, move the wrench over the glow-plug hole to the bolt on the other side of the cylinder).
- If the head is still tight, give a light tap with the 2 x 4 — avoid hitting the cooling fins.
- Remove the propeller driver. Look for a Woodruff key and a washer between the propeller driver and the front bearing; the washer must go back in the same place later. If the driver does not pull off by hand, use a small puller (do not whack the propeller shaft with the 2 x 4).
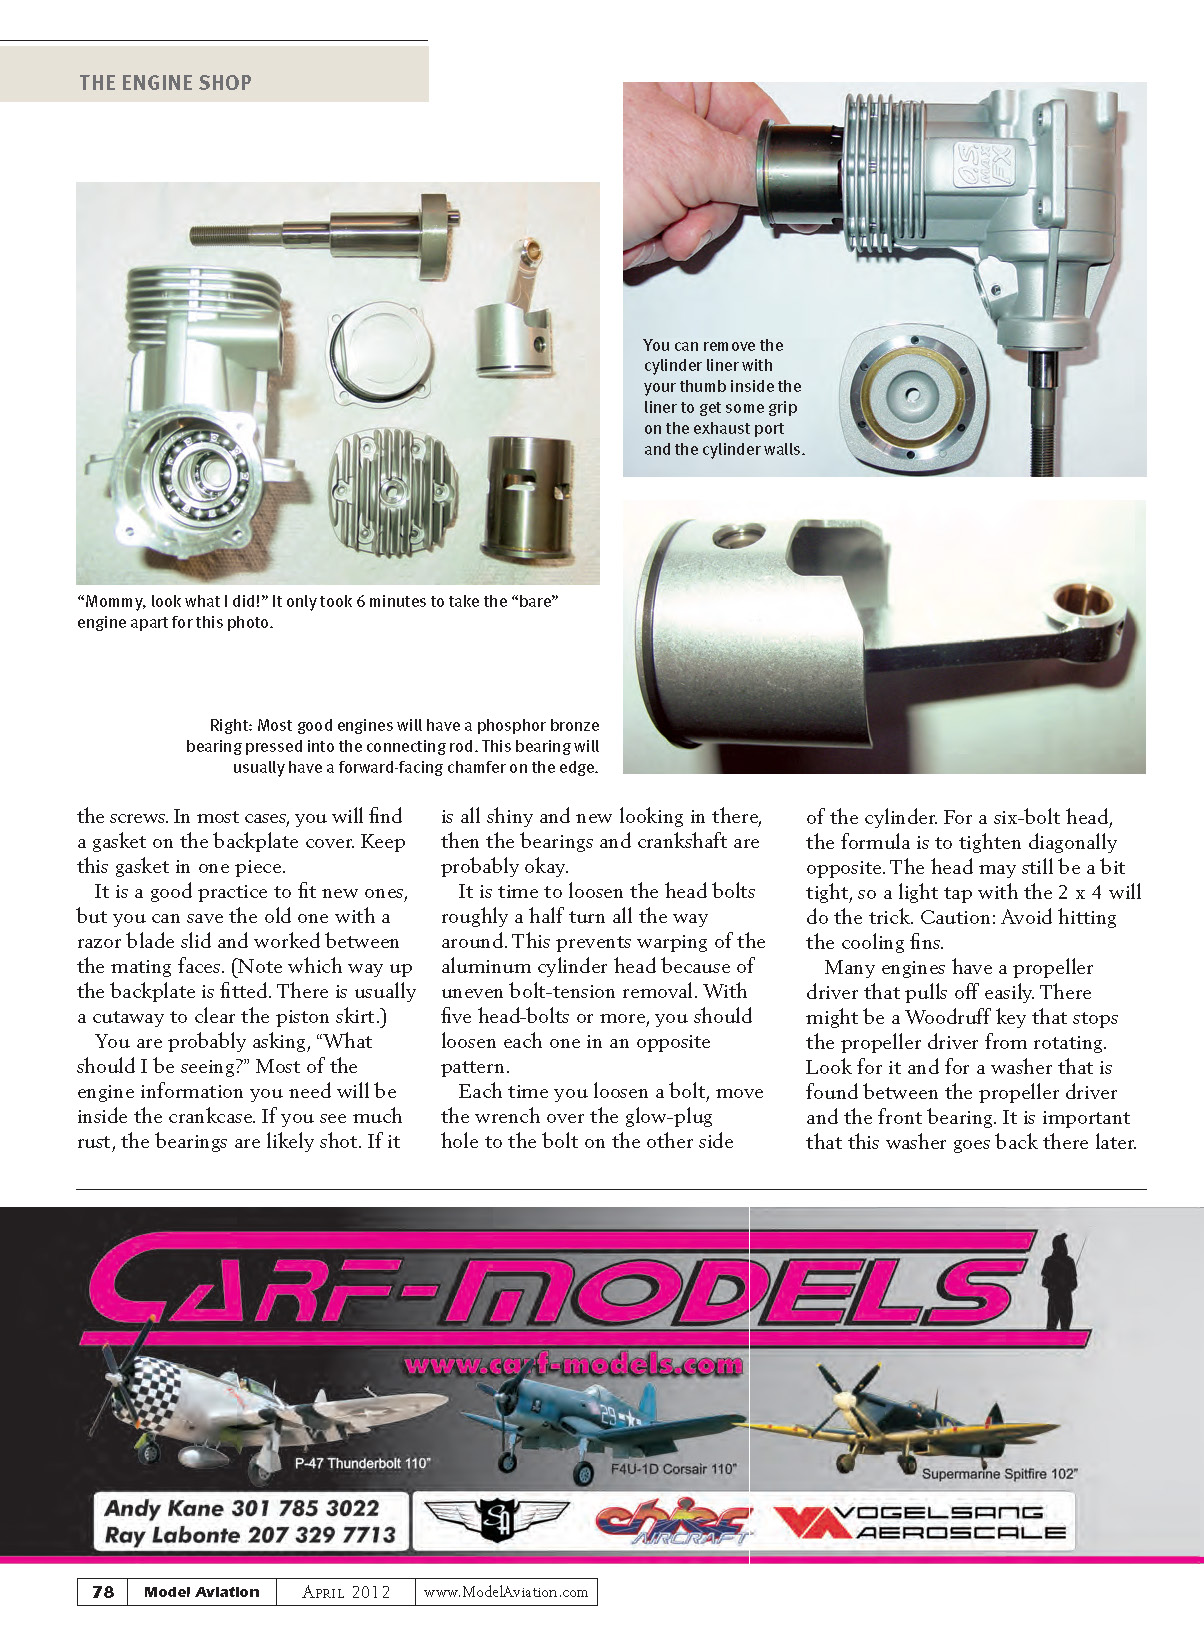
- Remove the cylinder liner. Put your thumb inside the liner for grip and slide it out. If it is stuck, warm the casing with a covering heat gun to loosen it (do not use paint-stripper heat guns — they get too hot and will distort the crankcase).
- Remove the piston and connecting rod assembly as one piece. The small end should slide to the rear of the piston on the wrist pin. If the connecting rod will not move back, thread some dental floss around the wrist pin to clean it.
- With the connecting rod moved back, it should come off the crankshaft pin (big end). You may need to jiggle it and twist the crankshaft a few degrees. Many pistons have a ring — you do not need to remove it yet.
- Note that many engines have a phosphor bronze bearing pressed into the connecting rod; it often has a chamfer on the forward side.
- Tap out the crankshaft with the 2 x 4. The wooden block has the right mass to move the shaft without damaging threads. Do not put the crankcase down on a hard or metal surface while doing this — you could damage the backplate mating surface. You can also use the 2 x 4 to loosen a stuck drive washer.
Bearing removal
- Photograph the bearings before and after removal to help with identification and ordering. Bearing numbers identify the parts you need.
- Heat the crankcase to make bearing removal easy: approximately 20 minutes in an oven at 350–400° F. You can use a covering iron or heat gun, but distribute the heat evenly to avoid distorting the casting.
- With the crankcase preheated, tap the back of the whole casing firmly on a wooden block; the rear/main bearing will fall out. Use oven gloves to handle the hot casting.
- If the bearing does not move, heat the casing again for another 10 minutes. The aluminum casting expands more than the steel outer ring, so gentle tapping or a wooden dowel poke will free the bearing.
I always replace the front and rear bearings every time — even in new engines — with stainless steel versions ordered from a trusted supplier (I use Boca Bearings). Once the bearings are out, you have effectively taken the engine apart.
In part two I will address carburetors, what to look for regarding damage and problems, and how to successfully put it all together.
Photo Question
Thanks to everyone who wrote to me about the vintage engine photo question. I received 39 emails — an outstanding response from you old-engine lovers. The first correct answer was from James Larkin, who identified a Super Cyclone, an Ohlsson 60, an OK Herkimer 60, and a Foster 99. All of you clearly have a passion for these lovely pieces of engineering from the past.
It was suggested that I make the question harder and rarer. I wonder if I will ever feel this way about my OPSs, Rossis, Enyas, EDs, Mercos, O.S.s, YSs, and Mokis, to name a few.
Happy New Year to all you motor heads — [email protected].
Transcribed from original scans by AI. Minor OCR errors may remain.

