
The Engine Shop
927 Pine Ave., Ozark AL 36360
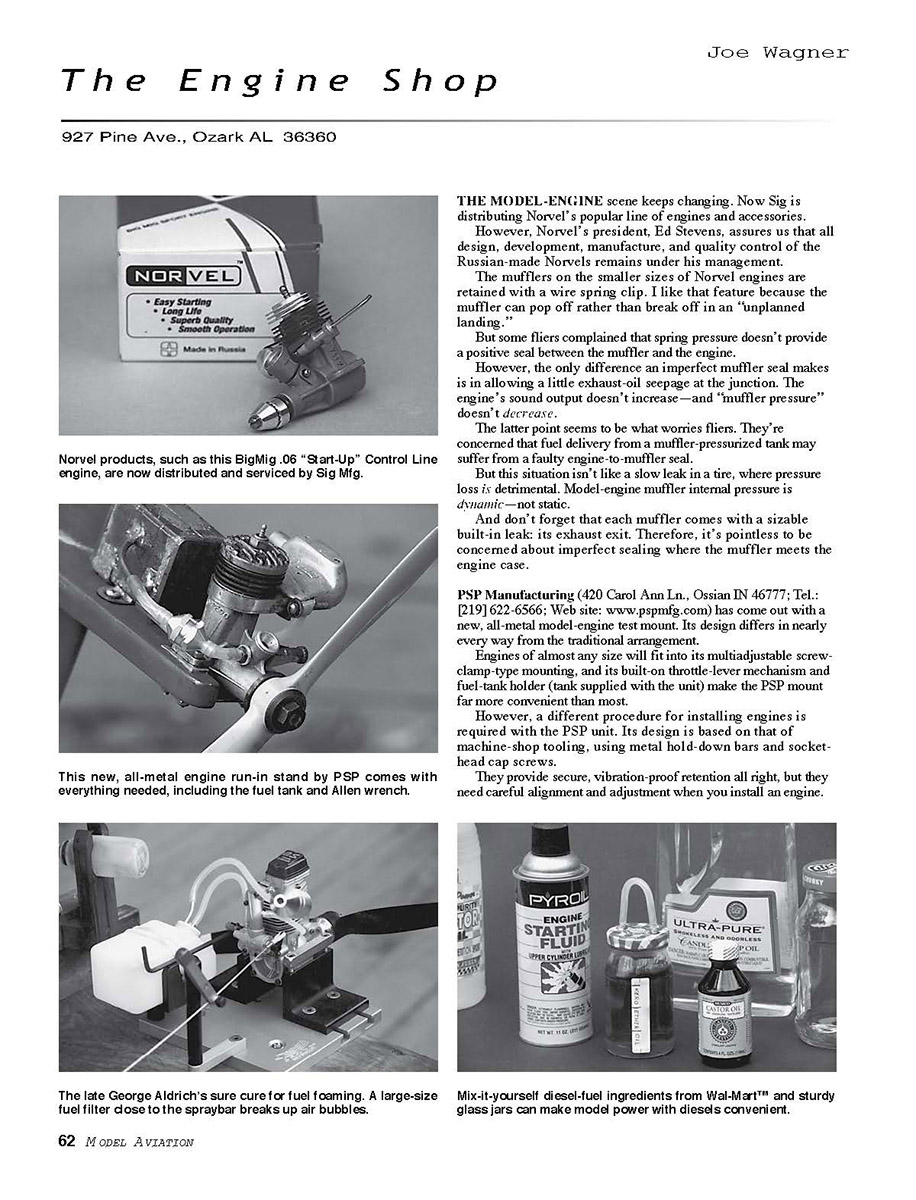
THE MODEL-ENGINE scene keeps changing. Now Sig is distributing Norvel's popular line of engines and accessories.
However, Norvel's president, Ed Stevens, assures us that all design, development, manufacture, and quality control of the Russian-made Norvels remains under his management.
The mufflers on the smaller sizes of Norvel engines are retained with a wire spring clip. I like that feature because the muffler can pop off rather than break off in an "unplanned landing."
But some fliers complained that spring pressure doesn't provide a positive seal between the muffler and the engine.
However, the only difference an imperfect muffler seal makes is in allowing a little exhaust-oil seepage at the junction. The engine's sound output doesn't increase—and "muffler pressure" doesn't decrease.
The latter point seems to be what worries fliers. They're concerned that fuel delivery from a muffler-pressurized tank may suffer from a faulty engine-to-muffler seal.
But this situation isn't like a slow leak in a tire, where pressure loss is detrimental. Model-engine muffler internal pressure is dynamic—not static.
And don't forget that each muffler comes with a sizable built-in leak: its exhaust exit. Therefore, it's pointless to be concerned about imperfect sealing where the muffler meets the engine case.
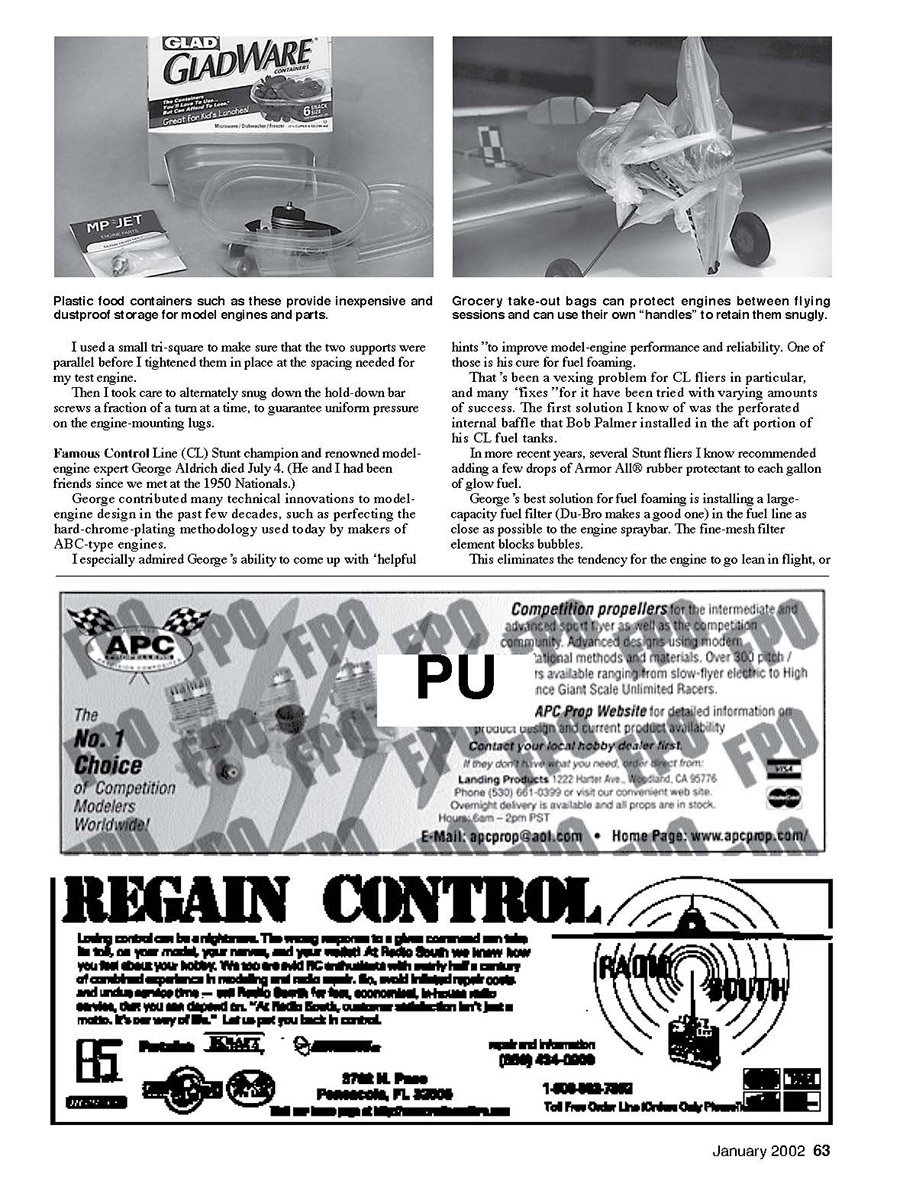
PSP Manufacturing (420 Carol Ann Ln., Ossian IN 46777; Tel.: [219] 622-6566; Web site: www.pspmfg.com) has come out with a new, all-metal model-engine test mount. Its design differs in nearly every way from the traditional arrangement.
Engines of almost any size will fit into its multi-adjustable screw-clamp-type mounting, and its built-on throttle-lever mechanism and fuel-tank holder (tank supplied with the unit) make the PSP mount far more convenient than most.
However, a different procedure for installing engines is required with the PSP unit. Its design is based on that of machine-shop tooling, using metal hold-down bars and socket-head cap screws.
They provide secure, vibration-proof retention all right, but they need careful alignment and adjustment when you install an engine. I used a small tri-square to make sure that the two supports were parallel before I tightened them in place at the spacing needed for my test engine.
Then I took care to alternately snug down the hold-down bar screws a fraction of a turn at a time, to guarantee uniform pressure on the engine-mounting lugs.
Famous Control Line (CL) Stunt champion and renowned model-engine expert George Aldrich died July 4. (He and I had been friends since we met at the 1950 Nationals.)
George contributed many technical innovations to model-engine design in the past few decades, such as perfecting the hard-chrome-plating methodology used today by makers of ABC-type engines.
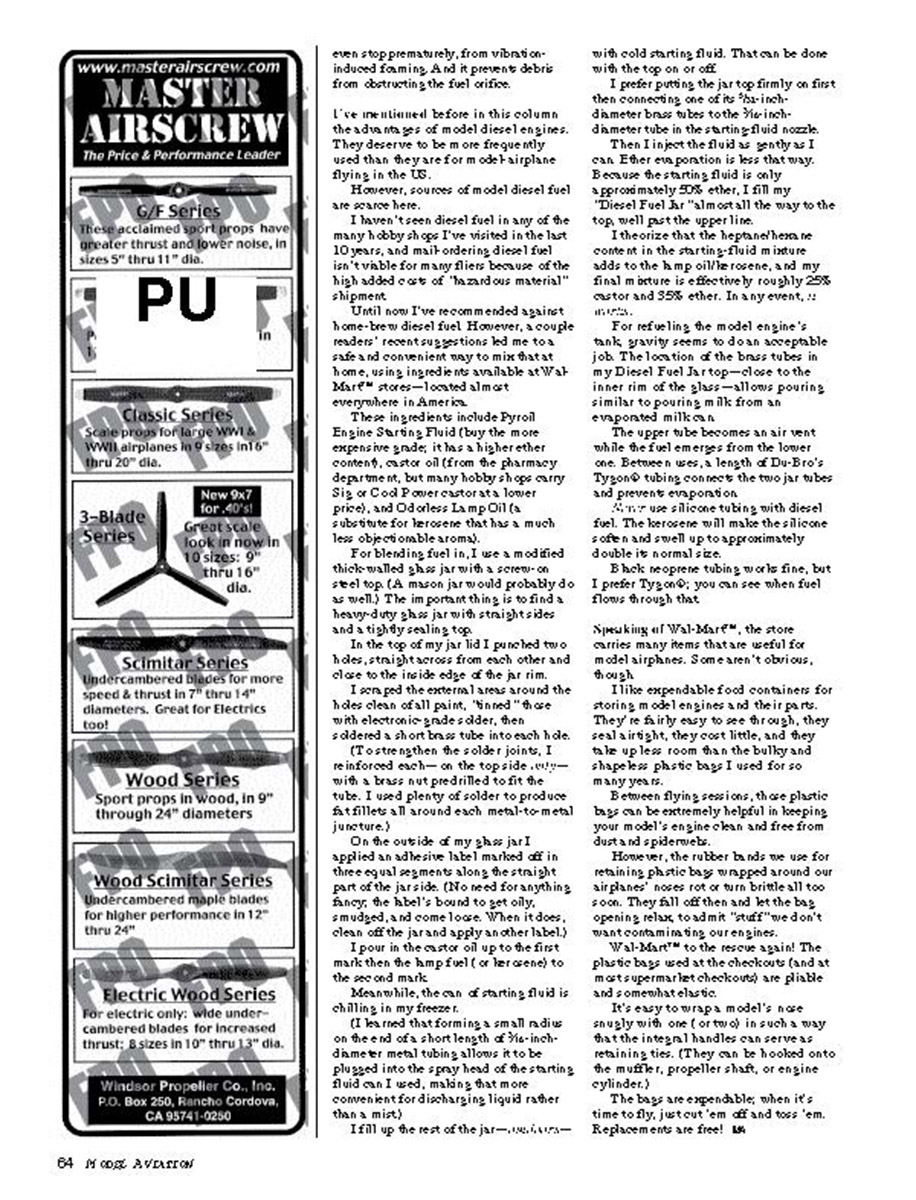
I especially admired George's ability to come up with "helpful hints" to improve model-engine performance and reliability. One of those is his cure for fuel foaming.
That's been a vexing problem for CL fliers in particular, and many "fixes" for it have been tried with varying amounts of success. The first solution I know of was the perforated internal baffle that Bob Palmer installed in the aft portion of his CL fuel tanks.
In more recent years, several Stunt fliers I know recommended adding a few drops of Armor All® rubber protectant to each gallon of glow fuel.
George's best solution for fuel foaming is installing a large-capacity fuel filter (Du-Bro makes a good one) in the fuel line as close as possible to the engine spraybar. The fine-mesh filter element blocks bubbles.
This eliminates the tendency for the engine to go lean in flight, or even stop prematurely, from vibration-induced foaming. And it prevents debris from obstructing the fuel orifice.
I've mentioned before in this column the advantages of model diesel engines. They deserve to be more frequently used than they are for model airplane flying in the U.S.
However, sources of model diesel fuel are scarce here.
I haven't seen diesel fuel in any of the many hobby shops I've visited in the last 10 years, and mail-ordering diesel fuel isn't viable for many fliers because of the high added cost of "hazardous material" shipment.
Until now I've recommended against home-brew diesel fuel. However, a couple readers' recent suggestions led me to a safe and convenient way to mix that at home, using ingredients available at Wal-Mart stores—located almost everywhere in America.
These ingredients include Pyroll Engine Starting Fluid (buy the more expensive grade; it has a higher ether content), castor oil (from the pharmacy department, but many hobby shops carry Sig or Cox Powercast at a lower price), and Odorless Lamp Oil or a substitute for kerosene that has a much less objectionable aroma.
For blending fuel, I use a modified thick-walled 8-oz. jar with a screw-on steel lid (A mason jar would probably do as well). The important thing is to find a heavy-duty jar with straight sides and a tightly sealing top.
In the top of my jar lid I punched two holes, straight across from each other and close to the inside edge of the jar rim.
I scoured the external areas around the holes clean of all paint, "tinned" those with electronic-grade solder, then soldered a short brass tube into each hole. (To strengthen the solder joints, I reinforced each on the top side—fill with a brass nut predrilled to fit the tube. I used plenty of solder to produce fat fillets all around each metal-to-metal juncture.)
On the outside of my glass jar I applied an adhesive label marked off in three equal segments along the straight part of the jar side. (No need for anything fancy; the label's bound to get oily, smudged, and come loose. When it does, clean off the jar and apply another label.)
I pour in the castor oil up to the first mark then the lamp oil (or kerosene) to the second mark.
Meanwhile, the can of starting fluid is chilling in my freezer.
(I learned that forming a small ridge on the end of a short length of 3/16-inch-diameter metal tubing allows it to be plugged into the spray head of the starting fluid can used, making that more convenient for discharging liquid rather than a mist.)
I fill up the rest of the jar—now 4 oz.—with cold starting fluid. That can be done with the top on or off.
I prefer putting the jar top firmly on first then connecting one of its 3/16-inch-diameter brass tubes to the 3/16-inch-diameter tube in the starting-fluid nozzle.
Then I inject the fluid as gently as I can. After evaporation is less that way. Because the starting fluid is only approximately 25% ether, I fill my "Diesel Fuel Jar" almost all the way to the top with the upper limit.
I theorize that the heptane/hexane content in the starting-fluid mixture adds to the bump of kerosene, and my final mixture is effectively roughly 25% ether and 35% other. In any event, it
For refueling the model engine's tank, gravity seems to do an acceptable job. The location of the brass tubes in my Diesel Fuel Jar—top—close to the inner rim of the glass—allows pouring similar to pouring milk from an evaporated milk can.
The upper tube becomes an air vent while the fuel emerges from the lower one. Between uses, a length of Du-Bro's Tygon tubing connects the two jar tubes and prevents evaporation.
I've used silicone tubing with diesel fuel. The kerosene will make the silicone soften and swell up to approximately double its normal size.
Black neoprene tubing works fine, but I prefer Tygon; you can see when fuel flows through that.
Speaking of Wal-Mart, the store carries many items that are useful for model airplanes. Some aren't obvious, though.
I like expendable food containers for storing model engines and their parts. They're fairly easy to see through, they seal tight, they cost little, and they take up less room than the bulky and shapeless plastic bags I used for so many years.
Between flying sessions, small plastic bags can be extremely helpful in keeping your model's engine clean and free from dust and spiderwebs.
However, the rubber bands we use for retaining plastic bags wrapped around our airplanes' noses rot or turn brittle all too soon. They fall off then the bag opens, ready to admit "stuff" we don't want contaminating our engines.
Wal-Mart® to the rescue again! The plastic bags used at checkout (and at most supermarket checkouts) are pliable and somewhat elastic.
It's easy to wrap a model's nose snugly with one (or two) in such a way that the integral handles can serve as retaining ties. (They can be hooked onto the muffler, propeller shaft, or engine cylinder.)
The bags are expendable; when it's time to fly, just cut 'em off and toss 'em. Replacements are free!
Transcribed from original scans by AI. Minor OCR errors may remain.

